You can obtain the Lego Star Wars Skywalker Saga Fulfill Your Destiny Minikits while taking on the Emperor himself for the last mission of Episode VI in the video game developed by TT Games.
Unfortunately, you can’t get all five collectibles in your first playthrough of the mission, so you have to come back later in Free Play mode.
One of the three Challenges can also only be completed in Free Play, so you might as well do it and get two birds with one stone.
For now, we will focus on the Fulfill Your Destiny Minikits in the following guide, so if you get stuck, give it a read.
Minikit #1: Always Check Behind The Chair
The mission starts with you fighting Darth Vader in front of the Emperor, watching from his throne.
The first collectible is behind the Emperor’s throne.
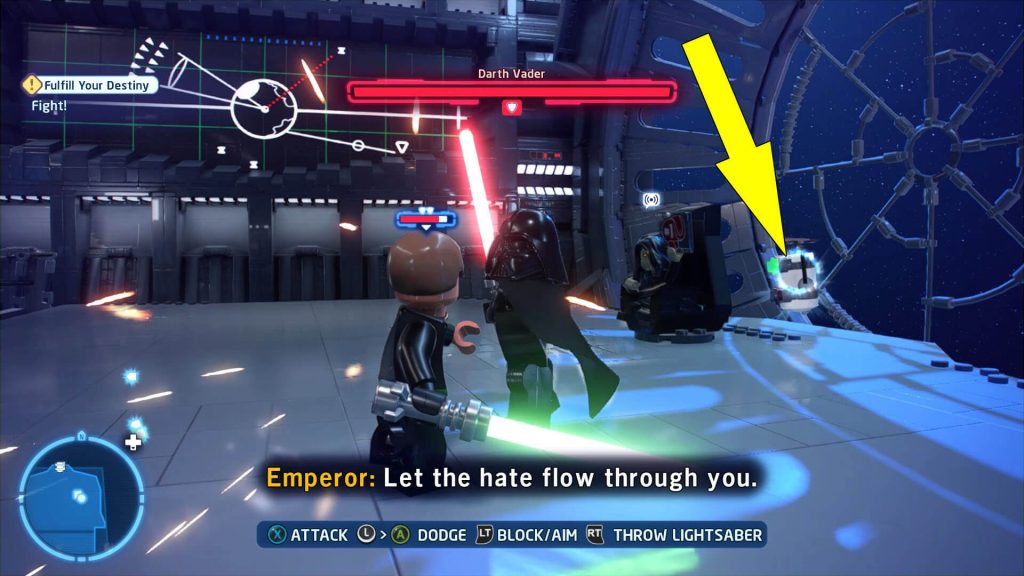
So try to dodge Vader’s attacks and quickly grab Fulfill Your Destiny Minikit #1.
Minikit #2: Emergency Empire Access
After you fall on the lower level and spend some quality father and son time playing a little game of hide and seek, you have to fight Vader a second time (from playing to fighting, things escalated quickly).
Then you have a cutscene leading to you and Vader joining forces against Palpatine.
The Emperor will shortly call for reinforcements. This is the time to take a step back from the boss fight and concentrate on the collectibles.
First, make your way to the south side of the area, behind the elevator, to find a terminal.
Switch to Vader or a Villain character and interact with the console to reveal the second Fulfill Your Destiny Minikit.
Minikit #3: Mint Condition
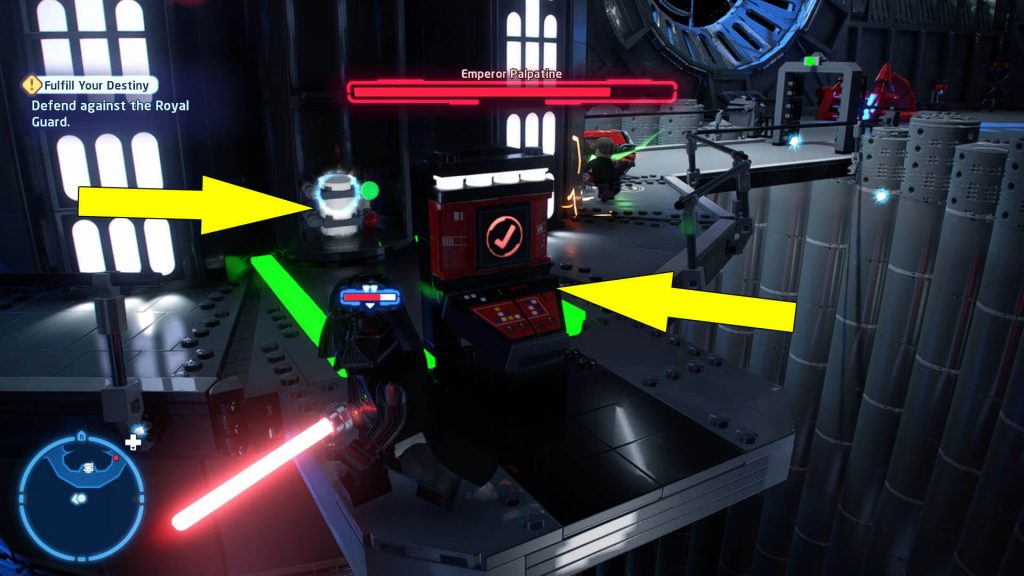
You can now make your way to the west side of the area avoiding Palpatine, and all the way in the back, you can find three statues with three boxes behind them.
Use the force of a Jedi or Dark Side character to put the statues in the boxes. But the trick is to put them in a specific order.
Check the following image to find where precisely you have to place the statues.

After the statues are placed in the correct order, Fulfill Your Destiny Minikit #3 will appear in the middle.

Minikit #4: Peculiar Protocol Password Panel
Upon collecting the previous Minikit, you have to turn back, so you face the elevator, and you can spot a Protocol Droid console on the right.

Switch to a Protocol Droid character and interact with the console to get the Death Star Throne Room Monitor password.
Now go to the opposite side, east of the elevator, and look for another Protocol Droid console behind a flower pot on the right.

Break the flower pot, interact with the console and insert the password you got earlier.
Some pieces should appear in front of the monitor to the left.
Build the fourth Lego Star Wars Skywalker Saga Fulfill Your Destiny Minikit from the pieces.

Minikit #5: Feeling Deflated
You can find a breakable console in the back, under a lamp also in the east part of the map like the previous collectible.

Destroy the console and take the power cell remaining.
Turn back and put the power cell in the slot on the right to reveal the last Fulfill Your Destiny Minikit above the bouncy castle.

Jump on the bouncy castle, obtain the last collectible, and you can check all five Lego Star Wars Skywalker Saga Fulfill Your Destiny Minikits. You can now deal with the Emperor and finish the mission.
