Star Wars Jedi Survivor Devastated Settlement is an area on the Koboh Planet that you will visit for the first time while working on Research Tanalorr On Koboh main mission.
To navigate the Devastated Settlement area, you’ll have to solve a few puzzles requiring you to find and manipulate Orbs, then place them into Couplers machines that allow you to clear the corrupted blockages on the updrafts.
Devastated Settlement Orb Puzzle is divided into three parts, which we will cover in-depth in the following Star Wars Jedi Survivor guide and show you how to solve them.
How To Solve Devastated Settlement Orb Puzzle #1
From the Devasted Settlement Meditation Point, climb the wall on the left to reach the Orb Coupler (the laser beam machine), then jump across the gap above the Meditation Point to reach the cave hosting the first orb puzzle.
After you defeat the DX Droid, squeeze through the gap in the wall, and Force Pull the giant block off the ledge by pressing  /
/ .
.

Squeeze back through the gap and use the Force Push on the switch in the middle of the room to make it spin, which will move the Orb Coupler on the left side of the room.
Doing so, the laser beam will clear the corrupted blockage on the left side of the wall splitting the room.
Go through the gap again, push the giant block near the ledge, and climb up to reach the Orb Coupler.
It is worth mentioning for completionists that there is a Force Echo – Databank entry in the corner of this area.
Take the Orb from the Coupler by holding  /
/ and place it into the glowing blue socket on the side wall where you cleared the corrupted blockage.
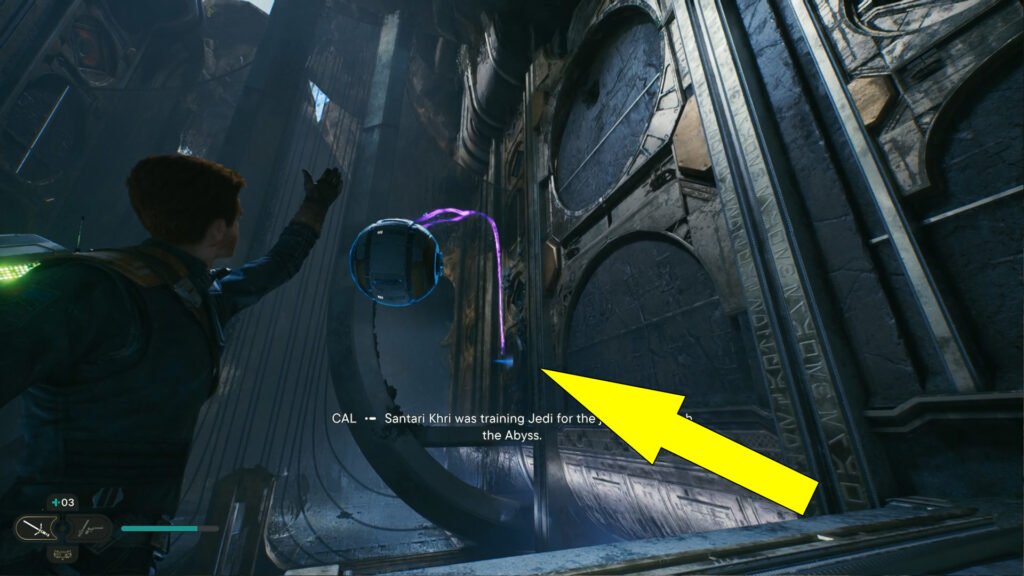
Jump below, squeeze through the gap one last time, and grab the Orb from the socket by holding /.
While holding the Orb, head outside and throw it into the Coupler on the other side of the Meditation Point by pressing /
Finally, get to the Orb Coupler and press  /
/ to interact with it, then aim at the corrupted blockage across the chasm to clear the updraft.
If you have trouble locating the corrupted blockage, check the marked image below and do the same thing.
After you clear the updraft, jump down below and ride the glider creature into the updraft, then turn to the right to reach the second part of the Devastated Settlement Orb Puzzle.
Devastated Settlement Orb Puzzle Solution #2
Even a droid with advanced programming would find the second part of Koboh Devastated Settlement Orb Puzzle challenging, so let’s dive into it.
After clearing the B1 Droids at the entrance, head inside and jump on the platform ahead, which will collapse.
Defeat the two Gorocco in the area by confusing one to fight the other, making the fight easier.
Now, use the Force to shatter the crack in the wall by pressing /, then grab the Orb from the Coupler and toss it into the glowing blue socket in the wall.

Doing so, the door near the crack will open. Climb the ledge to enter the next room.
Interact with the machine in the corner of the room to receive the Koboh Grinder upgrade for BD-1, which allows your droid to spray Koboh matter, the corrupted stuff we’ve been previously mentioning.
Return to the previous room, grab the Orb from the socket, and place it back into the Orb Coupler.
Press DPad Down on your controller to enter BD Visor and hold / to spray Koboh matter from the laser beam to the corrupted blockage to the right and the left.

After you clear both sides, climb the white-painted wall to the top, where you will find a Force Echo – Databank entry and a Force Essence collectibles.
From up here, grab the Orb from the Coupler and toss it into the socket on the right.

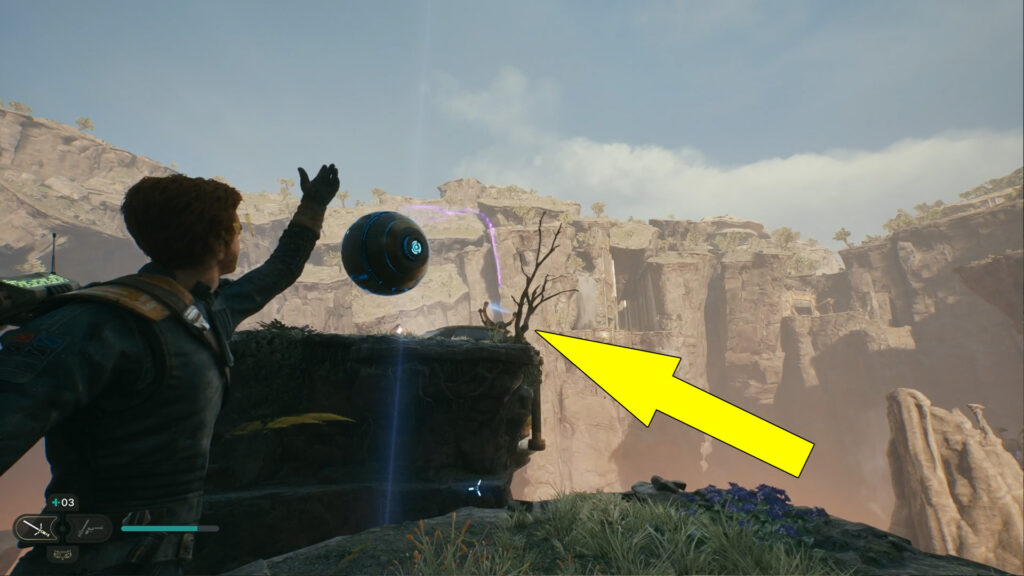
Wall run across the gap, grab the Orb from the socket, head outside, and place it into the Coupler.
As we did before, aim at the corrupted blockage to clear the updraft and progress further. Check the image below for a visual reference.

With the updraft up and running, ride the glider creature into it and turn right to reach the third and final part of the Devastated Settlement Orb Puzzle in Star Wars Jedi Survivor.
How To Solve Devastated Settlement Orb Puzzle #3
The third part of the Devastated Settlement Orb Puzzle is like rancor guarding its lair – tough to crack but not impossible.
Before going for the solution, let’s explain how this works a little bit. The Orb in this area powers the room door containing the said Orb.
If you remove the Orb from the socket, the door will close, leaving you no way the exit the room with the Orb. There is a gap in the wall that you can squeeze through but can’t while holding the Orb.
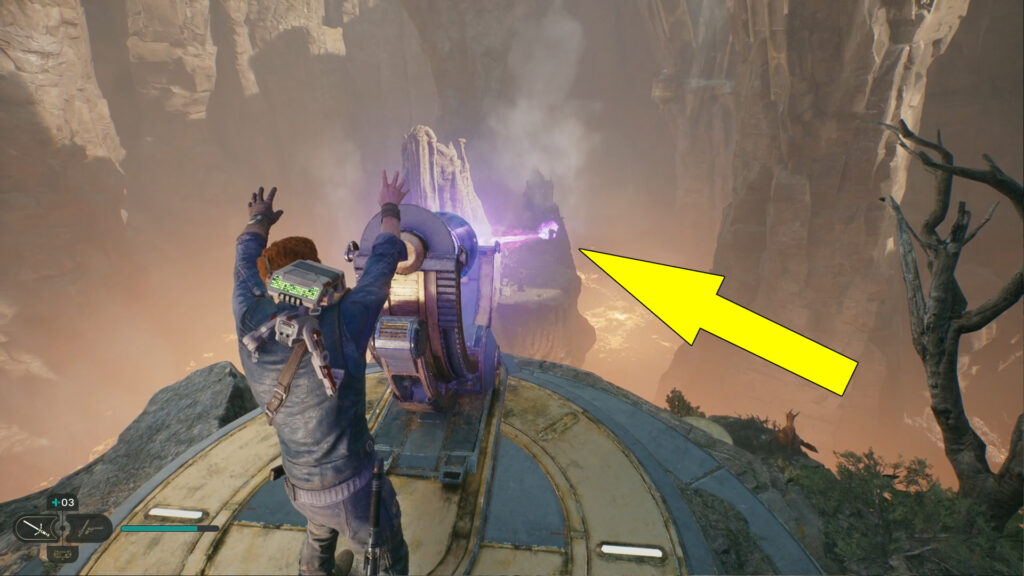
What you will have to do is to Force Pull the giant block off the crack in the wall and push it right under the door frame. Check the image below for a visual reference.

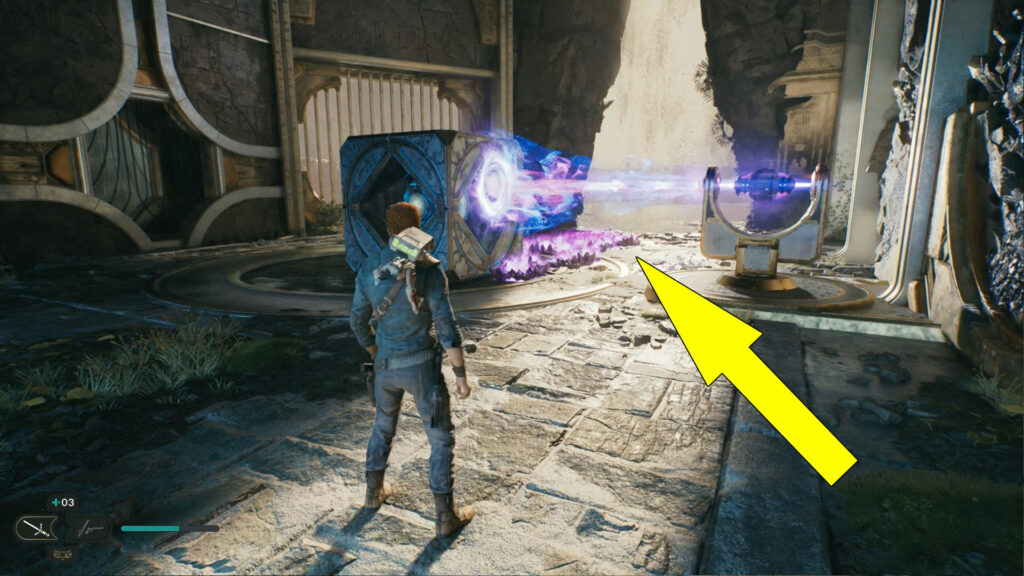
Now, grab the Orb from the socket, return to the first room, and place it into the Coupler.
If you squeeze outside through the wall, spray Koboh Matter from the laser beam using BD-1’s ability to clear the blockage and reveal a Force Essence collectible containing the Precision Perk and a Force Echo with a Databank entry.
Squeeze back into the room with the Coupler and move the giant block in the circular area of the room to block the laser beam from going through the window.
Finally, use BD-1’s Koboh Grinder to spray Koboh matter from the giant cube to the blockage to clear the cave’s entrance.
Now, you can pick up the Orb and carry it into the final Coupler outside. As before, aim the laser at the to clear the blockage on the updraft below.
Then, use the glider creature to cross the chasm and reach the Grand Courtyard Meditation Point.
And with that, you’ve completed all Star Wars Jedi Survivor Devastated Settlement Orb Puzzles in Star Wars Jedi Survivor. Make sure to check our Wiki Hub Page here for more helpful guides like this one.
