If you’re wondering where to find all five Basalt Rift Chests, then you should know that unlike other Chests we’ve uncovered as part of our complete Star Wars Jedi Survivor Wiki, this time around, some extra effort is required because the area you’ll get to cross on your journey to the Forrest Array is a bit larger.
The Star Wars Jedi Survivor Basalt Rift Chests are essential not only to completionists seeking to get the most out of Koboh Planet but also to those who want to unlock new customization options for Cal and his cute friend BD-1.
To help you with this task, we’ll go through all Chests locations in the Basalt Rift area of Star Wars Jedi Survivor in the following guide.
Koboh Basalt Rift Chests Locations Map
For our guide to be as helpful as possible, let’s start with a custom Basalt Rift map showing the locations of the five chests you must recover when you leave Swindler’s Wash.

It is worth knowing that the locations you see on the map above appear on your Holomap after you hack the Chests Map Upgrade Terminal we’ve explained in-depth here.
Since this can be done later in the game, if you want to save time and enjoy the customizations for longer, simply follow our guide. Here is how to get the five Basalt Rift Chests in Star Wars Jedi Survivor in the same order as the one on our map.
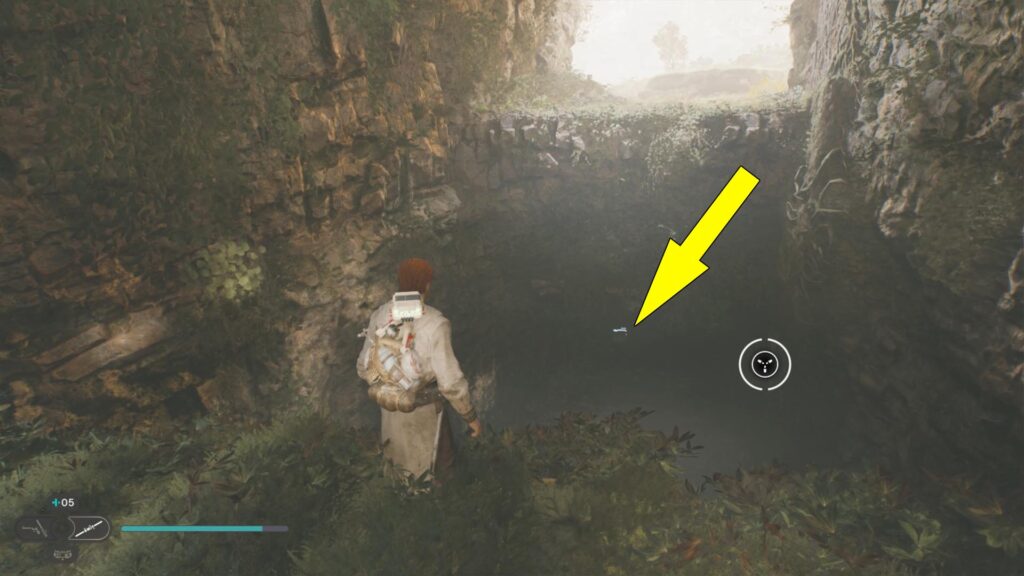
Chest #1 (Hunter Shirt): Close To The Meditation Point
For the first Basalt Rift Chest, you need to reach the Meditation Point. After you activate it, follow the tunnel on the right side, behind the broken bridge.
Use the vines on the left-side wall to climb to the ceiling and cross the gap. In the distance, you should see some Stormtroopers verifying one of the Databank Echoes.
Drop on the other side of the gap, then turn around to spot the Chest in a hidden cave. To get to it, you must use the grappling point on the right side, then climb the vines.
Chest #2 (Hunter Pants): Inside A Bilemaw Dan
After you get the previous Chest, follow the path ahead, collecting the Databank Echo the Stormtroopers were investigating.
Eventually, you’ll get to a tree branch you can walk on, then slide on a slippery slope. Jump over the gap, and you’ll discover a Bilemaw den.
Deal with the creature first, then check his cave for the second Star Wars Jedi Survivor Chest in Basalt Rift.

Chest #3 (Stim Upgrade): Near A Ruined Structure
For the next collectible, follow the linear path ahead, pulling the large stone pillars outside the mountain wall.
Eventually, you’ll meet Toa, an NPC. Continue on the path behind her, and you’ll reach a small crossroad. You have two possible paths here. First, follow the one up the hill, past the broken pillar on the road.
Moving up, you should see a yellow Chest (pictured below) near a tall, ruined building. To get to it, wall-run on the inside wall of the ruins you can see on the left side of the Chest.
There is a yellow painted line showing the path. When you get to the top, go around the remains of the structure near the Chest and open it to increase the number of Stims Cal can carry.

Chest #4 (Crew Cut Hair): In A Camp
Great job, but now it’s time to do a bit of backtracking. From the previous collectible, head down the hill, and turn left to spot a tree branch you can walk on to jump over a gap.
In the distance, you’ll see several Stormtroopers in a camp. Deal with them, then loot the fourth Basalt Rift Chest on the map above. It sits in their camp.

Chest #5 (Diligence Pommel): In A Cave
Last but not least, for the final Chest in Basalt Rift, continue to move down the hill, and you’ll see a large Bilemaw blocking the path ahead. While on the slope, facing the creature, turn left, drop to the lower level, and you’ll spot a large cave in the distance.
Head inside and claim the fifth Chest collectible.

Now that you are done with the Basalt Rift Chests, before heading towards the Forest Array, explore and complete the Chamber Of Reason Puzzle to unlock a new Perk and get more collectibles in the process.
