Star Wars Jedi Survivor Derelict Dam is the second area you’ll explore on the planet Koboh, and it features many Collectibles, including ten Databanks.
The ten Derelict Dam Databank Collectibles are required if you are aiming for 100% completion in the area, so it’s not a bad idea to grab all of them while trying to reach your old pal Greez.
Note that you have a lot of ground to cover, and if you don’t carefully explore the area, you can easily miss some of the Collectibles.
The good news is that the Databanks can be collected when you visit the area for the first time, as they don’t require any upgrades or special abilities.
Now, to learn how to quickly obtain all ten SW Jedi Survivor Databank Collectibles in the Derelict Dam area, you should follow our guide below.
Koboh Derelict Dam Databank Locations Map
On the following map of the Derelict Dam area, we’ve marked the exact locations of all ten Databank Collectibles.
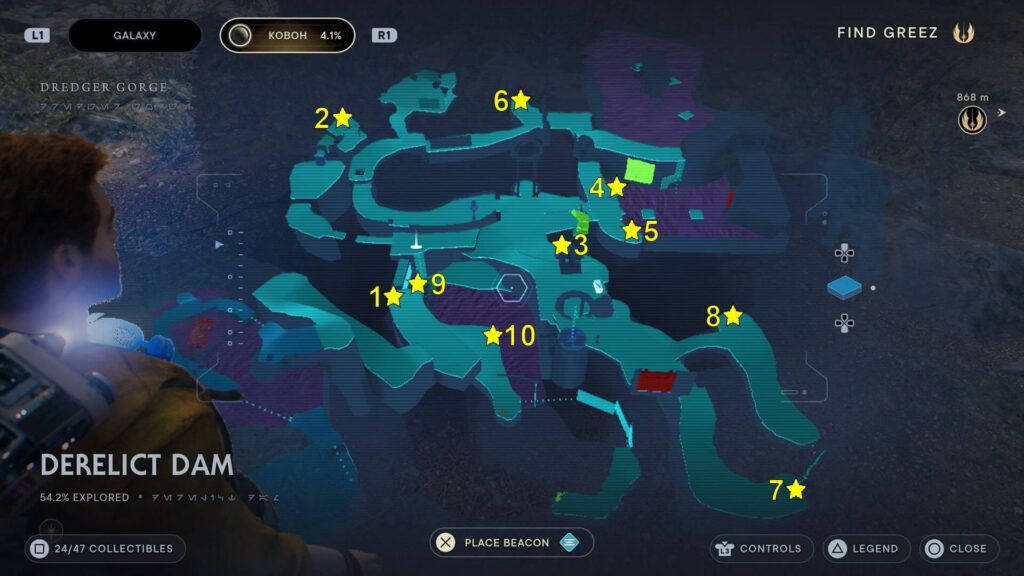
As you can see, the Databanks are scattered all over the region, and to continue, we’ll provide additional instructions on how to reach each one in the same order as the one on the previous map.
Databank #1 (Murdered Prospector): Under A Pillar
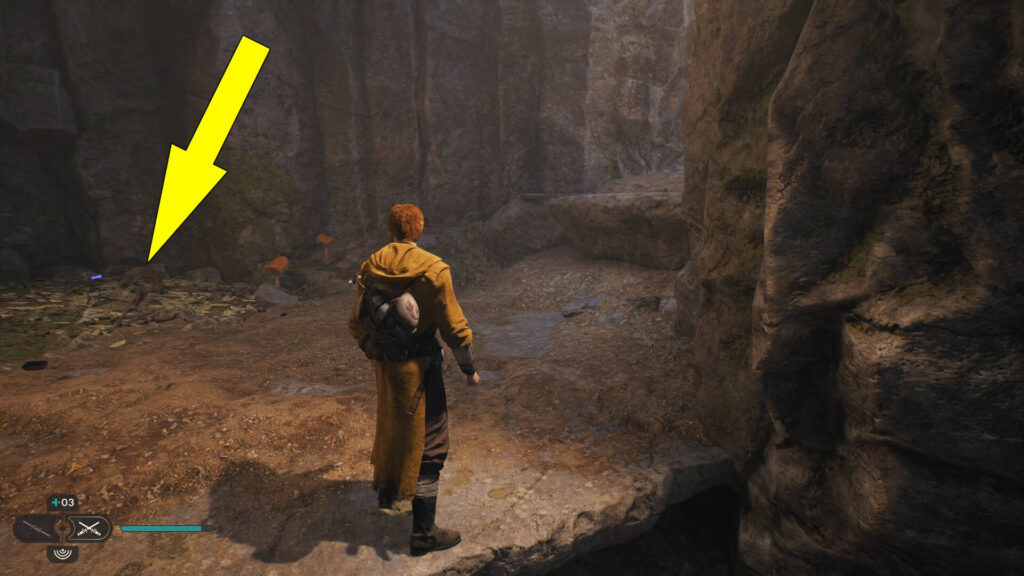
The first Databank Collectible is found shortly after entering the area; just proceed until you reach the dam.
In front of the dam, you can see a lifeless body under a pillar.
Press  /
/ on your PlayStation/Xbox controller next to the body to get the SW Jedi Survivor Databank.

Databank #2 (Gorocco Nest): In The Corner Of A Cave
For the second Derelict Dam Databank, you must first cross the dam and reach the area’s Meditation Point, where you can rest to replenish your health and stims.
Then cross the bridge next to the saving point and continue on until you have to fight a Gorocco beast.
Take your time and defeat the enemy, then use the Force to open the big door in the mountain wall.
Now head into the cave and climb the first ledge to find a Gorocco nest in the corner.
Scan the nest to obtain the second Databank.
Also, if you climb the second ledge, you’ll find one of the five Derelict Dam Essences.
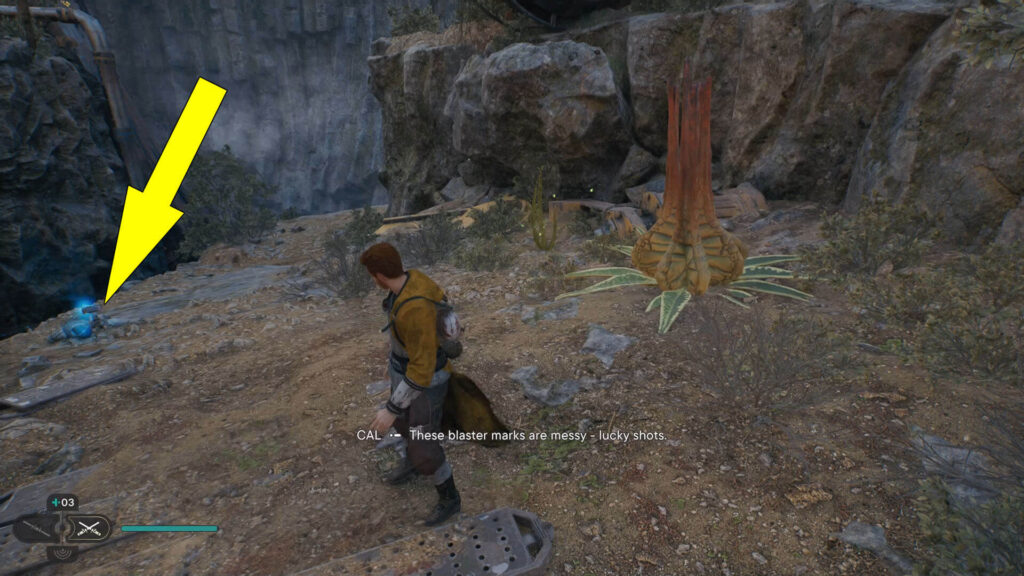
Databank #3 (Dead Bedlam Raider): On A Slope
Now head back to the Meditation Point and go directly forward to reach a small slope going down with a weird plant on the right side.
On the other side of the plant, you can see a dead body which you should scan to obtain the third Star Wars Jedi Survivor Derelict Dam Databank.
Look nearby for one of the thirteen Derelict Dam Seed Pods.
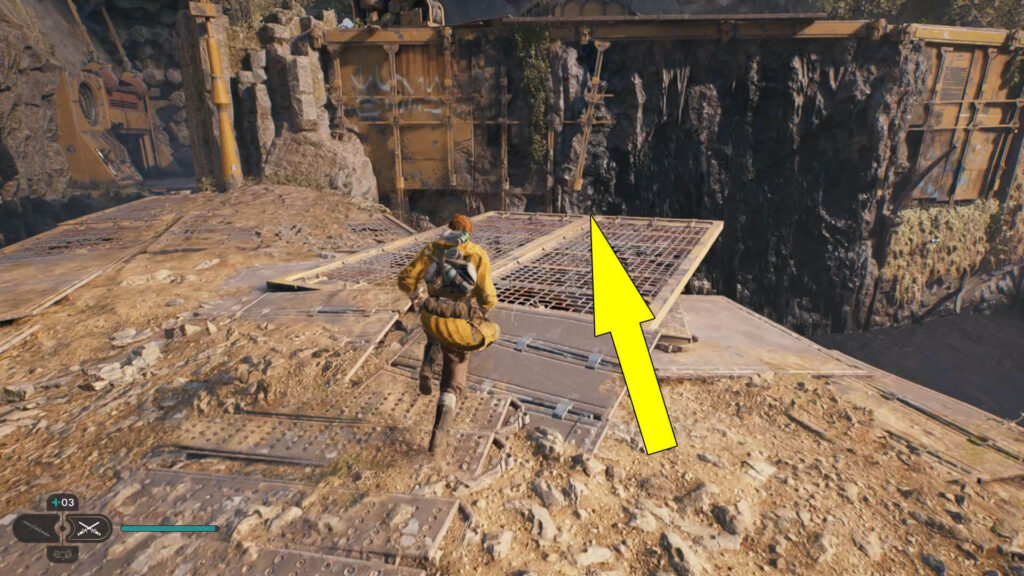
Databank #4 (Crumbling Dam Wall): In Front Of A Grill
Upon obtaining the previous Collectible, head back up the slope, go to the right, and then right again when it’s possible.
Then jump on the wall and go to the grill sticking out on the left side.
Scan the wall in front of the grill for the fourth Databank, as shown in the next image.
Databank #5 (Dam Flow Pipes): Next To A Tree
The next Databank in the Derelict Dam area is close to the previous Collectible.
Just turn around and head to the pipes next to the only tree on this wall.
Scan the pipes, and the Databank Collectible is yours.

Databank #6 (A Desperate Escape): In Another Cave
For the sixth SW Jedi Survivor Databank in the area, you have to jump on the first platform in the tar near the previous two Collectibles.
If you land in the tar, don’t worry, you don’t die, but you’ll slowly sink, so try to move fast.
From the platform, you have to grapple to the wall with the vines on the left side, then make your way up.
Once up, head left until you reach the edge and can see a platform with a couple of enemies under you.
You can also see the Databank in the cave to the left, as you can see in the following screenshot.

Databank #7 (Creature Bones): Next To A Rope
After getting Databank #6, proceed through the cave because you have to get out of it on the other side.
Eventually, you’ll reach an open hatch where you have to drop down and continue forward to reach one of the eight Derelict Dam Chests on the right side.
Proceed, and you’ll shortly get to what seems to be a dead end.
But if you interact with the device on the right side just before the dead end, a Roller Mine enemy will appear close by.
Use Force Push (press  /
/ ) on the Roller Mine to throw it into the rocks blocking your exit.
Note that Roller Mines will continue spawning here, and you’ll need them to continue to Star Wars Jedi Survivor Derelict Dam Databank #7.
Once you get out of the cave, make sure a Roller Mine is following you, but keep a safe distance so it doesn’t explode.
Then head to the slope going up on the right side and continue forward until you have to drop down.
You can see another blockage after you drop down, and you can blast it with the Roller Mine that is following you.
However, you’ll have to use Force Pull (hold  /
/ ) to get the Roller Mine down and aim it at the blockage. Then use Force Push, and the way should be clear.
Make your way forward dealing with a couple of enemies, and you’ll get to some large bones next to a rope you can use to go up.
Scan the bones to get credit for the Collectible.

Databank #8 (Abandoned Encampment): Under A Tree
Upon collecting the previous Databank, head up the rope, then go forward to reach an encampment under a tree.
Use scan again, this time on the encampment, to obtain the eighth SW Jedi Survivor Derelict Dam Databank.

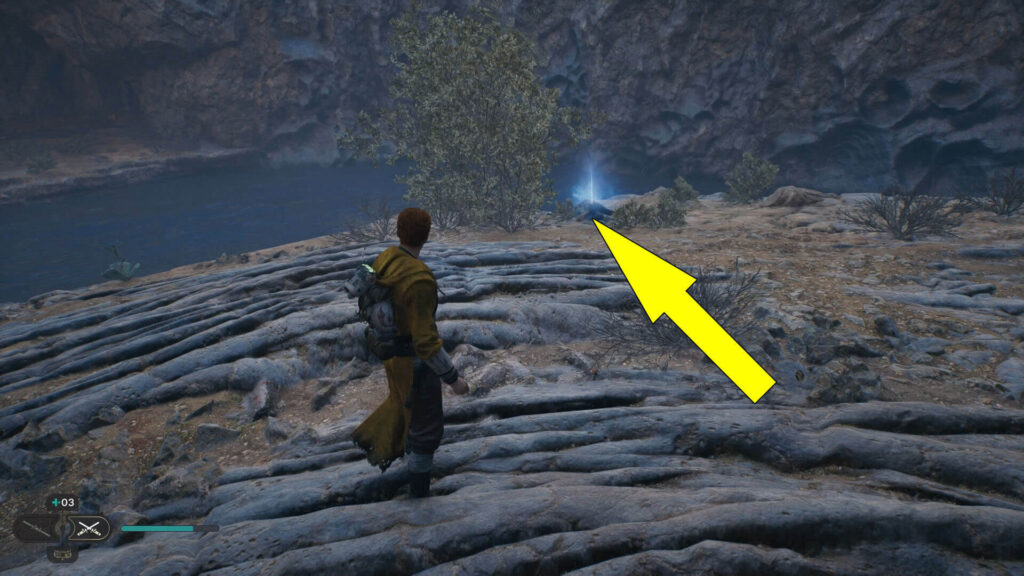
Databank #9 (Destroyed Dam): Near Some Vines
Continue on from the previous Collectible to unlock an elevator shortcut next to another Derelict Dam Essence and then make your way back to the area’s Meditation Point.
Next to the saving point, go to the edge to spot some vines you can use to get all the way down to where the ninth Databank is waiting for you.

Databank #10 (Drowned Prospector): By The Shore
Now that you have obtained Databank #9 head forward, sticking to the shore, and you’ll find another dead body next to a small tree.
Interact with the body to get the tenth Databank.
Well done, Jedi! You’ve obtained all ten Star Wars Jedi Survivor Derelict Dam Databanks and can now focus on other Collectibles. Also, don’t forget to visit our Wiki Hub here if you need further assistance.
