Star Wars Jedi Survivor Derelict Dam is the second area of the Koboh Planet that you will first explore during the Find Greez main quest and features a total of 47 collectibles, including eight different Chests.
Finding the Derelict Dam Chests requires careful searching and exploration, which can be time-consuming and exhausting.
Also, not all the chests in the Derelict Dam area are accessible from the beginning, so you’ll have to return once you unlock the required abilities.
As such, in the following guide, we will equip you with all the information you need to find and collect all eight Derelict Dam Chests in Star Wars Jedi Survivor.
Koboh Derelict Dam Chests Locations Map
We’ve prepared a custom map that will save you time and effort by showing you exactly where all the Chests collectibles are located in the Derelict Dam area.
Reaching most of these collectible Chests requires you to solve a few quick puzzles to create or reveal a new pathway leading to them.

So, we’ll walk you through all the Derelict Dam Chest locations following the same order as in the map above.
Chest #1 (DB1 Scrapyard Body): Near The Meditation Point
After you solve the Tar Pit Bombs Puzzle in the Gorge Crash Site area and open the last collectible Chest, you’ll enter the Derelict Dam area.
Go down the zig-zag slope until you find a dead Raider next to a yellow pole that holds one of the first Databank entries in the area.
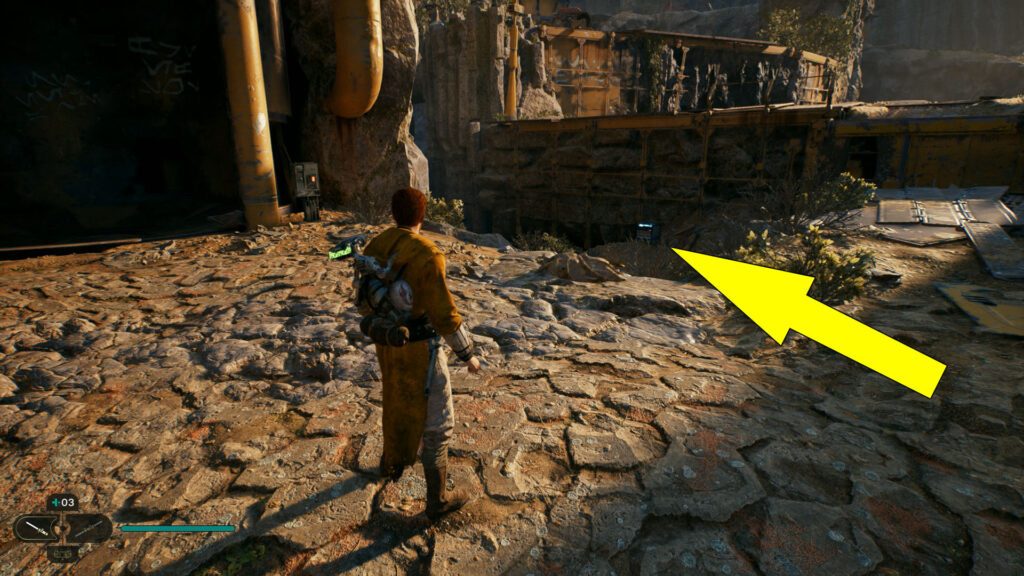
You can see the Derelict Dam Meditation Point across this broken bridge from his body. Before jumping on the bridge, look down to spot the first Chest containing a Body Part – Scrapyard for your droid BD-1.
To reach the Chest, jump onto the metal bridge, then jump down on the ledge below with one of the Treasure collectibles.

Chest #2 (Light Metal Weapon Material): Near A Broken Lift
After opening the previous Chest, get to the bridge’s other end and climb the vines to the top to reach the Meditation Point.
From the Meditation Point, follow the path to your right to reach a non-functional elevator (for now).
Near this elevator, take the lower path to find the second collectible Chest in Derelict Dam.
Chest #3 (Locked Chest): Inside A Cave Room With A Brazier
Now, reach the metal walkway above the previous Chest to find a tar pit with two platforms in the middle of it.
Jump down on the first platform, use the Ascension Cable on the vines near the flowing tar, and climb up.
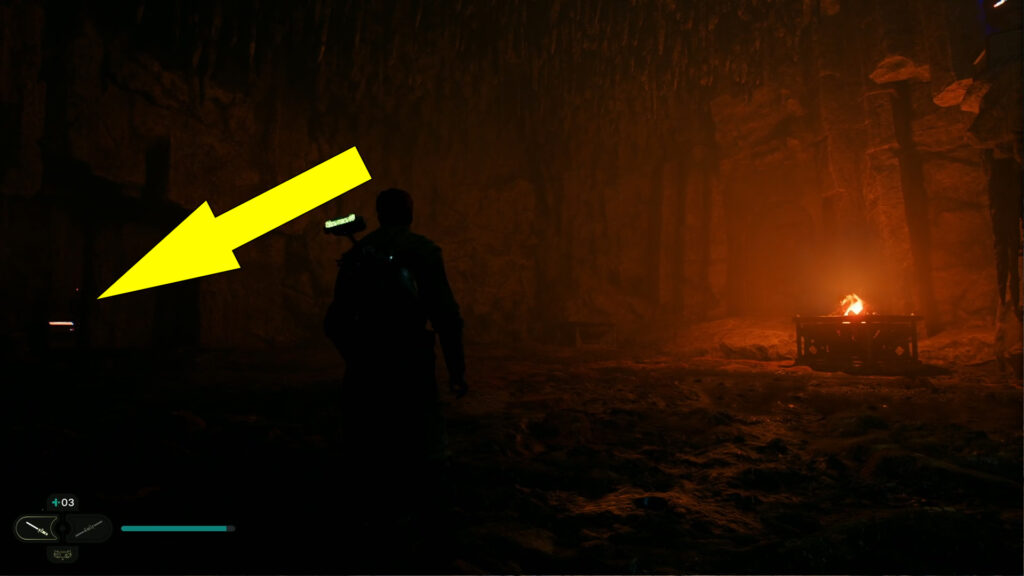
Follow the path down to enter a cave while dealing with enemies along the way. You’ll also find one of the Databank entries near the cave entrance.
Go through the cave and climb the yellow ledge, then follow the path to the right to enter a room with a fire brazier near a locked door.
On the left side of this area, you’ll find a locked red Chest which is impossible to open during your first visit here.
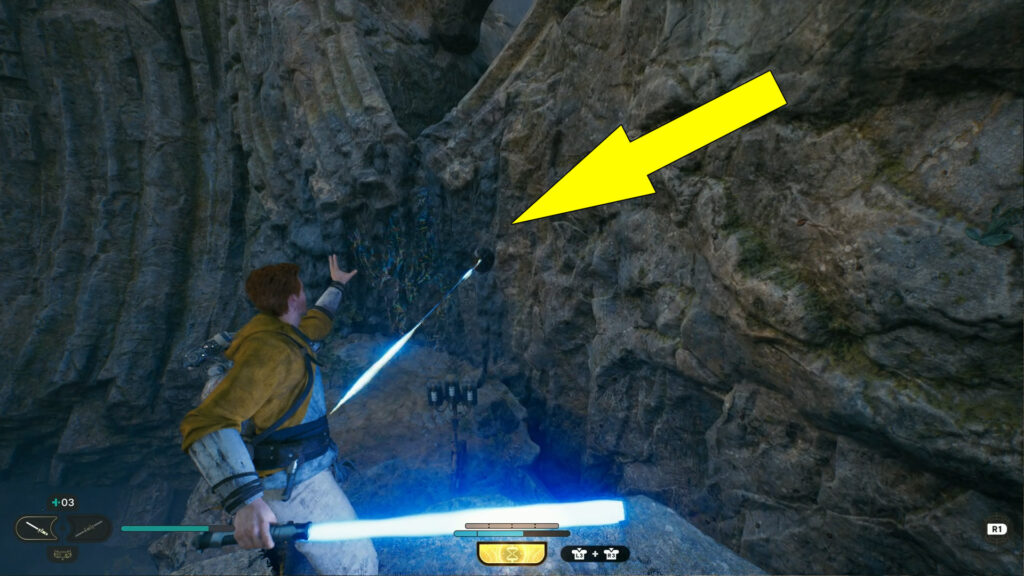
You’ll need the Electro Dart upgrade for BD-1, which can be obtained later in the story. After you get the upgrade, aim at the blue battery above the door using the Electro Dart.
Doing so will start the boss fight against Vashtan Wolfe, which can be pretty tricky. After you defeat him, you can collect your reward from the Chest.
Chest #4 (BD-1 Material – Anodized Metal): On A Ledge Of A Cave Room
In the same area as the previous Chest, Wall Run on the ridged walls on the right side and climb the ledge.
At the top, you’ll find the fourth Derelict Dam Chest near the blue battery, which contains a BD-1 Material – Anodized Metal.

Chest #5 (Tactical Jacket): On A Corridor
Exit this area, follow the path to the right, and go through the hole in the floor.
A few steps further into this corridor, you’ll find the fifth Derelict Dam Chest on the right side containing a cosmetic item – Tactical Jacket.

Chest #6 (Stim Cannister): Requires Force Lift and Slam
At the end of the corridor, interact with the flashing red terminal by pressing  /
/ Down. Doing so will keep spawning Roller Mines that we will use to destroy walls to reveal new paths.
After you activate the terminal, use the Force Push by pressing  /
/ to push the Roller Mine into the wall ahead to create an exit from the cave.
Once you exit the cave, you’ll notice that you are back near the Derelict Dam Meditation Point.
Now, take the path up leading to the nearby giant gear. Past this giant gear, there is a ledge overlooking a lower area with a breakable glowing wall, similar to the one in the cave.
What you will have to do is to make one of the Roller Mines follow you near this ledge, then hold  /
/ to grab it using the Force, then quickly throw it into the glowing wall by pressing / before it explores.
Also, don’t forget to keep a safe distance from the Roller Mine to avoid making it explode.
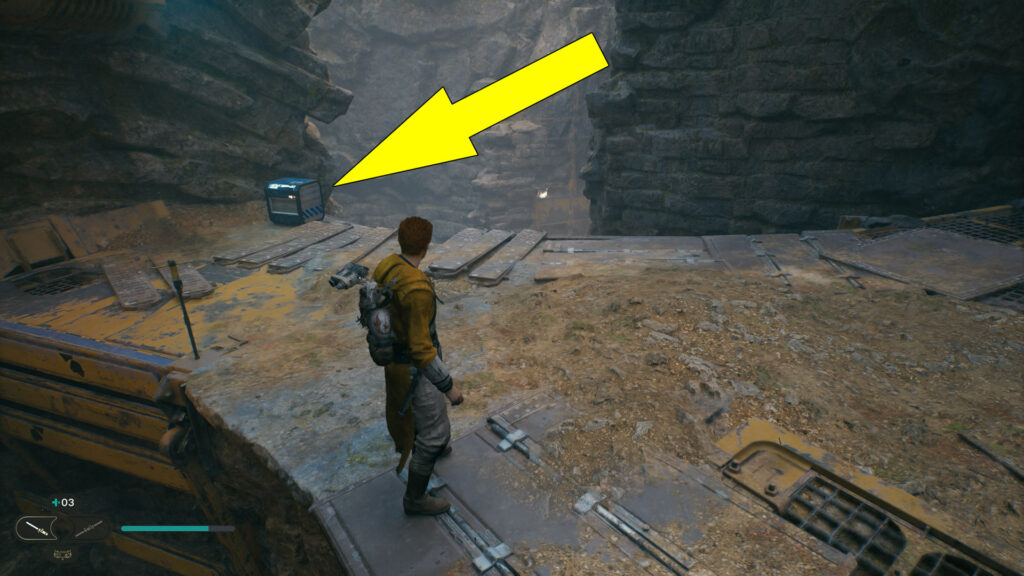
Follow this new pathway, deal with the Gorocco blocking your way, and climb the rope to the top. At the bottom of the rope, you can pick up another Databank entry.
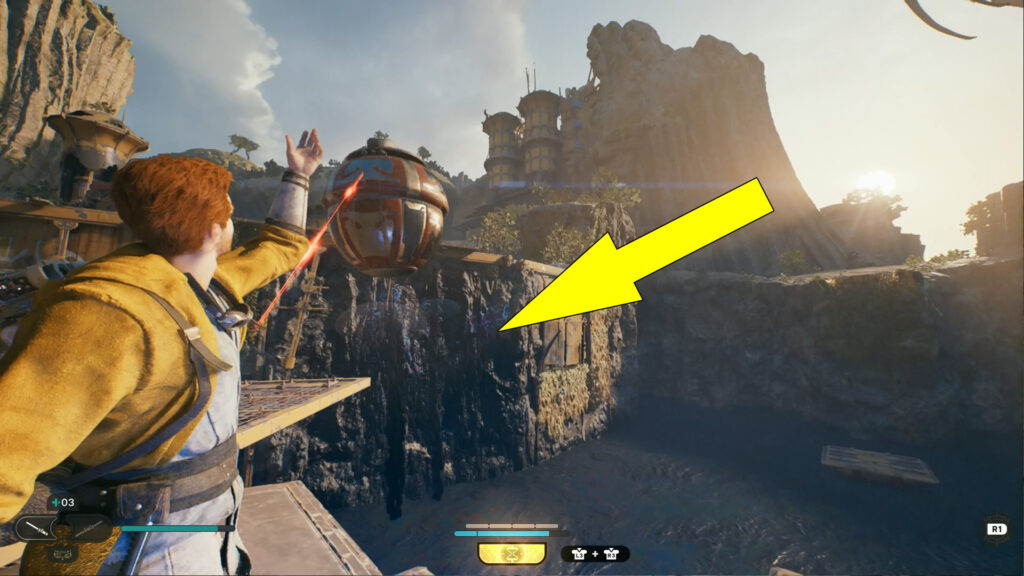
After climbing the rope, follow the path across the stone bridge, and you’ll reach the same area as in the image below.

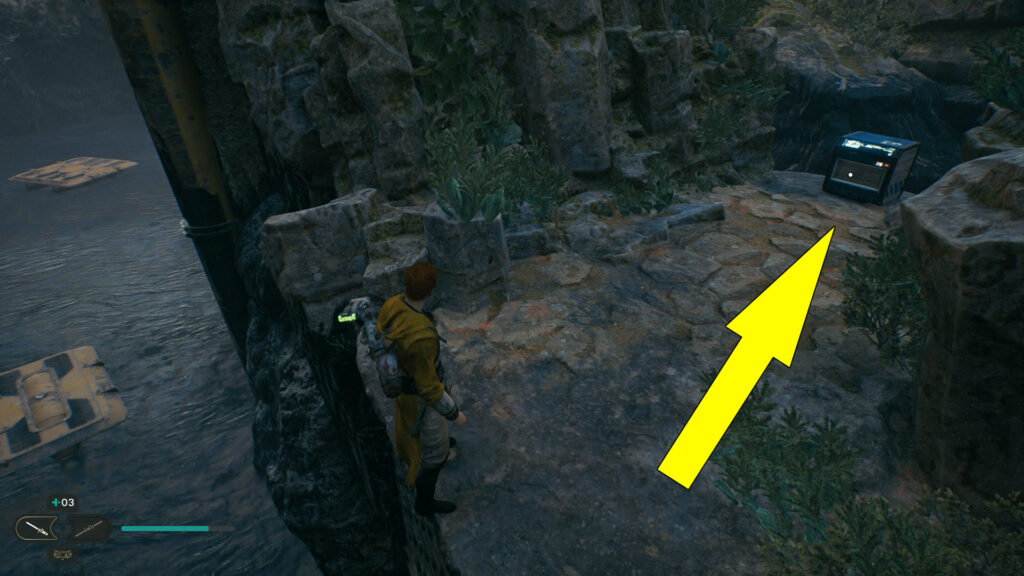
On the other side of the ravine, there is the sixth Derelict Dam Chest, but unfortunately, you can’t reach it without unlocking Force Lift and Force Slam, which allows you to open the nearby gate marked with a red icon.
We will create a shortcut to this area, so you can easily return here later in the game after you unlock the abovementioned abilities.
Chest #7 (Cal’s Mullet Hairstyle): On A Ledge Above The Tar Pit
From the previous Chest, grab the nearby Derelict Dam Essence collectible, and take down the elevator, which will take you back to the near the giant gear and the NPC Vendor – Prospector.
Now, return to the cave spawning Roller Mines, make one follow you, and throw it on the blocked path to open up access to the dam.
Once again, make another Roller Mine follow you and throw it on the dam wall with flowing tar to explode and clear the blockage. Doing so will raise the tar pit level.
Now, jump on the first platform in the tar pit and climb the vines on the left again. You can go through the tar briefly before it pulls you under.
At the top, follow the pipe above the tar pit, then cross the two platforms. You can also pick a Treasure collectible in this area.
Climb the grated wall ahead from the second platform to reach the seventh Derelict Dam Chest in Star Wars Jedi Survivor.
Chest #8 (BD-1 Scrapyard Head): Near The Southern Reach Meditation Point
Return to the previous tar pit with the two platforms in the middle of it. Jump onto the second platform, and climb the vines ahead to trigger a cinematic with the giant wild creature.
After the cutscene, take the elevator down and clear the enemies in the following area.
Then, push the yellow cube near the ridged wall so you can Wall Run and reach an upper area. Here you will find the final Derelict Dam Chest containing the BD-1 Scrapyard Head.
And with that, you’ve collected all eight Derelict Dam Chests in Star Wars Jedi Survivor. If you wish to continue your collectibles hunt, make sure to check our Wiki Hub Page here for more helpful guides.
