Star Wars Jedi Survivor Fogged Expanse Treasures are collectibles very well hidden in the foggy area on planet Koboh.
But if you want to achieve 100% completion in the Fogged Expanse area, you need to find all seven of them.
Also, the said Treasures will get you seven Priorite Shards which can be exchanged for all sorts of items at Doma’s shop back in Rambler’s Reach Outpost.
With that said, you should check the following SW Jedi Survivor Fogged Expanse Treasures locations guide and make sure you don’t miss any of the seven collectibles.
Koboh Fogged Expanse Treasures Locations Map
First, it would be best to check our map below of the Fogged Expanse area because, on it, we’ve marked the locations of the seven Treasures; that is, if you haven’t unlocked the Treasures Map Upgrade, which reveals the collectibles on your holomap.
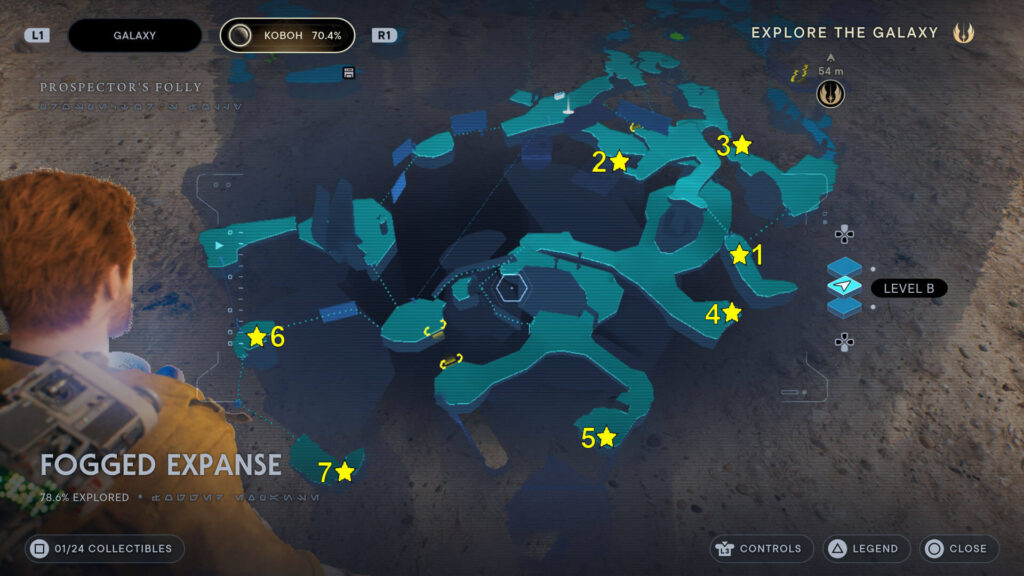
Now let’s see how to reach each collectible following the same order as the one on the map above.
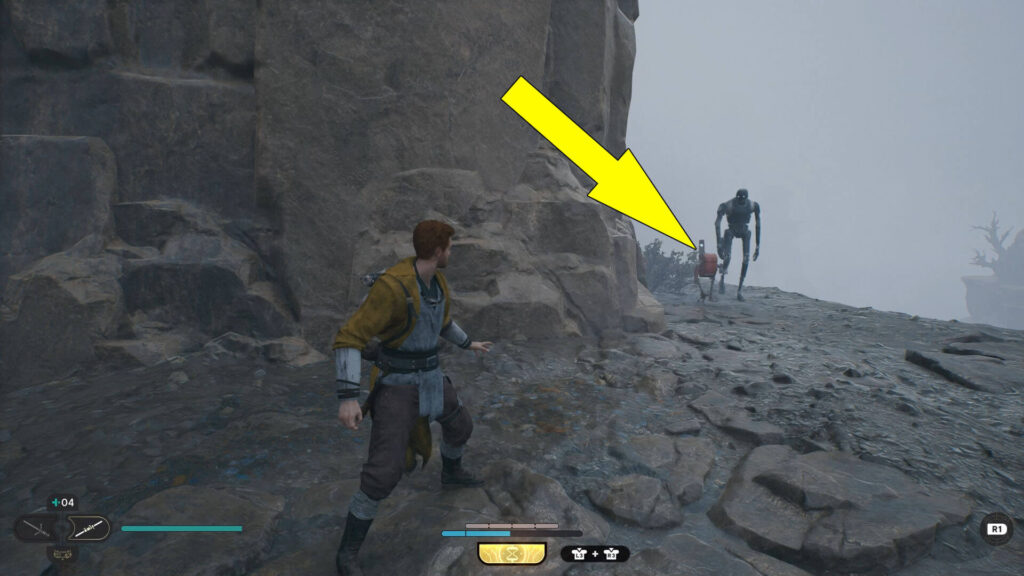
Treasure #1 (Priorite Shard): On A Scavenger Droid
For the first Treasure in Fogged Expanse, you should start from the area’s Meditation Point and head up the slope next to it.
Then climb up the ledge, and go to the metal platform on the right side, from where you have to shoot a BD-1 Electro Dart at the blue fuse in the building on the left.
For the Electro Dart, you have to press  Down on your PlayStation/Xbox controller, select its icon in the bottom left corner of your screen by pressing Right, then press
  /
/ to shoot a dart at the fuse.
As you can see, doing so triggered the wall on the right side to come to you.
You must now run on the wall to reach the other side of the gap, but time your jumps well because the wall will shortly return to its initial position.
Once on the other side, move forward, go up the ramp, jump over the chasm toward the ledge as much as you can, then grapple the rest of the way, and when you land, you should see a Scavenger Droid running away from you.
Catch up to the droid who seems to have a bodyguard you must defeat, and when you’re done, also destroy the little rascal to reveal the first Treasure collectible.
If you fail to destroy the Scavenger Droid fast enough, you must rest at a Meditation Point to make it respawn.
Treasure #2 (Priorite Shard): Under A Pile Of Stones
Upon obtaining Treasure #1, retrace your steps to the wall you ran on to get here.
This time run on the wall’s other side to reach the cliff with the ramp on the left side.
Then, facing the ramp, double jump and dash to the cliff slightly to the right to find one of the two Fogged Expanse Essences and the second Treasure.
To reveal the Treasure, you must use Force Lift ( +
+ /
/ +
+ ) on the pile of stones in front of another blue fuse.

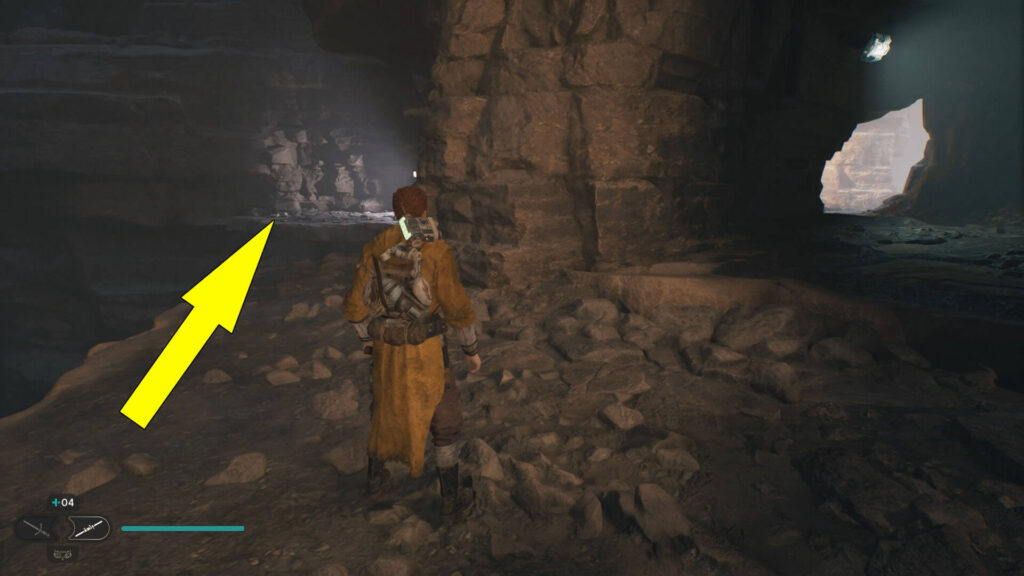
Treasure #3 (Priorite Shard): Next To A Light
Now throw an Electro Dart in the blue fuse next to Treasure #2 to open a shortcut, and then head back to the SW Jedi Survivor Fogged Expanse Meditation Point.
Then go on the path under the wall you performed your cool stunts earlier to grab the first two collectibles but stick to the left side to reach a cave’s entrance.
Head inside, and when you reach the edge, look to the right to spot the third Fogged Expanse Treasure next to a light.
Treasure #4 (Priorite Shard): Near A Pole With Four Lights
After getting Treasure #3, head outside the cave and go to the left until you reach a fork in the road, where you must choose the left path.
Move forward, hugging the left wall, to get to a pole with four lights with a pile of stones near it, on which you can use Force Lift to reveal the next Treasure.

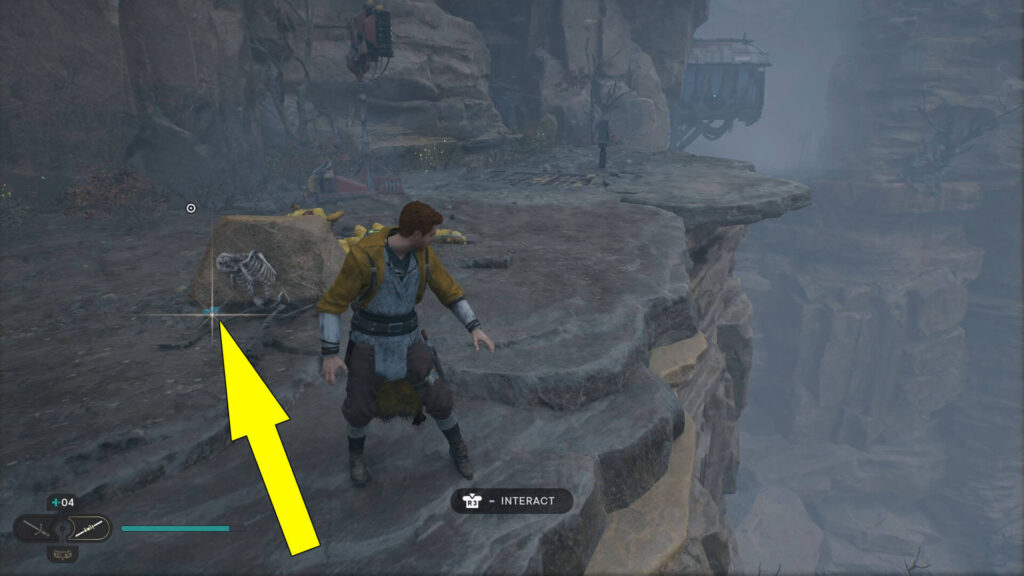
Treasure #5 (Priorite Shard): In A Skeleton’s Right Hand
Once you’re done with the previous collectible, go back on the path you took to get here, hugging the left side, and you’ll reach a slope going down next to one of the three Fogged Expanse Databanks.
Go down the slope and move forward to spot two walls you can run on to get to the other side of the chasm.
Then head forward, pass the metal gate on the left side (remember it because you’ll have to return here soon), and go down the slope to reach an area with a bunch of Seed Pods.
Approach the edge on the right side of the area to find a skeleton behind a rock.
You’ll be able to spot the fifth Star Wars Jedi Survivor Fogged Expanse Treasure in the skeleton’s right hand, as shown in the next image.
Treasure #6 (Priorite Shard): Near Some Dead Trees
Now get back to the metal gate mentioned earlier, open it using the Force, defeat the beast, then proceed to pass by another Databank and reach a ramp from which you can jump to grab some vines.
Follow the vines until they run out, then jump on the cliff in front and move forward to spot a wall on which you can use the Force to push it.
Then double-jump and dash to the wall, run as much as you can on it, double-jump again, and grapple to the cliff in front.
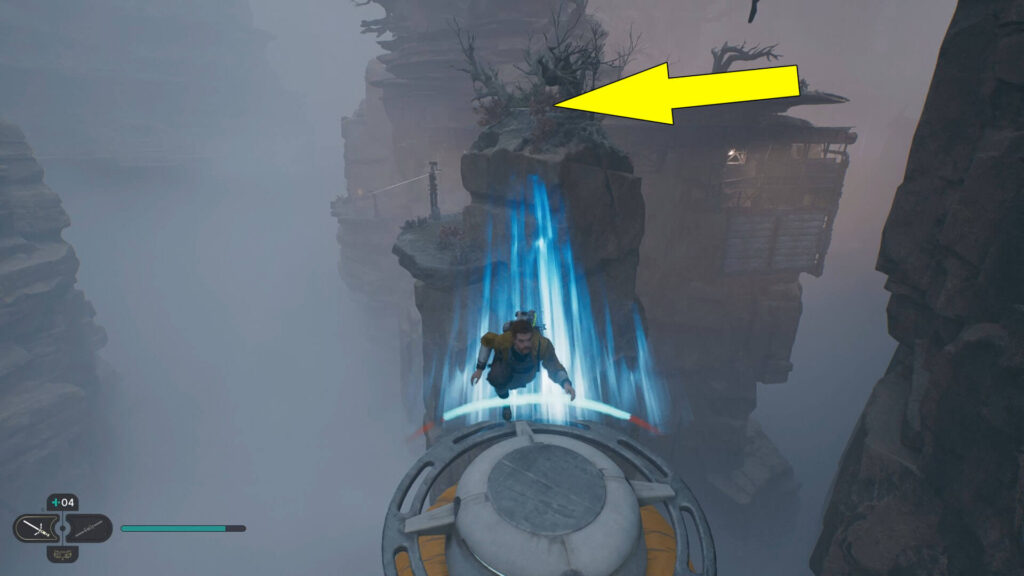
After getting on the cliff, move forward, and when you get to the edge, turn to the left to spot a floating machine.
To continue, you’ll need the Upgraded Ascension Cable, which you unlock during the main story.
Now jump toward the flying machine, grapple to it by holding  /
/ , then aim it at the dead trees on top of the cliff you came from, and release the button.
Doing so will make you jump from the floating machine to the dead trees, near which you can find another SW Jedi Survivor Fogged Expanse Treasure.
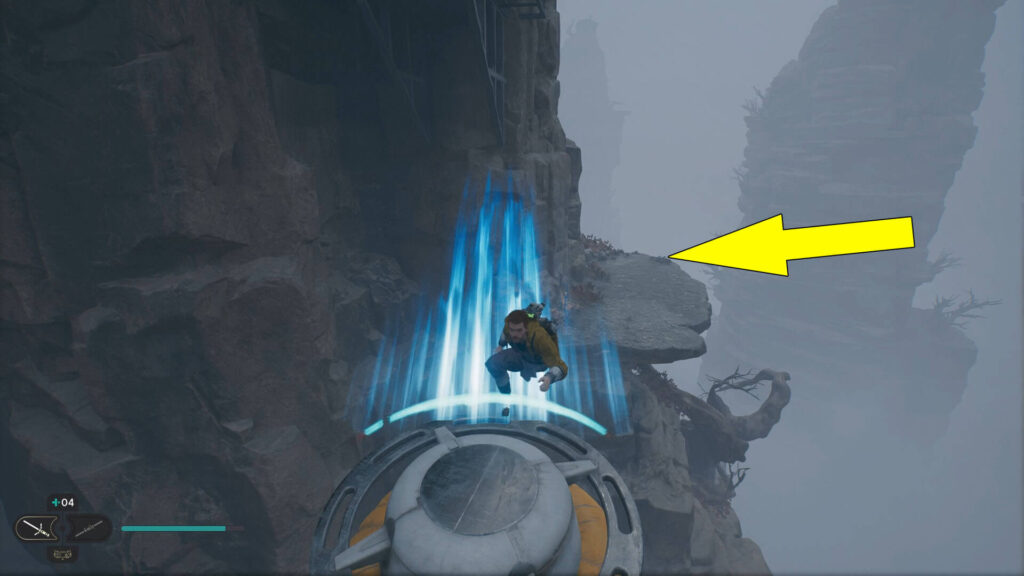
Treasure #7 (Priorite Shard): Next To A Skeleton On A Cliff
For the last collectible, you need to grapple to the flying machine again, but this time, aim at the far cliff in front.
You should find the Treasure next to a skeleton near more Seed Pods at the edge of the cliff.
You’ve finally done it, Jedi! All seven Star Wars Jedi Survivor Fogged Expanse Treasures are in your possession but don’t hesitate to refer to our Wiki Hub Page here if you’re looking for more collectibles.