Star Wars Jedi Survivor Hunter’s Quarry is an area you get to explore on planet Koboh where you can find a total of twenty-three collectibles, among which nine Databanks.
The Hunter’s Quarry Databanks are not mandatory for the main story, but the completionists out there will want to obtain all of them.
However, some of them can definitely cause you problems, especially if you don’t have the Databanks Locations Display Map Upgrade. Also, the Force Lift ability is necessary.
Therefore, if you want to get through the SW Jedi Survivor Hunter’s Quarry Databank collectibles quickly, make sure to check the guide below.
Koboh Hunter’s Quarry Databank Locations Map
As you can see on the next map, the Databank collectibles are scattered all over the Hunter’s Quarry area.

Considering that two of the collectibles are locked behind a small puzzle, the map alone will not be enough to obtain all the Databanks, so we’ll provide additional instructions.
Databank #1 (An Honest Appraisal): At The Back Of A Corridor
To start, get to SW Jedi Survivor Rambler’s Reach Outpost Meditation Point, and turn left, facing the settlement to see a wall covered with vines you must climb.
Once up, look slightly to the right, and you should be able to spot a yellow structure in the distance.
Get to it to find a gate you can open only with Force Lift ( +
+ /
/ +
+ on PlayStation/Xbox).
After getting past the gate, move forward to reach a hole where you must jump to the wall on the other side and attach to it to get all the way down.
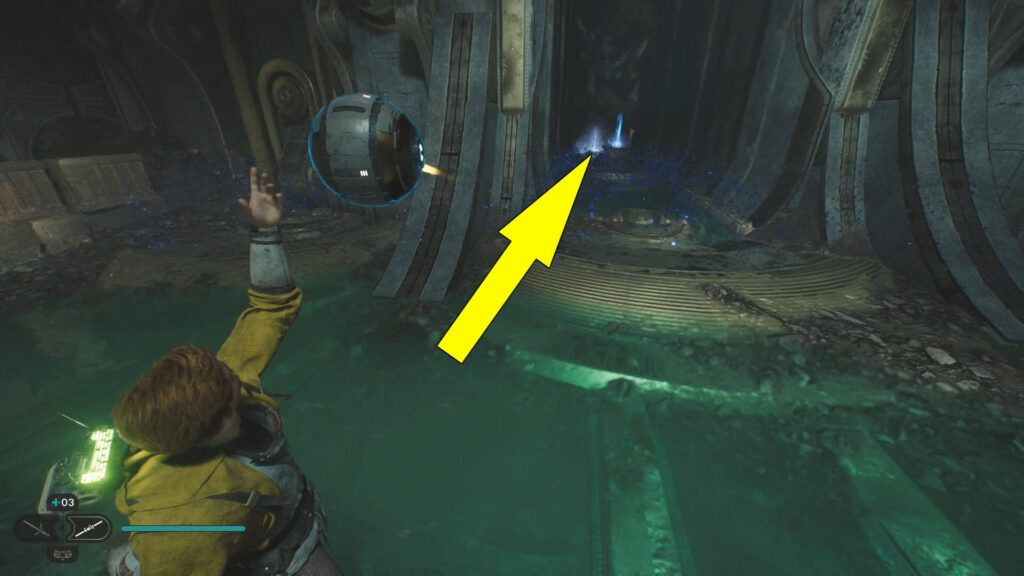
Now get on the round platform and look for a ramp but be careful of the weird dust on the ground because if you stand too much in it, you’ll die.
Go to the ramp to spot another round platform you must jump on.
Then look to the left to spot a ball device in the corridor and hold  /
/ to grab it.
Now keep holding it and get to the back of the corridor where the orb was.
As you can see, the ball clears the dust around it so you can proceed safely.
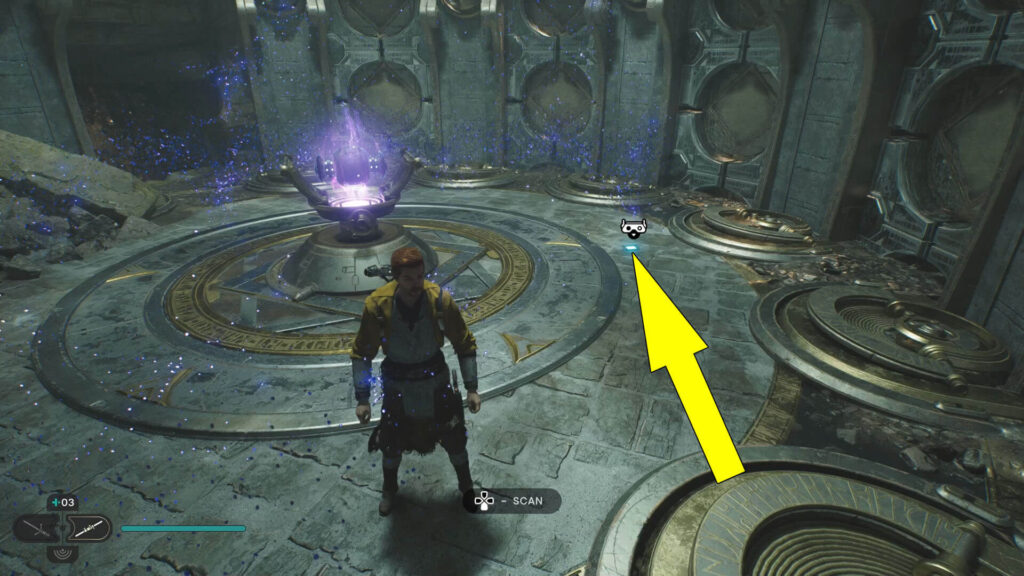
The first Star Wars Jedi Survivor Hunter’s Quarry Databank is at the back of the corridor, as shown in the next screenshot.
As such, get to it and put the orb in the socket device before you interact with the collectible. Press  /
/ while aiming at the socket to place the ball device.
Databank #2 (The Koboh Emergence): Next To A Socket
To continue, grab the orb again, move forward with it, then head through the tunnel on the right side to reach another socket.
Place the ball in the socket, then grab the second collectible next to it.
Databanks #3&4 (A Mechanical Touch & A Gift Revoked): Inside A Building
Upon obtaining Databank #2, grab the orb once again, head up the stairs, and place it on another socket.
Then follow the ray to get out of the cave, and once out, go to the right hugging the mountain wall.
You’ll shortly reach a couple of water pools which you should go through, and climb the ledges to get to a wall you can run on.
It’s time for some cool parkour, so wall run, then jump to the ledge and grab it.
Now head left, jump to another ledge, go left some more, and jump to the wall covered with vines.
Follow the wall portion covered with vines until there is no more to go.
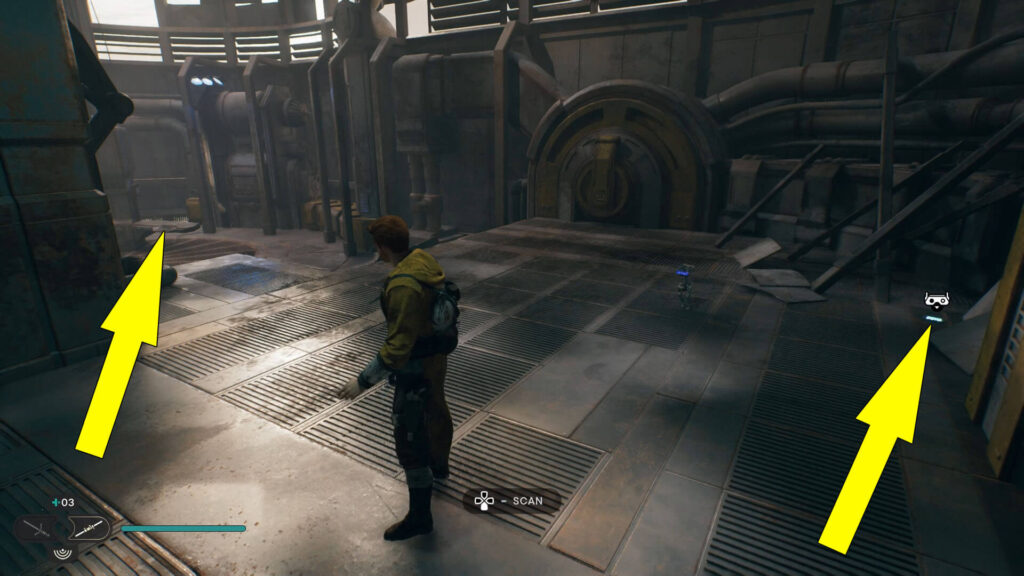
Then drop down and look for a hole in the nearby building. The hole is right next to a couple of water pools.
Head into the building through the hole to find the next two Hunter’s Quarry Databank collectibles, one immediately as you drop down and the other on the console down the ramp in front.
Note that you’ll also find one of two Star Wars Jedi Survivor Hunter’s Quarry Treasures in the same building.
Databanks #5&6 (A New Beginning & A Task Too Far): On A Table & In Front Of A Wall
After getting the previous two collectibles, look for a device that BD-1 can interact with inside the same building.
Now a Roller Mine should appear, and you must make it follow you up the ramp, then to the right, where you can see the blocked exit leading outside.
Use the Force to clear the way with the Roller Mine and get outside.
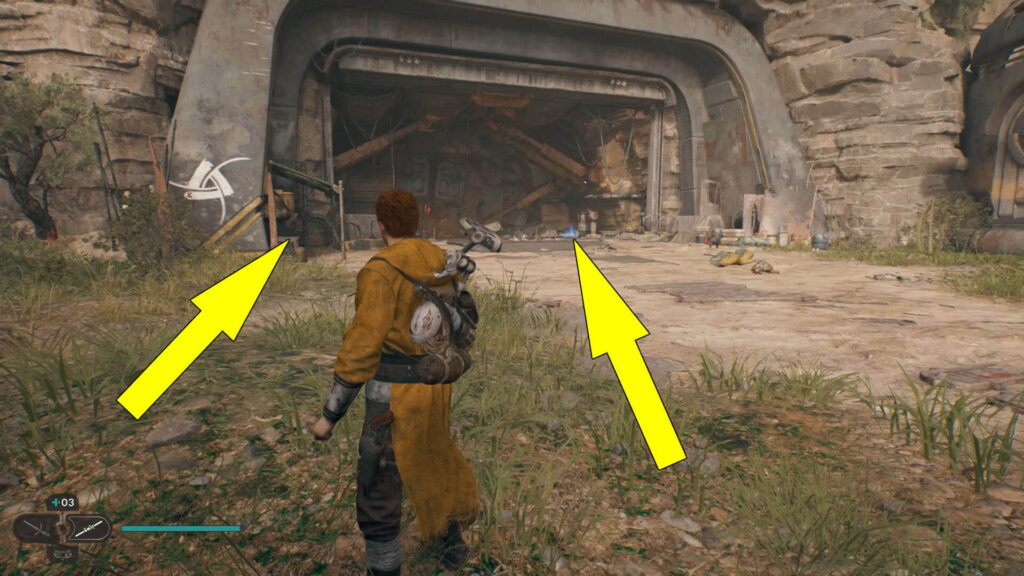
To continue, head down the ramp, then go to the right, and get past the building to see a big entrance inside the mountain on the right side.
You’ll find Databank #5 on the table left of the entrance and Databank #6 inside, in front of the wall on the right side.
You can also spot one of the three Hunter’s Quarry Chests near Databank #6.
Databank #7 (The Wise Hunters): Under A Huge Skeleton
For the next SW Jedi Survivor Databank in Hunter’s Quarry area, you’ll have to follow the road left of the big entrance from before.
You’ll soon reach a cave you must enter, then proceed to get to a larger area with water on the ground and a huge skeleton on the left side.
Databank #7 is in a small opening under the huge skeleton, just like in the following image.
Also, you can find another Chest at the back of the cave.

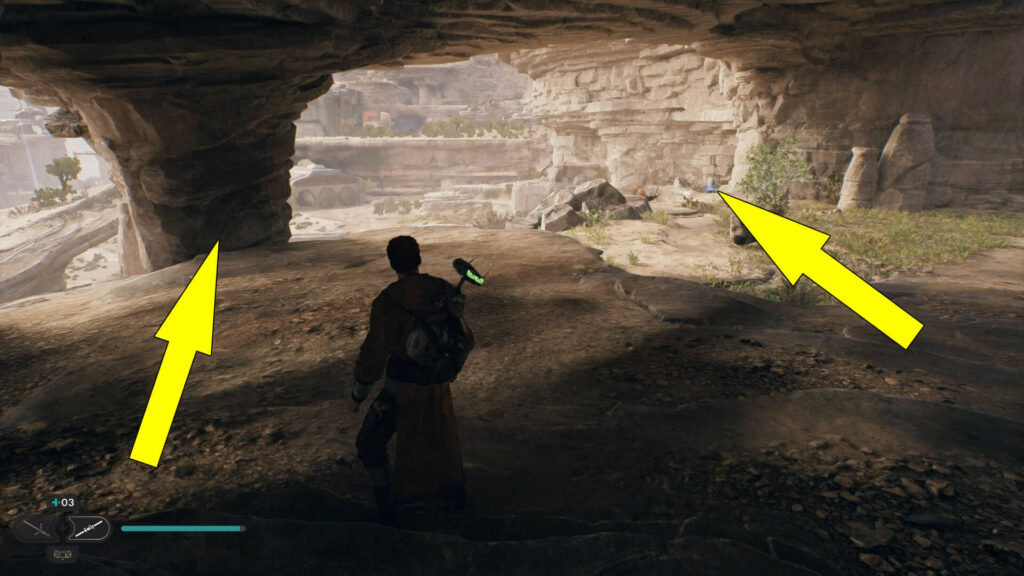
Databanks #8&9 (Gorocco Sanctuary & Free Sample): In Front Of A Pillar & Next To A Sort Of Radio Device
Now get out of the cave from where you got the previous collectible and climb the mountain wall to the right.
Then get to the edge on the other side to find the last two Databanks, one in front of a pillar and the other next to a sort of radio device.
Fantastic job, our Jedi friend! You’ve collected all nine Star Wars Jedi Survivor Hunter’s Quarry Databank, and you can now look for the Force Tear in the same area or visit our Wiki Hub Page here for other collectibles and puzzles.