Atlas Fallen Caladrias Forbidden Lands Anvils are very useful checkpoints because they can be used to save the game, fast travel, make upgrades, and regain your health.
Keep in mind that there are forty-one Anvils in the video game developed by Deck13 Interactive, and you’ll need to obtain all of them if you want to unlock the Forgemaster Trophy/Achievement.
But let’s focus on the Caladrias Forbidden Lands Anvils for now, which I suggest you discover quickly so you can fast travel all over the region.
As such, throughout the following guide, we’ll provide instructions to help you find all twelve Atlas Fallen Anvils in the Caladrias: Forbidden Lands region as fast as possible.
Where To Find All Caladrias Forbidden Lands Anvils in Atlas Fallen
First, you should check the map below, where we’ve marked the locations of the twelve Anvils.
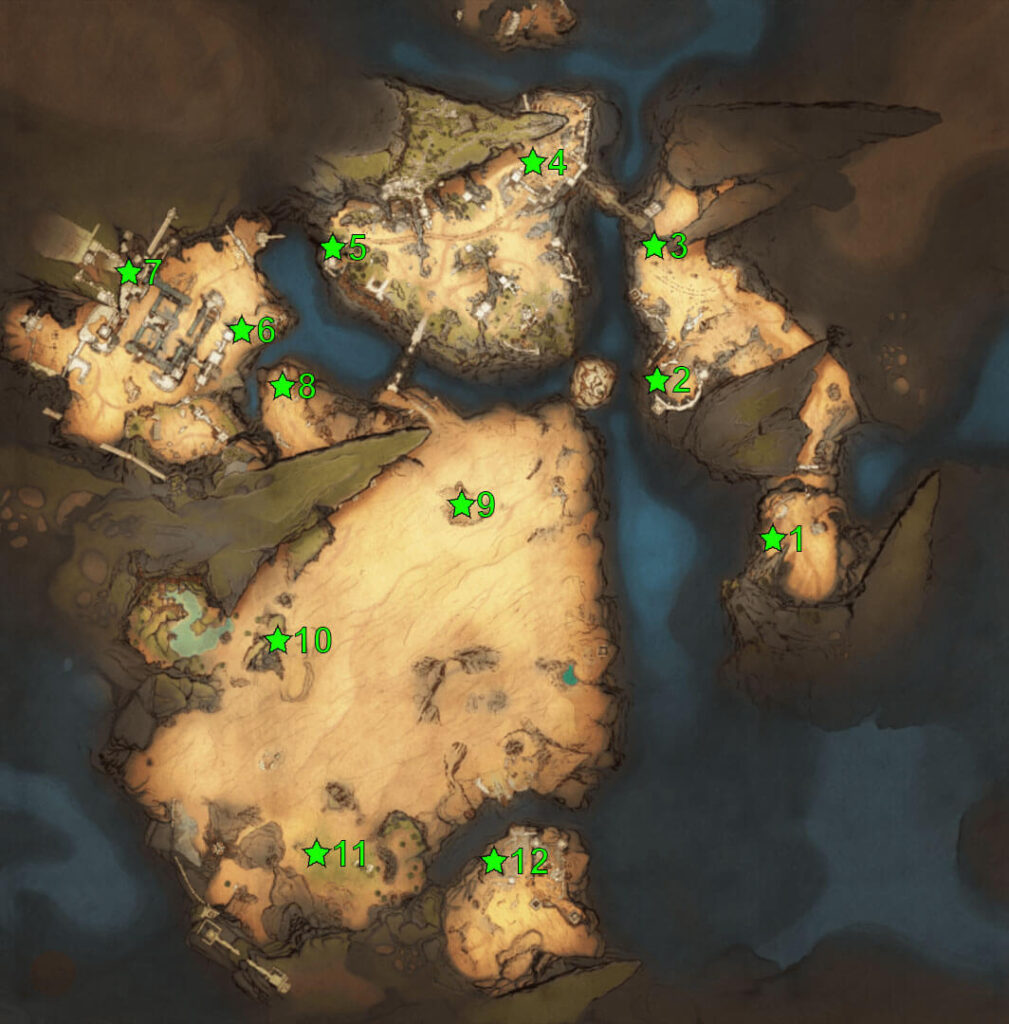
Now let’s discuss each checkpoint in the order listed on the map above.
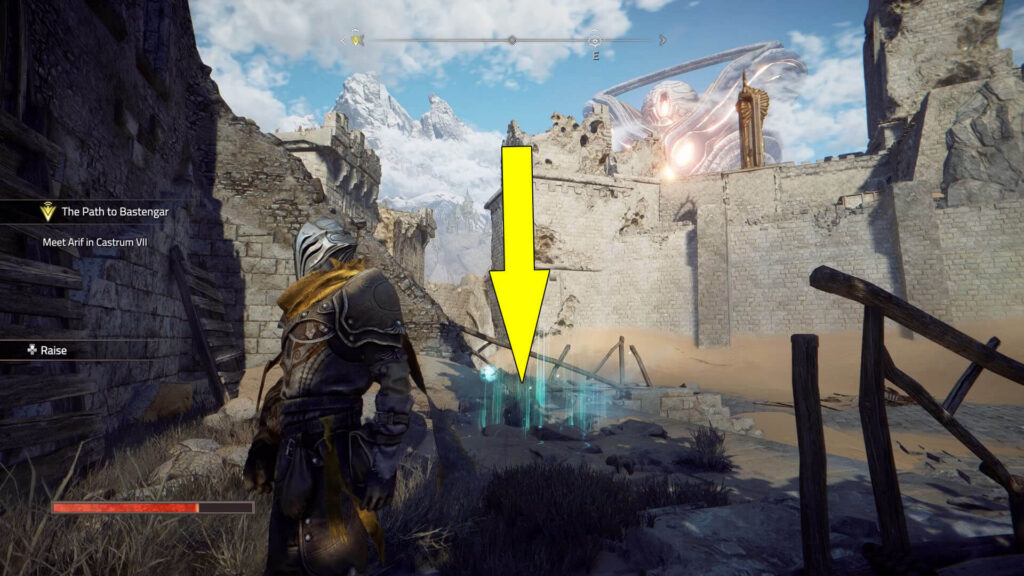
Anvil #1 (Eastern Desert Passage): Near Some Ruins
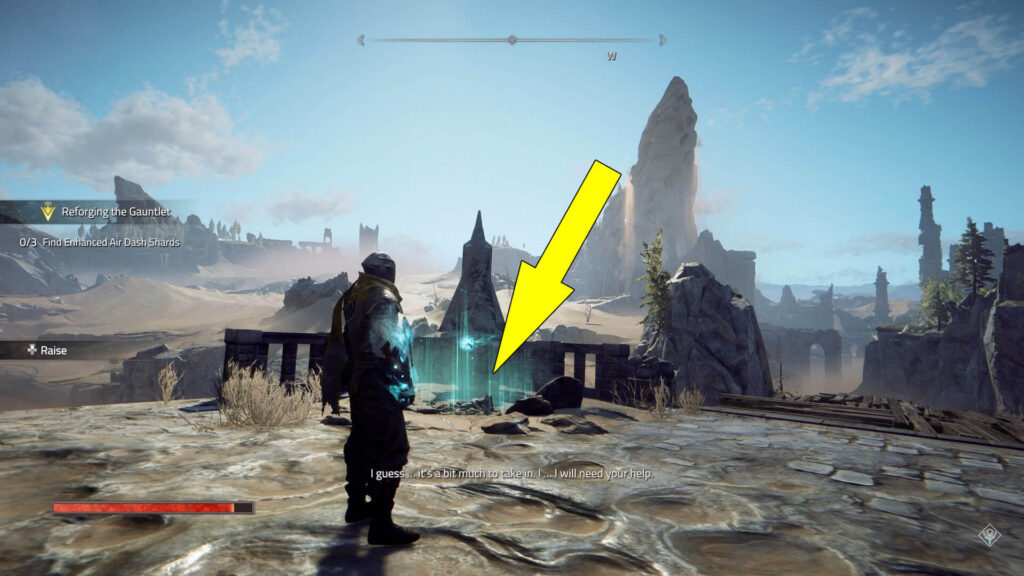
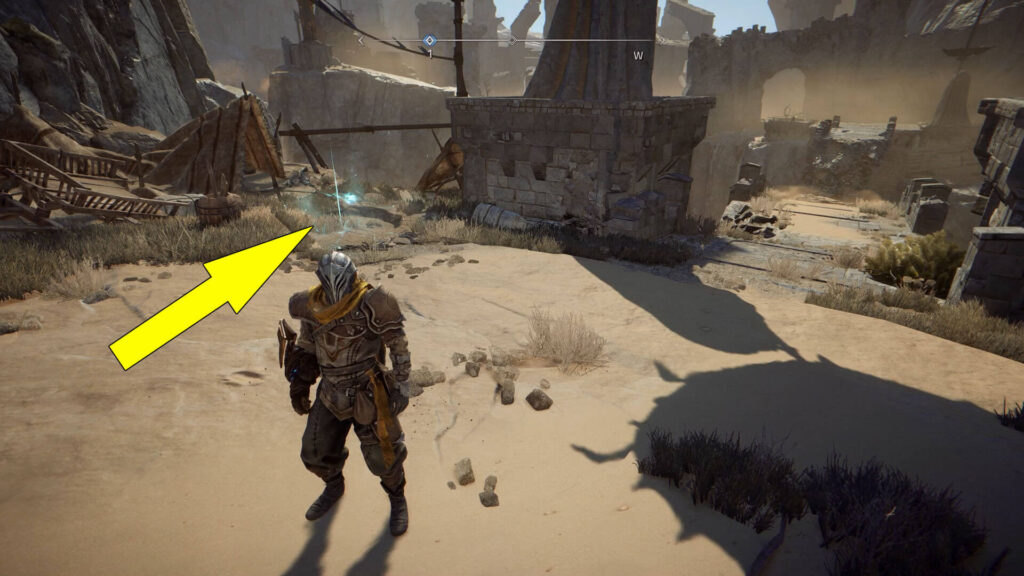
The first Anvil is found in the Eastern Desert Passage area as you enter the Caladrias Forbidden Lands region.
Once you reach the spot, you can see cracks in the ground glowing blue near some ruins.
If you approach the cracks, you can hold the Up  button on the D-Pad of your PlayStation/Xbox controller to raise the Anvil.
Then all you need to do is go near the Anvil and press the  /
/ button to interact with it.
You’ll have to repeat this process with all the Anvils in Atlas Fallen.

Anvil #2 (Eastern Ruins): Next to a Broken Bridge
For the second Anvil, you have to head to the Eastern Ruins area; you have the exact location pinpointed on our map.
The checkpoint is positioned next to a broken bridge.
Anvil #3 (Eastern Desert Graveyard): Near a Dead Tree
Now head to the Eastern Desert Graveyard in the northeastern corner of the region at the third location marked on the previous map.
The Anvil can be raised near a dead tree.

Anvil #4 (Castrum VII): Next to the Village Vendor
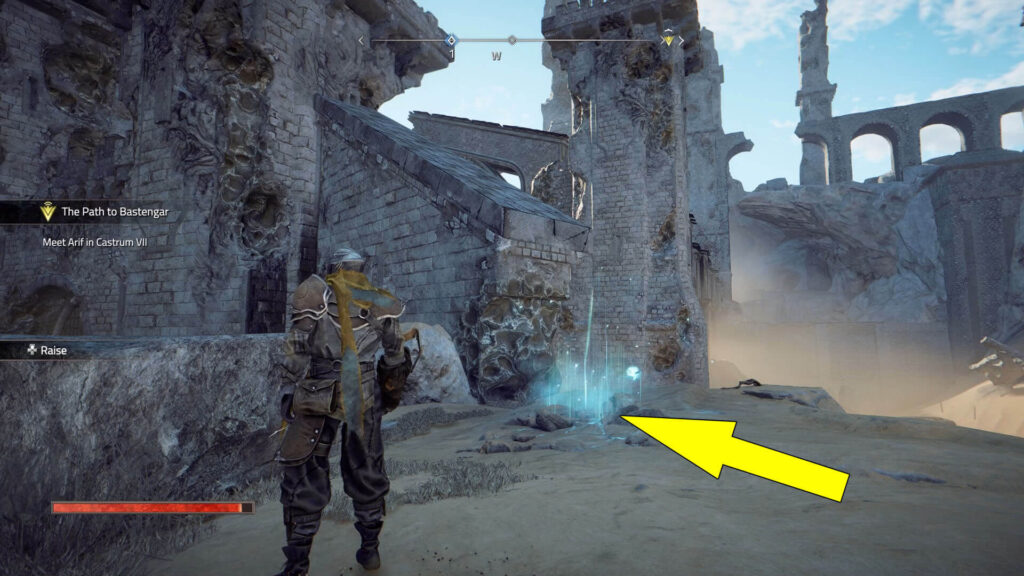
Anvil #4 can be raised in the Castrum VII settlement on the north side of the region.
The checkpoint is located next to the village vendor.

Anvil #5 (Shattered Keep: North Entrance): Next to Another Broken Bridge
The next Anvil is located at the North Entrance of the Shattered Keep, west of Castrum VII.
Look for the checkpoint next to another broken bridge.
Anvil #6 (Shattered Keep: Outlook): Next to Some Ruins
For Anvil #6, you need to get on the other side of the broken bridge near the previous checkpoint and to do so, you need to have the second air dash unlocked by upgrading your gauntlet.
Check our Reforging the Gauntlet guide if you need help finding the shards necessary for the upgrade.
Once you get over the gap, head to the Outlook of the Shattered Keep, at the sixth location on our map, to find the Anvil next to some ruins.
Anvil #7 (Shattered Keep: Inner Skirts): Near a Big Green Flag
Another checkpoint is found in the Inner Skirts of the Shattered Keep.
When you find the place, look for the Anvil near a big green flag, like in the following screenshot.

Anvil #8 (Shattered Keep: South Entrance): Near the Stairs of Some Ruins
To continue, make your way to the South Entrance of the Shattered Keep, at the eighth location pinpointed on the map above.
You’ll find the checkpoint near the stairs of some ruins.

Anvil #9 (Wastelands): Next to a Tarp
Now you’ll need to head to the Wastelands area in the middle of the region.
When you get to the ninth spot marked on our map, look for another Anvil next to a tarp.

Anvil #10 (Moose Pond): Next to a Tent
For the next checkpoint, you have to go to the Moose Pond area in the southwestern part of the region.
After you get there, search for the Anvil next to a tent on the edge of a cliff.

Anvil #11 (Watchtower): By the Edge of a Cliff
Anvil #11 will take you to the south side of the region, at the Watchtower.
The checkpoint can be activated by the edge of a cliff at the said spot.

Anvil #12 (Lost Hideout): On Top of Some Stairs
Finally, the last Anvil is located in the Lost Hideout on the south side of the region.
More exactly on top of some stairs at the twelfth spot marked on our map.
Well done, friend! You’ve managed to activate all twelve Atlas Fallen Caladrias: Forbidden Lands Anvils and can now focus on the Watchtower in the same region.
