God Of War Ragnarok The Broken Prison is one of the two Favours you must complete in Niflheim and one of the 47 Side Quests available in the video game developed by Santa Monica Studio for PlayStation 5 and PS4.
God Of War Ragnarok Broken Prison is relatively short compared to other Favours, and you can only play it after beating the story.
The Favour involves a small puzzle you’ll need to solve in the Aesir Prison Wreckage, which is, in fact, a piece of Asgard that landed in Niflheim after the battle at the end of the game.
God Of War Ragnarok Broken Prison Favour is required if you wish to achieve 100% completion in Niflheim, so throughout the following guide, we’ll tell you how to navigate this rectangular building.
How To Start The Broken Prison In Niflheim
To start the GoW Ragnarok Broken Pison Favor or Side-Quest, if you want, you must first beat the story. Completing A Viking Funeral Favour explained here is not mandatory, so after dealing with the Aesirs, pick any Mystical Gateway you want, then travel to The Raven Tree Mystic Gateway.
If you have already found all 48 Odin’s Ravens, make sure you visit The Raven Tree and open the 6 Legendary Chests as we’ve explained in our Eyes of Odin Favour guide.
Now, from Lunda’s Shop, while facing The Raven Tree, follow the path on the left side, behind the large arena.
As you walk on the path, you’ll automatically start The Broken Prison Side-Quest in the latest God of War Ragnarok game.

When you get to the other side of the icy path, you’ll see the Aesir Prison Weckage below, so make sure you descend.
The only objective of this Favor is to search the prison, but this prison features a puzzle that involves some wooden beams you can move in the central area. So let’s see what you must do to reach the bottom of the prison.
Aesir Prison Weckage Puzzle Solution
Upon reaching the upper floor of the prison, deal with the Aesirs first, then go around the central area and look for a wooden beam. You should see it below your current position, and you can also spot an airstream coming out of it.
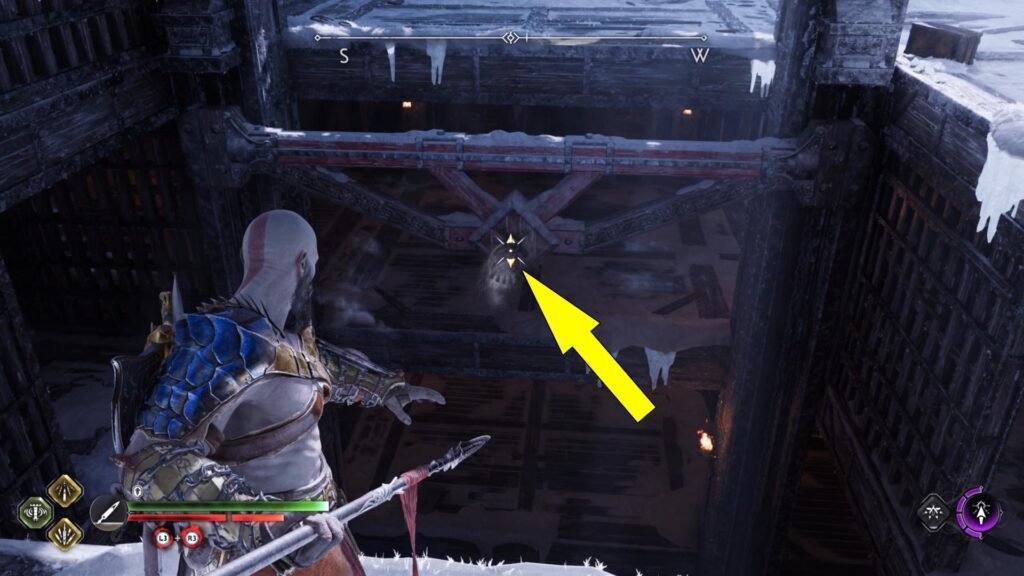
Throw your spear at the airstream (pictured) below, then head right, around the corner.
Descend one level, clear the floor, then look for a chain you can use to lower the wooden beam and the spear one level.
You can see the correct position in the following screenshot.

From the chain, head left, and jump on the spear below.
Now, on the next level, deal with more Aesirs, then take your time to look for one of the 35 Nornir Chests, which counts as one of the Aesir Prison Wreckage Collectibles we’ve covered here.
Return to the chain when ready, and while standing close to it, you’ll see another wooden beam.
Plant a spear into it, then make sure it’s one level below your current location (as pictured).

Head right now, and use the spear on the second beam to descend to the bottom of the prison.
This is the search area, so make sure you clear it first. Once you are done, head back up one level and move the wooden beam to the same level as the first one.
Next, go up one level (where the Nornir Chest is found), and use the chain to lower one of the beams.
Descend again (only one way to do it), and you should be above the ground floor. Go around the central section and descend again to reach the other side of the ground floor.
After you deal with the enemies, you’ll find a rather large door (pictured below).
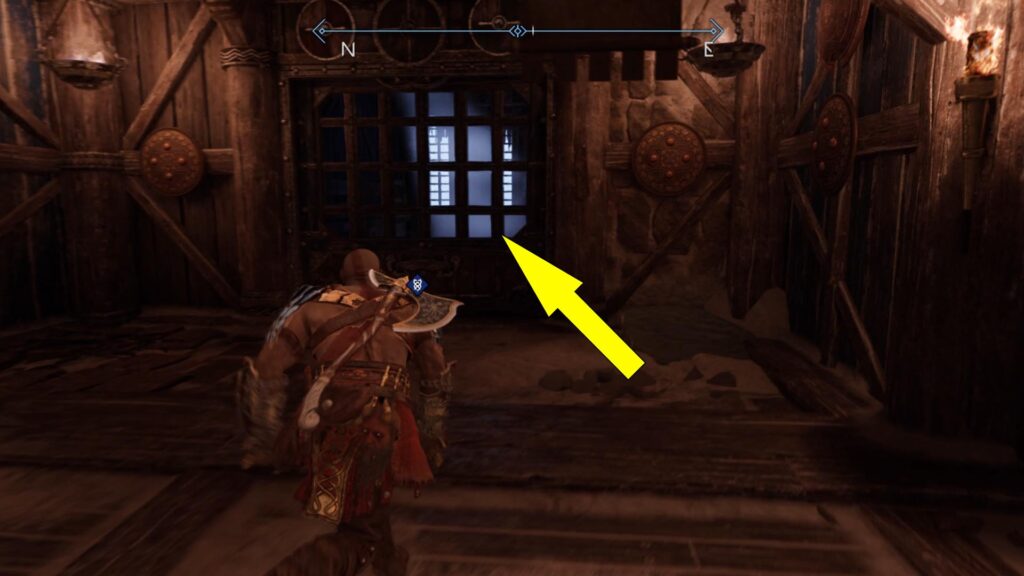
Open it, and you’ll find Tyr, who tells you what happened to him after betraying your party.
Upon talking to Tyr, God Of War Ragnarok The Broken Prison Side Quest ends, and you’ll have to exit following the same path you used to get inside, except that this time you’ll need to move the beams up, not down.
Now that this Side Quest is complete, make sure you visit our God of War Ragnarok Wiki Hub if you need help with other quests or if you want to find all collectibles in the game.
