God of War Ragnarok Temple of Light is the second region in the Alfheim realm and requires solving a series of puzzles to navigate through by finding the right angles to break the light crystals using the Twilight Stones.
Also, the God of War Ragnarok Temple of Light contains ten collectibles that can be acquired during your first visit with Tyr in Groa’s Secret Main Mission.
Check the list below for all the available God of War Ragnarok Temple of Light collectibles:
- 1 Nornir Chest
- 3 Legendary Chests
- 2 Lore
- 2 Artifacts
- 2 Odin’s Ravens
If you want to return to the Temple of Light later in the game (or after finishing the story), use The Strond Mystic Gateway.
Then, go through The Strond region (covered in-depth here) until you reach the gate leading into the Temple of Light, immediately after the broken bridge flanked by two turning wheels.
Lore Scroll (The Bifrost Bridge): On The Ground
After entering the Temple of Light, destroy the light crystal above the door by throwing the Leviathan Axe at the hanging Twilight Stone.
Then, follow the linear path until you reach another sealed door. As before, use the Twilight Stone on the left side of the light door to destroy the light crystal above.
Open the gate, then use the two grappling points to reach the bridge near the volatile Lake of Souls.
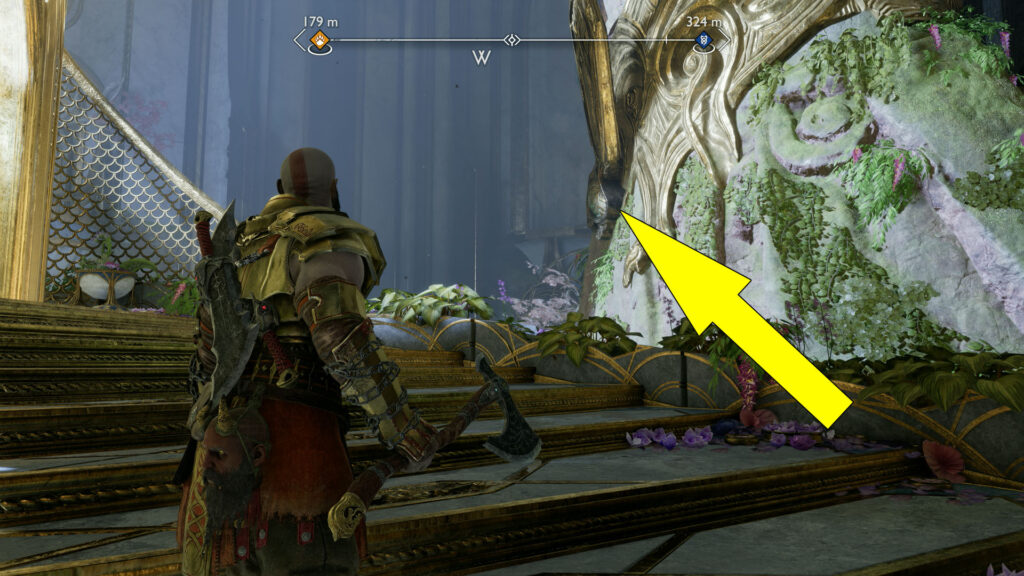
Now, climb the spiral staircase (only way forward) until you see a drop-down point on the left side with glowing markings on the edge. It’s almost halfway up the stairs.
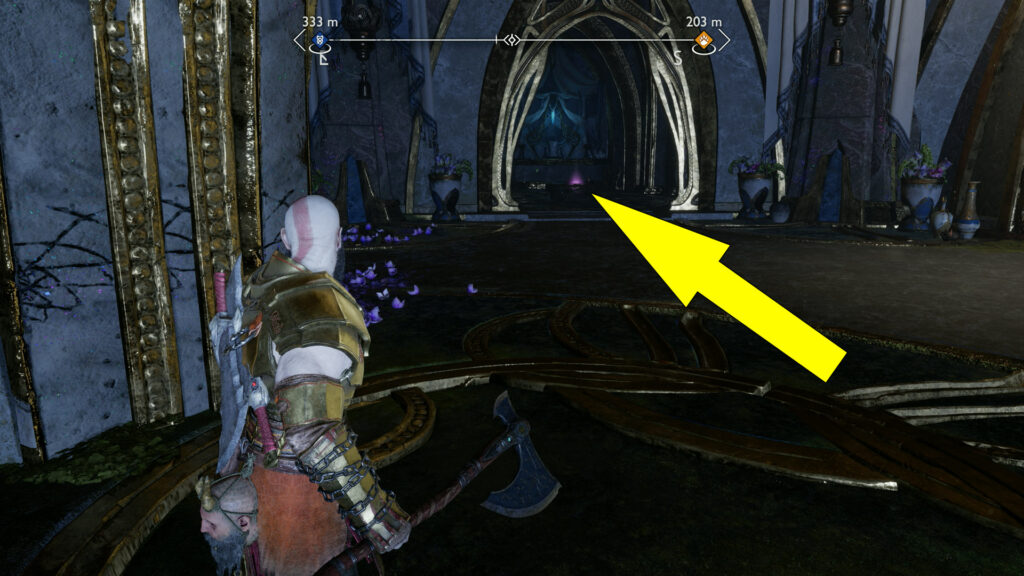
Once you drop down, turn right, then follow the path left to find the God of War Ragnarok Temple of Light Lore Scroll glowing golden on the ground.
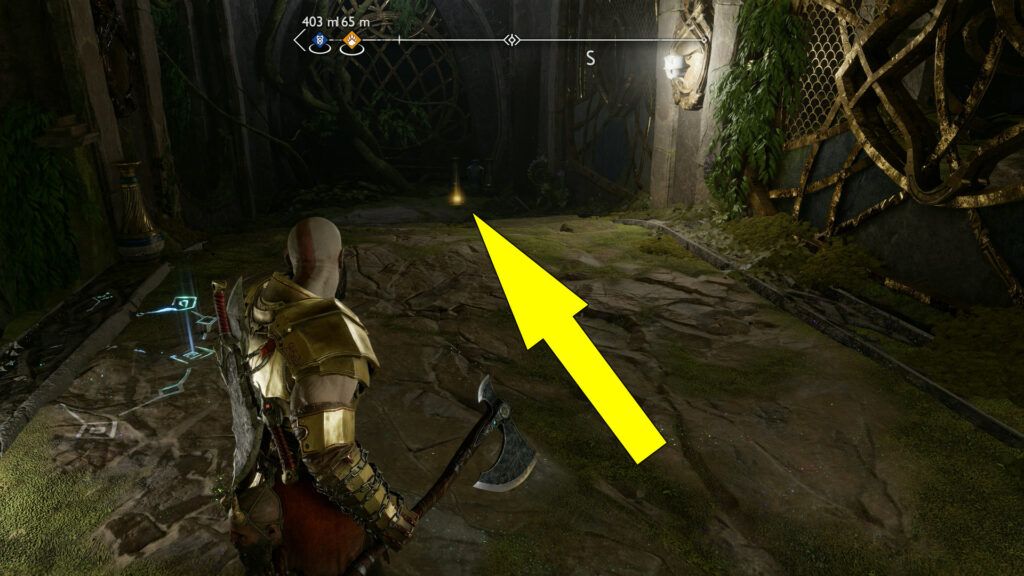
Check our God of War Ragnarok Lore Locations Guide here if you are looking to find all 80 Lore collectibles and make some Hacksilver as well.
Legendary Chest 1 (Hades Retribution): Near The Lore Scroll
From the previous Lore Scroll, turn around and drop down the ledge on the right.
The God of War Ragnarok Temple of Light Legendary Chest will be in front of you. After opening the Legendary Chest, you’ll receive the Hades Retribution, a Light Runic Attack.

If you want to expand your Runic Attacks collection, check our God of War Ragnarok Legendary Chests Locations Guide here.
Odin’s Raven 1: Hidden Behind Grating Fence
Climb back up and check on the opposite side of the previous Lore Scroll to find the God of War Ragnarok Temple of Light Odin’s Raven, hidden behind a grating fence in a poorly lighted area.
Throw your Leviathan Axe at the Twilight Stone on the left side of the wall so it ricochets into another Twilight Stone, which will hit Odin’s Raven.
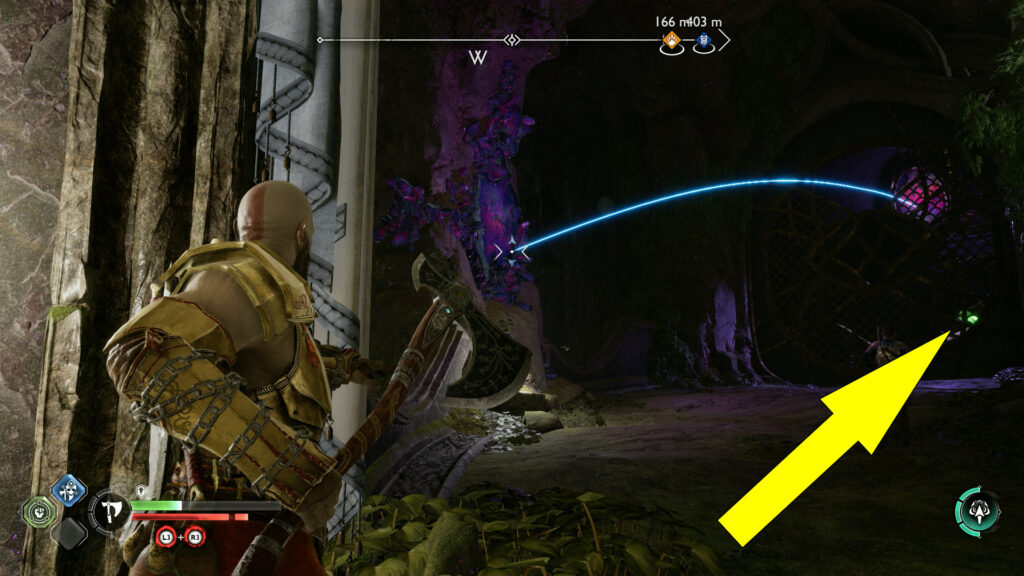
Killing the raven will count towards the progress of the God of War Ragnarok The Eyes of Odin Favour.
Artifact 1 (Visions After Rest – Kvasir’s Poems Set): In The Corner Of The Room
Climb back up to the spiral staircase and go all the way up. At the end of the stairs, turn right and climb up the wall near the hanging Twilight Stone.
Then, turn left to find the God of War Ragnarok Temple of Light Artifact glowing purple in the corner.

Also, if you want to gather more Lore collectibles, check 0ur the God of War Ragnarok Artifacts Locations Guide here.
Legendary Chest 2 (Hilt of Gram): Hidden Behind A Grated Fence
From the Lore Scroll location, throw your Leviathan Axe on the right side of the hanging Twilight Stone to destroy the light crystal and proceed forward.
Follow the linear path, open the large gate, climb up the short stairs and drop down the ledge on the left, where is a turning wheel.
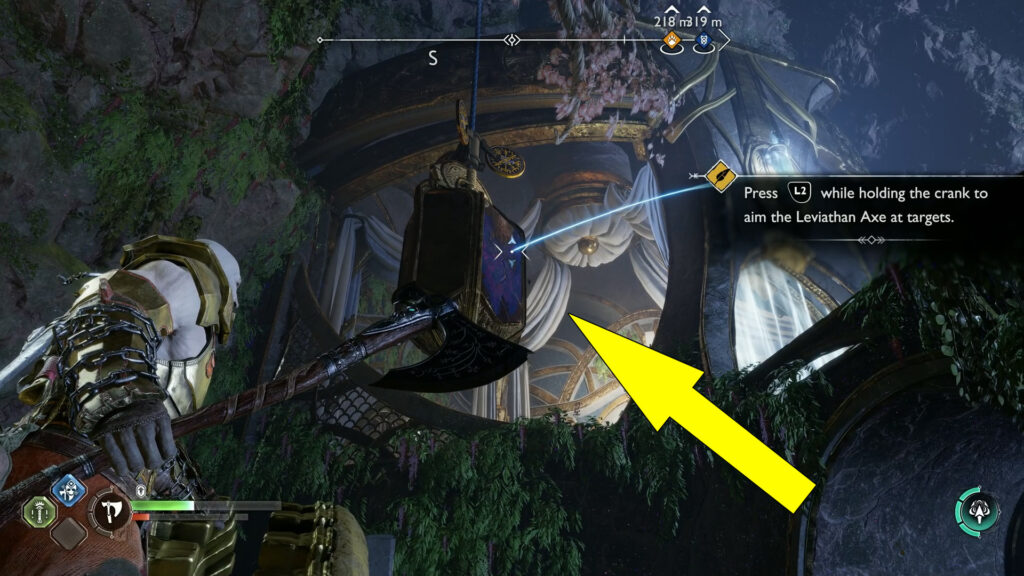
Go through the gate near the wheel, then pull the chain to raise a Twilight Stone mirror all the way up.
While holding the chain, throw your Leviathan Axe at the mirror to make it stuck behind the grated fence.

Let go of the chain by pressing (Circle), position yourself next to the lamp near the edge, and recall your axe by pressing (Triangle).
Doing so, the axe will hit the blue lock holding the platform with the God of War Ragnarok Temple of Light Legendary Chest.
The platform with the Legendary Chest will fall onto the ground, giving you access to open it and receive the Hilt of Gram Relic.
Artefact 2 (Spirits Within Walls – Kvasir’s Poems Set): In A Small Room
From the previous Legendary Chest, climb back up and return to the turning wheel.
If you haven’t destroyed the light crystal above the archway, spin the wheel down once, hit the left plate above the hanging Twilight Stone mirror, then throw your Leviathan Axe into the mirror to destroy the light crystal.
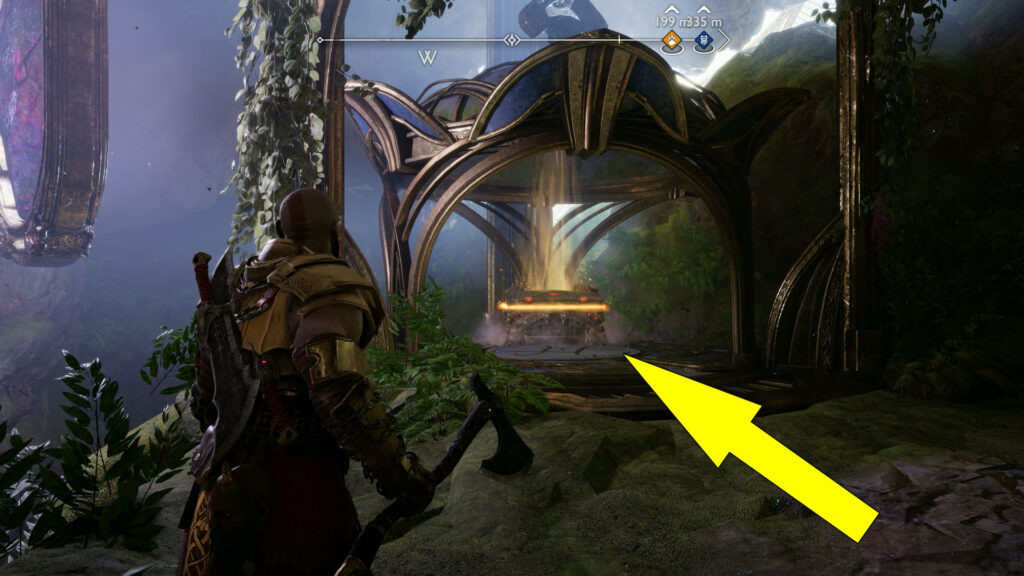
Immediately after going through the archway, you’ll find the God of War Ragnarok Temple of Light Artefact glowing purple in a small room on the left.
Legendary Chest 3 (Rune-Engraved Release): Near The Grappling Point Area
From the last artefact, go through the gate, and you’ll reach an area with several grappling points above water.
Drop down the ledge and use the grappling points to reach the southeast platform.
While looking west on the platform, you’ll notice a Twilight Stone mirror that you can swing left and right using your Blades of Chaos and a light crystal behind it.
You have to swing the hanging Twilight Stone mirror to the right, then quickly throw the Leviathan Axe into it, so it ricochets into the light crystal.
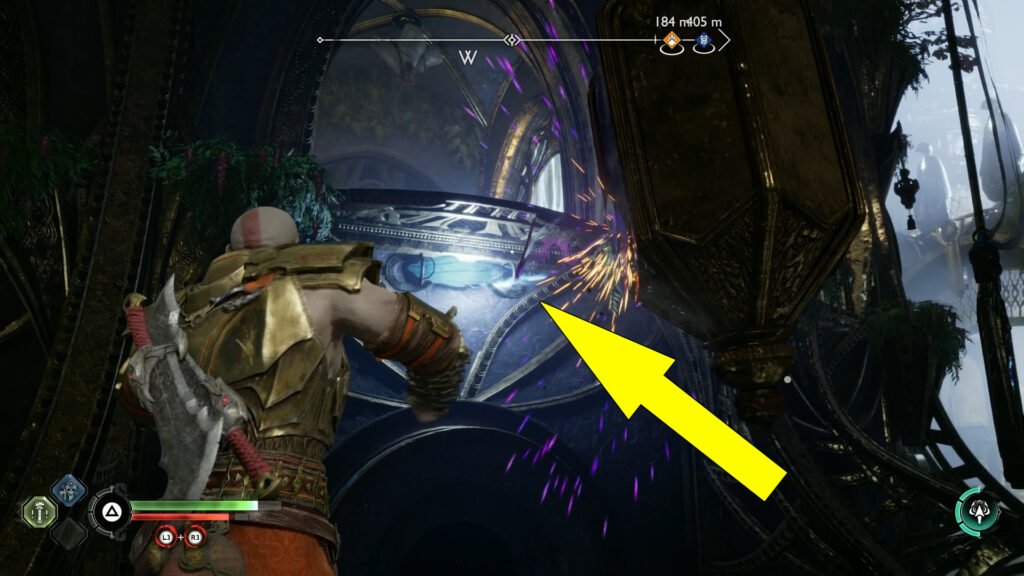
This action requires precise timing, so it will take a couple of tries until you nail it.
After destroying the light crystal, press (Circle) on the southern grappling point, then reach the ledge on the right.
The God of War Ragnarok Temple of Light Legendary Chest will be right in front of you, next to the gate.
After opening the Legendary Chest, you’ll receive the Rune-Engraved Release Accessory.
Nornir Chest: After The Light Bridge
From the Legendary Chest, open the nearby gate, climb the next ladder and cross the light bridge to find the God of War Ragnarok Temple of Light Nornir Chest.
To open this Nornir Chest, you must hit the three seal bells with your Leviathan Axe in quick succession.
The first seal bell is to the left of the chest in the far back. The second seal is close to the chest on the left. The third seal bell can be found in the corridor to the right of the chest, near the Twilight Stone mirror.
But first, head to the third seal bell and clear the rubble covering it by shooting a green arrow, then return in front of the chest.
The chest will only open if you hit all three seals in a short time (around 5 seconds). Follow the sequence in the image below for the highest chance of success.
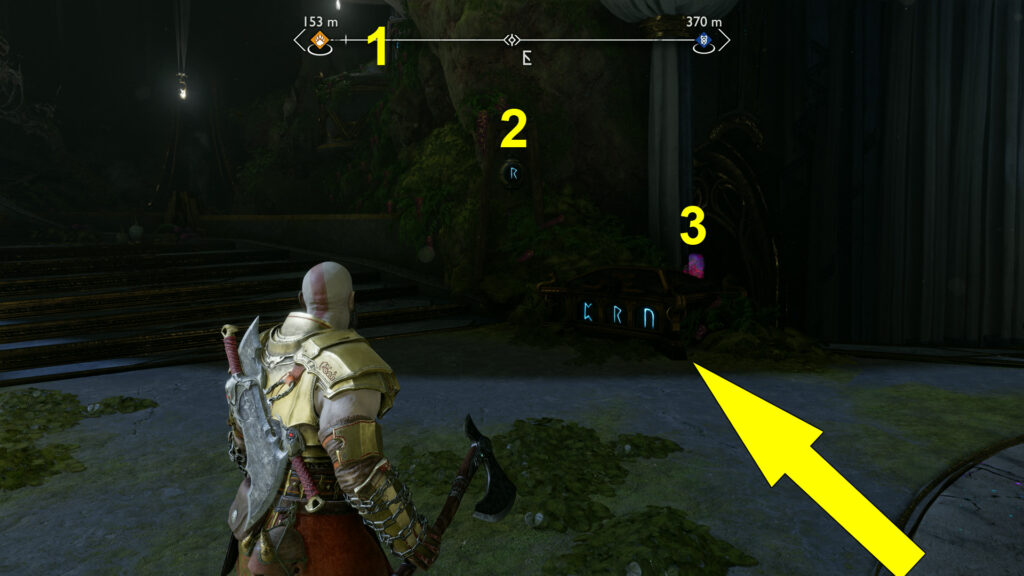
Use the Twilight Stone mirror to ricochet the Leviathan Axe into the seal. Also, try to use the quick throw by pressing (L2) + (R1) if you struggle aiming.
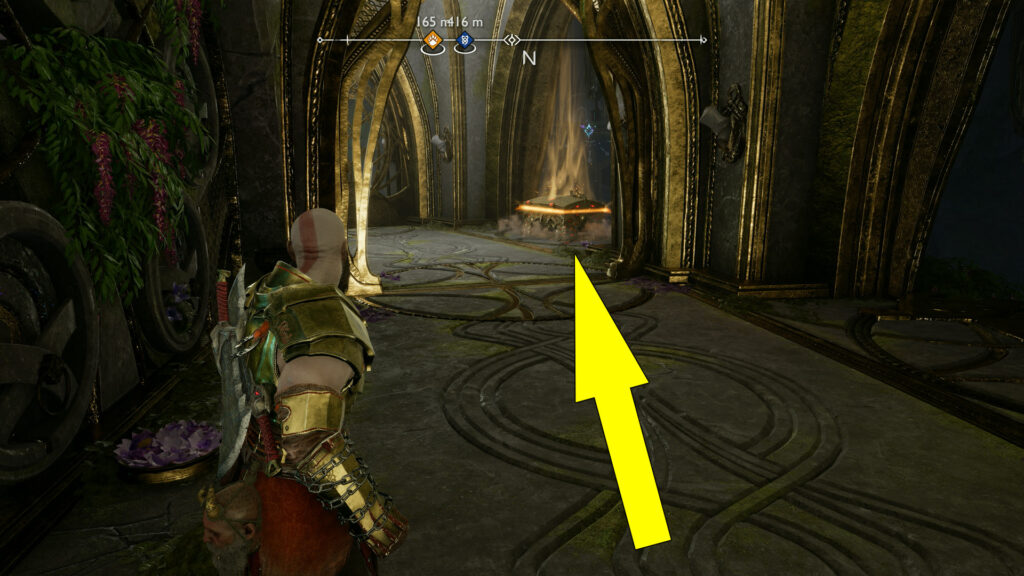
Odin’s Raven 2: Behind The Light Of Alfheim
From the Nornir Chest, take the stairs up and check behind the Light of Alfheim to find the God of War Ragnarok Temple of Light Odin’s Raven sitting on the edge of a small tower on the left.

Lore Rune Read (Limitless): Engraved On A Wall
Enter the next room, where you must solve a relatively challenging puzzle to unlock the next light door.
First, destroy the Sound Stone at the bottom of the statue on the right using a green arrow, then use your Blades of Chaos to drag the statue to the left.
Then, climb the wall behind the statue, turn right, and swing to the other side of the room using the grappling point. Kick the shield near the ledge to create a shortcut to up here.
Behind this statue, destroy the Sound Stone using a green arrow, then destroy the glowing visible clamp to make it fall further to the right.
Drag the statue to the left using the Blades of Chaos, then throw your Leviathan Axe at the Twilight Stone on the back of the shield to destroy another hidden clamp, which will make the statue fall further to the left.

Return to the opposite balcony, where you can now throw your axe and smash the crystal to unlock the door by positioning yourself to the right of the other statue.
Keep following the path outside, then enter the Temple of Light to reach the last light door.
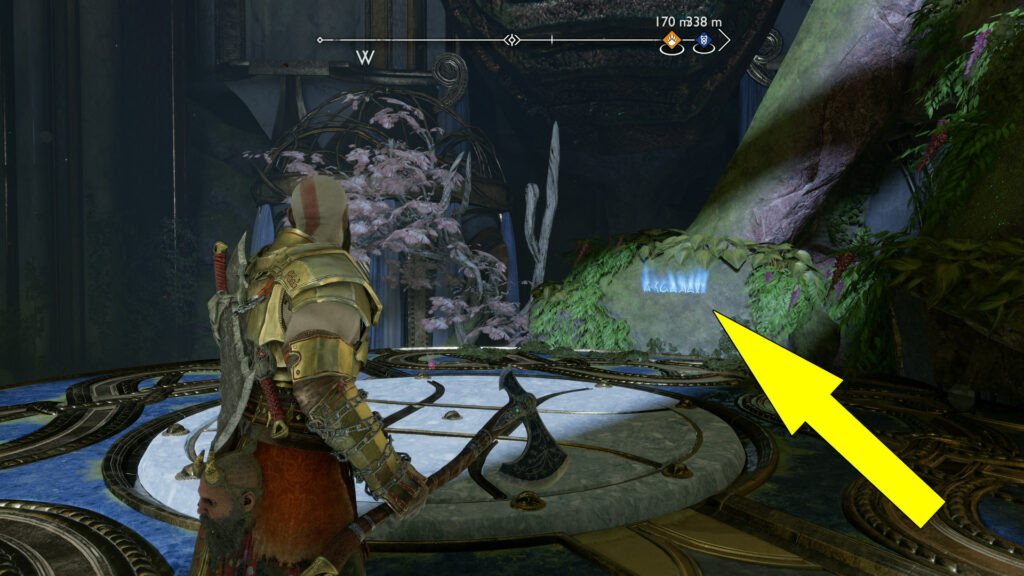
On the right side of the stairs, destroy the Sound Stone on the nearby wall (check the image marked below).
Destroying the Sound Stone will release a grappling point, allowing you to swing on a platform.
While looking north on the platform, you’ll spot the God of War Ragnarok Temple of Light Lore Rune Read engraved in a stone with glowing blue glyphs.
Also, to unlock the final light door, release the Twilight Stone mirror on the left side of the stairs by destroying the Sound Stone holding it, then, with Tyr’s help, throw your axe at it so it ricochets into the light crystal.
That’s all the collectibles you can find in the God of War Ragnarok Temple of Light region. The following area you can achieve a 100% completion rate is The Canyons covered in-depth here.
For more helpful guides about collectibles and favors, feel free to check our God of War Ragnarok Wiki Hub.
