Two Chivalrous Heroes is the second Wo Long Fallen Dynasty Main Battlefield or main mission, in which you’ll make a new ally and face several dangerous monsters. After defeating Zhang Liang, General of Man, at the end of the Village Of Calamity Main Battlefield, you’ll end up in a rocky, steep, and desert area, where you’ll meet Zhao Yun, one of the Five Tiger Generals.
Throughout the Two Chivalrous Heroes Main Mission, Zhao Yun will assist you in fighting against the Yellow Turban Rebellion, Demonized Fanatics, and the two bosses. Yes, you heard me right, two!
As soon as the level begins, follow the linear path and grab the Tiger Seal along the way until you reach Battle Flag 1. Upon raising the Battle Flag, you’ll unlock the Supplies and Online Lobby (Recruit and Co-op) in the menu. Don’t forget to spend your Qi from the previous main mission.
Battle Flag #2
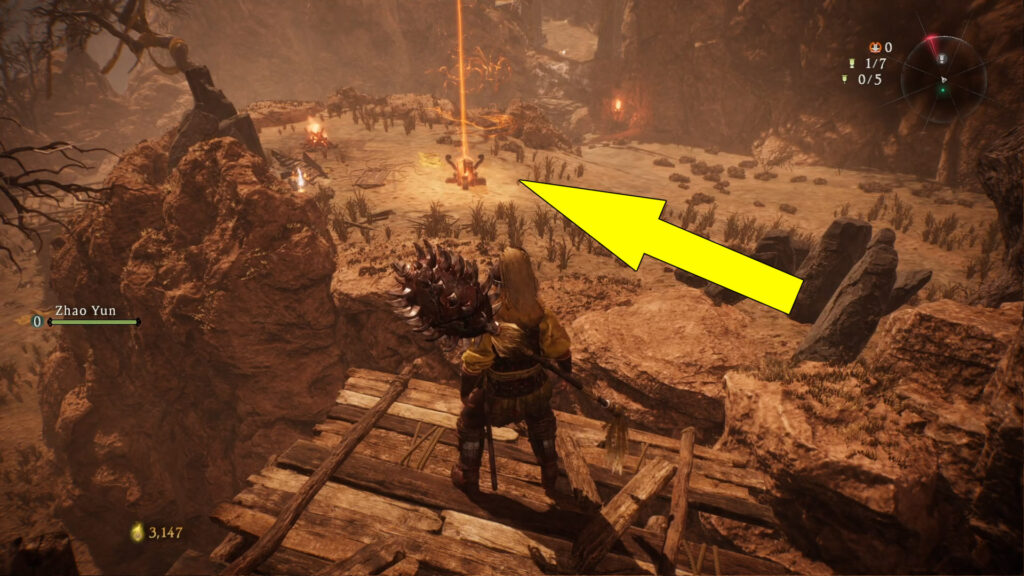
Once you’re ready, follow the path ahead until you get to a farm area with withered crop fields. Right in front of you, there are three Yellow Turban Bandits that you have to defeat. There is no way to fight one at a time, so you’ll have to fight against all of them at once.
After defeating all of them, a horde of reinforcements will rush into the area. Luckily, a cutscene will play that introduces Zhao Yun, who will drive them all away before assisting you on your mission. Now, let’s grab all the loot in this farm area. You can find Genuine Qi Fragment in front of a blockade on the far right side of the path we came from.

After picking up the fragment, turn around and check the wooden shack on the right side for a Genuine Qi Flake hiding behind some breakable wooden crates. Since there’s nothing left around the area, head through the gate ahead to find a glowing purple banner known as the Burial Flag.
Burial Flags mark the spot where an enemy killed another player nearby. Remember that they will have a Vengeance Aura and a higher Rank Morale than those around them. Finding and killing that enemy will earn you various bonuses. After closing the tooltip explaining the Burial Flags, you can turn off vengeance auras with the Memorial Tablet.
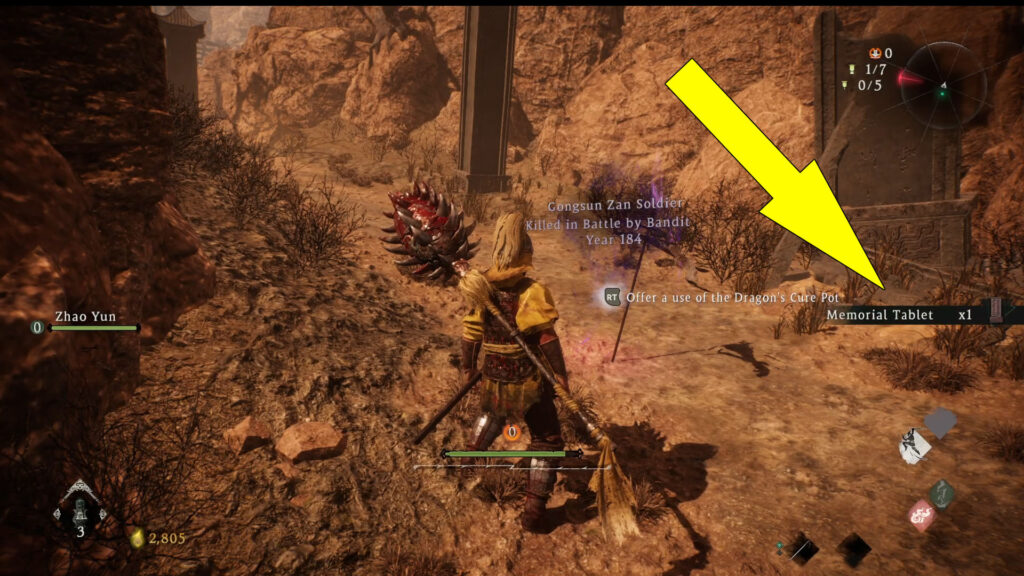
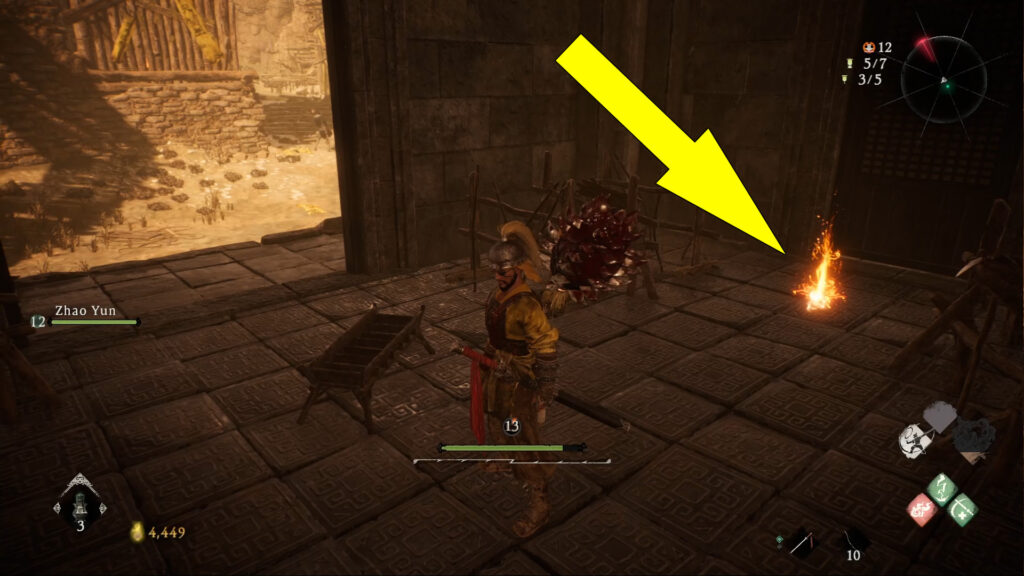
You can also briefly boost your Morale Rank by offering a Dragon’s Cure Pot charge at a Burial Flag. I recommend offering a Dragon’s Cure Pot charge only when you are injured and must heal yourself. Now, climb up the slope and defeat the Soldier ahead. On the wooden platform behind his location, you can pick up a Genuine Qi Flake.
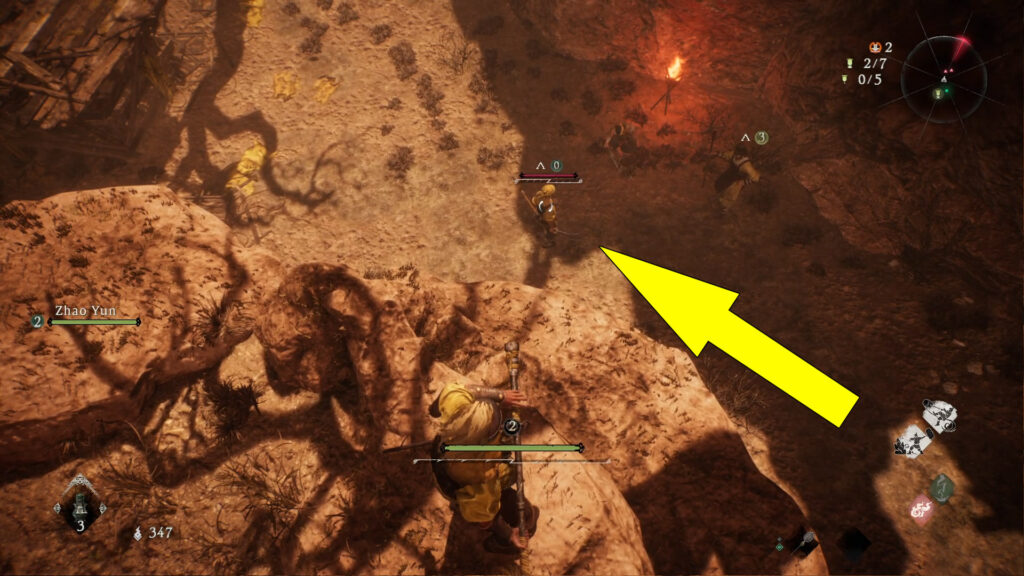
Past the wooden platform, three soldiers are camping near a torch. Leave them for now, turn around, and take the side passage on the left. Behind some crates, you can find Genuine Qi Flake.

Then, climb up the two white-painted ledges on the right, sneak behind the Soldier, and lock on him to perform a Fatal Strike so you can easily pick the Genuine Qi Flake near him. Climb the ledge to the left and jump over the gap to reach the second Battle Flag in Two Chivalrous Heroes Main Battlefield. Also, don’t forget to collect the 2-Star Hairpin Accessory nearby.
After you raise the flag, you’ll unlock another menu called Reinforcements. In this menu, you can select companions to help you throughout the missions. At the moment, the only companion available is Zhao Yun, but don’t worry. You’ll unlock more of them in the following missions.
Marking Flag #1
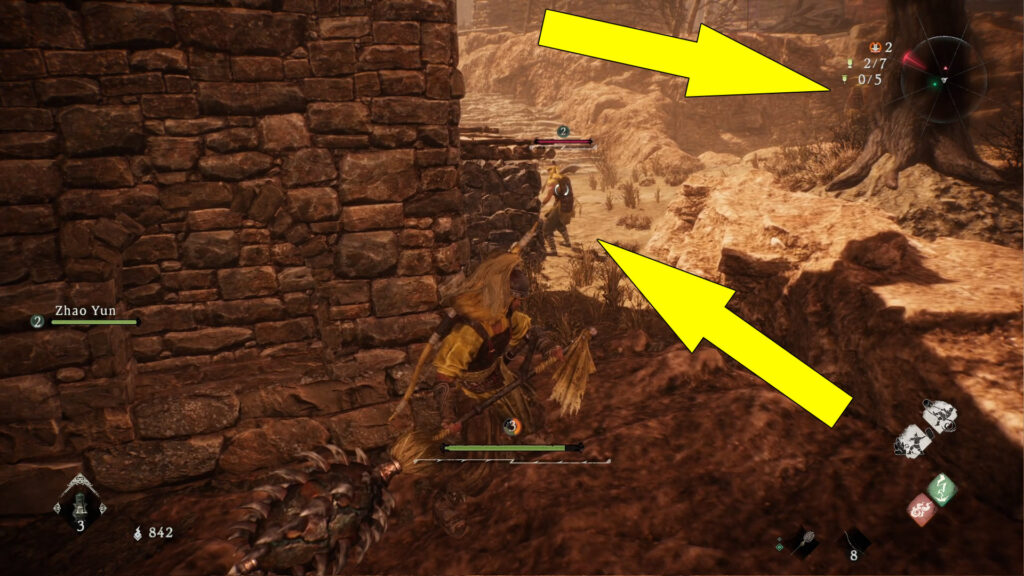
Down the slope from the Battle Flag, you’ll notice the three soldiers we’ve seen previously. You can take one of them with an aerial Fatal Strike and slash the other with Normal Attacks.
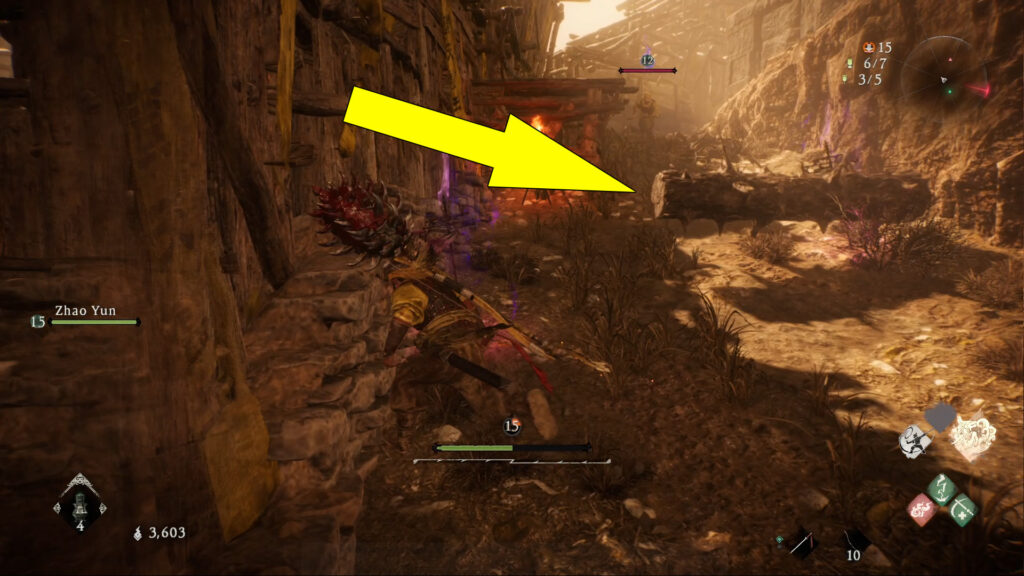
Because you take them by surprise, they won’t have time to react, making it an easy fight. After you’ve killed them, climb the nearby wooden platform to pick up a Genuine Qi Flake. Go up the path, past the Battle Flag, to reach a gate. A Rank 1 Steel can be found on a little ledge above the cliff to the right, as well as a Bamboo Bow and 7 Arrows on a corpse near the gate ahead.

Open the gate to progress further with the Wo Long Fallen Dynasty Two Chivalrous Heroes Main Mission. After you enter the village, you’ll notice the damaged or burnt houses and an archer waiting for you on the left ledge in the distance.
You can either shoot him using the Bamboo Bow you just acquired to get the feel of it, or we will sneak behind him later into the guide. Now, enter the first building on your right to find a Treasure Chest containing a 2-Star Yellow Turban Bandit Guard. Head outside and go to the back of this building to find 2 Arrows.

Follow this narrow clifftop path behind the houses all the way to the end to find a Soldier waiting to jump on you if you would’ve come via the main road. Sneak up behind his back and kill him with a Fatal Strike. Repeat the same process for the other nearby Soldier.
Climb the stairs, and if you haven’t killed the archer earlier, sneak behind his back to perform a Fatal Strike. Then, enter the building on the left to encounter a Soldier with a high Morale Rank guarding a Genuine Qi Flake.
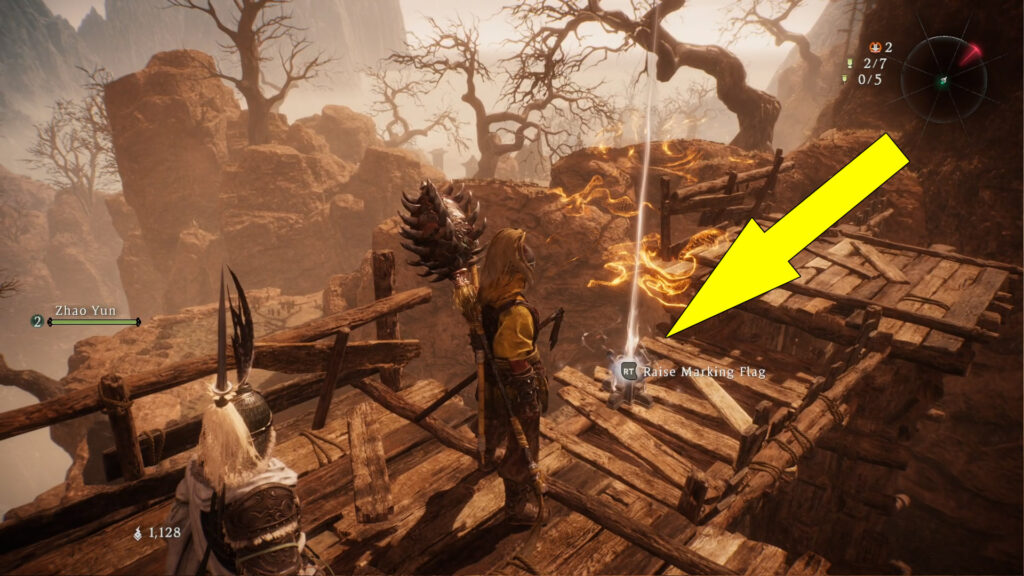
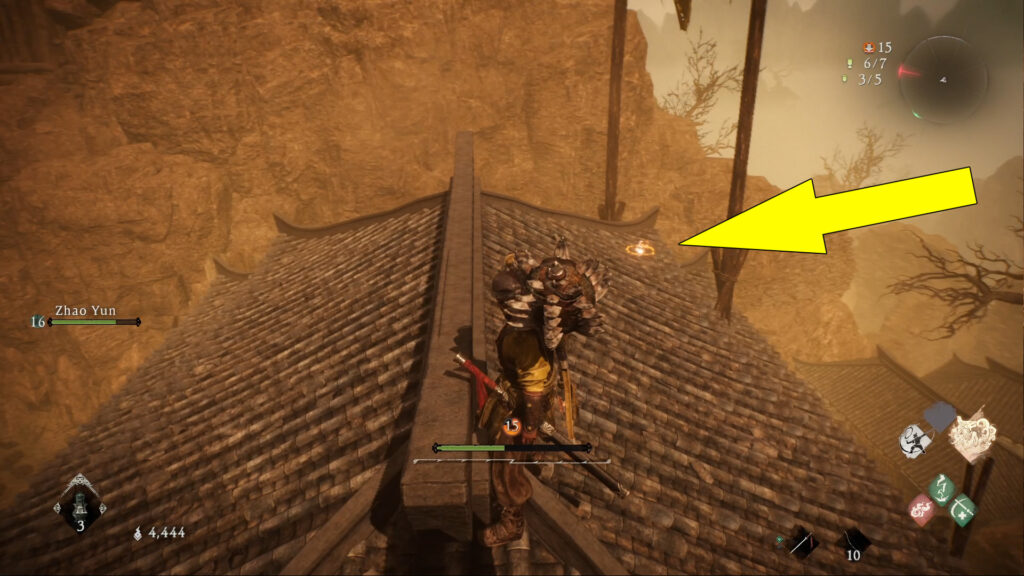
After you kill him and collect the loot, go through the other door and jump on the rooftops of the building to reach the top of the gate you’ve opened earlier. At the top, you’ll find your first Marking Flag for the Two Chivalrous Heroes Battlefield.
Battle Flag #3
From the Marking Flag, return to the top of the stairs near where you killed the archer. Here, you can take the path ahead, where a Leader awaits you, or explore the other two paths on the right. Since the Leader is a high Morale Rank enemy with several soldiers and archers around him, I recommend first exploring the other paths and building up Morale Rank along the way.
So, let’s proceed with the rightmost path behind the building near the edge of the cliffs. Sneak behind the Soldier overlooking the chasm and perform a Fatal Strike, then collect the 2-Star Yellow Turban Bandit Bracers off the ground nearby.
Climb the nearby wooden scaffolding to reach the rooftop. To the right, you can pick up a Small Genuine Qi Clot near a tree covered in golden cloth. On the hay roof of the nearby building, there is 1 Elixir near a corpse hanging over a wooden platform.

Kill one of the bandits with an aerial Fatal Strike from the hay rooftop, and slash the other until he dies. Then, check around the building with the hay rooftop you’ve jumped from to find 3 Arrows.
Now, climb the ledge near where you killed the two bandits and follow up the path immediately on the right. At the top of the path, you’ll find the third Battle Flag in Two Chivalrous Heroes Battlefield. Also, you can pick up 3 Throwing Knives on a ledge below the Battle Flag.

Marking Flag #2
Go back down the path and check behind the small animal shelter for a Wolf waiting to jump on you. Past the animal shelter and the wolf, there is a Yellow Turban Soldier patrolling in and out of the building on the left. Unfortunately, two more Soldiers with higher Morale Ranks are in the opposite building on the right. If you get close and alert the patrolling Soldier, the other two will jump into the fight.
So, to avoid getting overwhelmed, you can use the bow to lure the patrolling Soldier and take him out alone. Then, you can defeat the other two soldiers waiting in the right-hand building. Once you clear the area, let’s grab some loot. Enter the right-hand building and grab the 2-Star Yellow Turban Bandit Footwear on the table. Also, pick up the 2 Throwing Knives off the corpse in the middle of the road.
Now, follow the path to the right of this corpse and climb up the ledges to reach a house with an injured Gongsun Zan Soldier in front of it. You can speak with him if you want. Enter inside this house to open a Treasure Chest containing a 2-Star Iron Sword. Drop down into the small space behind the previous house to find a Rank 1 Leather.
Now, return to the animal shelter where you killed the wolf and use it to reach the rooftops.

The nearby larger roof covered with hay has a big hole you can jump through and enter the house. Inside the house, you’ll find the second Marking Flag in Two Chivalrous Heroes Battlefield and a Treasure Chest containing a 2-Star White Horse Servant Cavalry Greaves.

Battle Flag #4
Leave the house and return to the rooftops the same way as before. Go along the rooftops until you reach another house with a hole in the roof near the Leader and the Battle Flag. You can reach a Genuine Qi Fragment through the hole in the roof. Also, under the improvised wooden ramp inside the house, you can find a Treasure Chest with a Rank 1 Steel.
After grabbing the loot, head back to the rooftop and kill the archer looking toward the Battle Flag with a Fatal Strike. Immediately after killing the archer, you’ll alert another archer standing on a rooftop on the right side.
Take him out using the Bamboo Bow, then jump down and fight the Leader and the nearby Soldier. Once you’ve defeated the Leader, loot him to receive a 3-Star Yellow Turban Champion Armor and an Elixir and raise the fourth Battle Flag in Two Chivalrous Heroes Battlefield.
Marking Flag #3
Before going through the gate, go to the right of the Battle Flag and climb the wooden platform between houses. Then, follow the path to the left to pick up 3 Arrows off the wooden platform above the gate. Drop down and go to the left of the gate to pick up a Genuine Qi Fragment.

Now, go through the gate and look to the left for a Wolf ready to jump on you. After you kill the wolf, grab the Genuine Qi Fragment behind him and a Throwing Knife near the stairs.
Climb the ledge ahead to reach a corrupted area with a stone platform in the middle. Here, you will encounter three Demonized Fanatics of different Morale Ranks playing dead. You can sneak behind the Demonized Fanatic on the ground floor to perform a Fatal Strike, then take the other two on the stone platform.

Once you’ve defeated them, grab the Genuine Qi Flake off the stone platform and move into the next area, where you will see Demonized Fanatic lurking around. Ignore him for now and take the path up on the right by climbing the ledges.
Along the way, you will encounter two Demonized Fanatics, throwing Fire Bombs as you climb. Take them out and keep going up. At the end of the path, you’ll reach the third Two Chivalrous Heroes Marking Flag in Wo Long Fallen Dynasty.

Battle Flag #5
Now, follow the same path you came here to the lonely Demonized Fanatic, who is not so lonely. At the top of the slope is another Demonized Fanatic hiding behind the crates, ready to push a rolling spike trap to you as you approach the first one. So, get the attention of the first Demonized Fanatic, triggering the rolling trap, and immediately run out of the way to avoid getting hit.

The rolling spike trap will kill the first Demonized Fanatic, making the fight easier against the second one. Go to the top of the slope and grab the 3 Arrows hidden in an alcove on the right side.
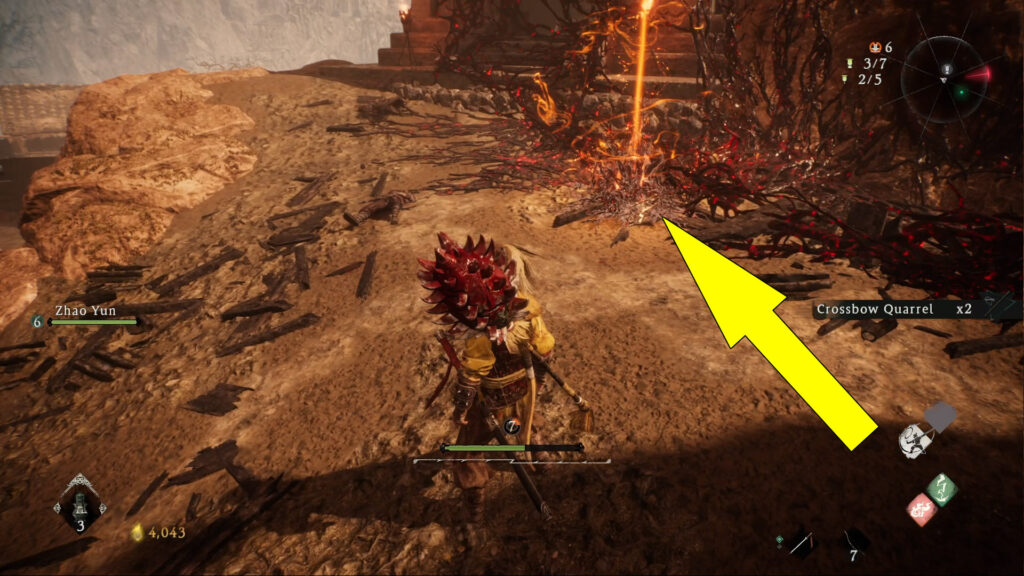
Continue up the path to encounter another pair of Demonized Fanatics, one of them lurking on the ground floor and the other throwing firebombs at the top of a rock near a brazier. Behind the brazier at the top of the rocky structure, you can pick up a Genuine Qi Fragment.
If you look toward the path you came from this rocky structure, you’ll see a white-painted path on the left that you can climb. This path leads to a Demonized Officer Leader with a high Morale Rank guarding a Battle Flag.
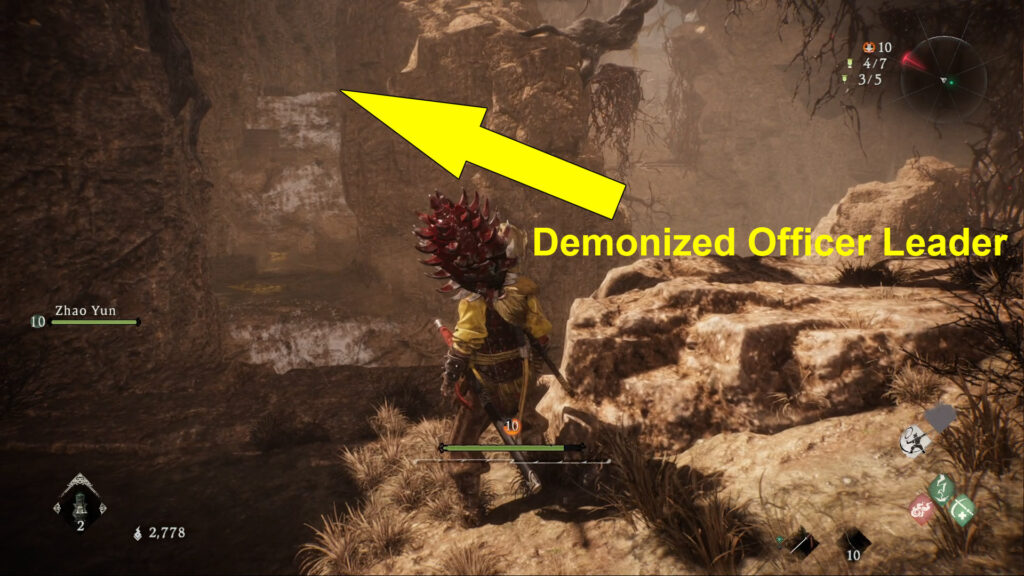
We would recommend avoiding fighting him for now but don’t worry. We will get him later in the mission. Now, in the corner of this area behind the brazier is a bundle of logs that you can kick down to create a shortcut to Battle Flag #2.
Kick down the pile of logs and go rest to the Battle Flag because we will face Zhuyan, the first boss of the Two Chivalrous Heroes Battlefield, in the following area. Don’t forget to spend all your Qi to upgrade your character and tweak your equipment. Go up the hill and open the wooden gate to start the boss fight against Zhuyan.
How to Defeat Zhuyan in Two Chivalrous Heroes Battlefield
Zhuyan is a massive ape-like demon who mainly attacks you with its huge, ripped arms. His attack moves include an overhead slam, a swipe with his tail, horizontal swipes, and an uppercut, where it drags its arm along the ground before swiping upwards.
Zhuyan also pounds the ground with both hands, doing damage upfront and minor shockwaves around him that, if you get too close, can also damage you.
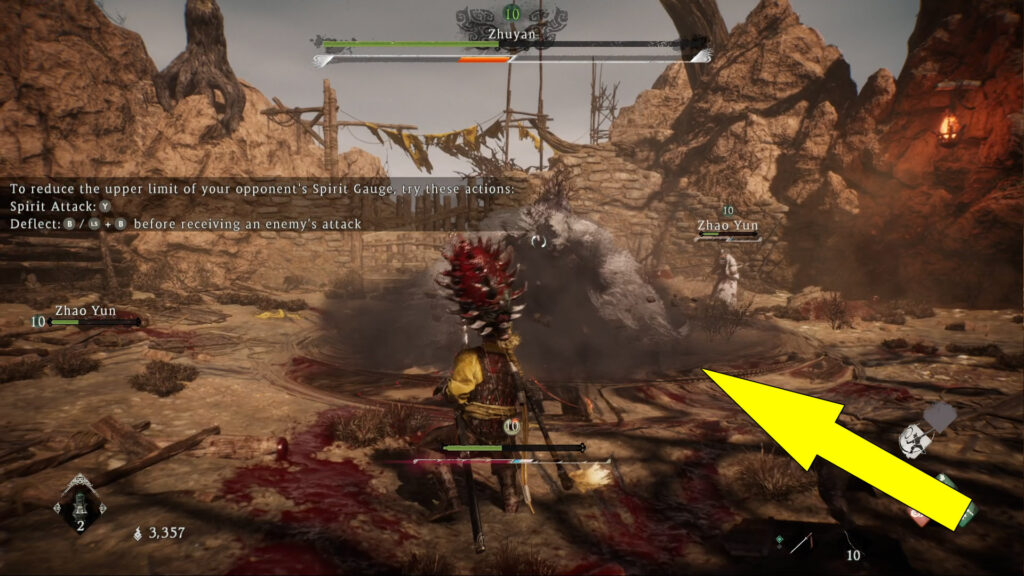
If you stay too long and close to him, he will growl, releasing a flurry of corruption spikes that will damage and knock you back. This ability resets the upper limit of its Spirit Gauge if it was reduced by Fatal Strikes, Spirit Attacks, or Deflects.
Zhuyan performs two Critical Blows. In the first, he performs a backflip before landing on his hands and throwing itself at you in a flying kick that can go the whole length of the arena.

During the second Critical Blow, it will do a backflip before performing a powerful overhead slam with both hands.
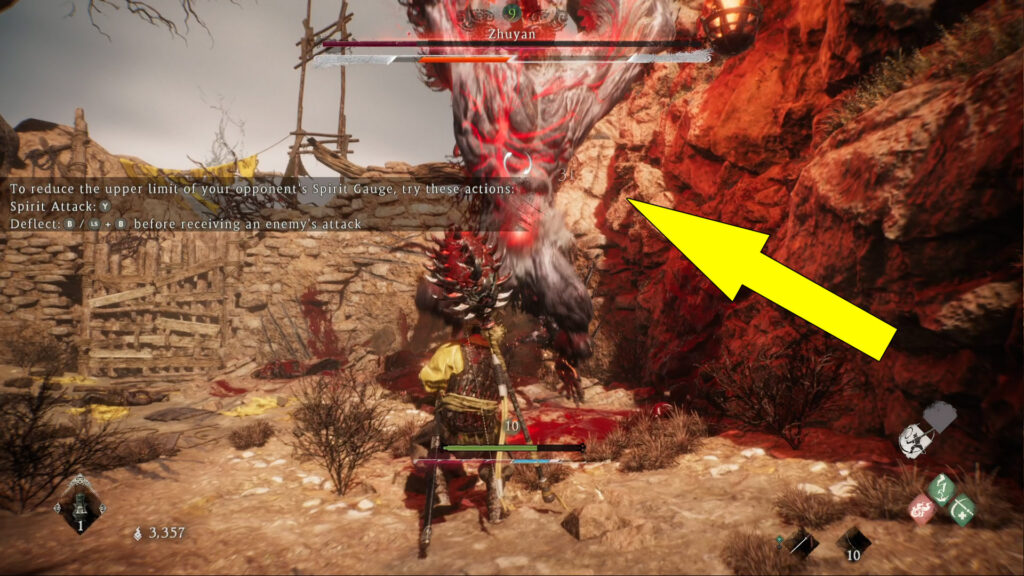
So, the best way to approach and defeat this boss is to play defensively as much as possible. Deflect and dodge his melee attacks while you slip 1-2 hits here and there. Keep somewhat of a distance and wait for him to perform its Critical Blows.
If you successfully deflect its Critical Blows, you’ll deplete a significant portion of its Spirit Gauge, leaving him vulnerable to Fatal Strikes. Brute forcing the boss with Normal and Spirit Attacks or using Spells and Martial Arts isn’t as efficient as being patient and timing your Deflects against his Critical Blows.
This one should be a piece of cake compared to the first boss of the Village Of Calamity Mission. Once you’ve defeated Zhuyan, you’ll unlock the Qilin’s Jade item, which allows you to set Qilin as a Divine Beast and Vow of the Stalwart Trophy/Achievement.
After the fight, continue through the open gate to raise the fifth Wo Long Fallen Dynasty Two Chivalrous Heroes Battle Flag.
Don’t forget to spend your well-earned Qi upgrading your character.
Battle Flag #6
Head to the left and climb the ledges while grabbing the 5 Rank 1 Steel along the way. At the top, you’ll meet an NPC named Zhu Xia, who is a blacksmith. She can upgrade your equipment level in exchange for Copper and upgrade materials.
We recommend holding your materials for now until you obtain better equipment to upgrade. Now, follow the path ahead until you reach an open area. Kill the Demonized Fanatic below you with an aerial Fatal Strike and slash the other wobbling on the stairs.
At the top of the stairs is one more Demonized Fanatic wielding a Sabre. Take him out as well. Then, look to the right and below the stairs for a Genuine Qi Flake.

Now, go up the stairs, and instead of entering the stone building, take the narrow path to the right with a wooden fence. At the end of the path, you’ll find a Treasure Chest containing 2 Rank 1 Leather. Also, looking to the right and below Treasure Chest, you’ll notice a cave entrance with crates in front of it.

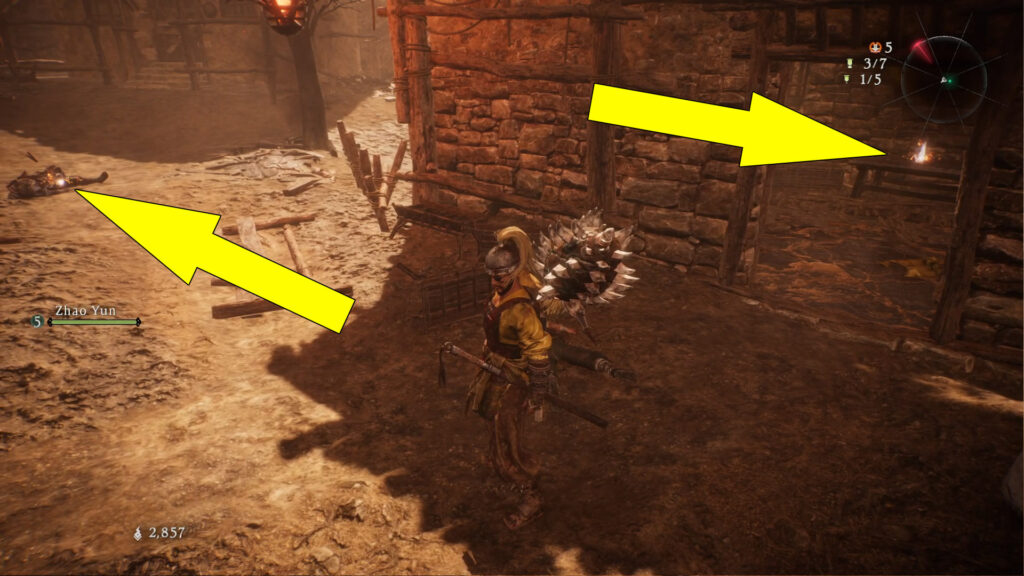
After you open the Treasure Chest, jump down and enter the cave below. In the main area of the cave, you’ll have to defeat five Demonized Fanatics. For most of them, you can sneak behind their back to perform a Fatal Strike and kill them in one shot. Then, you can loot the area for 3 Throwing Knives near the edge and 2 Throwing Knives near the wooden structure.

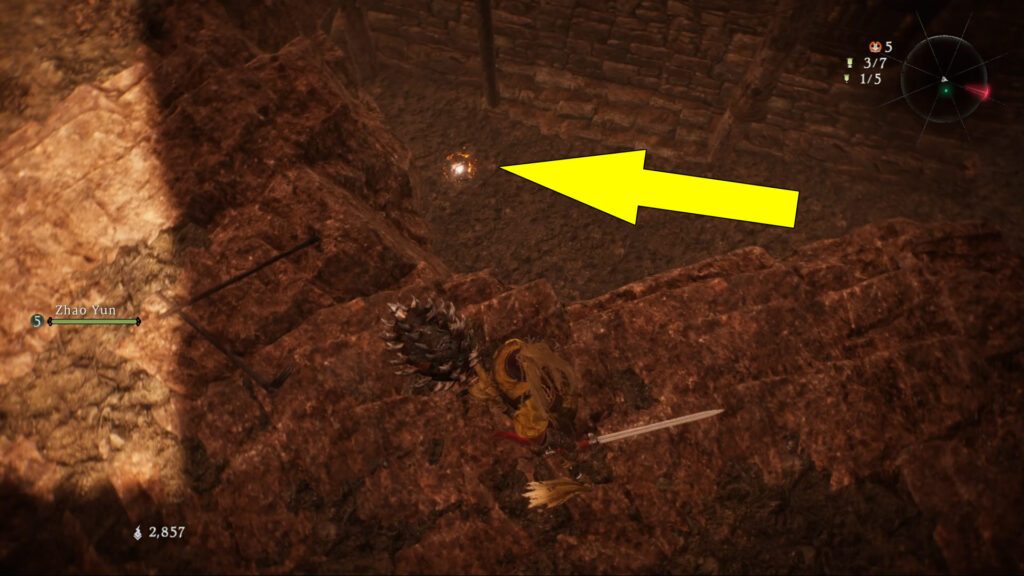
In the far back corner of the main area, a smaller room is blocked by crates, and a Demonized Fanatic is ready to ambush you inside. Destroy the crates, kill the Demonized Fanatic, and then collect the Elixir on the ground.
If you look over the ledge in the main area of the cave, you’ll see the Demonized Officer Leader we mentioned before fighting against the first boss, Zhuyan. Before jumping on him with an aerial Fatal Strike, kick down the nearby ladder to create a shortcut back up after you defeat him.

Once you’ve defeated him, grab his loot, open the nearby Treasure Chest containing a 3-Star Great Wooden Hammer, and raise the sixth Battle Flag of the Two Chivalrous Heroes Main Mission.
Marking Flag #4
Now, climb the shortcut ladder, exit the cave the way you came, go up the stairs, and enter the stone building. Defeat the Demonized Fanatic wielding a Polearm and grab the Dragon Vein Crystal off the ground behind him. Also, break the nearby crates to find a Rank 1 Leather.
Dragon Vein Crystal is a usable item that allows you to increase the usage limit of the Dragon’s Cure Pot by one when used. So make sure to collect all of them to take full advantage of the Dragon’s Cure Pot. As you exit the stone building, you’ll see on the right a Demonized Fanatic wobbling in front of some stairs.
If you approach him and follow this path, you will be ambushed by a horde of enemies, likely resulting in a quick death. Instead, take the path on the left while hugging the left side because a Soldier will push a rolling spike trap as you go up.
After dodging the trap, kill the Soldier and climb the wooden platform ahead to reach the scaffolding. Follow the cat-walk to the left leading to the rooftop of the stone building and grab the 3 Arrows.
From the rooftop, return to the scaffolding along the clifftop and climb the ledge ahead. On the left is a path over a chasm leading to a tower with a Golden Cicada Shell, one of the few collectibles in Wo Long Fallen Dynasty.

Jump onto the next set of scaffoldings, where you will encounter an archer and find 2 Arrows along the way. Under the archer’s platform, you must defeat two more Soldiers with high Morale Ranks to reach and raise Marking Flag #4 in the corner. You can perform an aerial Fatal Strike on one of them and quickly slash the other with Normal Attacks.

If you care that much about collecting everything, there is a Throwing Knife left between the scaffoldings down the slope on the right, near the cliff’s edge.
Marking Flag #5
Once you’ve cleared the area and raised the Marking Flag, climb the platforms near the large building to reach the rooftops. Go to the rooftop’s left side, kill the Demonized Fanatics pair, and destroy the crates to collect a Rank 1 Leather.
Near the hole in the roof, use the wooden board to climb to the very top and find a 3-Star Yellow Turban Champion Armor. Now, enter the building through the hole, perform a Fatal Strike on the Demonized Fanatic lurking below, and kill the second one in the corner. After you clear both of them, collect the loot in the main room:
- 1 Rank 1 Steel – in the left corner
- 2 Rank 1 Leather – in the right corner
- 1 Rank 1 Steel – under the crates
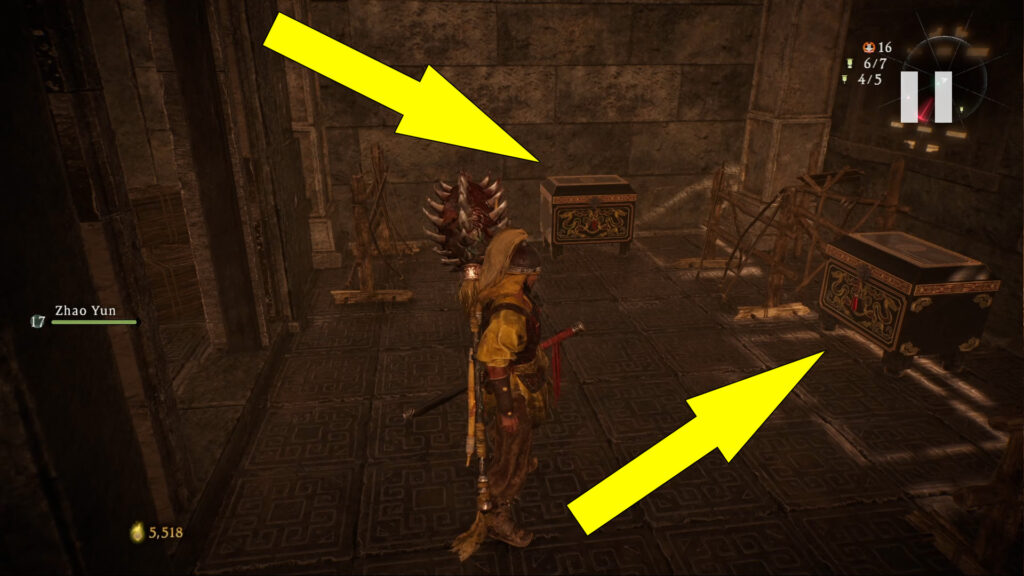
Move into the small side room to find a Demonized Fanatic playing dead and two Treasure Chests containing the following items:
- White Horse Servant Cavalry Armor
- White Horse Servant Cavalry Helmet
- White Horse Servant Cavalry Gauntlets
Exit the building, turn immediately right, and climb the wooden platform. At the top, follow the path to the left and perform a Fatal Strike on the Demonized Fanatic who is looking down. On the next platform, there are three more Demonized Fanatics and a white-painted wooden wall.

Defeat all the Demonized Fanatics, break the white-painted wooden wall, and drop down here to find the final Marking Flag in Two Chivalrous Heroes Battlefield.

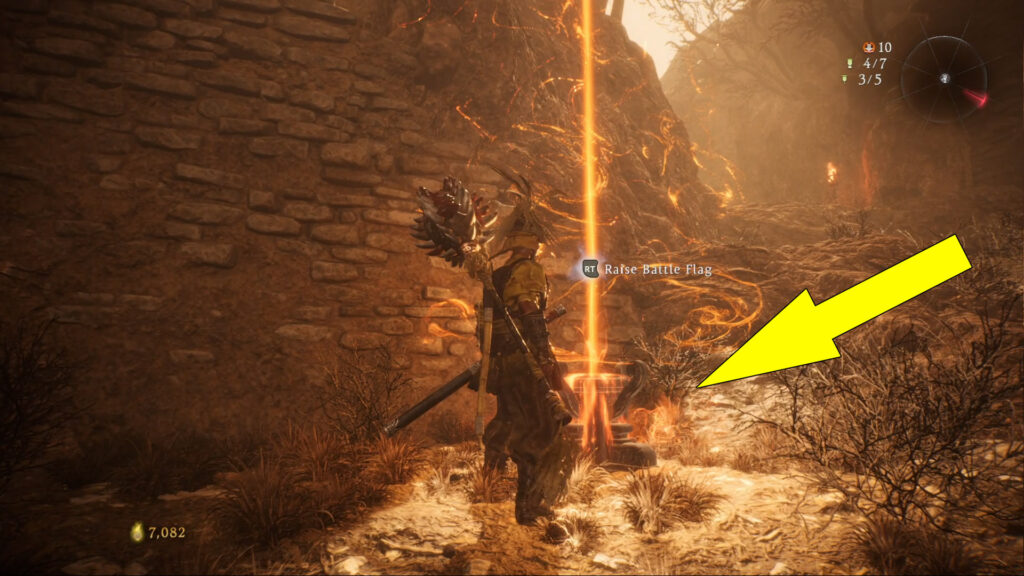
Battle Flag #7
After raising the Marking Flag, go outside and fight the Demonized Officer Leader. You should be able to concentrate primarily on him now that you’ve eliminated the majority of the enemies in this area. After you defeat him, collect the loot he drops and raise the final Battle Flag in Two Chivalrous Heroes Mission.

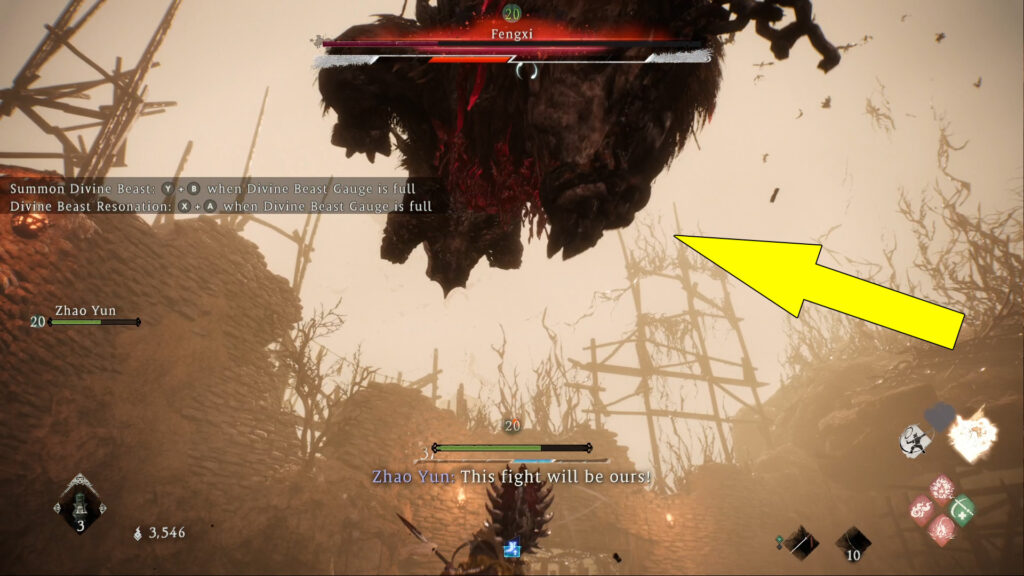
Rest at the Battle Flag and prepare to fight against Fengxi, the second boss of the Two Chivalrous Heroes Battlefield.
How to Defeat Fengxi in Two Chivalrous Heroes
Fengxi is a giant demon resembling a hog; his primary weapon is his enormous, hideous-looking tusks. The hog is incredibly swift on his feet and will use a variety of attacks without giving you a break.
Fengxi uses a variety of ranged attacks, but his favorite move when you are far from him is a charging attack, in which he lowers his head and runs at you from across the arena in an effort to stab you. He will perform this attack up to three times in a row, and you can avoid him by dodging/deflecting to the sides.

Fengxi can also leap into the air and attempt to land on you, doing significant damage if successful. Fengxi is also capable of performing a powerful jump into the air, trying to land on you and doing a fair amount of damage if he succeeds.
Be aware that, like Zhuyan, he has the ability to growl, causing several corruption spikes to erupt from the ground around him, damaging you and knocking you back. He also possesses a deadly tail whip that can knock you back if you are coming at him from behind.
When his health is low, he can also jump up and whip his body about violently when his health is low, creating little shockwaves with each landing. Like the Zhuyan, Fengxi has two Critical Blows in addition to his regular attacks, which we want to focus on and exploit. The first Critical Blow consists of turning his tusks a bright glowing red and charging at full speed.

He will use this Critical Blow more often if you keep a distance from him, and it’s easier to Deflect. In the second Critical Blow, the boss will rise on its back legs, get close to you, and then try to crush you.
So, the main strategy to defeat Fengxi is to maintain a safe distance from him to avoid being caught off guard and bait his Critical Blows and charge attacks. Once more, concentrate on deflecting his Critical Blows because doing so would swiftly deplete his Spirit Gauge and leave him vulnerable to Fatal Strikes.
After the boss fight, a lengthy cutscene will play, marking the ending of Two Chivalrous Heroes Mission and the start of the next, The Valley of Crying Wraiths. Using the Travel Option at the first Battle Flag also allows you to start The Yellow Heaven Burns Side Mission.
