God of War Ragnarok Applecore is a labyrinthine maze region in the Svartalfheim realm that you will first visit alongside Atreus in your quest to find Tyr.
God of War Ragnarok Applecore contains 14 collectibles, most of them being available to collect after you unlock the Draupnir Spear:
- 2 Nornir Chests
- 2 Legendary Chests
- 3 Lore
- 3 Artifacts
- 1 Buried Treasure
- 1 Odin’s Raven
- 1 Yggdrasil Rift
- 1 Draugr Hole
Finding your way around this complex labyrinth can be difficult, mainly because there are a few hidden areas you can’t reach during The Quest for Tyr Main Mission.
However, it gets much less annoying to explore after you have a solid idea of how this complex underground network of tunnels works.
Therefore, in the following guide, we will explain how to enter the Applecore region after the story and where to find all the collectibles in the shortest and quickest way possible.
How To Reach The Applecore After Story
This God of War Ragnarok Applecore collectibles guide is meant to be followed after you finish the story or at least after you unlock the Drapnir Spear at the end of the Forging Destiny Main Quest.
To return to The Applecore region, fast travel to the Mystic Gateway in the Aurvangar Wetlands region (covered in-depth here), then follow the path to the left until you reach the Ferry.
Take the Ferry to Sverd Sands island and follow the path until you reach an elevator that will take you down in The Applecore.
Follow the steps below only after you’ve unlocked the Draupnir Spear because it’s essential to clear or create new paths to hidden areas with it.
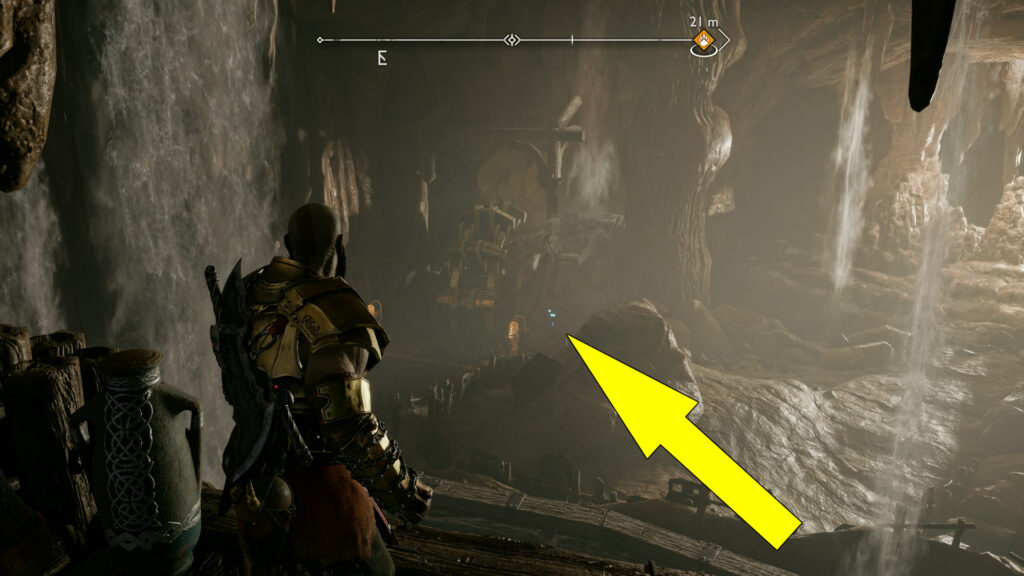
Lore Treasure Map (Demise of Dagestr): Near A Corpse
After you’ve reached the Applecore through the elevator from Sverd Sands, follow the path down and clear the enemies along the way until you reach a wall with wind/gas coming out of it on the right side.
Throw a spear at the wind in the wall, then climb the spear and the ledge to find the God of War Ragnarok Applecore Lore Treasure Map on the ground.
This will start the Demise Of The Dagestr Treasure Hunt.
If you wish to find more Lore Treasure Maps, check our God Of War Ragnarok Lore Locations Guide here.
Nornir Chest 1: After The Lore Treasure Map
From the previous Lore Treasure Map, follow the path up to find the God of War Ragnarok Applecore Nornir Chest.
To open this Nornir Chest, you’ll have to throw a spear in three seal totems and simultaneously detonate them by pressing (Triangle).
The first two seal totems can be found to the west of the Nornir Chest, hanging in the air on some platforms. Throw a spear in each totem.
While facing the Nornir Chest, climb the two ledges on the right, then immediately turn west to find the third seal totem.

After sticking a spear into the last seal totem as well, detonate all spears by pressing (Triangle) to unlock the chest and secure its treasures.
If you are looking to increase your Health and Rage Bars, check our God of War Ragnarok Nornir Chest Locations Guide here to find more of them.
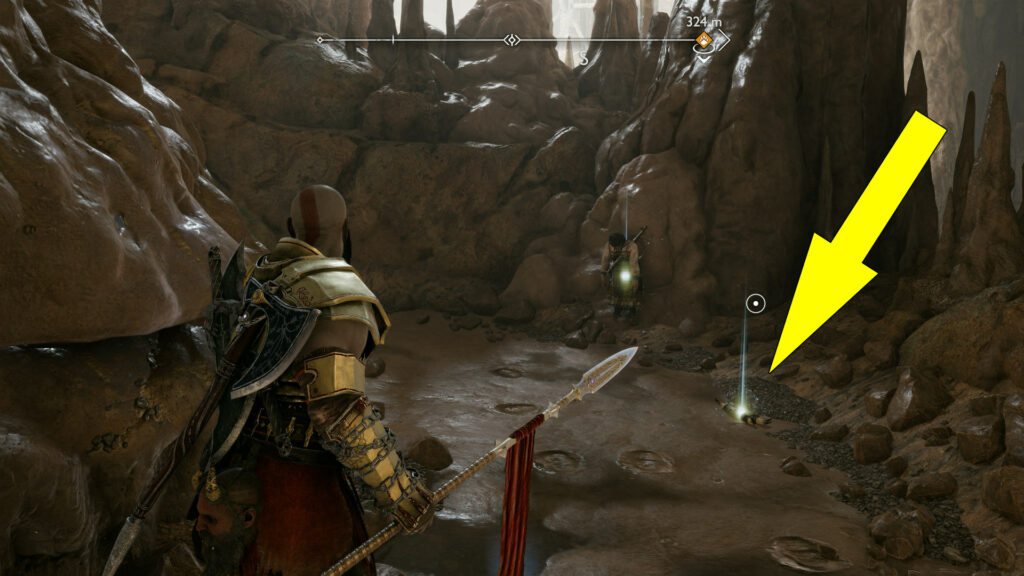
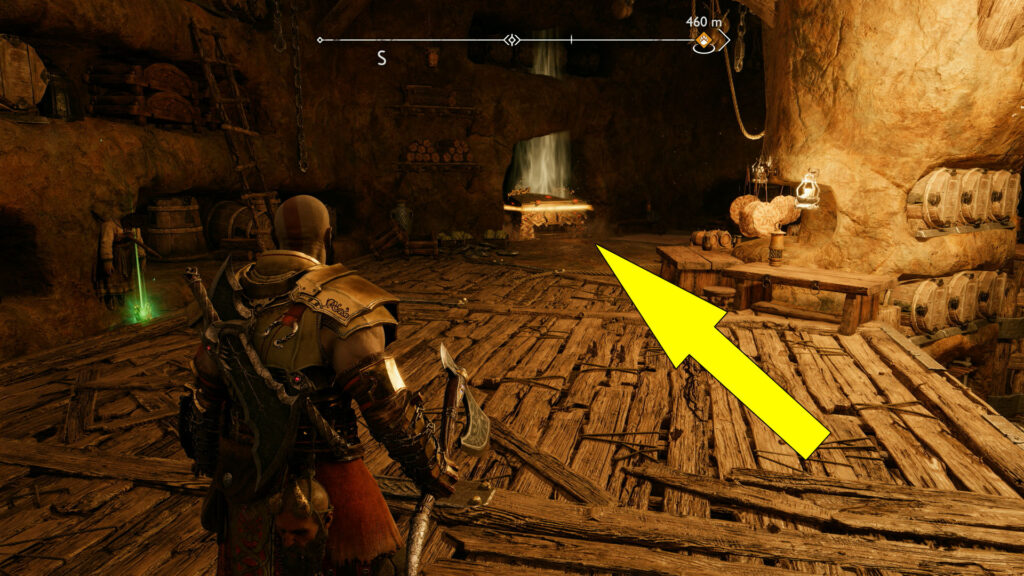
Artefact 1 (Sanguinity – Kvasir’s Poems Set): Behind A Breakable Rock
From the previous Nornir Chest, climb back down and reach the end of the area. You’ll find another spot to plant a spear in the wall to climb up.
After climbing up, follow the path until you see a rock glowing golden on the left. Throw a spear and detonate it to clear the way.
Behind the breakable rock, you’ll find the God of War Ragnarok Applecore Artifact near a stabbed corpse.

If you want to know how many artifacts can be found across all nine realms, check our God of War Ragnarok Artifacts Locations Guide here.
Odin’s Raven: Perched On A Shelf
From the artefact, use the grappling point on the ceiling to reach the tunnel above, then climb down on the golden chain to start a boss fight against the Miklimunnr.
After defeating him and collecting all the drops, crawl through the tunnel on the northwest side of the room.
Open the gate ahead to find the God of War Ragnarok Applecore Odin’s Raven right in front of you.
Hit him with your Leviathan Axe to kill it and to progress The Eyes Of Odin Favor.
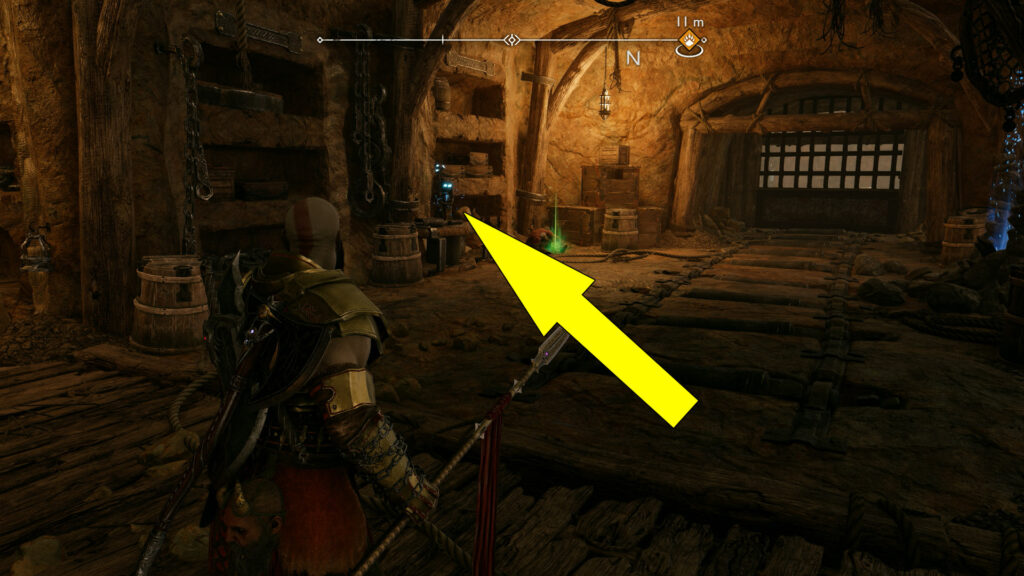
Artifact 2 (Durinn’s Stone Statue – Things Left Behind Set): Covered By Soundstone
From the previous Odin’s Raven, climb along the wall on the right and open the gate, then drop down straight ahead.
Shoot a sonic (green) arrow at the soundstone by pressing (L2) + (Square) to be able to collect the God of War Ragnarok Applecore Artefact behind it.

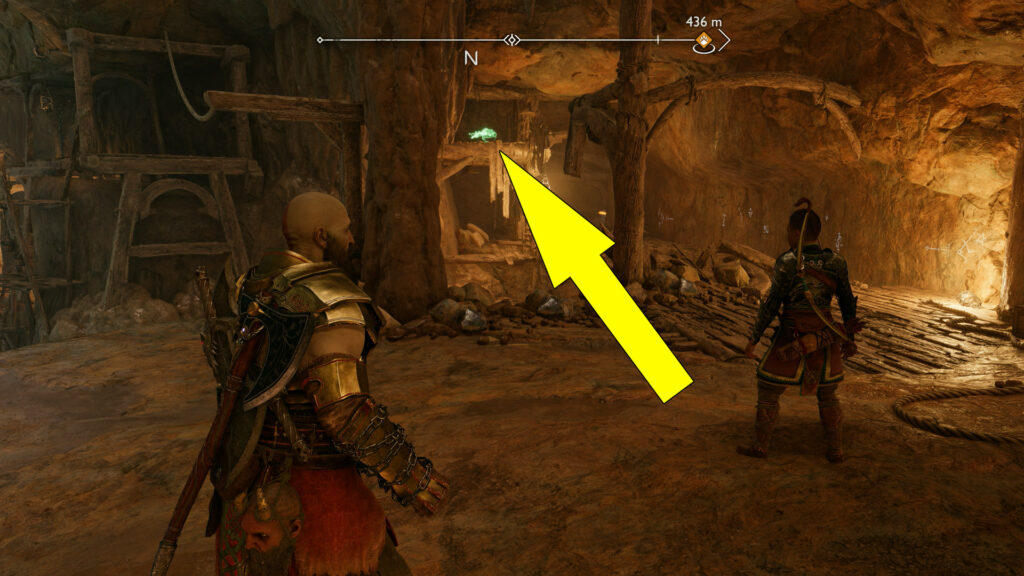
Draugr Hole (Chaos Spark): In A Storage Room
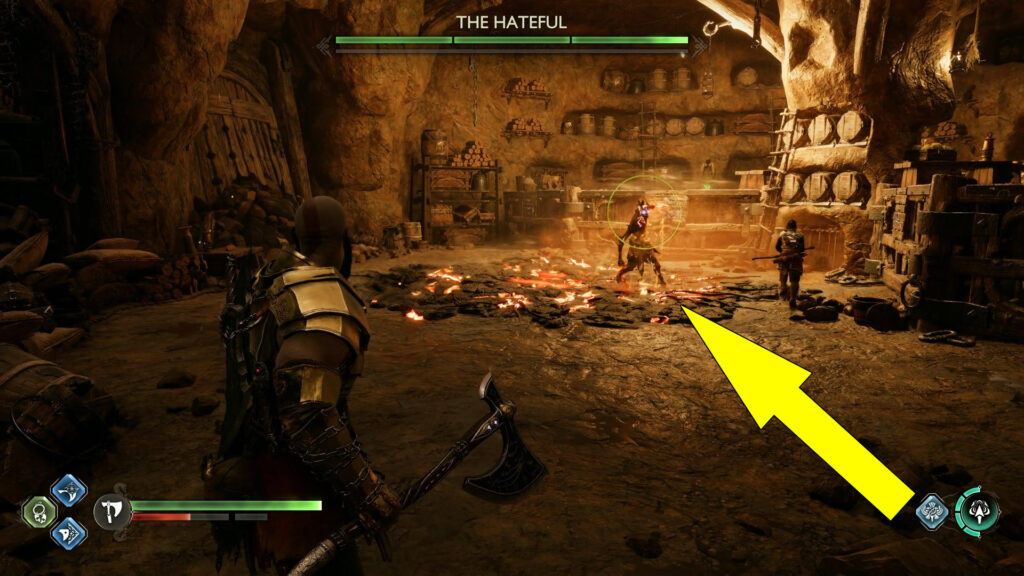
From the last artefact, go through the door on the right to start the God of War Ragnarok Applecore Draugr Hole fight.
Defeat The Hateful miniboss to count the Draugr Hole activity as completed and progress the Born From Fire Favor we’ve covered here.
Legendary Chest 1 (Fortified Frost Knob): Near The Draugr Hole
After clearing the Draugr Hole, climb the room’s left or right ledge to find the GoW Ragnarok Applecore Legendary Chest.
Open the Legendary Chest to receive the Fortified Frost Knob, an Axe Attachment.
Check our God Of War Ragnarok Legendary Chests Locations Guide here to find more of them and expand your build options.
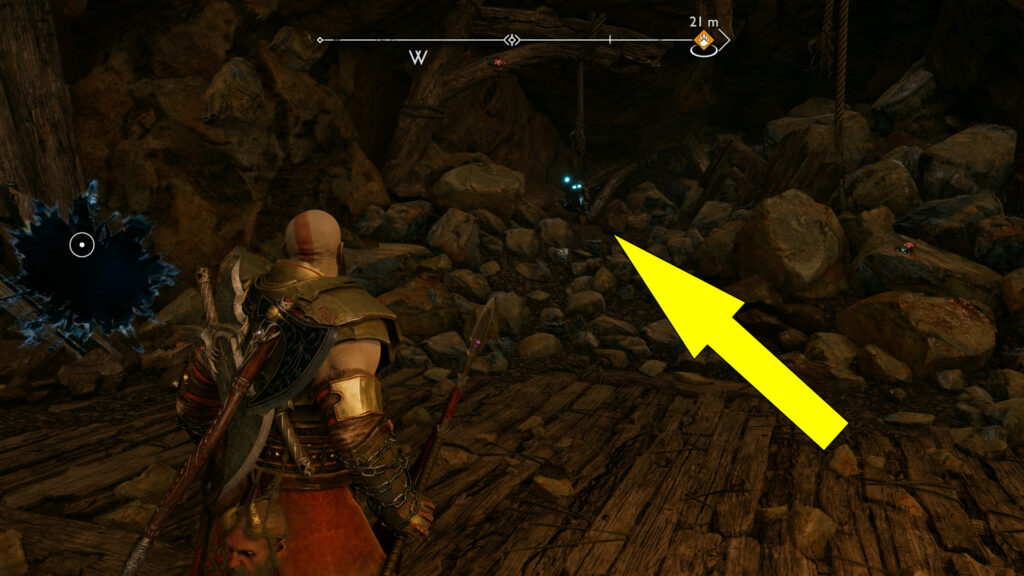
Buried Treasure (Mining Glory): At The End Of Mine Tracks
After opening the Legendary Chest, exit the room, climb back up on the left, and swing across on the right using the grappling point.
Follow the path until you find the first opportunity to drop down on the right on some mine tracks.
Once you’ve dropped down, turn around and follow the mine tracks downward, going in a spiral until the end.
At the end of the mine tracks, turn left and immediately right to find the GoW Ragnarok Applecore Buried Treasure glowing golden next to the river.
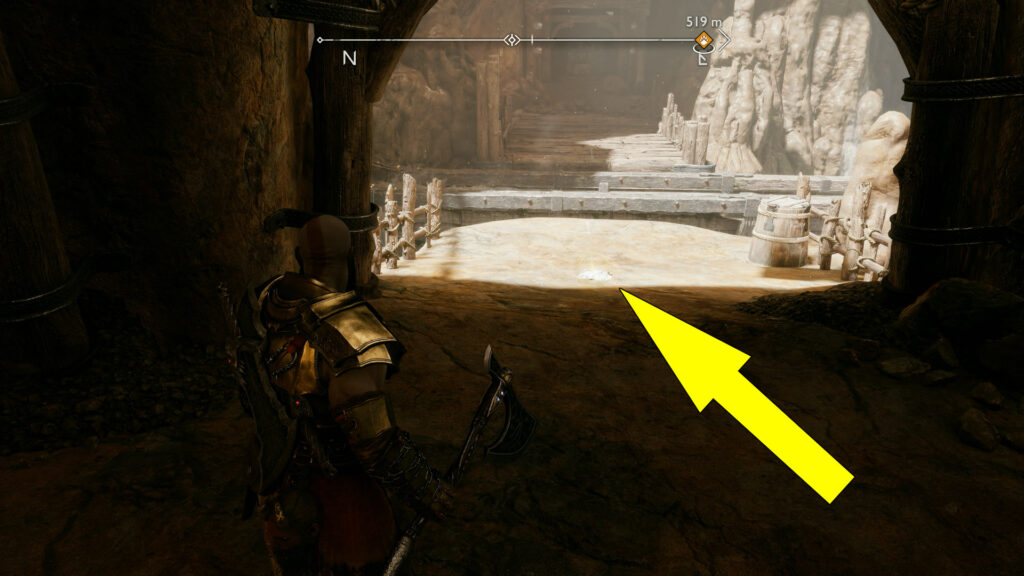
To spawn the Buried Treasure, you must first get the Treasure Map, which can be obtained from the Lore Scroll collectible located in the Nidavellir region (covered in-depth here) in the Svartalfheim realm.
If you don’t have the Mining Glory Treasure Map, you won’t be able to see the glowing orange light.
Lore Marker (Cooperation): Behind A Breakable Wooden Barricade
From the Buried Treasure, go to the left and destroy the wooden barricade to reveal the God of War Ragnarok Applecore Lore written on a stone tablet below.

Lore Rune Read (The Vault): Behind A Breakable Wooden Barricade
Return to the location of the Buried Treasure, jump over the river and crawl through the tunnel on the left.
Open the gate ahead, and you will reach the water wheel puzzle during the story.
Freeze the water on the higher trough to make it overflow into the lower trough, which will spin the water wheel and unlock the grappling point on the crane.
Swing across using the grappling point, then break the wooden barricade on the left to reveal the GoW Ragnarok Applecore Lore written with glowing glyphs on the wall.

This one was probably obvious to you during the story, and you’ve already picked it up.
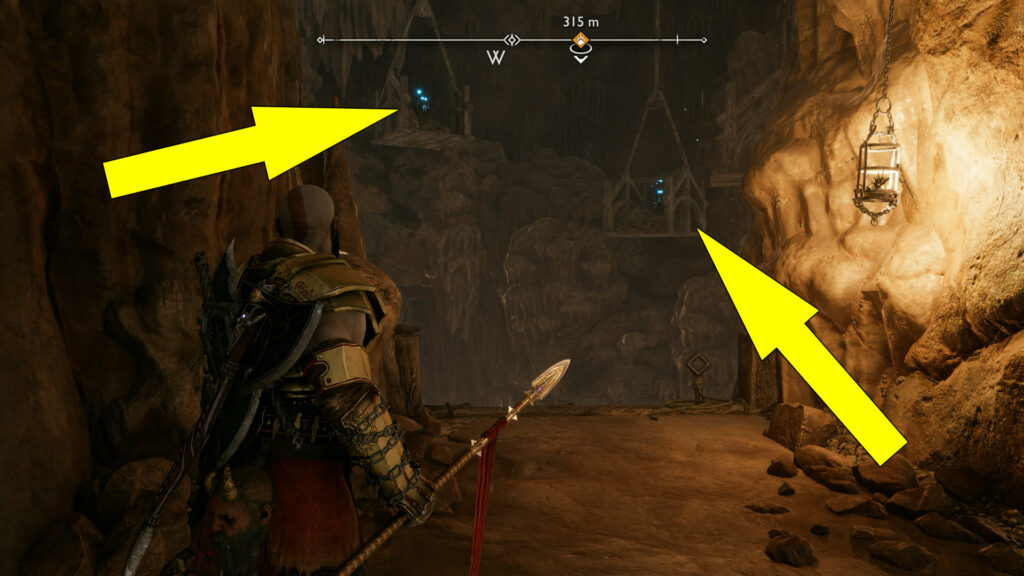
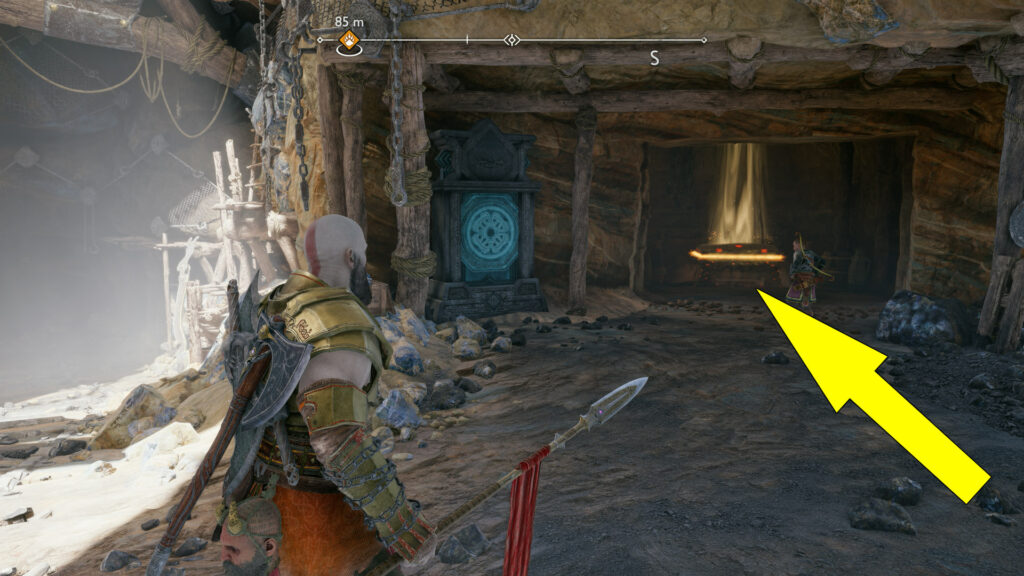
Artefact 3 (Althjof’s Statue – Things Left Behind Set):
Retrace your steps all the way back to the Buried Treasure location. Then, follow the spiral mine tracks until they stop on a broken bridge blocked by rubble.
Clear the rubble by blowing up the explosive vase with your Leviathan Axe. Go down the path on the left path to find the right angle, as marked in the image below.
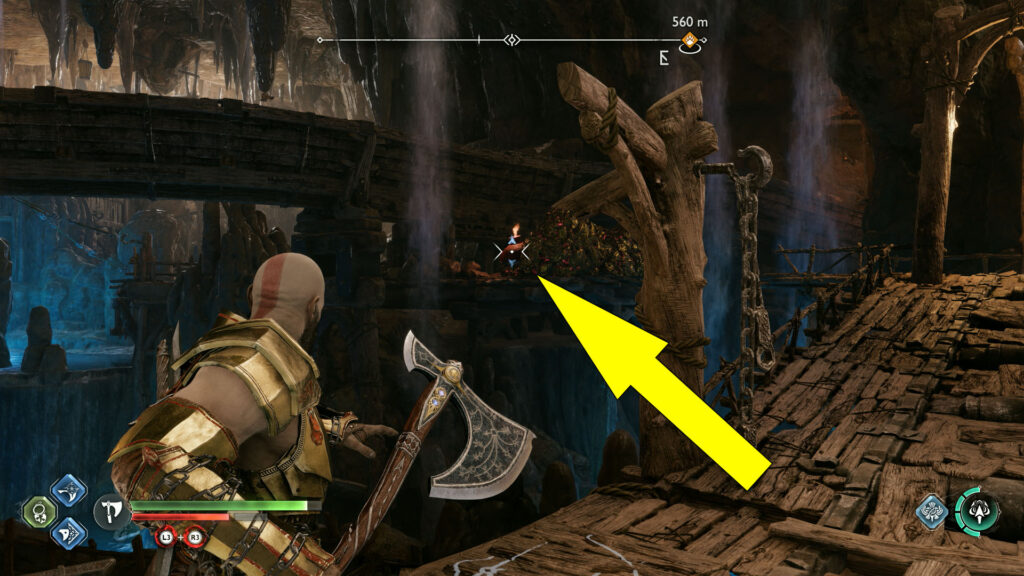
Jump over and crawl through the gap to enter the next area. Deal with the enemies around, then swing across using the grappling point, climb up the ledge and go through the white-painted gate.
After going through the gate, climb the ledge on the left to find the God of War Ragnarok Applecore Artifact glowing purple on the floor.
Yggdrasil Rift (Lindwyrm + Gale Spark): Near The Applecore Mystic Gateway
To the right of the previous artefact, throw a spear at the wind coming out below the wooden pole, then use it to climb up. Immediately on the left, you’ll find the God of War Ragnarok Applecore Yggdrasil Rift.
This Yggdrasil Rift holds a Lindwyrm, which can only be captured using Lindwyrm Trap.
To get a Lindwyrm Trap, speak with Ratatoskr (the squirrel) at Sindri’s House, who will give you one for The Lost Lindwyrms Favor. Without the trap, you won’t be able to pull out the Lindwyrm and close the rift.

After pulling out the Lindwyrm, interact with the rift once more to receive a reward and mark it as completed.
Nornir Chest 2: Nex To The Applecore Mystic Gateway
You’ll find the God of War Ragnarok Applecore Nornir Chest in the same area as the Yggdrasil Rift.
To open this Nornir, you’ll have to throw a spear at the three seal totems and detonate them at once, as with the previous Nornir Chest.
The first seal totem is to the right of the chest in the distance, covered by the water coming from the trough above. Freeze the water above using your Leviathan Axe and throw a spear into the totem.
The second seal totem is obvious, right in front of the Mystic Gateway.
The third and final totem is to the left of the chest near the Yggdrasil Rift location, hidden behind the rubble. Blow up the explosive vase using your axe or spear to reveal the seal totem.
After sticking a spear in each totem, blow all of them at once by pressing (Triangle) to unlock the Nornir Chest.
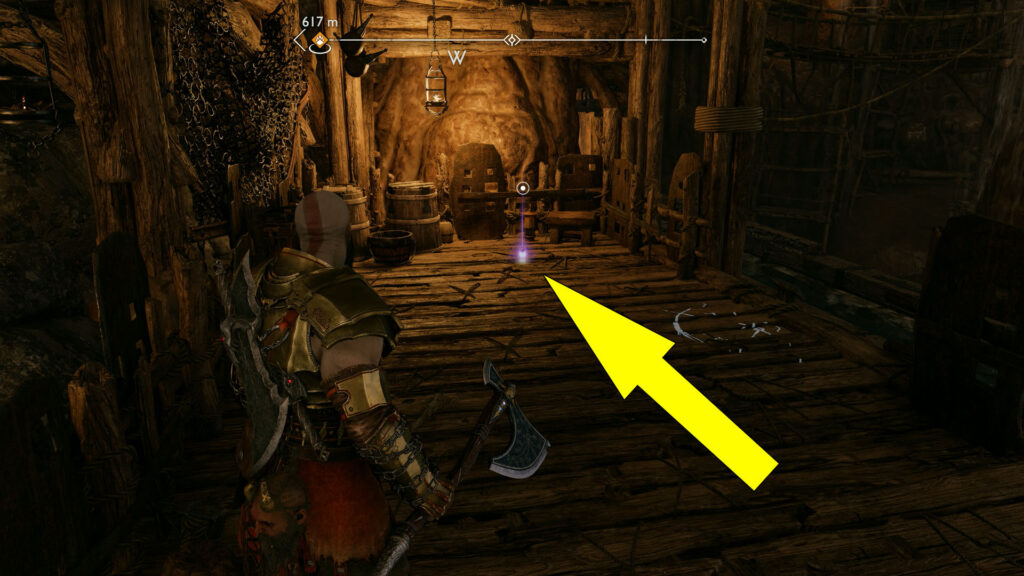
Legendary Chest 2 (Banahogg Knob):
Even though the following Legendary Chest is in the Jarnsmida Pitmines region, it counts towards The Applecore region.
From the Nornir Chest, go through the gate ahead, climb down the ledge on the left, then crawl through the narrow tunnel on the left.
At the end of the tunnel, use your Blades of Chaos to climb the ledge, then climb the smaller one and follow the mine tracks up until you see a blue altar on the left side.
Interact with the blue altar to open a secret wall door, which hides the GoW Ragnarok Applecore Legendary Chest.
Open the Legendary Chest to receive the Banahogg Knob, an Axe Attachment.
That’s all you need to know to find all God of War Ragnarok Applecore collectibles. If this guide helped you locate them, check our GoW Ragnarok Wiki Hub for more.
