Prince of Persia: The Lost Crown is an amazing game with challenging puzzles, and one of the most interesting ones is the Clock Puzzles in Upper City. This guide provides a step-by-step puzzle walkthrough to help you quickly solve it. I’ll cover everything from solving the puzzle rooms to fixing the clock hands.
How To Solve the Upper City Clock Puzzles in The Lost Crown
The Upper City Clock Puzzles can be found in the top-right area of the Upper City during The Celestial Guardians main quest. To solve these puzzles, you must first unlock the “Chakram Shadow of the Simurgh” upgrade.

You can find this upgrade in the constellation located in the top-left part of the Upper City right after defeating a boss. Once you have this upgrade, you’ll gain the ability to teleport to the spot where your Chakram is thrown, which will make the Clock Puzzles a walk in the park.
Puzzle Room #1: Bottom Chamber
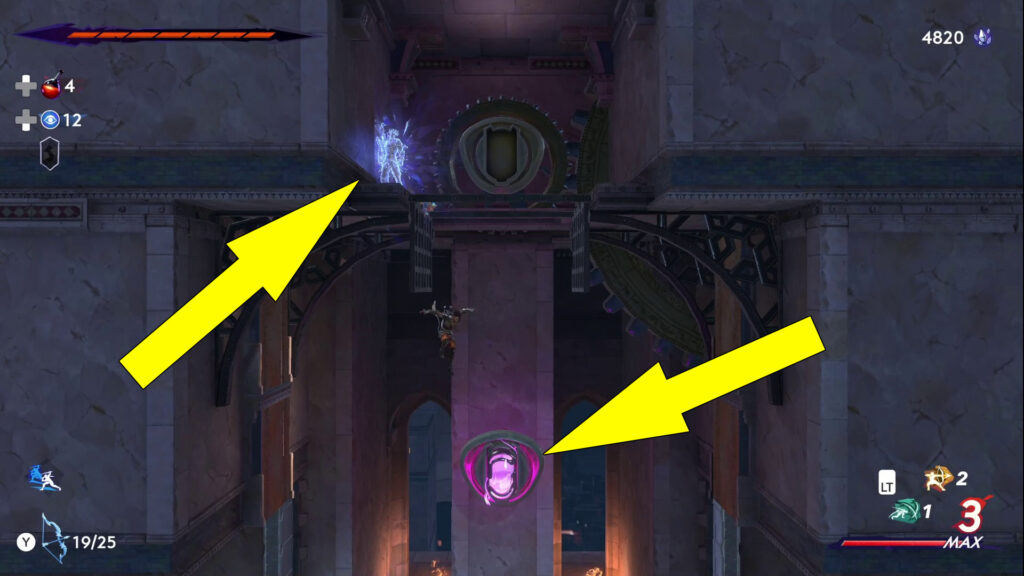
Head inside the room located at the bottom of the giant astronomical clock. Throw your Chakram towards the ledge with the purple crystal on it and teleport yourself on that ledge. Once there, use the “Dimensional Claw” to grab and hold the crystal.

Now, place the crystal inside the slot in the middle of the room to reveal a new ledge above it. Jump on the ledge, throw your Chakram towards the ledge in the top-left corner of the room, and teleport yourself to it. Then, press  /
/ to create a “Shadow of the Simurgh” on this ledge and return to the crystal.

Grab again the purple crystal with the “Dimensional Claw” and press / to teleport back to the ledge on top. From there, perform a double jump and a “Rush of the Simurgh” toward the center of the room. Then, simply throw the purple crystal through the open gate into the slot above to complete the first Clock puzzle room.

Puzzle Room #2: Left Chamber
Enter the room on the left of the astronomical clock. Jump off one of the walls and create a “Shadow of the Simurgh” when you’re above the empty crystal slot. Use the “Dimensional Claw” to pick up the purple crystal below. Then, teleport to your shadow copy and place the crystal inside the empty slot as you fall.

When on the ground, throw your Chakram up, teleport at the highest point, and double-jump through the open gate above. Create a “Shadow of the Simurgh” up here and jump back down. While falling, be sure to collect the purple crystal.
With the purple crystal in your possession, teleport back to your shadow copy on top. Then, simply toss it into the crystal slot to complete this Clock puzzle room in Upper City.
Puzzle Room #3: Right Chamber
The right chamber is the toughest of all Clock puzzle rooms. It’ll really test your ability to think outside the box and keep good timing. To get started, use the “Dimensional Claw” ability to pick up the purple crystal and place it in the empty crystal slot.
Now for the tricky part! First, jump up and grab the purple crystal while in the air. Then, quickly do a “Rush of a Simurgh” towards the left and make a second jump to reach the wall. While hanging on the wall, do a double jump and another “Rush of a Simurgh” to get above the second ledge and create a “Shadow of the Simurgh” there.

When you reach the ground floor, simply toss the purple crystal into its slot and teleport to your shadow copy. From there, throw your Chakram upwards and teleport to its highest point. Then, just jump through the gate and make another shadow copy on top.

Drop down from here and pick up the purple crystal. Finally, teleport to the shadow on top and place the crystal into the slot to finish the third Clock puzzle room.
Puzzle Room #4: Main Chamber
After finishing the first three puzzle rooms, it’s time for one more Clock puzzle. In the main chamber, you’ll come across three pressure plates on a ledge. Each corresponds to a colored symbol: blue full moon, red half-moon, and yellow sun.
Stepping on a plate stops the movement of the ring with the same symbol, while the others keep rotating counterclockwise. Your goal is to synchronize the three rings and ensure that the symbols on each ring glow simultaneously.
It may appear complex at first glance, but it’s actually a relatively simple solution. First, step on the red pressure plate when you see the red symbol glowing. Stay there until you notice the blue symbol glowing alongside the red one. Then, quickly step off the red pressure plate. Great job on synchronizing the red and blue rings! Now, let’s add the yellow one to the equation.


Wait for the yellow symbol to glow and quickly step on the yellow pressure plate. Hang tight there until all three symbols light up at the same time. Once that happens, you’ve solved the Upper City Clock Puzzles in Prince of Persia: The Lost Crown.
Need help with side quests? Check out our guides for The Deserter, Motherly Love, Ancient Power Unearthed, or The Architect quests.
