Escape Academy The Confrontation is less tricky than the previous escape room we’ve completed in the game, named Tea ‘N Tea. Confrontation is actually the easiest and shortest level in the video game developed by Coin Crew Games.
You don’t even have a time limit in The Confrontation escape room, so you can finally relax for once. However, one of the two Puzzles in Escape Academy Confrontation can cause problems; therefore, don’t hesitate to check the walkthrough below if you get stuck at any point.
How To Complete The Confrontation Escape Room
Gillian approaches you, telling you she thinks something fishy is going on and wants to confront Eel to get some answers. Thinking the same, you decide to follow her to The Headmaster’s Office using the game’s map, of course.
The office is not at all as you remember it, and you’re probably getting even more curious about what’s going on. So, let’s get to the bottom of this by finding Eel and confronting him to complete the Escape Academy Confrontation level.
How To Find Eel
Ignore everything in the office and go to the door on the right side.
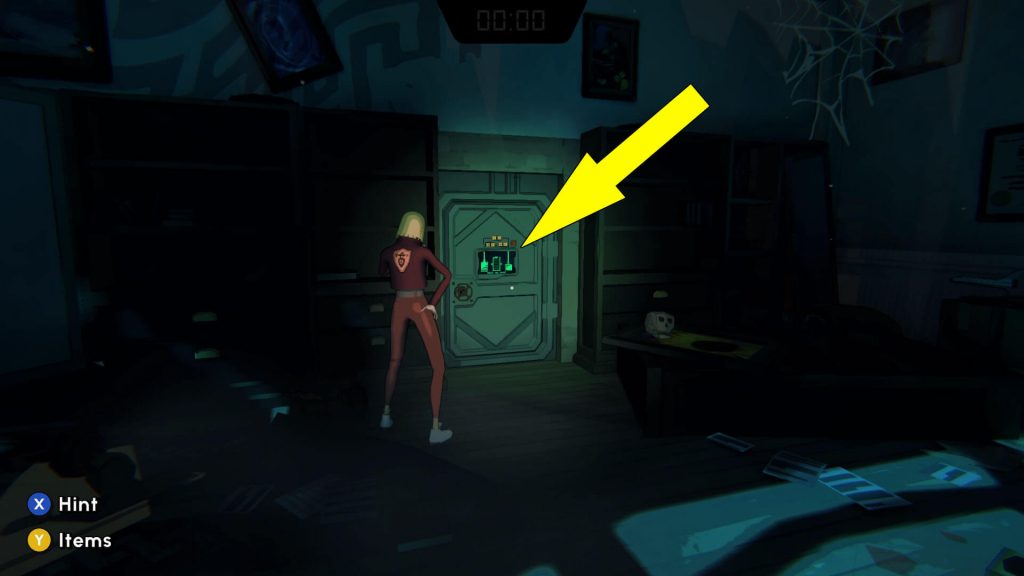
The door has some buttons with arrows on it and a display, so you can’t really miss it. Once you get close to the door, inspect it, and you’ll see the following message at the bottom of the display: “FILL TO LINE.”
Above the message, you can see three battery icons displaying how much energy each battery has. You have a line on the middle icon, so considering the previous message, you need to fill the middle battery to that line, not even a bar higher or lower.
You can transfer the energy between the three batteries by pressing the arrows above, which I’ve numbered in the following screenshot.

The lines near the arrows show the energy flow. So, for example, if you press the arrow I’ve marked with “2” in the image above, the energy goes from the left battery to the middle one. Also, note that pressing an arrow will take all the energy from the current battery and put it in the other one.
However, if there is no more space in the battery where the energy is going, the remainder stays in the original battery. With the help of the instructions above, try to fill the middle battery precisely to the line (4 bars) to complete the Puzzle and move to the next step in the Escape Academy Confrontation escape room.
This type of Puzzle is actually quite old and was done with buckets or bottles of water instead of batteries. Try as many times as you want because there is no time pressure. Also, there is a reset button in the top right corner if you want to restart at any point.
And if you just can’t figure it out, here is the solution:
- Push the arrow I’ve numbered with “5” in the screenshot above to move the energy from the right battery to the middle battery. From left to right, the batteries now have 5, 3, and 0 bars of energy.
- Then, push “4” to move energy from the left battery to the right battery. Batteries now have 2, 3, and 3 bars of energy.
- Push “5” to move the energy from the right battery to the middle battery. Batteries now have 2, 6, and 0 bars of energy.
- Push “4” to move the energy from the left battery to the right battery. Batteries now have 0, 6, and 2 bars of energy.
- Push “1” to move energy from the middle battery to the left battery. Batteries now have 5, 1, and 2 bars of energy.
- Push “4” to move energy from the left battery to the right battery. Batteries now have 4, 1, and 3 bars of energy.
- Push “5” to move the energy from the right battery to the middle battery. Batteries now have 4, 4, and 0 bars of energy.
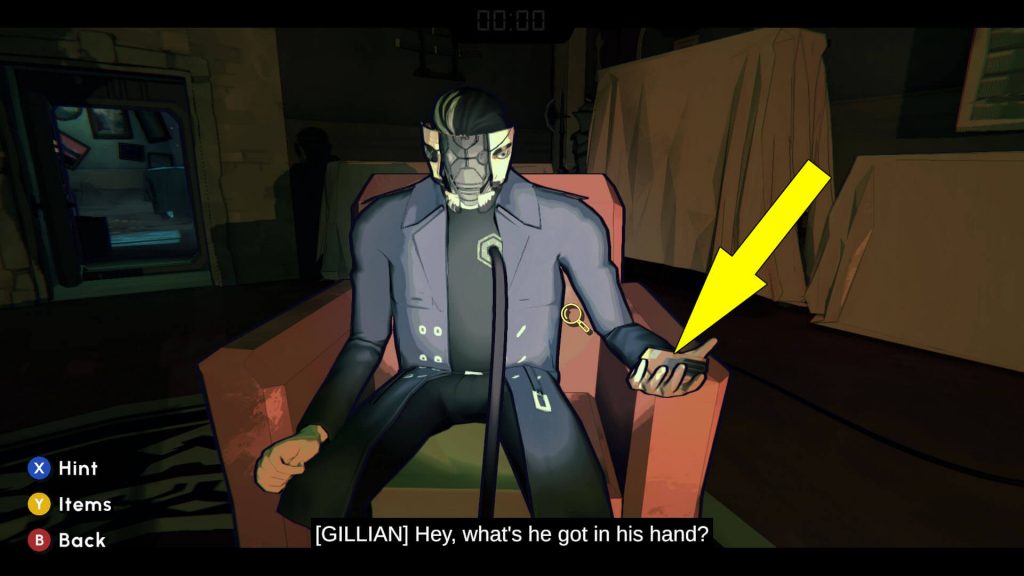
Push the buttons in the correct order, and when you’re done, the door opens. You’ll find Eel sitting on a chair inside the newly accessible room. But surprise, surprise, Eel is a robot! Someone was playing you this whole time.
How To Unplug the Robot
You came here for answers, and now you have even more questions, so unplug the robot to see what happens. Following the cable coming out of the robot will lead you to its socket. Unplug the fake Eel and then take the Strange Keycard out of his hand.
Now go to the fireplace in front of the robot and insert the Strange Keycard in the device to the left, on the wall, as shown in the next screenshot.
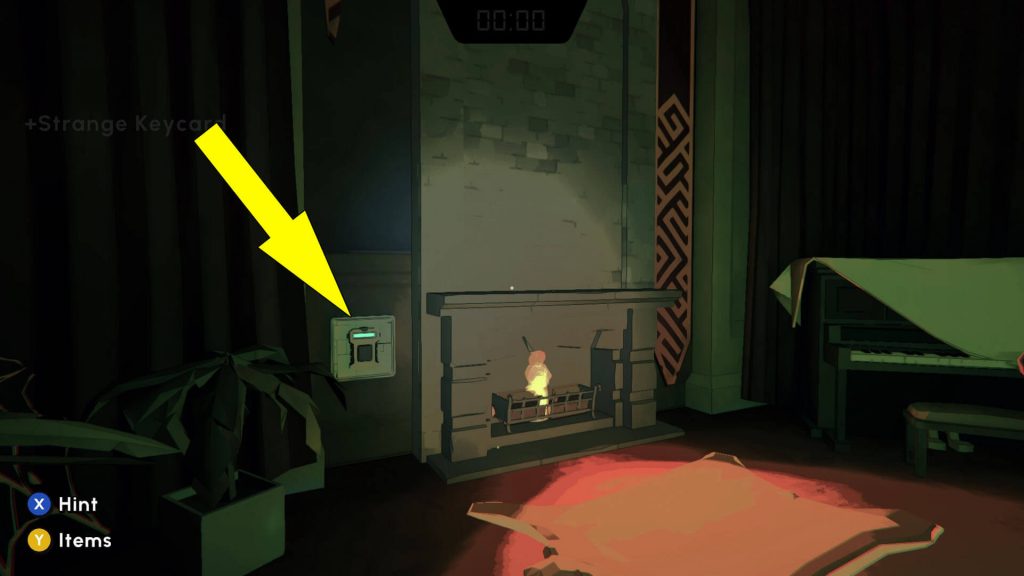
Doing so opens a secret passage leading to an elevator. After a short conversation with Gillian, the level ends, but don’t hesitate to check our walkthrough for the last level, named What Lies Below.