Tunic Quarry Golden Chests are well hidden, and you’ll need to invest serious time to explore the area thoroughly, provided you want to loot all 27 of them. Of course, you’ll be rewarded accordingly with the following:
- Effigy
- Ability Cards
- Game Currency
- Fang
- Fox Doll
- Blue Mushroom
- Potion Shards
- Blue Fruit
- Pink Fruit
- Explosive Bomb
To access the Quarry, you need the Magic Orb. And I suggest entering the Quarry after dealing with The Librarian, on top of the Great Library, a small area that has Golden Chests as well.
Where To Find All Quarry Gold Chests in Tunic
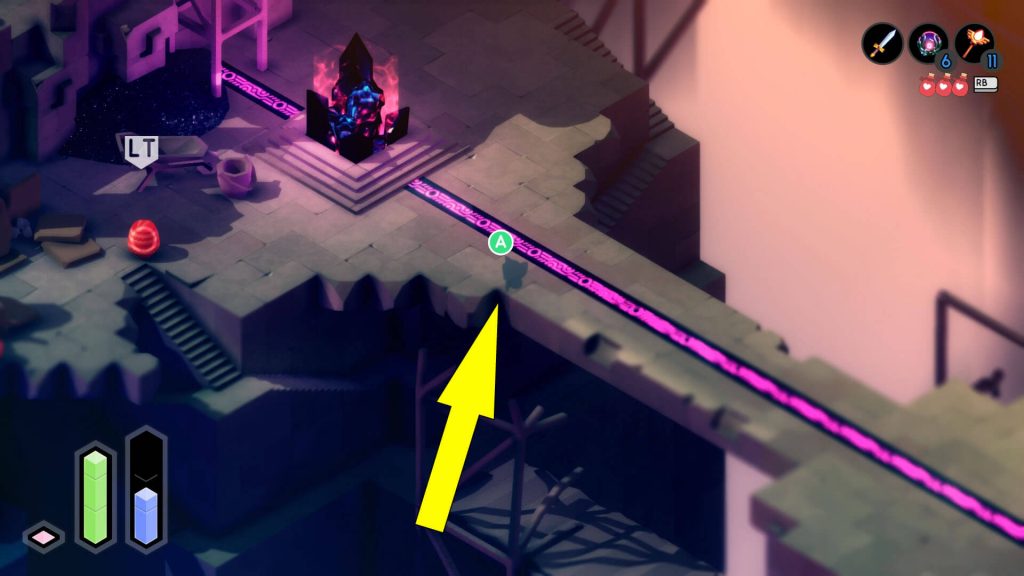
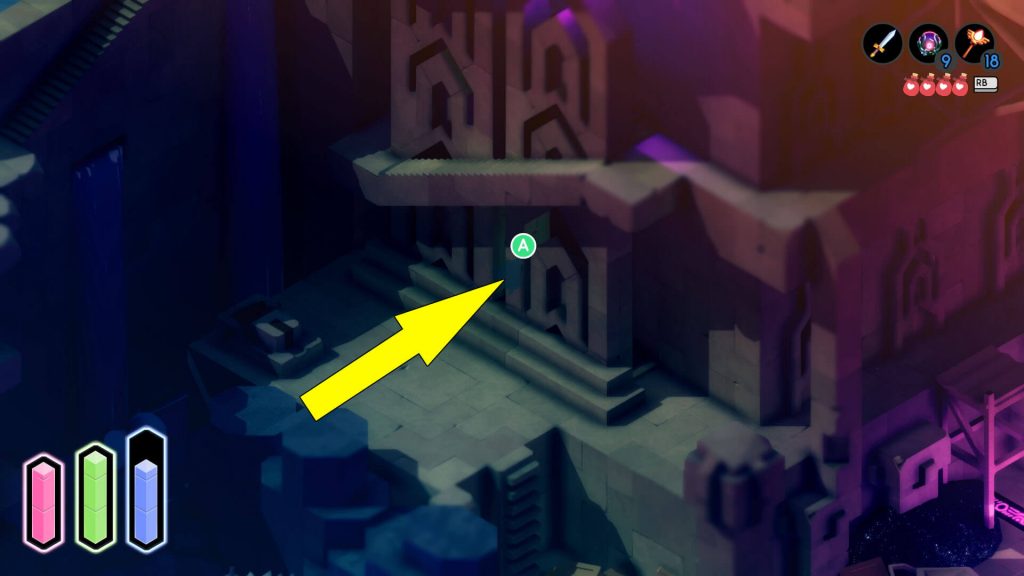
The entrance to the Quarry is in the northwest corner of the Overworld. Once at the said location, use the Magic Orb to grapple the target on the lower level in the southwest.

Then, proceed north and climb the ladder. Continue north until you reach an obelisk that you should activate before you advance. Go forward, and you’ll soon find another obelisk; activate this one as well and continue until you reach a Fox Shrine.
Activate the fast travel in front of the Fox Shrine. If this is not your first time visiting the Quarry, you have probably already done all of these, and you can fast-travel directly here. Anyway, before you continue, here is the Quarry Golden Chest locations map.

Since most likely you’ll need additional help, following the same order as the one on the map, here is where to find all Chests in the Quarry area of Tunic.
Golden Chest #1: Behind a Couple of Boxes
Go north at the first marked location on the map above. As you can see, your health bar goes down slowly if you get near the areas that turn your screen purple.
So stay away from these areas for now. Later, you’ll get an Ability Card that will help you with this problem. Now, let’s get back to the first Chest, which you can find behind a couple of boxes at the said location.

Golden Chest #2: In Front of the Stairs
Go down the small stairs south of Chest #1, and then head east to find the second Chest in front of some stairs going up.
Loot the Chest for some much-needed Game Currency.
Golden Chest #3: On the Edge
Now head back to Chest #1, but right before the last set of stairs leading up, go through the small space on the left and go down under the stone bridge to find the next Gold Chest at the edge, as shown in the next screenshot.

Go around the obstacle to open the Chest and get an Explosive Bomb. Be careful not to blow yourself up with that thing.
Golden Chest #4: Near the Small Bridge
Consult the map above again and go toward the fourth Chest. You can see it on the other side of the gap.
Lower the small bridge to reach the Chest and get a Fang, which you can use to upgrade your attack at a Fox Shrine.
Golden Chest #5: Behind the Destructible Wall
A couple of meters east of Chest #4, you can destroy the wall on the left, so it’s time to make use of the Explosive Bomb from before. Behind the destructible wall is the next Quarry Chest, containing Blue Fruit.

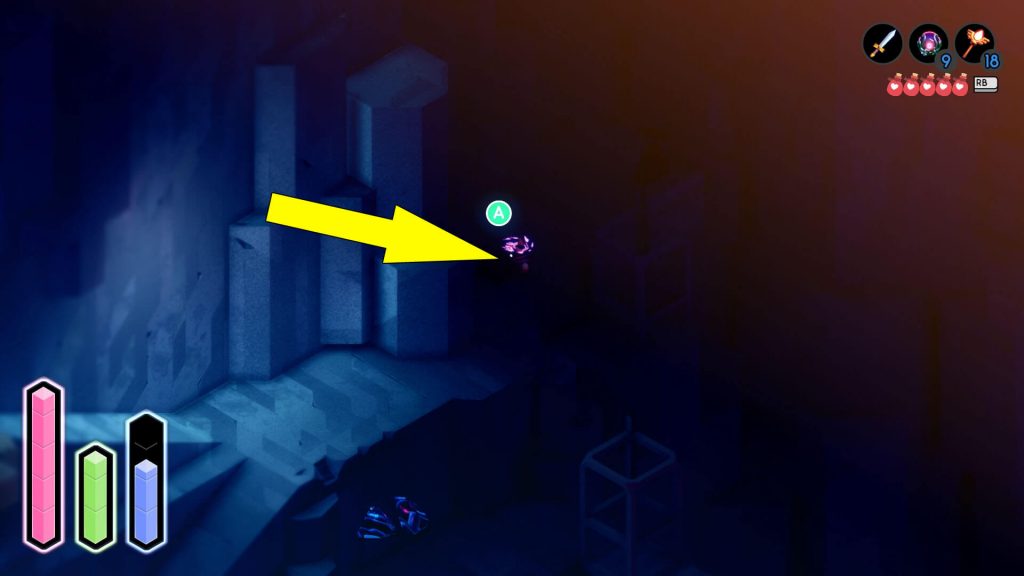
Golden Chest #6: In the Dark Area
After looting the previous Chest, head east and up the first two ramps. Then, go to the dark area in the eastern part of the Quarry to find Gold Chest #6 hidden from the world. Open the Chest to get it out of its comfort zone and get some Game Currency.
Golden Chest #7: At the End of the Narrow Path
Go back from Chest #6 and take the narrow western path between the two ramps. You’ll reach the seventh Chest when you hit the wall at the end of the narrow path.
The Chest rewards you with Pink Fruit, which you can use to recover some health.
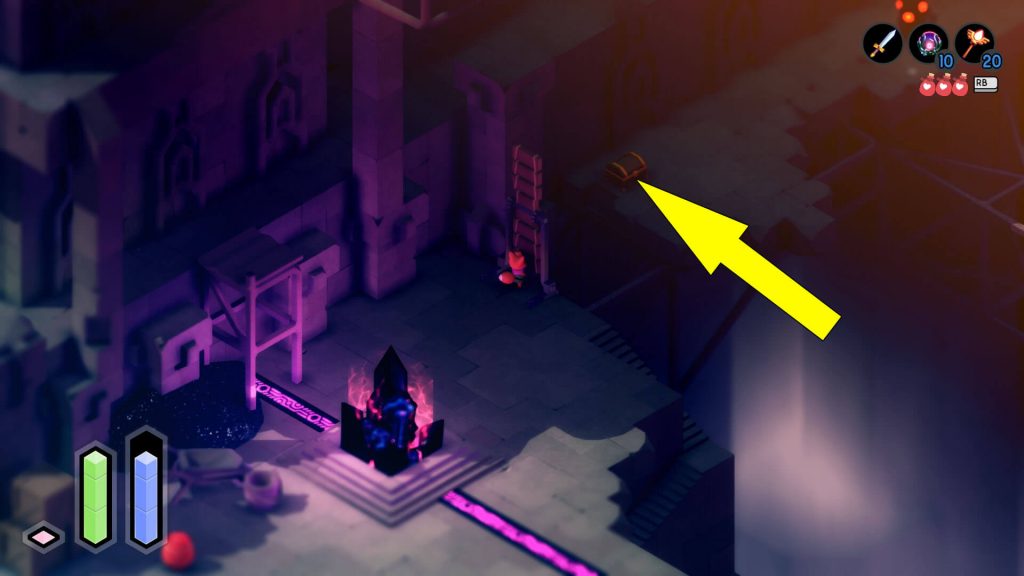
Golden Chest #8: Up a Ladder
While opening Chest #7, you probably observed a ladder in a purple area to the north. Take the ladder up and turn right. Another ladder is hidden in the darkness, which you should use to get to the next Golden Chest.

You’ll get a helpful Ability Card from the Chest. Equip the Card to increase your pairing time window.
Golden Chest #9: In a Small Room
Get back to the ladder in the purple area and go down the stairs in front of it. Once down, you can enter a small room to the right of the stairs to get Ivy from the ninth Tunic Chest.

Good thing you are not claustrophobic because there are a lot of rooms like this in the game.
Golden Chest #10: Under the Stairs
Get out of the room with Chest #9 and head west to the tenth location I’ve pinpointed on the map above. Another Chest is waiting for you under the stairs at the said location, behind the wall, as shown in the following image.
You have a Lure inside the Chest, which is good for distracting enemies or if you are in the mood for some fishing.
Golden Chest #11: Under a Platform
After opening the previous Chest, go up the stairs above it to the first floor. Now, make your way east on the edge of the building to Gold Chest #11, located under a platform.

Golden Chest #12: On a Broken Stone Platform
Return to the stairs from before after obtaining Chest #11 and go up to the last floor. Head to the right, where you can see the next Tunic Chest on a broken stone platform.

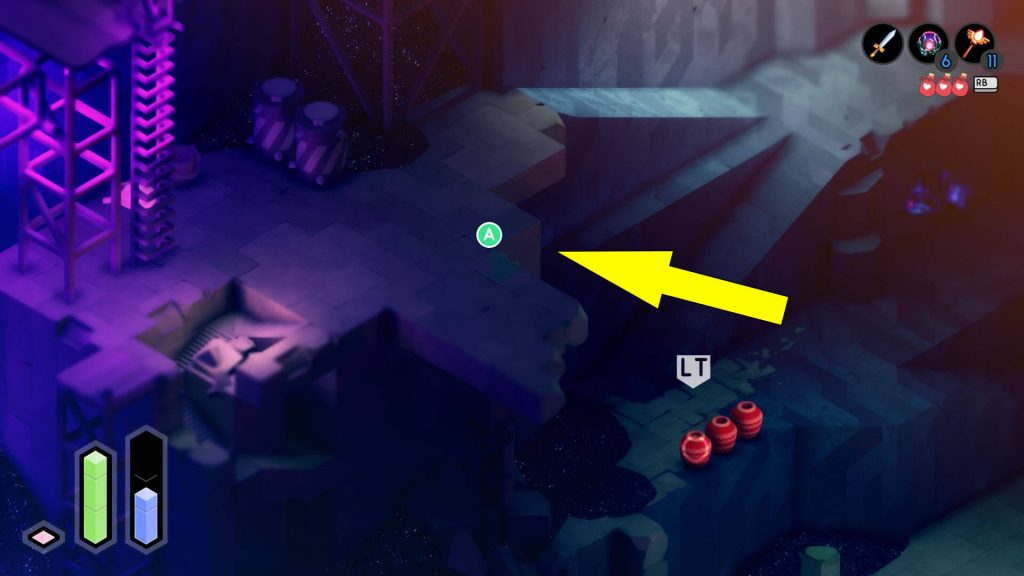
Golden Chests #13 & 14: On the Edge of the Mountain
Make your way north from the location of Chest #12 until you reach a Fox Shrine. Look for the ladder to the right of the stairs in front of the Fox Shrine, near some jars, and go up to spot the next two Golden Chests at the edge of the mountain.
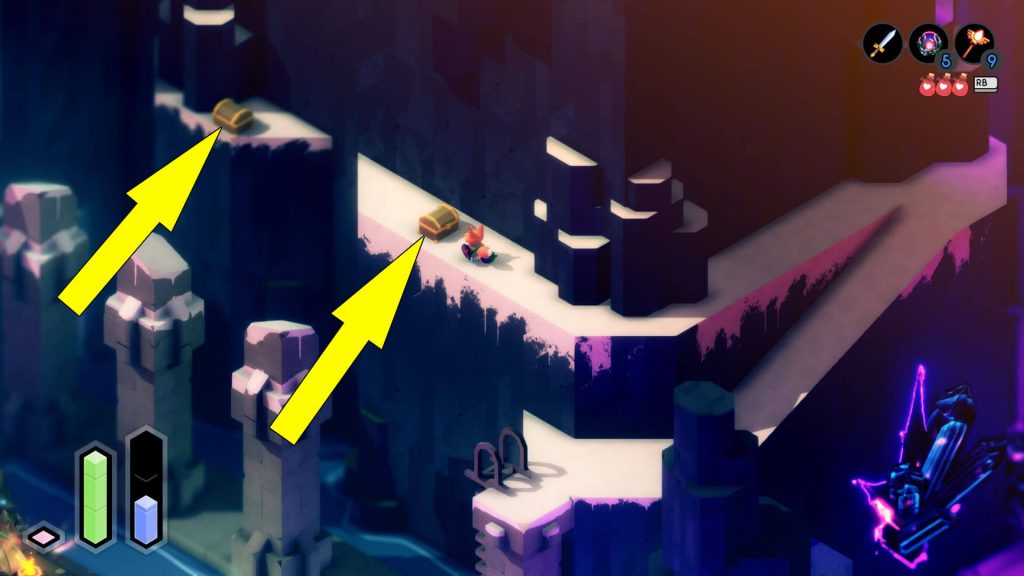
You need the Teleport Dash to get to Chest #14. You can return later if you don’t have the Dash.
Golden Chest #15: In Front of a Fox Statue
For the fifteenth Chest, you have to enter the Monastery on the northern part of the Quarry. The Monastery is marked on your map. Once inside the Monastery, proceed forward and deal with the enemies. You’ll soon reach a couple of chests in front of a fox statue. However, only one Chest is closed, so open it to get an Ability Card.
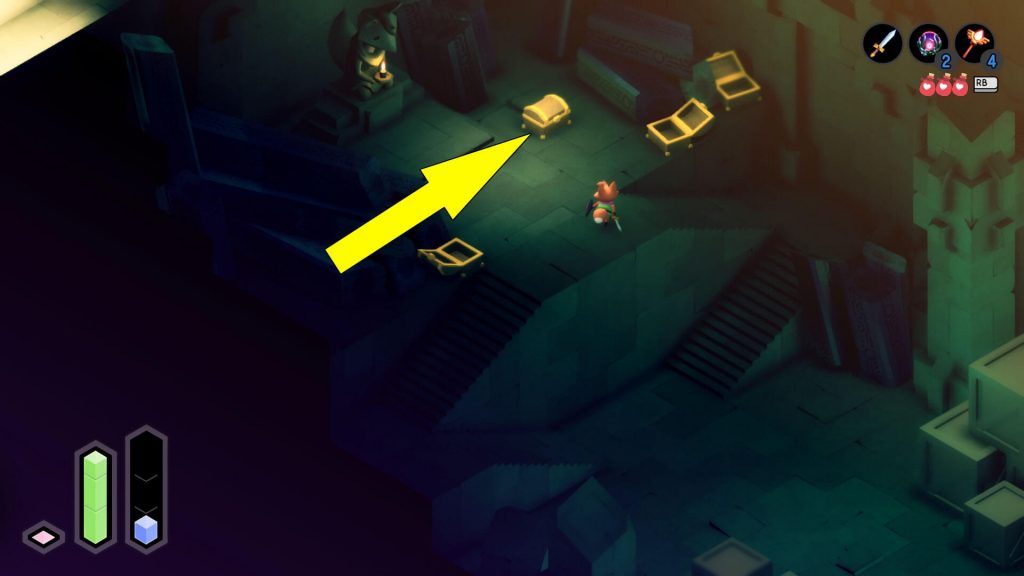
This Card, called Scavenger’s Mask, is very useful in the Quarry because you won’t lose health anymore in the areas that turn your screen purple. We talked about this when I was giving instructions about Chest #1, remember?
Golden Chest #16: Near the Waterfalls
Exit the Monastery by climbing the ladder to the right of the fox statue from before and going through the light on the left. Now, make your way down to the location marked with 16 on the map above. The next Chest is near the waterfalls, down the green ramps.

Golden Chest #17: Behind the Wall Near the Waterfall
The seventeenth Chest is below the previous one, behind the wall near the waterfall. So go down the stairs and loot the Chest to receive a Potion Shard.

Golden Chest #18: Behind the Wall Near the Bushes
For Golden Chest #18, you must first go down the ramps next to the previous Chest and stop in front of the entrance with the yellow light. Now throw an Explosive Bomb in the bushes in front of the wall to the left. Then, go through the opening to loot the Chest.
I know you like blowing things up, so if you have already used all your Explosive Bombs, you can come back later.
Golden Chest #19: North of the Crystal
Go down the ramp near Chest #18 and deal with the enemies working on a crystal. The following Gold Chest awaits a couple of feet north of the crystal.

Golden Chest #20: On a Hidden Path
After looting Chest #19, continue going down the ramps until you reach another two crystals. Clear the enemies and take the path between the crystals that seems to lead to a dead end.

Pass through the space and go to the boxes on the right.

Destroy the boxes and take the hidden path behind them to reach Chest #20.
Golden Chest #21: At the End of the Western Path
Get back to the two crystals from before and take the western path at the same level as the crystal near the railroad. At the end of the path is the next Golden Chest.

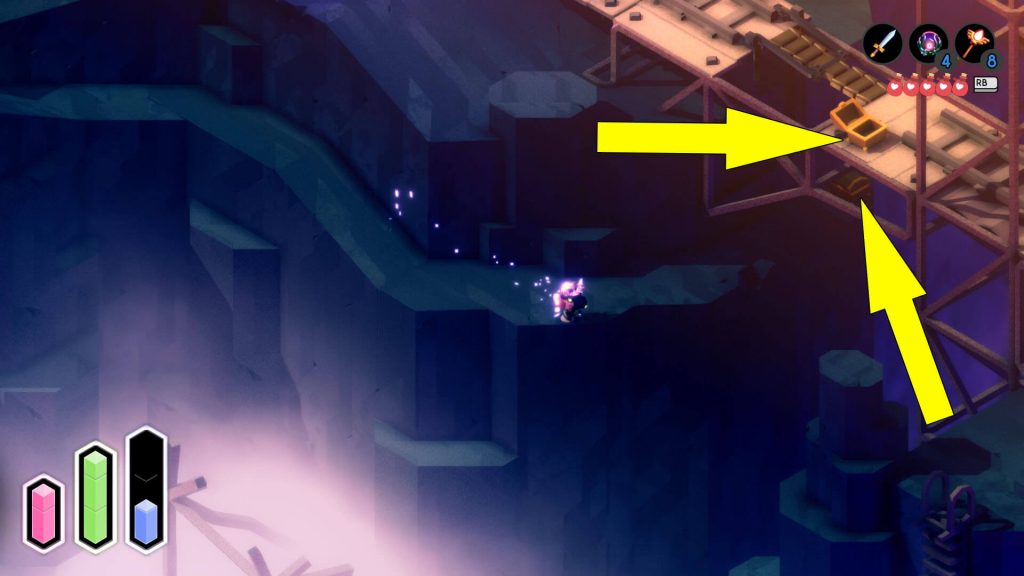
Golden Chests #22 & 23: On and Under the Railroad
After you are done with Chest #21, go back toward the crystals, but take the path to the right at the crossroads, leading under the railroad, where you’ll find Golden Chest #22. And above it, you can see another Gold Chest on the railroad.
Golden Chest #24: Behind the Boxes on the Platform
Now, at the beginning of the railroad, take the eastern path leading to the location marked with 24 on the map above. The next Chest is behind the boxes on the platform.
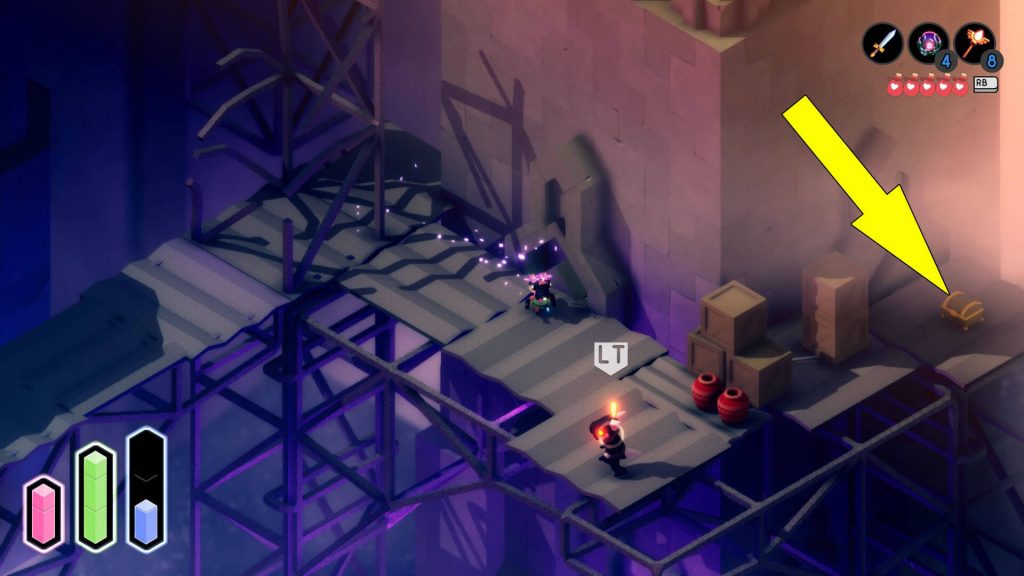
Golden Chest #25:Near a Ramp
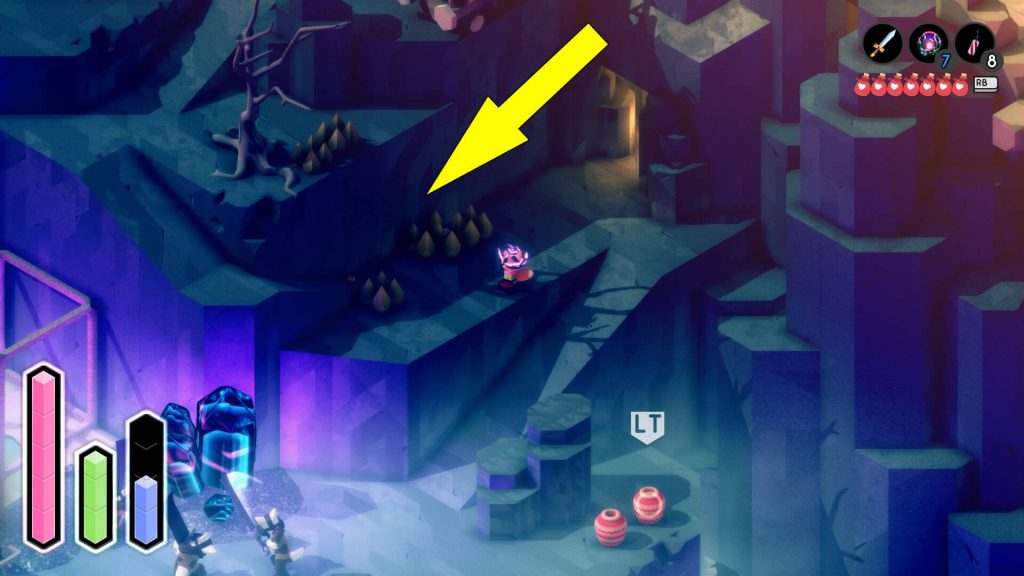
You can now go south on the railroad and use the first ladder you find to get down. Take out the enemies and go down the ramp west of the crystal near the broken ladder you used to get here. Gold Chest #25 is waiting for you near the ramp, as shown in the next screenshot.

Golden Chest #26: On the Other Side of a Bridge
After looting the previous Chest, go back up the ramp and cross the southern bridge. Another Chest is on the other side of the bridge, so go for it.

Golden Chest #27: Near a Cart Filled With Crystals
For the final Quarry Chest, you first have to return to the broken ladder from before and go down the ramp behind the wall. You’ll soon reach another railroad that you should follow east, but keep an eye open for an entrance to a small area to the north. Head there to find the last Gold Chest near a cart filled with crystals.