Horizon Forbidden West Restless Weald is the third Relic Ruins activity you can complete in the video game published by Sony Interactive Entertainment, and the second one featured in the second area Aloy gets to explore (the first one being No Man’s Land). The Restless Weald Relic Ruins counts as one of the 9 Relic Ruins locations available in the video game and includes a puzzle you’ll have to figure you.
The HZFW Restless Weald Relic Ruins is different than all Relic Ruins we have covered so far, but the objective is the same. Your goal is to secure the Restless Weald Relic Ruins Ornament, and in the guide below, I’ll tell you how to do it.
Where To Find the Restless Weald Ruins
On the map below, you can notice that the Horizon Forbidden West Relic Ruins landmark is in the northwestern corner of the map.
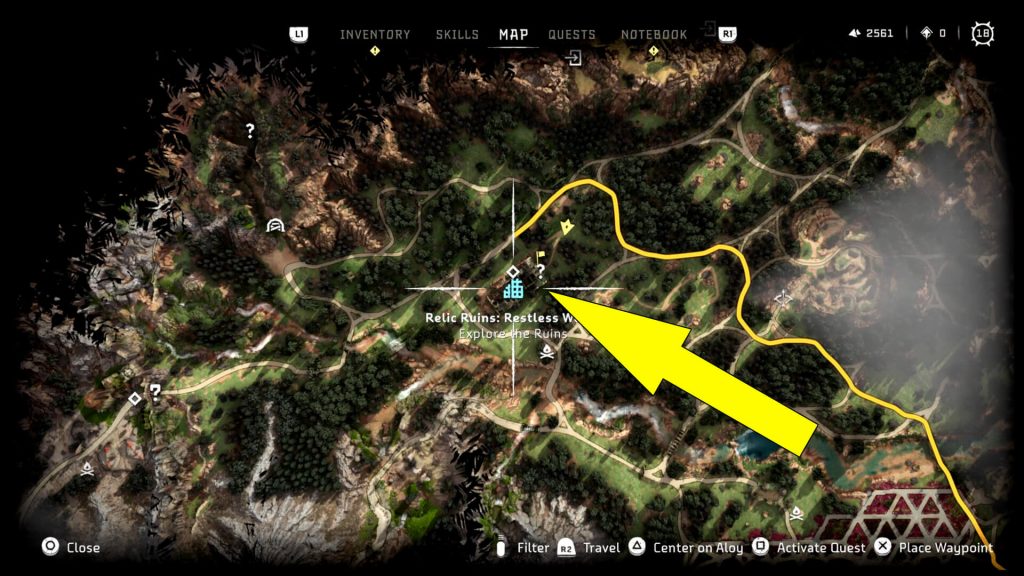
Specifically, you’ll find it northwest of Plainsong Vista Point and Plainsong Settlement, west of Plainsong Hunting Grounds, and southwest of Riverhymn, where we have explored the Top of Drumroot during The Roots That Bind side-quest. So, your first objective is to get to the location marked on my map above and approach the ruins from the northeast.
Restless Weald Relic Ruins Puzzle Solution
To secure the Relic Ruins Restless Weald Ornament in Horizon Forbidden West, you’ll need three essential items:
- A Key Module
- The Door Code
- The Igniter
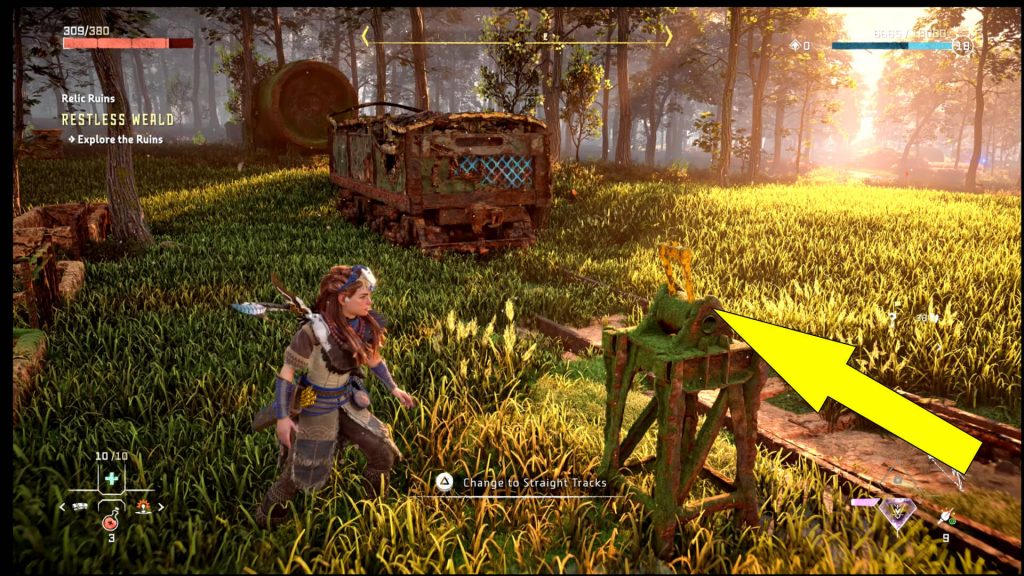
While the first two can be obtained while exploring the Ruins, the third one unlocks via story progression and allows you to remove Firegleams. Assuming you already have the Igniter, look around to spot a cart while approaching the Ruins from the location marked on my map (northeast).
How To Get the Key Module
The first step in completing the puzzle is to figure out how the cart works, and to do this, start by pulling it all the way to the end of the tracks. You can do this using Aloy’s Pullcaster or her bare hands. The idea is to move the cart away from the building and past the spot where the tracks meet or the yellow switch nearby. Here is where to move the Railcar.
Now, interact with the yellow lever I have marked to switch the tracks. As you can guess, now you’ll have to pull the Railcar down the second track that is in a straight line. Basically, you’ll want to get it close to the ruins in front of you. If needed, you can stop near the lower roof of the building to grab the loot chest, but then make sure you pull/push it all the way to the end of the second track.

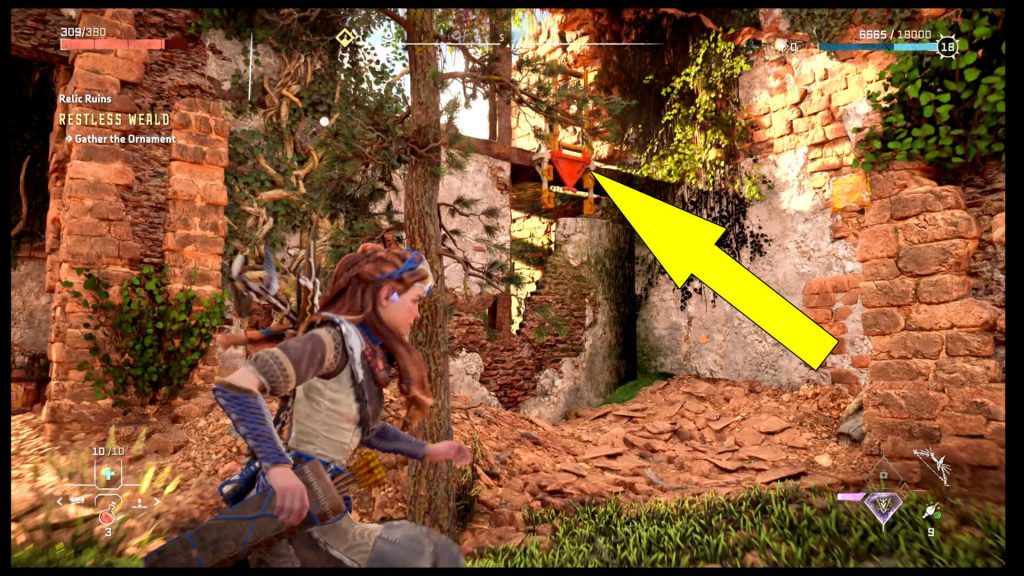
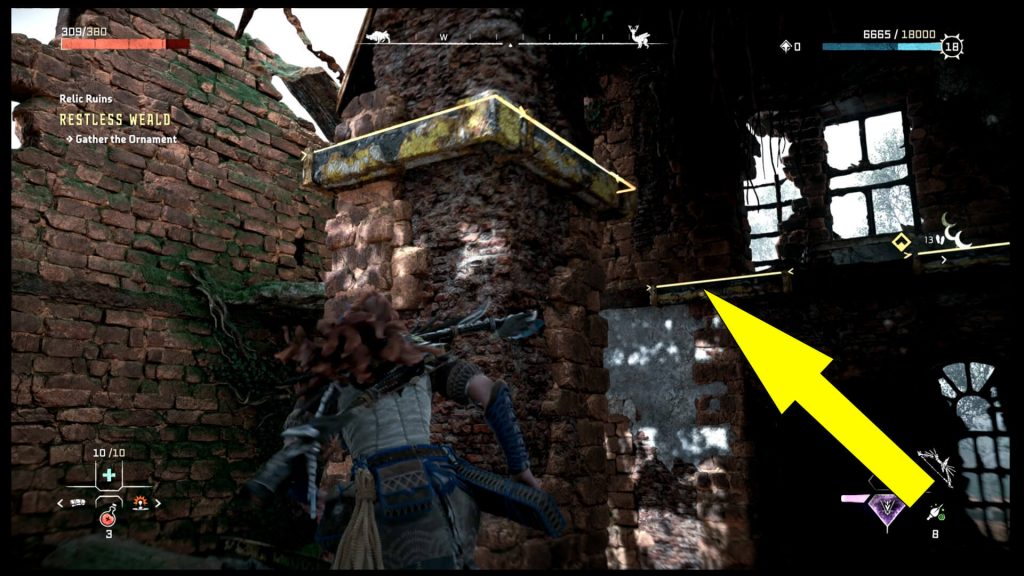
Now, hop on the Railcar, then garb the yellow ledge on the wall (marked above), then slowly walk on the yellow rope to reach the other side of the ruins. Here, you should spot the Relic Ruins Restless Weald Key Module, which is, in fact, the Depot Office Key.

What Is the Restless Weald Code
Now that you have the Key is time to find the Restless Weald Relic Ruins Door Code, but this one is a bit different than any other code. If you wish to skip this step, you should know that it’s 1923; however, you may want to know how to figure this out.
So, head to the inner courtyard nearby, then go right to the other side. Now, you’ll see a ladder on the left side (pictured below).
Shoot the clamp to lower the ladder; then, there’s a yellow ledge on the opposite wall. Grab the ledge; head left, then jump on the yellow ladder. Now, pull yourself up, and you’ll see the locked door you have to open using the code mentioned above. However, there is also a Datapoint you can scan here (marked below).
It mentions the year when the facility was built if you read it, which is 1923, or the code you want to use for the locked door. However, a second hint can be found in the room below your current location. If you head down and scan the Datapoint, it clearly states that Arinth Tejero set the entry code to the year the station was built.

To find when the station was built, head outside (southeast), and on the exterior wall, you’ll see the number 1623, except that six fell, so it’s, in fact, 9.

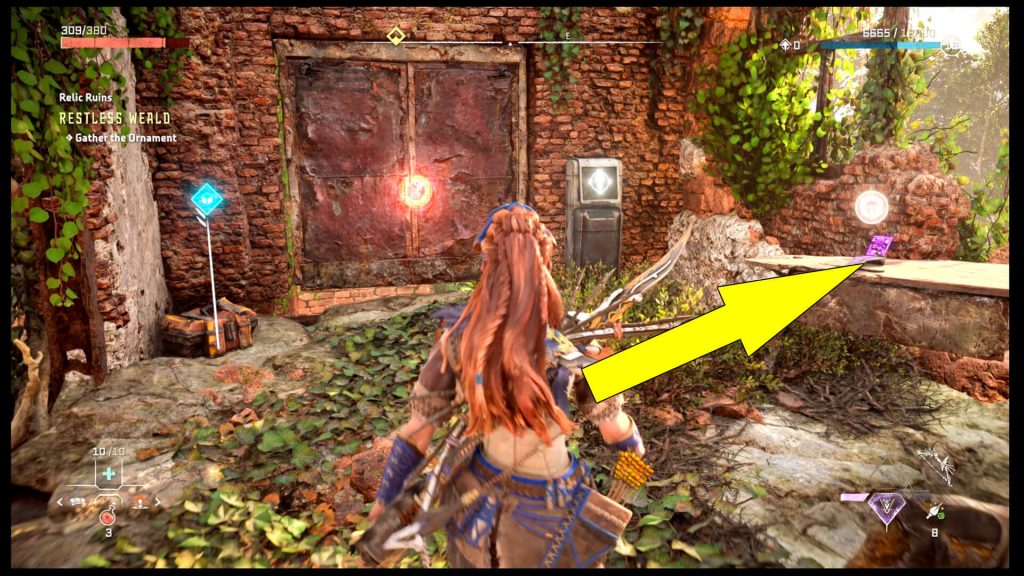
Great, now head back to the locked door using the path explained above and use the code and the Key on the terminal nearby.
How To Get the Relic Ruins Restless Weald Ornament
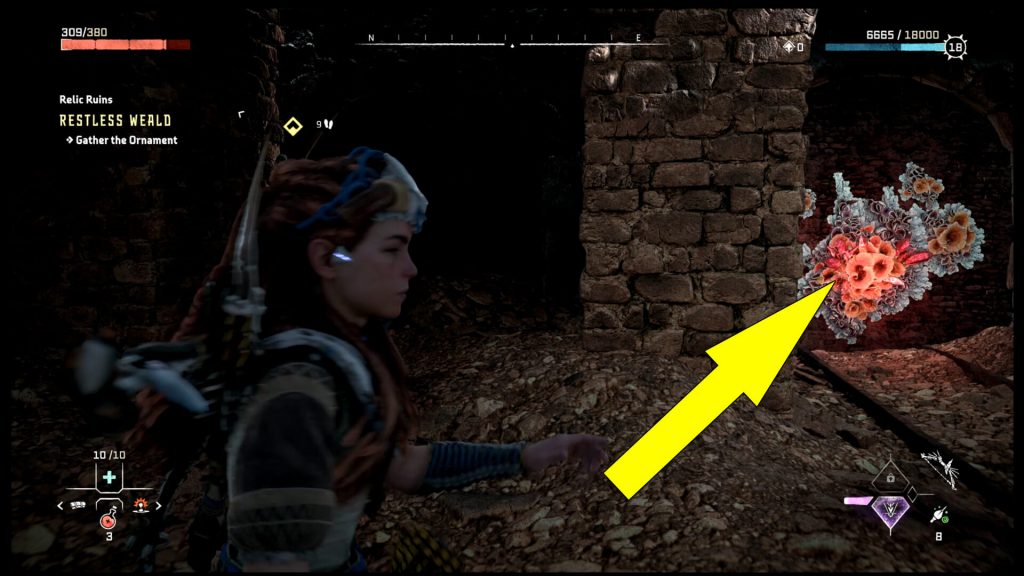
Once you unlock the door, use the zipline above to enter the building on the other side of the depot. In the new room, use the Igniter to get rid of the Firegleam pictured below.
Now, you’ll notice that you created a hole in the wall. Furthermore, you can notice that there is a train track on the ground. Exit the building, then head left to spot the Railcar you moved earlier. This time, as you can guess, you’ll have to repeat the first step and bring back the Railcar to its initial position, then push it through the hole inside the depot.
Make sure you flip the switch when you reach the end of the track, then push it forward. When the Railcar is inside the depot, continue to push it all the way to the end of the track, then hop on it.
Grab the ledge close to you, then turn right and continue to move to the other side. Now, press O to do a backjump, and you’ll land on another ledge. Head right, then pull yourself up to see the Horizon Forbidden West Restless Weald Ornament waiting for you.

Pick it up, then feel free to explore the Train Depot as you wish.
How To Use the Ornament
If you want to know how to use the Restless Weald Ornament you just found, then you’ll have to progress the story and reach Hidden Ember, where you’ll meet Stemmur. The NPC will trade all 9 Ornaments for nine animations that allow you to change the night sky in the desert.
Last but not least, you’ll be able to unlock Stemmur’s stash and get the Ancestor’s Return Legendary Shredder Gauntlet; however, you’ll have to finish all 9 Relic Ruins in the game for this weapon, the Long Coast Ruins being the trickiest.
