Stand Of The Sentinels Tallneck is a Horizon Forbidden West machine you can override while looking for Demeter in the video game published by Sony Interactive Entertainment. Horizon Forbidden West Stand Of The Sentinels is a lot harder to climb than the Cinnabar Sands Tallneck, for example, because you’ll have to know the exact path you have to follow.
On top of this, there are two scenarios regarding this Tallneck, although it is unclear yet if it’s a bug or just a method used by Guerrilla Games to diversify their latest release. Basically, the Tallenck we’ll cover below changes its path for some players. Simply put, since the Tallneck is walking in a circle, we have two instances:
- It can move clockwise
- It can move counterclockwise
Regardless, throughout the guide below, we’ll cover both of them so you can learn how to climb the HZFW Stand Of The Sentinels Tallneck.
Where To Find the Stand Of The Sentinels Tallneck
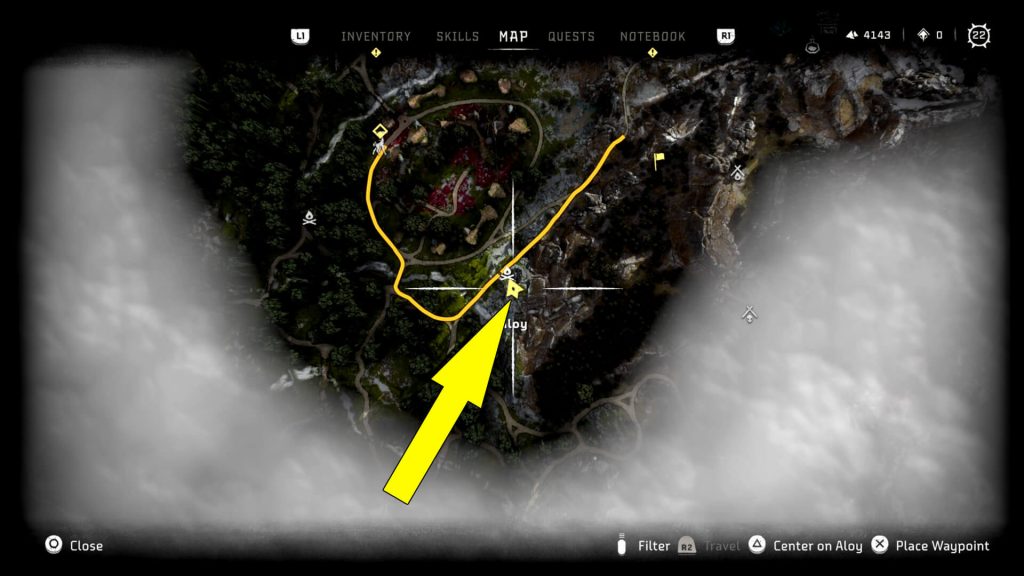
Let’s start with the Tallneck’s location, and as you can see below, it is in the center of Demeter’s region. Or, in the area, you’ll have to find Demeter. Look for it southeast of The Long Coast Vista Point.
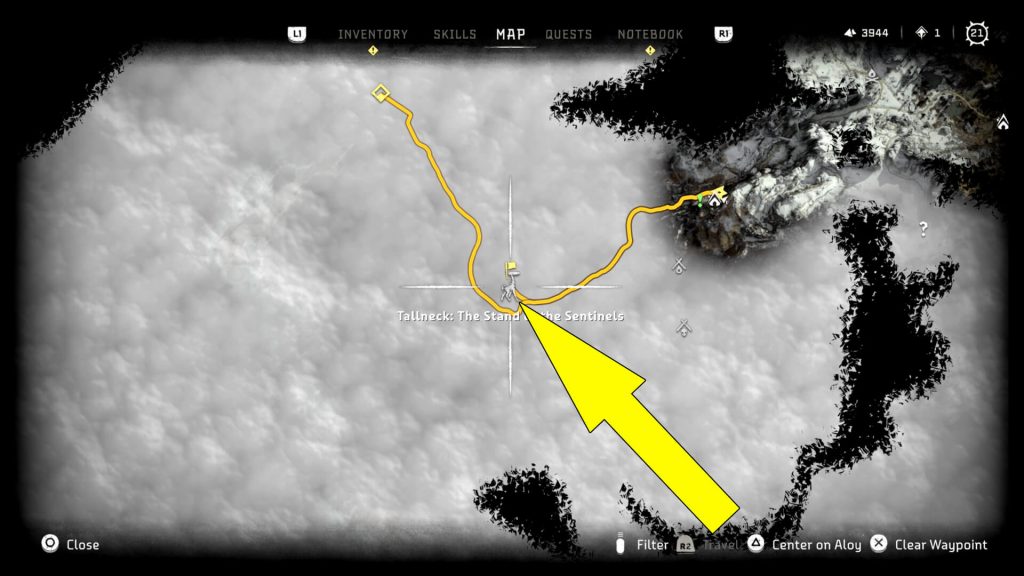
Upon reaching the location marked on my map, there are two essential aspects you have to be aware of or two additional steps you have to complete:
- First, clear the area of Stalkers because they can deal a lot of damage
- Second, pay attention to the path the Tallneck is following and determine if it’s moving clockwise or counterclockwise
Based on the Tallneck’s path, there are two methods to approach the giant creature.
How To Climb up the Abandoned Settlement
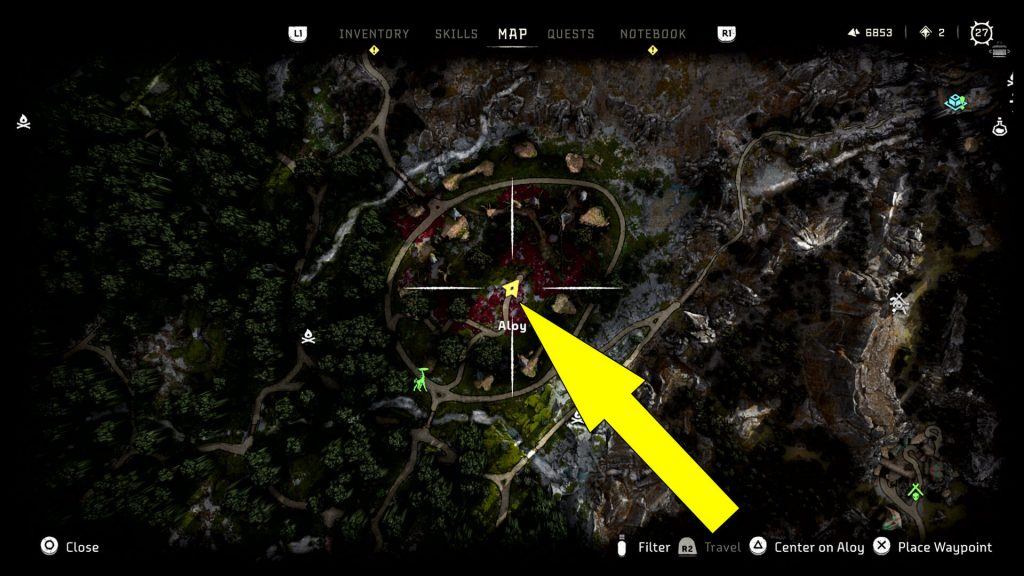
If the Horizon Forbidden West Stand Of Sentinels Tallneck is moving clockwise, then you’ll have to climb up the Abandoned Settlement, and there is a good reason for this, as you’re about to see. The starting location is the central area (marked on my map below) in this scenario.
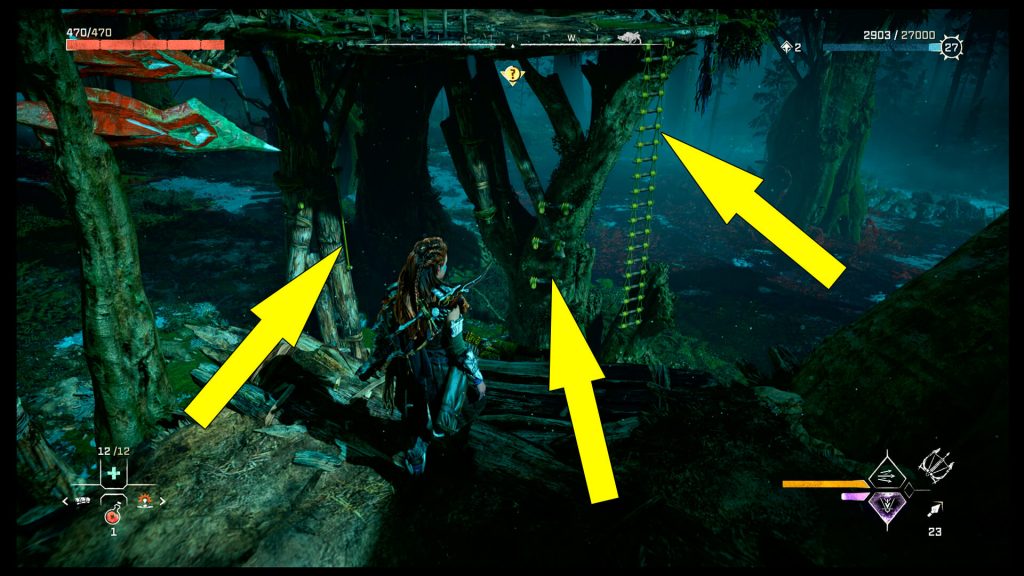
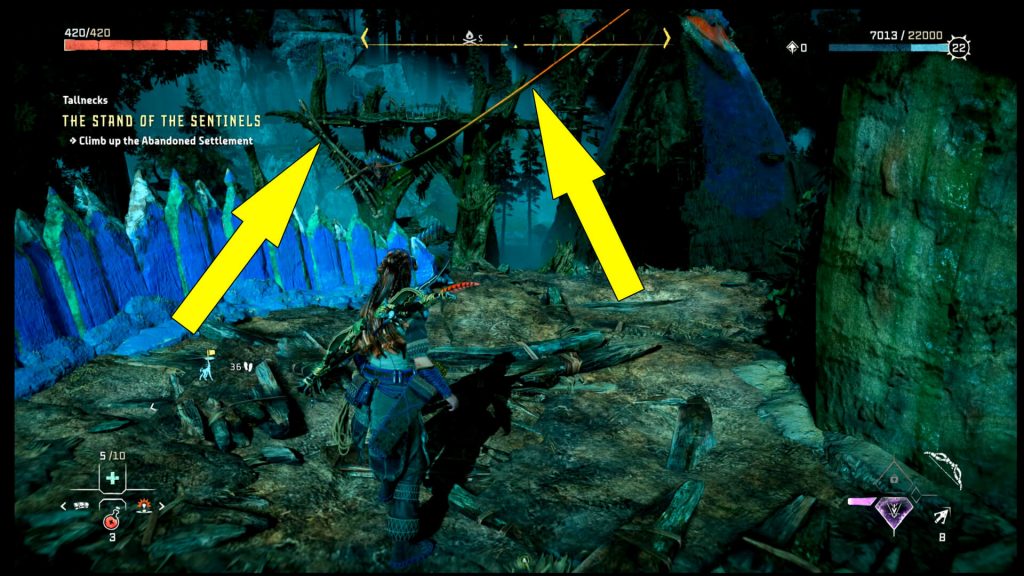
Once you reach it, you’ll want to locate the broken bridge. Now, you’ll have to use the grappling point (also marked below) to pull yourself up.

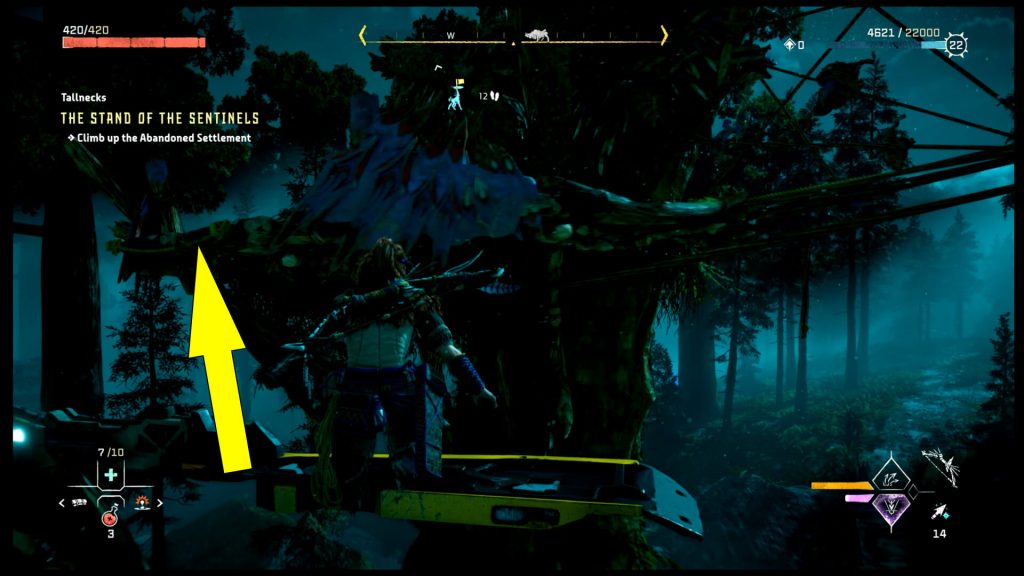
From here, you’ll want to head left and follow the wooden bridges until you reach a gap. This is the first step of the puzzle because you have to pay close attention to the environment. Basically, from the location you see in my image, you want to glide to the ledges in the distance (the left side of the ladder or the arrow in the center).
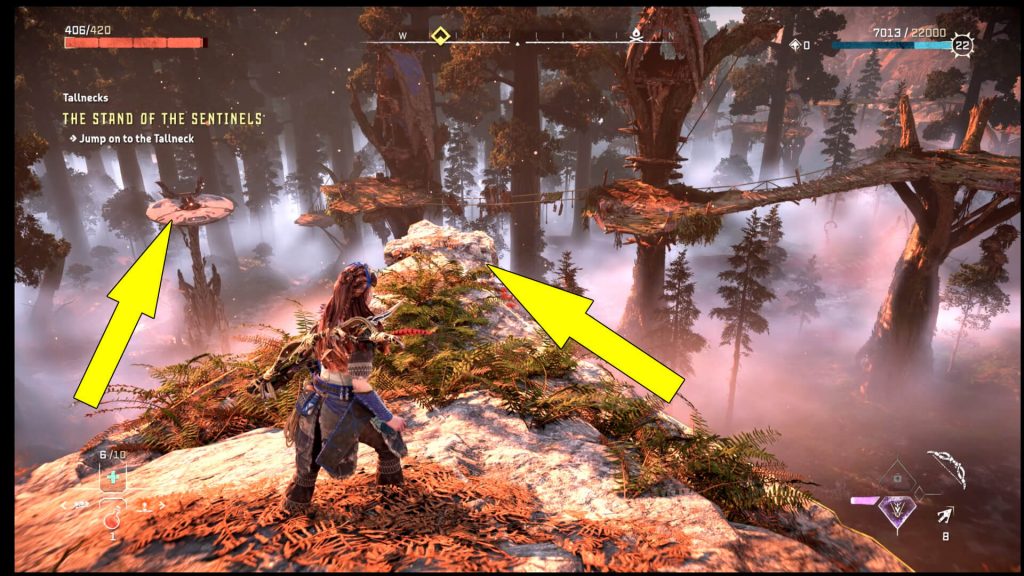
Next, you must follow the yellow ledges on the left side (image above) and head up to the next platform. Once you do that, you must lower the yellow leader (right side in my screenshot) because if you fall to the ground, you’ll use it to get back to this location.
When you get to the next platform, wait for the Tallneck to arrive because you’ll have to use the giant machine as a bridge.
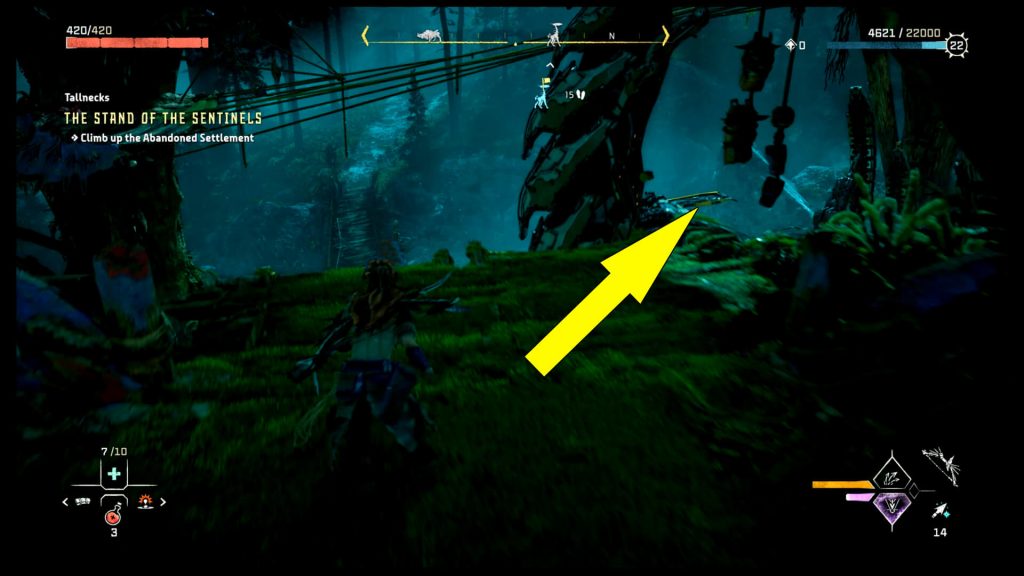
What you need to do is to jump on the Tallneck’s back on one of its platforms, then quickly move to the other one, and then to the platform on the following tree (pictured below).
Depending on how the Tallneck is moving (clockwise or counterclockwise), there are two platforms you can use to launch yourself on its back. The first can be observed in my screenshot above, while the second is to the left.
Now, on the next platform, turn right and simply walk on the ropes to advance. Keep pushing forward, then on the next platform, drop the yellow ladder (right side in the following screenshot).
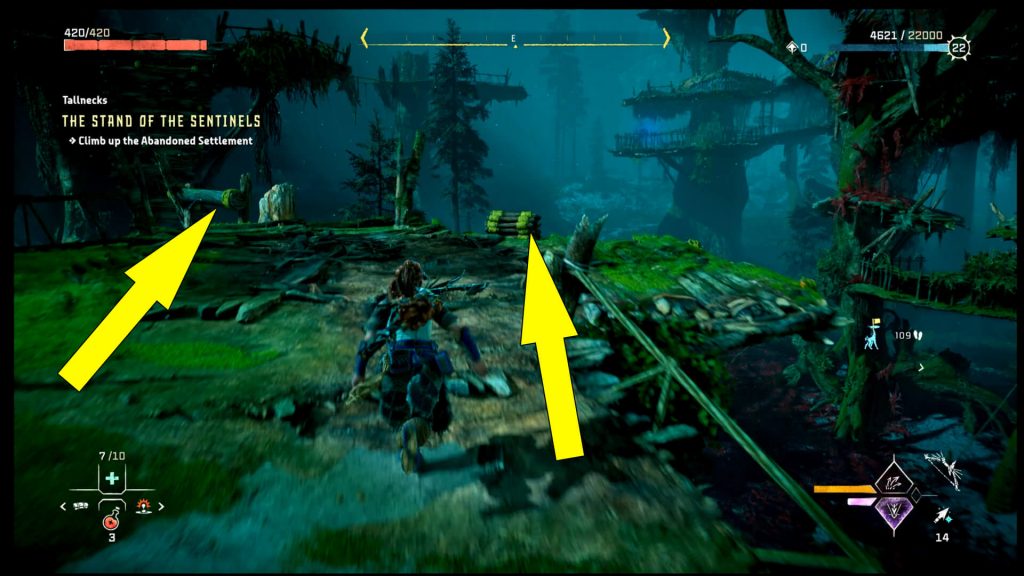
Now, you’ll want to use the logs to get to the next section. Jump on them, then grab the ledges on the broken bridge, then pull yourself up.
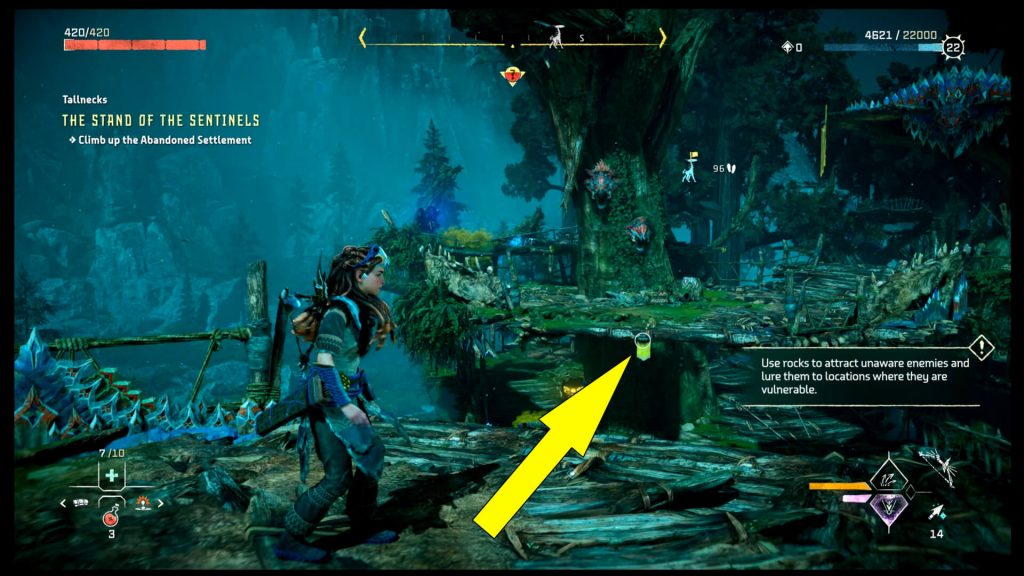
From here, you’ll have to cross two ropes. Notice that there are some obstacles, so jump from left to right and vice-versa to advance. Drop the yellow ladder on the other side upon reaching the next platform, then turn right to see a Grappling Point.
However, before jumping to the next platform, consider dealing with the machines (Clamberjaws) from a distance, as they can deal a lot of damage.
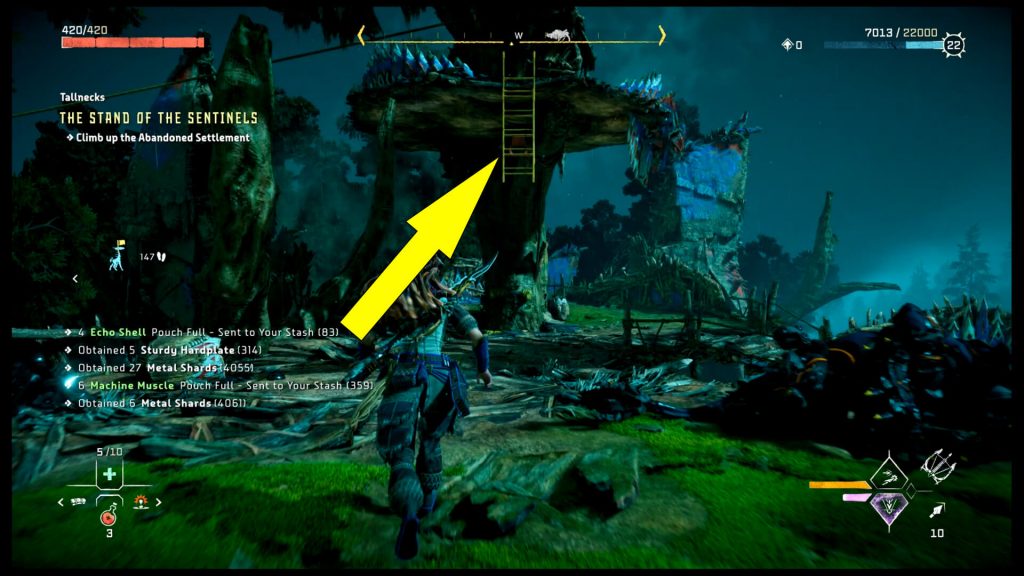
In the next area, after you loot everything, shoot the clamp on the yellow ladder, then head up. You can see it below.
Once you reach the top, turn left, and you’ll see a zipline. Use it to get to the platform in the distance (pictured below), then use the yellow ledges on the left side (also shown) to climb to the top.
Great, now turn right to see a Grappling Point you can use to get to the next platform. From here, you can cross the bridge ahead to get to one last platform.
Once you get there, you’ll be able to jump on the Tallneck, but there is a catch here. This is possible only if the Tallneck’s path is clockwise because you must jump on the ledge in the following screenshot.
If the Tallneck is walking counterclockwise, the ledge is on the other side, and you won’t be able to jump on it; hence, you’ll have to use the second method.
How To Climb the Tallneck Dish
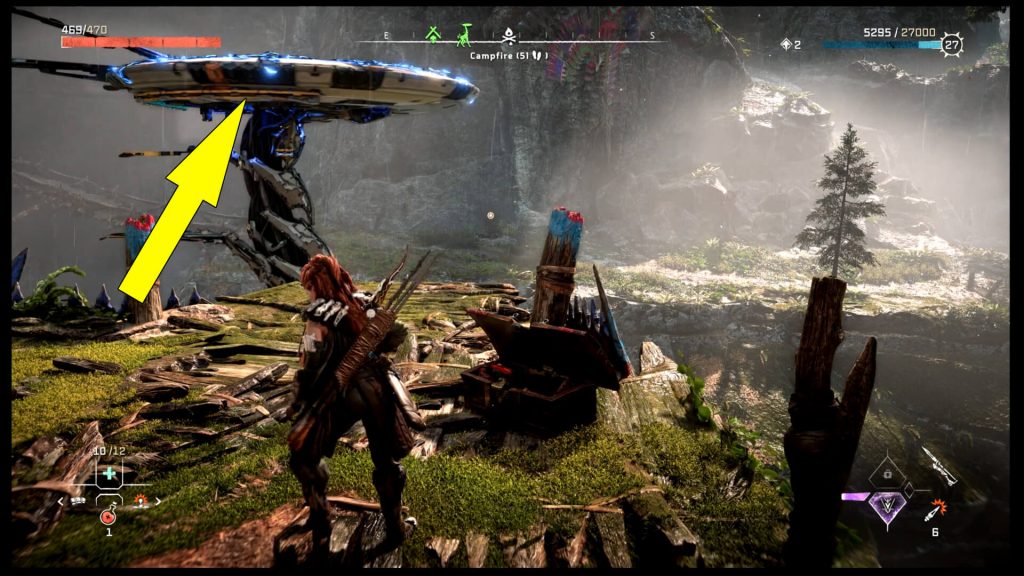
Luckily, if the Stand Of The Sentinels Tallneck moves counterclockwise, it’s easier to get to the top, although this method should work in both cases. What you have to do is to get to the location I have marked below.
Above the Campfire, there is a colored stone, almost impossible to miss. Go around to the mountain and make sure you get to the top of the said stone. Now, wait for the Tallneck to approach (pictured below), then sprint, jump and glide on its head.
In both cases covered above, as you probably know by now, you have to interact with the central section once you get to the top of the Tallneck.
