The Fearamid Rune Switch is one of the two Tiny Tina’s Wonderlands challenges you have to complete to reach 100% in the final area of the video game developed by Gearbox Software before dealing with the Dragon Lord. The Fearamid Switch is easy to find, but completing the challenge in the allotted time is a tricky objective because the switches you’ll have to activate are scattered around the central section of the temple.
Since they are pretty far from each other, you’ll have to follow a specific path, and you’ll also have to move as fast as possible without being interrupted.
Where To Find the Fearamid Switch
On the map below, you can notice the Rune Switch in Fearamid is in the center of the large temple you’ll get to explore once you get to this area.

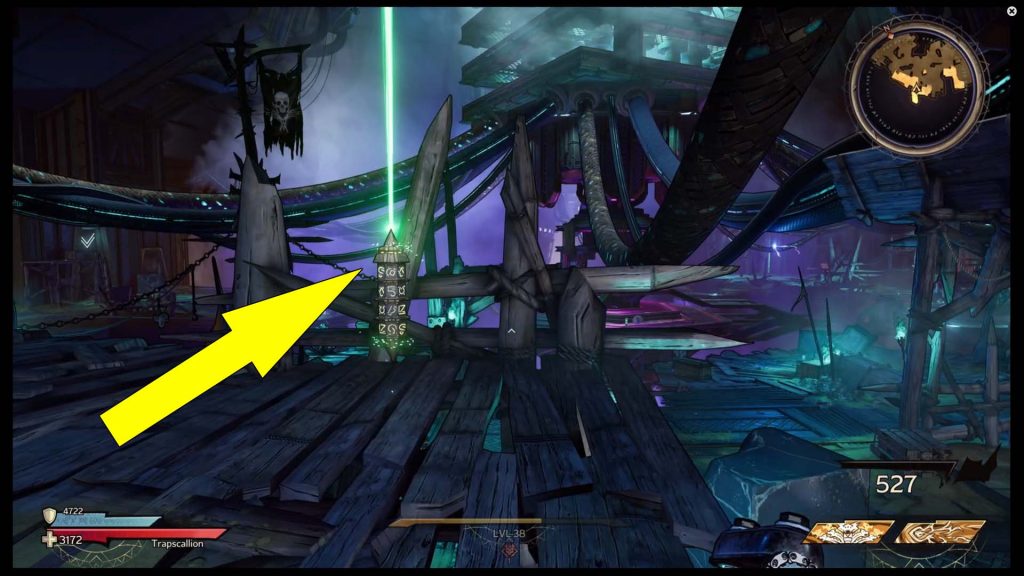
From The Fearamid – Facing Fear fast travel point, head inside the temple, and follow the stairs. Once you enter the Ruling Core, turn right, and you’ll spot the Rune Switch on top of a wooden platform (pictured below).

How To Complete the Rune Switch Fearamid Challenge
Upon finding the Fearamid Rune Switch, you might be tempted to start the challenge right away, but you shouldn’t. Instead, focus on clearing the Ruling Core area of all enemies, and don’t miss any of them. The idea here is to eliminate all Skeletons in this area because they’ll slow you down if they shoot you, thus failing the challenge.
Since you’ll be racing against the clock, you won’t have time to deal with the mobs. Obviously, you’ll want to deal with the mobs while finding the Lucky Dice chests, Poetry Page, and Scrolls inside the Ruling Core. After you manage to fully clear the central section of the temple, head back to the Rune Switch and activate it.
Without waiting to see what’s happening, start running to the central section, where the large engine (core) can be spotted, and on the left side of the stairs, you’ll see the first Switch (pictured below).

Interact with it and keep sprinting across the bridge ahead of you, then turn left, and you’ll see the second Rune Switch. Follow the ramp behind the platform to get close and activate it.
Now, from your current location, jump down and keep sprinting toward the next Switch in the distance. Eventually, you’ll come close to a bridge with two traps. To avoid the darts, slide, then keep pushing forward, hugging the left side. When you get close to the third Switch, you’ll want to cut the last corner (pictured below).

Follow this path and quickly activate the final Switch when you see the option to do so on your screen.
