Brighthoof Lucky Dice are by far the trickiest collectibles in Tiny Tina’s Wonderlands, the video game developed by Gearbox Software because, unlike the Lucky Dice from other regions we have covered, they can be obtained only by progressing through the game. That’s because some Brighthoof Lucky Die locations are locked early in the game, which means that you’ll have to gain access to those areas by finishing specific side quests and main quests.
Nevertheless, you can find and open some Lucky Dice in Brighthoof earlier, but if you’re looking to get all of them as soon as you get to the hub town, you’ll notice that you won’t be able to complete this task. To help you get 100% completion in Brighthoof, throughout the guide below, we’ll go over all of the Lucky Dice you can find in this town. Specifically, all 20 collectibles you must obtain during your journey.
Where To Find The Brighthoof Dice Chests
As usual, let’s start with the Brighthoof Lucky Die locations map. As you can see, these chests are scattered all over the town.
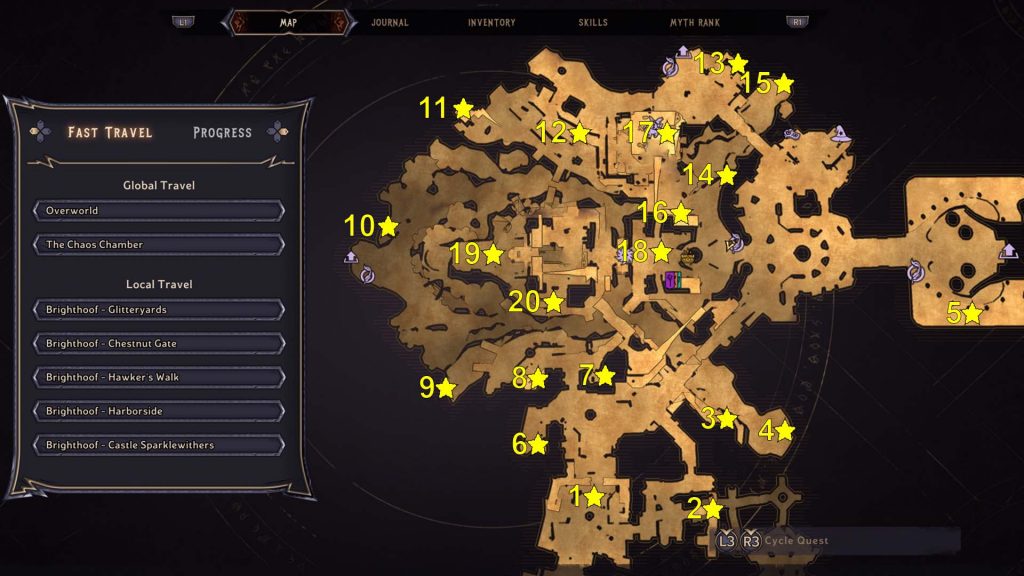
When looking for them, you’ll have to consider the game’s verticality and that some areas may not be available from the start. For example, the fifth Lucky Die on the map above can’t be obtained unless you finish the story or the game’s Epilogue because the collectible is in the courtyard of Castle Sparklewithers. The gates to the said castle won’t open unless you beat the game.
Therefore, if you get stuck while looking for the Lucky Chests marked on our Brighthoof map, check the corresponding tips listed below.
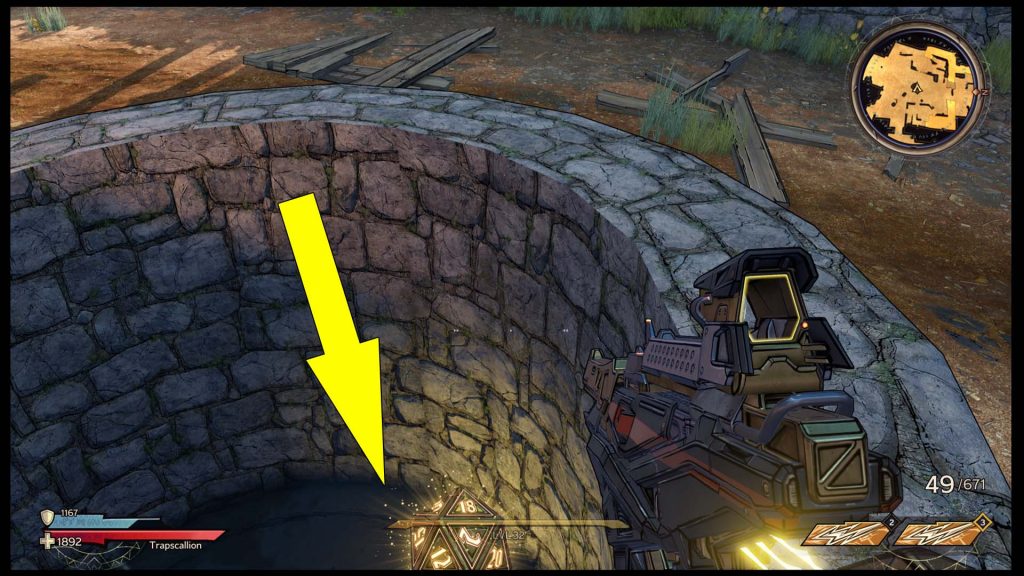
Lucky Die #1: In a Well
The first Lucky Die collectible marked on the map above is found inside a well. You can get this one when you reach Brighthoof, even though it’s pretty easy to miss.
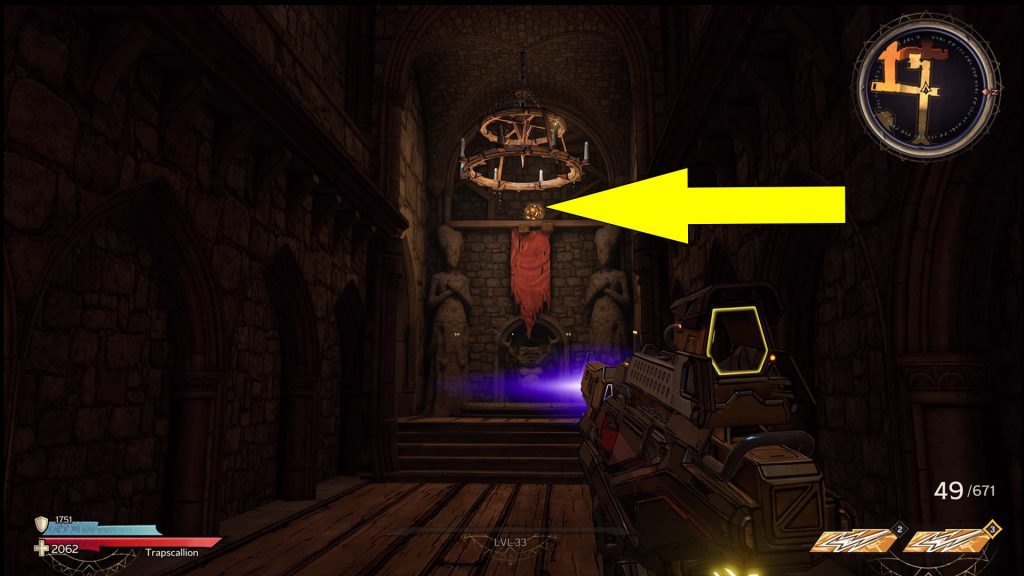
Lucky Die #2: Inside an Underground Temple
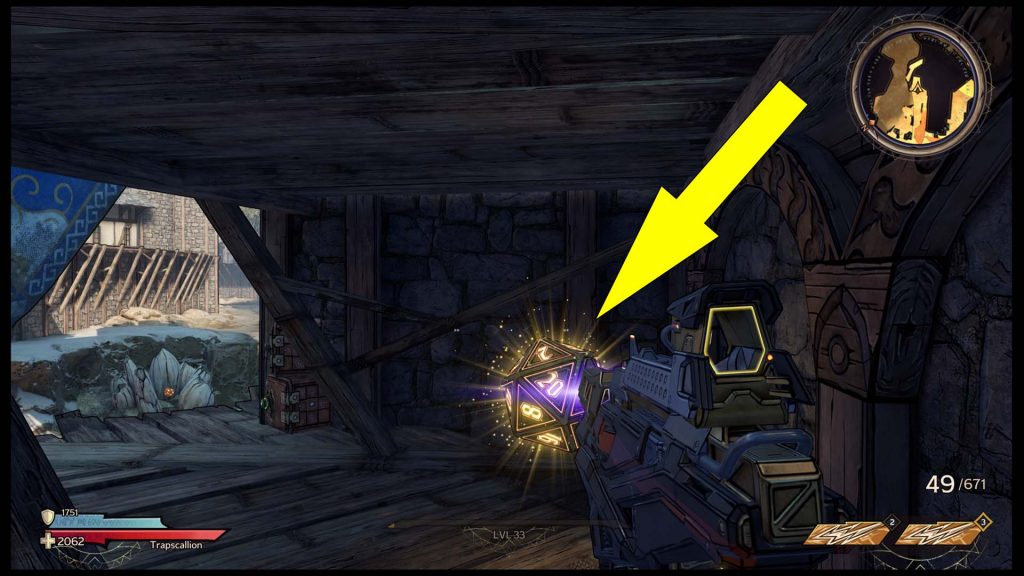
While the first collectible is accessible, the second Lucky Die on the map above has a special requirement. As you can see, the collectible is in a corridor leading to an underground temple. Without spoiling the game, this area is behind a locked gate you can open only by completing the Inner Daemons side quest, which starts in the Weepwild Dankness region.
Follow the said side quest, and as you progress, you’ll eventually unlock the gate, and you’ll have to descend to the temple below Brighthoof. You’ll see the Die on the upper level pictured below on your way down. Climb the ladder in the room on the left while facing the Die to get it.
Lucky Die #3: Under a Walkway
For the third Lucky Die collectible on our Tiny Tina’s Wonderlands map above, you have to progress the story up to the point when you blow up the ocean. This event happens during the Emotion of the Ocean main quest early in the game. The collectible is on the ledge under the walkway, and you can get it by dropping on it from above.
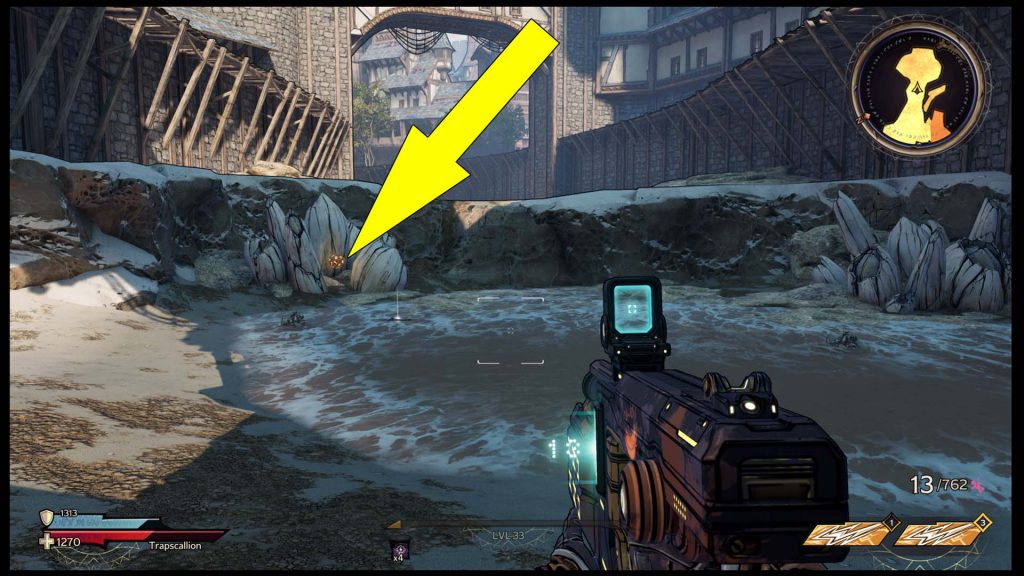
Lucky Die #4: In the River Bed
After you get the previous Die collectible, jump in the river bed below, and you’ll see the next one between some rocks. Again, this one can’t be collected early in the game.
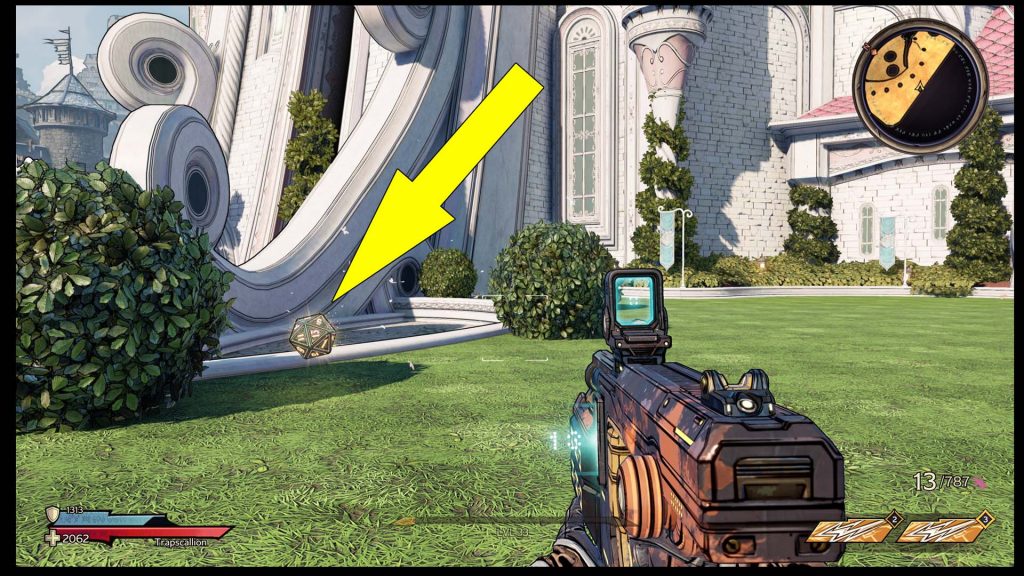
Lucky Die #5: Behind a Bush in Castle Sparklewithers
As mentioned above, the fifth Brighthoof Lucky Die is easy to spot but hard to get. It sits behind a bush in the courtyard of Castle Sparklewithers, on the right side facing the castle. This area, however, can be accessed only by finishing the story during the Epilogue.
Lucky Die #6: In an Alley
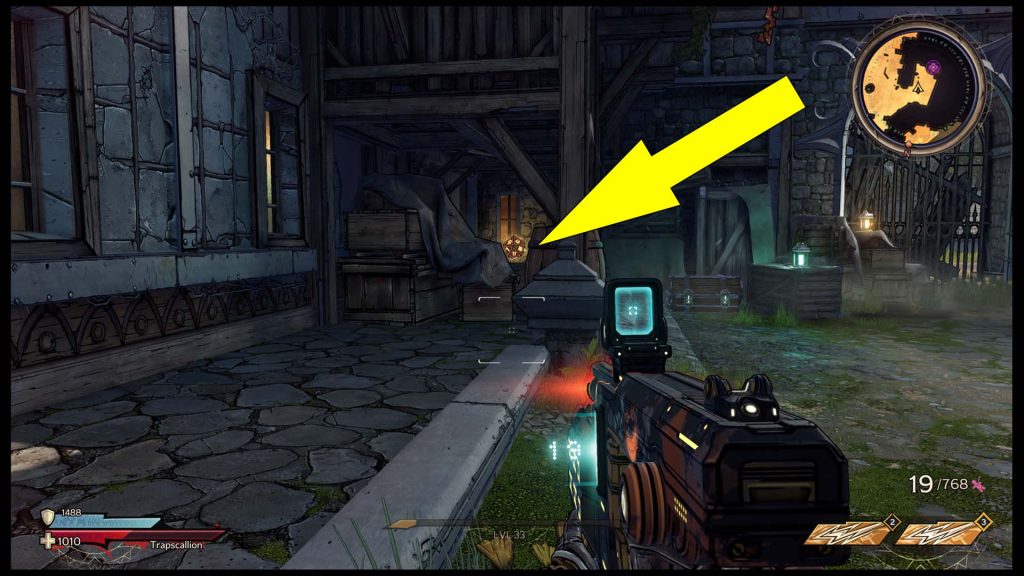
The sixth Lucky Die in Brighthoof doesn’t have any special requirements. You’ll find it at the end of an alley, behind some crates you have to smash.
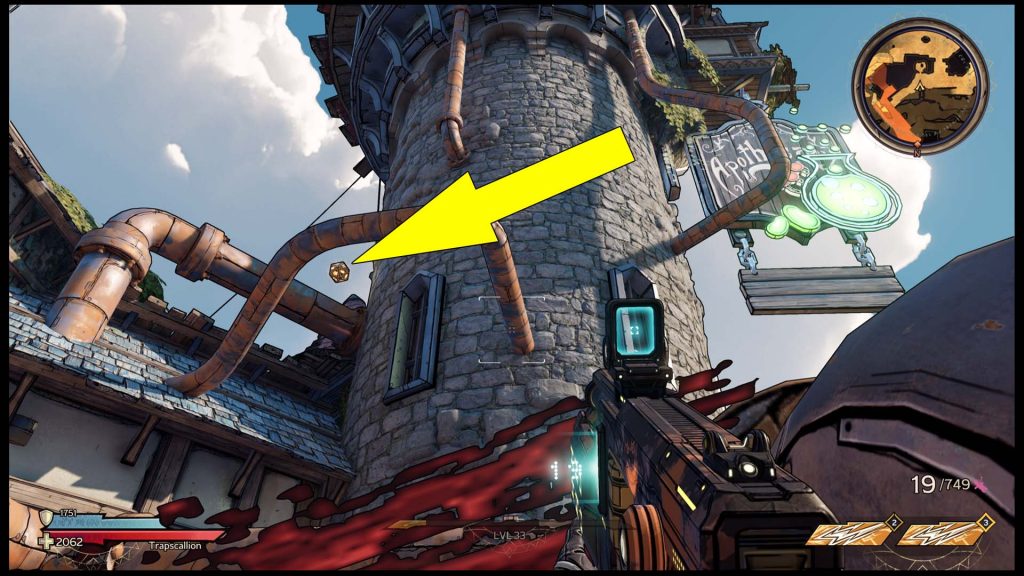
Lucky Die #7: Near a Round Tower
Another Brighthoof Die that is quite hard to spot is the one on the tower’s rooftop marked on the map above. You can see it near some pipes (pictured below). To get it, look for the wooden crates near the largest pipe. Climb on them, jump on the pipe, and walk towards the roof where the collectible is waiting.
Lucky Die #8: On a Balcony
The eighth collectible is also quite accessible since it’s on a balcony you can access anytime you want. To get to it, climb the stairs near the large crane.
Lucky Die #9: At the Edge of the Reef
Upon blowing up the ocean (according to Tina), head to the location on the map above to spot the Luck Die at the edge of the map. This one is very easy to spot, but you’ll have to progress the story.
Lucky Die #10: Under a Shipwreck
From the previous collectible, head towards the Brighthoof – Harborside fast travel point. While facing the transition point on the right side, you’ll see a shipwreck. Behind it is another Die.
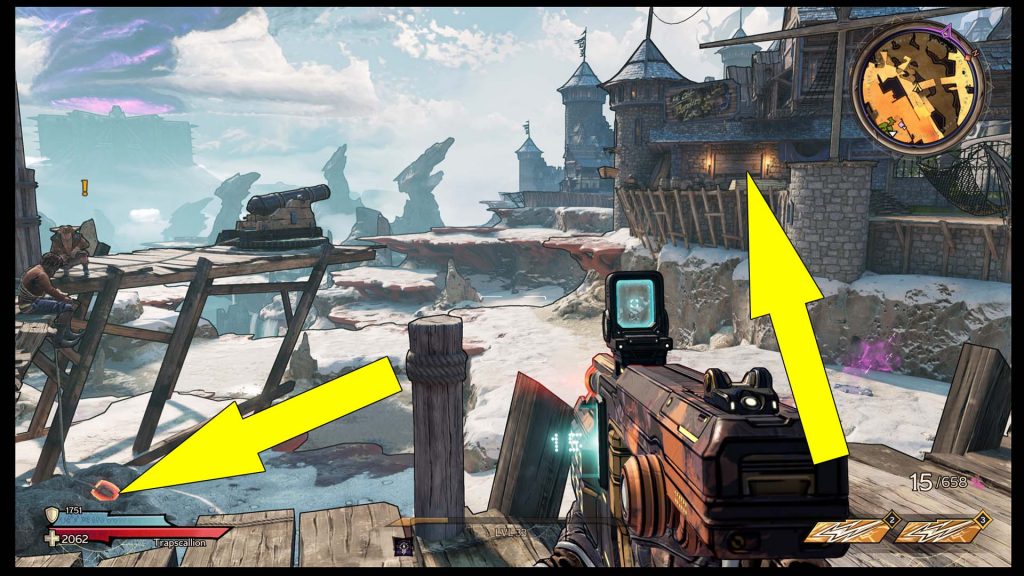
Lucky Die #11: Inside Ye Olde Bandits Lair
The next Brighthoof Die is impossible to spot while exploring the town. If you follow the map above, at the location I have marked, you’ll find the Ye Olde Bandits Lair. To get the Lucky Die and one of the Brighthoof Scrolls, you’ll have to destroy the wooden plank under the billboard. You can shoot the canon on the other side of the docks (pictured below) by aiming for the small barrel on the ground. Obviously, you have to blow up the ocean by progressing the story.
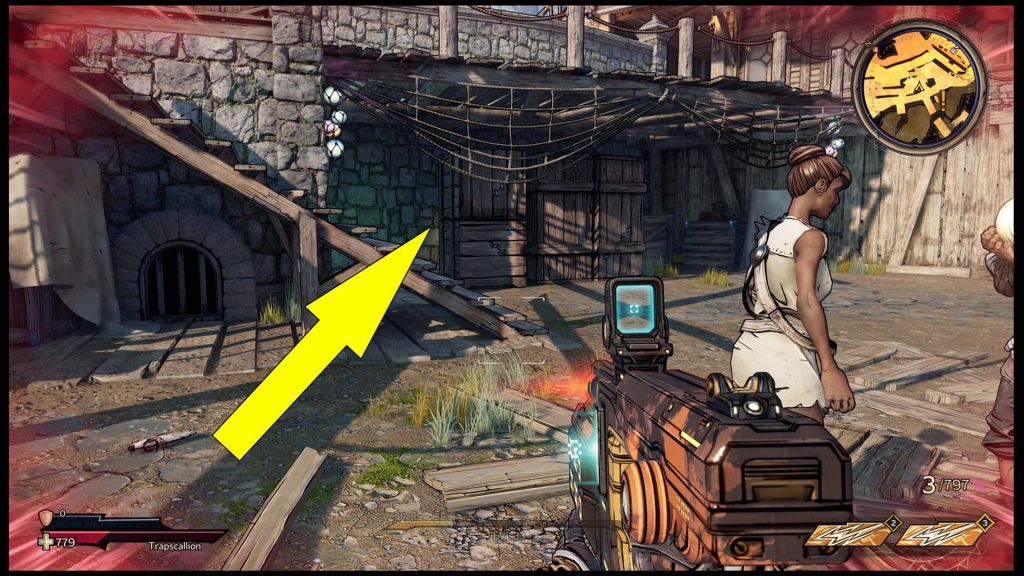
Lucky Die #12: Behind Some Crates on the Docks
Look for the next Brighthoof collectible I have marked above behind some crates while exploring the docks. The crates (pictured below) are at the bottom of the stairs, and you can see the Lucky Die glowing.
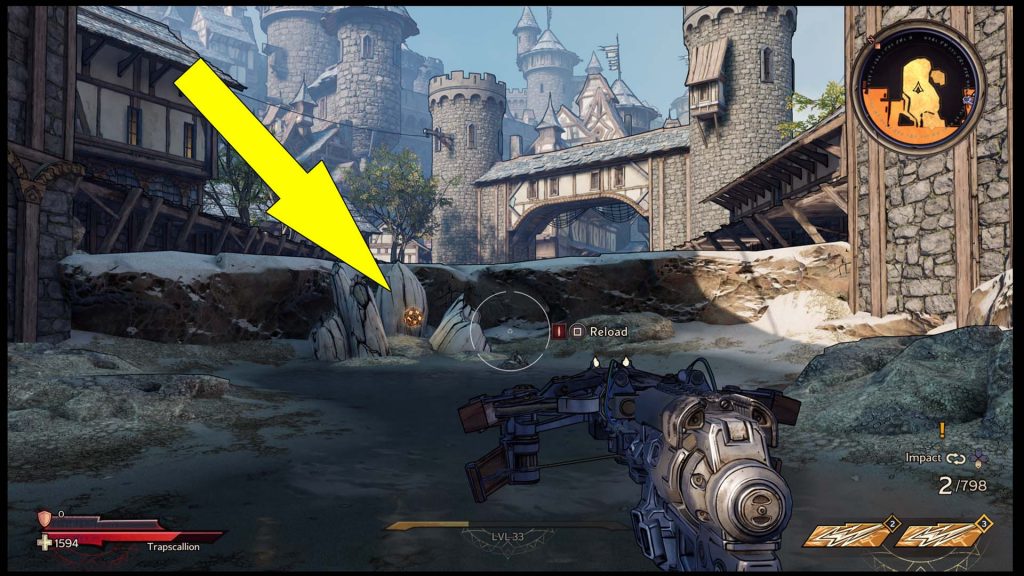
Lucky Die #13:Behind a Locked Balcony Near Chestnut Gate
To get the 13th chest on the map above, you must play a mini-game. Specifically, you’ll need to shoot the three small targets under the balcony where the Lucky Die is locked behind a gate. You can ignore the large targets, and there is no timer. Simply shoot the small ones, then get the chest.

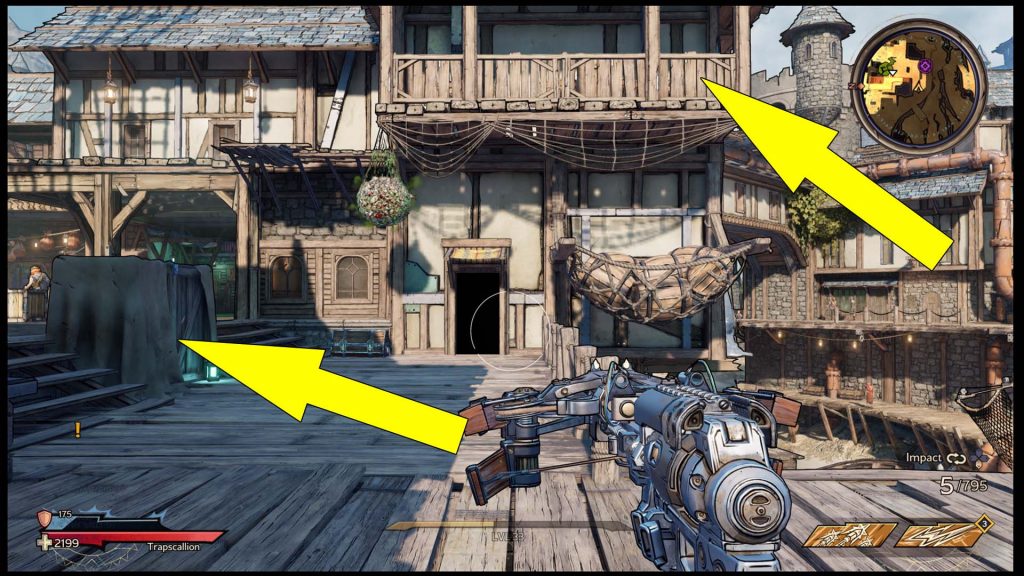
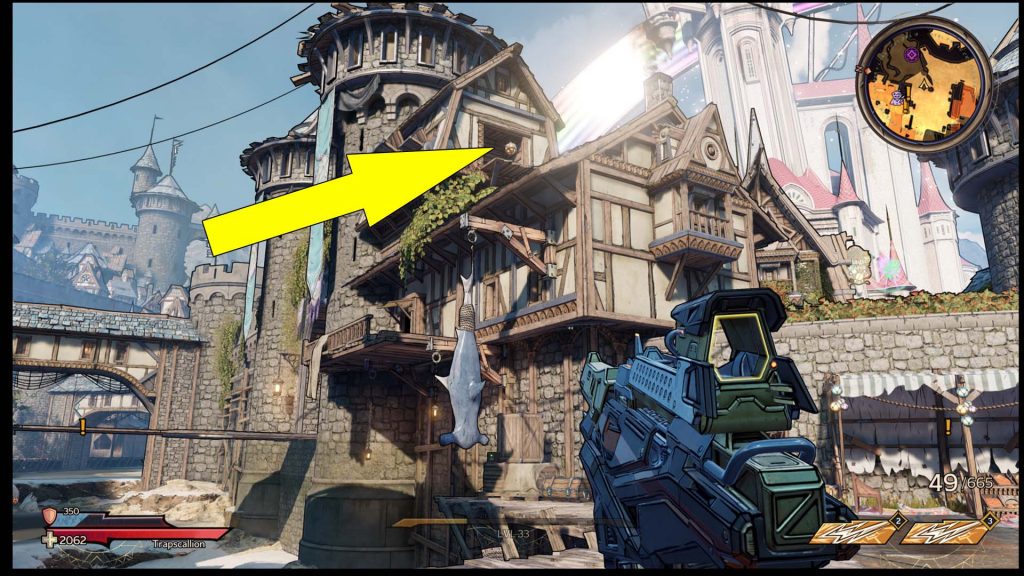
Lucky Die #14: On a Balcony Above a Hanging Shark
After you get to the location of the Die in Brighthoof, you’ll see the collectible on a small balcony you’ll have to reach. To get there, start by climbing the crate near the hanging shark, then jump on the balcony on the first floor. Now, turn around and jump on the pole, keeping the shark suspended, then on the roof where the Lucky Chest is waiting.
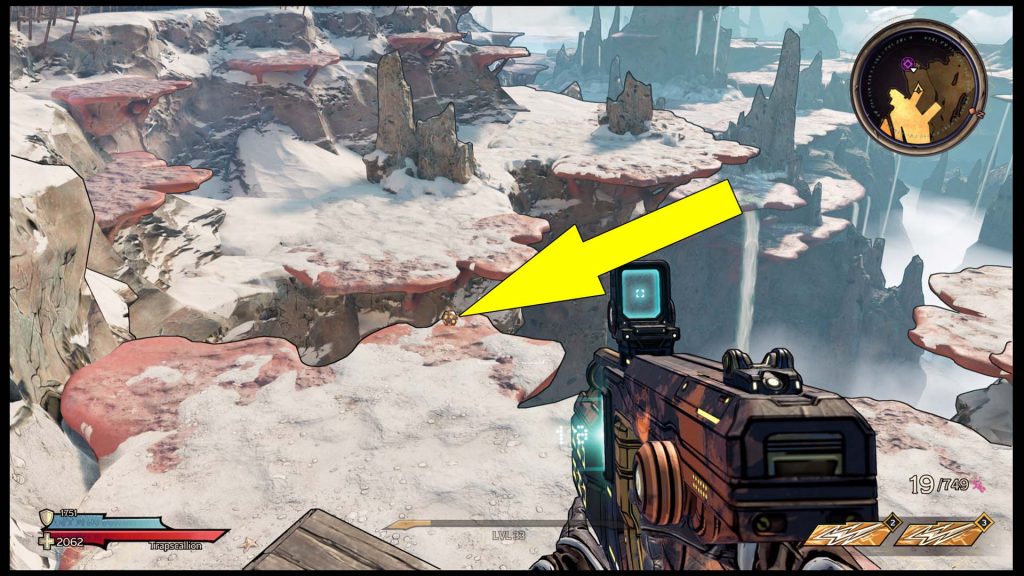
Lucky Die #15: At the End of the River Bed
Another chest can be found at the end of the river bed marked on the Brighthoof Lucky Die locations map above. Check the location after you get rid of the water via story progression.
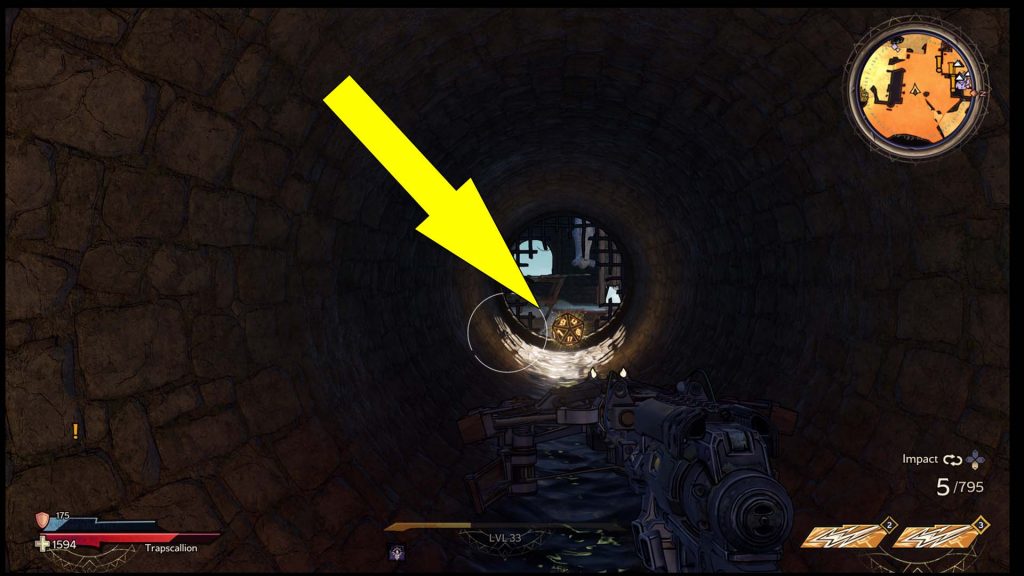
Lucky Die #16: In the Sewers
Upon collecting the previous chest, remain in the river bed. Opposed to the location where you found the last Die is the entrance to the sewers. At the end of the tunnel is the next one.
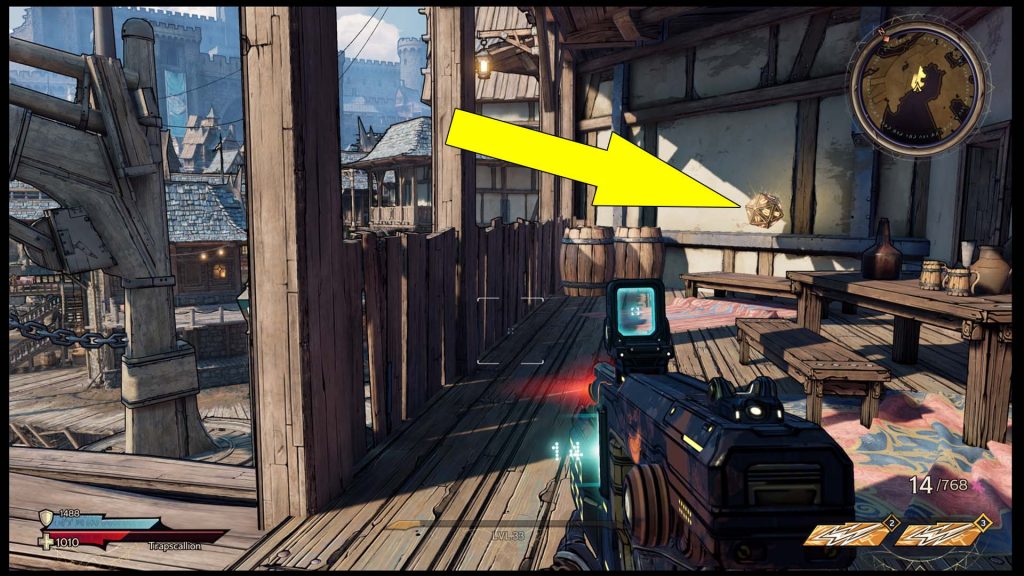
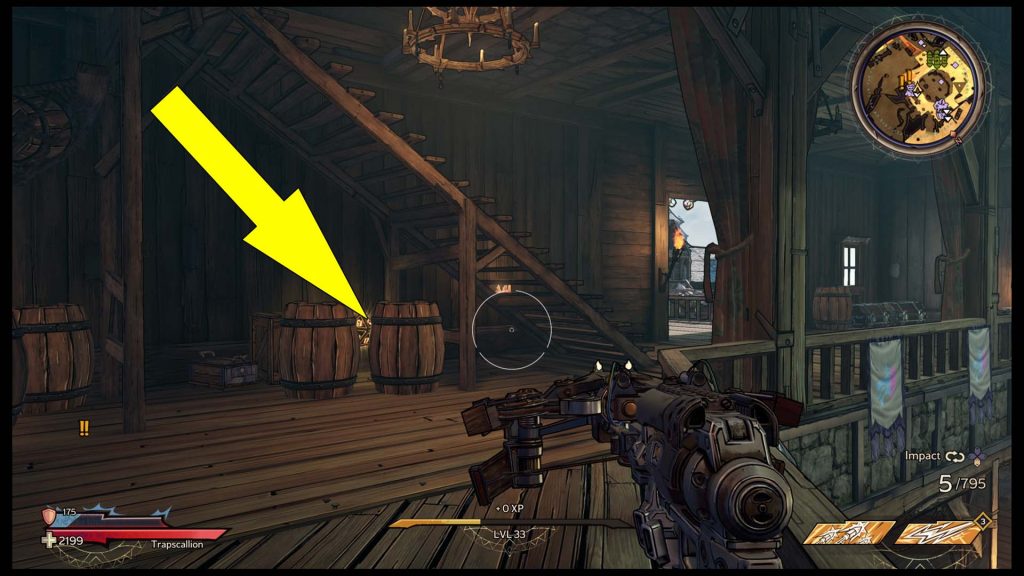
Lucky Die #17: On the Second Floor of Izzy’s Fizzies
Inside Izzy’s Fizzies, you can find another Lucky Die. Just head to the second floor and look under the stairs leading to the third.
Lucky Die #18: On the Rooftops
After you get the previous Die, head to the rooftop of Izzy’s Fizzies. Look around for a fishing net you can reach to get on the other side of the street. Next, use the pink jump pad to get to an upper platform and look over the roof on the right side after you land.
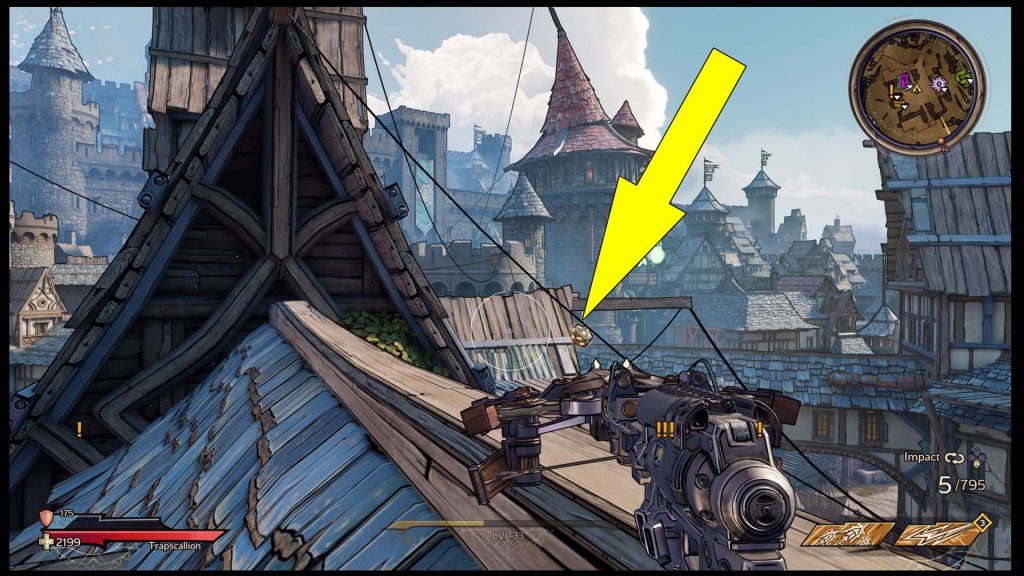
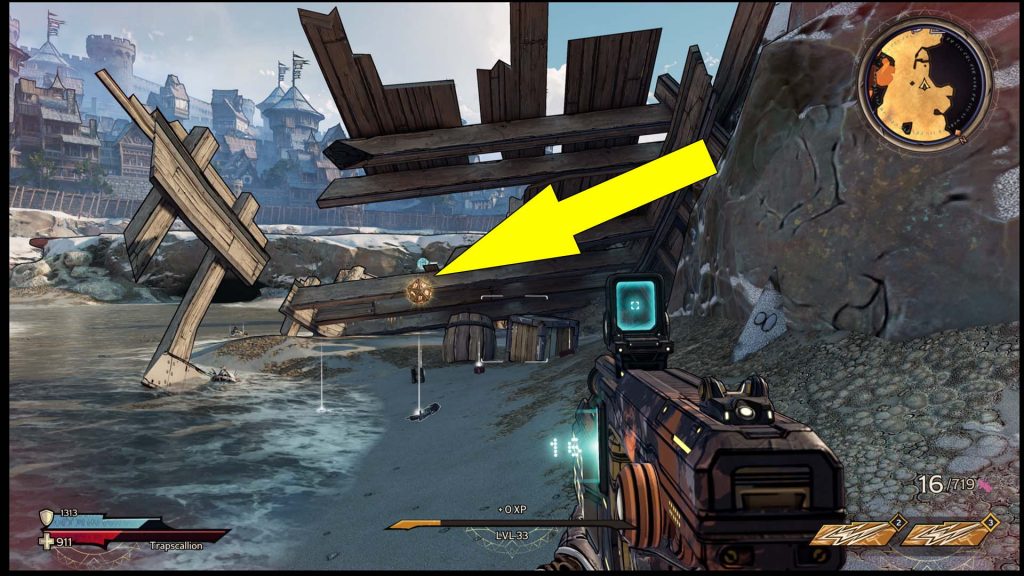
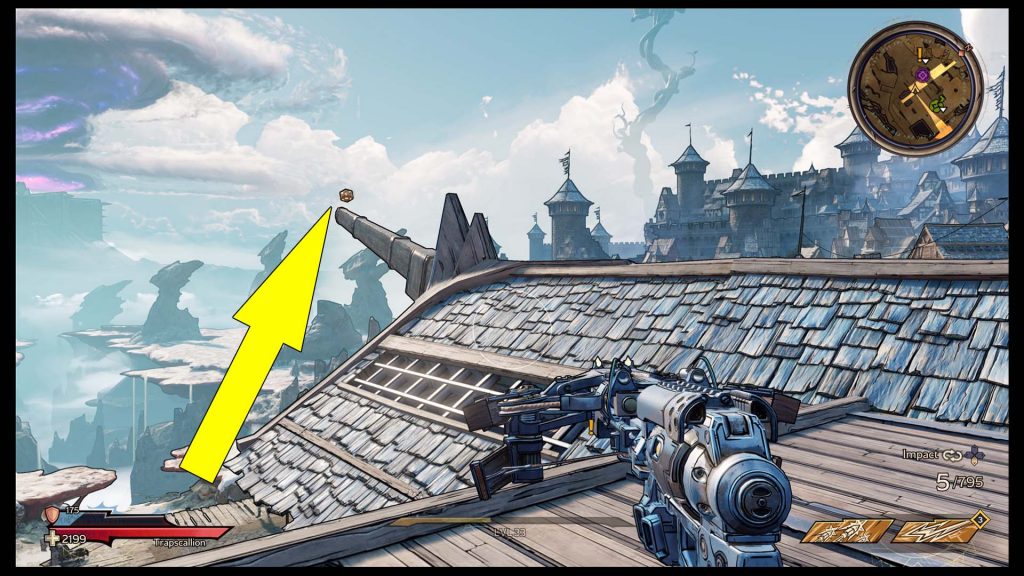
Lucky Die #19: On a Bow Beam
From the previous Die, retrace your steps to the wooden platform, then head left, remaining on the rooftops. Keep moving east, jumping from one platform to another and crossing two additional fishing nets. The next collectible is on a bow beam (pictured below). Mark the location on the map above to get close.
Lucky Die #20: On a Balcony in Harborside
Last but not least, there is one Lucky Die found on a balcony in Harborside. You can see its location on the map above, and to get it, you’ll have to jump on the wooden crate marked below and then onto the small balcony. The collectible is behind some crates and barrels on the balcony, marked for you in the following screenshot.