Tiny Tina’s Wonderlands Fearamid Lost Marbles are the trickiest collectibles you’ll have to find before fighting the last boss in the video game developed by Gearbox Software. That’s because, unlike the Lucky Die Chests and the hidden Lore Scrolls, the Lost Marbles in Fearamid appear on your map, but they are in places that are hard to reach.
Where To Find the Fearamid Marbles
In Fearamid, you’ll need to find and smash two Lost Marbles, and as with all marbles we already covered, let’s start with the collectibles locations map below. As you can see, these are found towards the end of the area, just before facing the Dragon Lord.

Lost Marble #1: Under a Wooden Platform
For the first Lost Marble in Fearamid, start from The Fearamid – Catwalk To Obliteration fast travel point, and follow the wooden ramps up. The moment you exit the temple, you’ll see a bridge and, on the right side, a power cable. Cross the bridge, then drop on the cable (pictured).
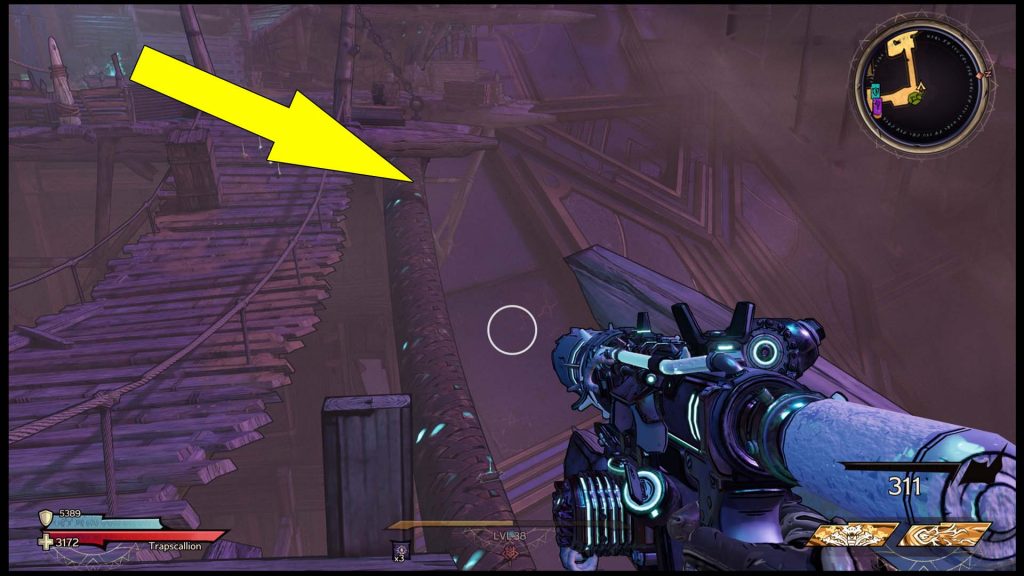
Now, cross the cable, collect the Lore Scroll, then look under the wooden platform. Here, you’ll see the first Lost Marble.

Jump on the platform where the Marble is found and smash it to get the Garderobe Gold Chrome Armor Color.
Lost Marble #2: Near a Metal Platform
The second of the two Fearamid Lost Marbles is easier to get. You’ll find it after reaching the Soul Collection Nexus. Clear the area, follow the hallway with many obstacles, moving towards the boss room and The Fearamid – Final Steps fast-travel point. Eventually, you’ll get to another corridor, and you’ll see two engines. Look for the Lost Marble in the area behind the floor (marked below).
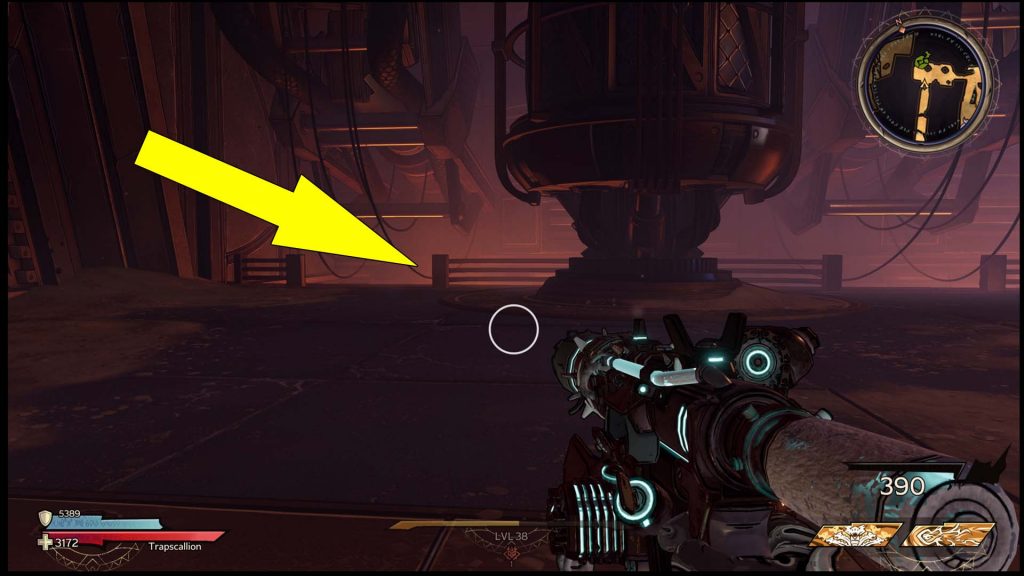
Crouch and drop to the area to get close to the Lost Marble. Smash it, and you’ll get the Royal Oil Chrome Armor Color.

