Besides the Lucky Dice, which you can find within the Wonderlands regions (all of them listed here), there are also 22 Tiny Tina’s Wonderlands Overworld Lucky Dice that can help you reach 100% Overworld progress. The Overworld Lucky Dice follow the same logic as all other chests, meaning that they do not appear on your map, and because of this, they can be pretty challenging to track.
Where To Find the Overworld Dice Chests
For this guide to be as helpful as possible, let’s start with the Overworld Lucky Die locations map, which pinpoints the spots you’ll have to reach for these collectibles in the video game developed by Gearbox Software. As you can see, they are scattered all around the Overworld region.
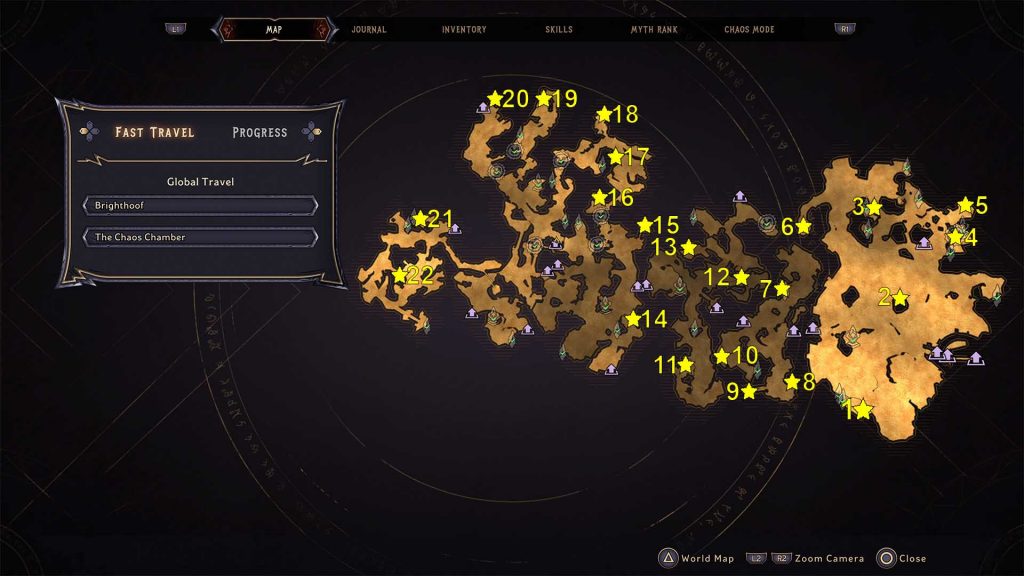
It is worth knowing that you’ll have to complete side-quests for some of them, while for other Lucky Chests, you’ll need to finish encounters. Therefore, these are best approached after you finish all Overworld side quests so you can have full access to the locations you’ll need to reach.
Lucky Die #1: On a Hill
The first Lucky Die on the map above is on top of a hill in the desert area known as Parched Wastes. You’ll have to complete the small dungeon and finish the encounter to get it. Once you do this, you’ll reach the said hill via the upper door.
Lucky Die #2: On Top of a Soda Can
The second Overworld Lucky Die on the map is pretty easy to find. It sits on a soda can in the middle of the desert area. Climb the can and collect it.

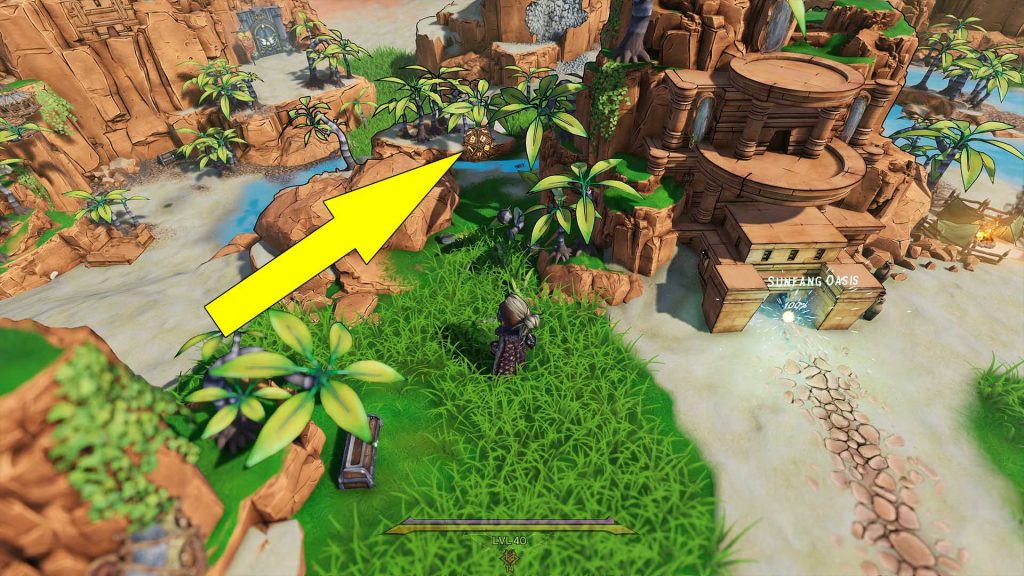
Lucky Die #3: Behind a Barricade
For the next Overworld Die, head to the entrance to Sunfang Oasis. While facing the transition point, on the left side is the Chest. Smash the wooden barricade to claim it.
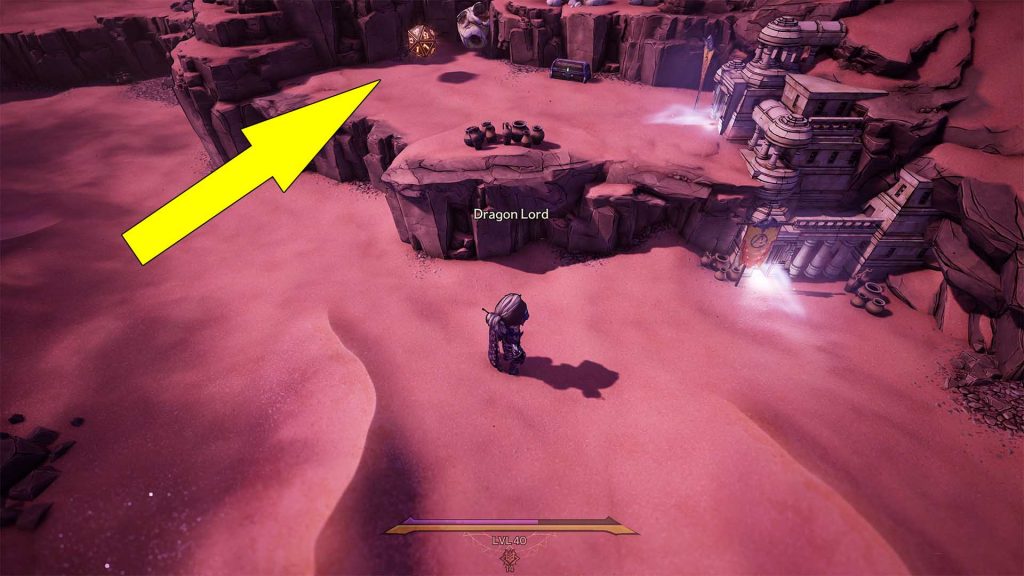
Lucky Die #4: Near Shrine of Crazed Earl
For the 4th Tiny Tina’s Wonderlands Overworld Die Chest, you’ll have to complete another encounter. You can see the location on the map above, and when you get to the spot I have marked, enter the dungeon. Once you finish it, you’ll end on the hill where the Chest awaits. Collect it, then unlock the Bottlecap Shortcut.
Lucky Die #5: Behind a Red Barrier
From the previous Chest, only several steps away is another Lucky Die. It sits behind a magic barrier you can smash.

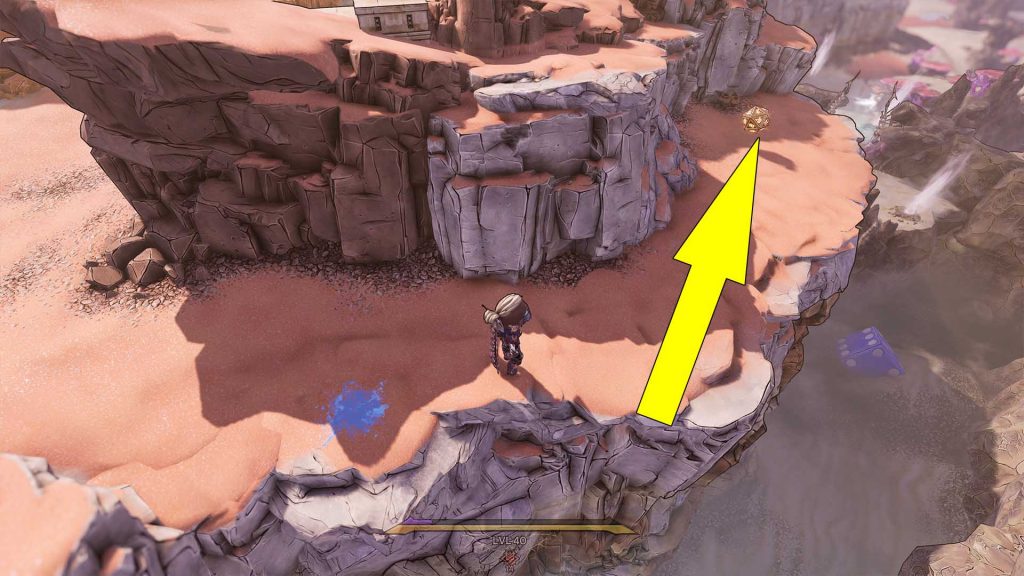
Lucky Die #6: At the Edge of the Mountain
The sixth Overworld Lucky Chest sits at the mountain’s edge. Be careful because you’ll be ambushed while trying to get it.
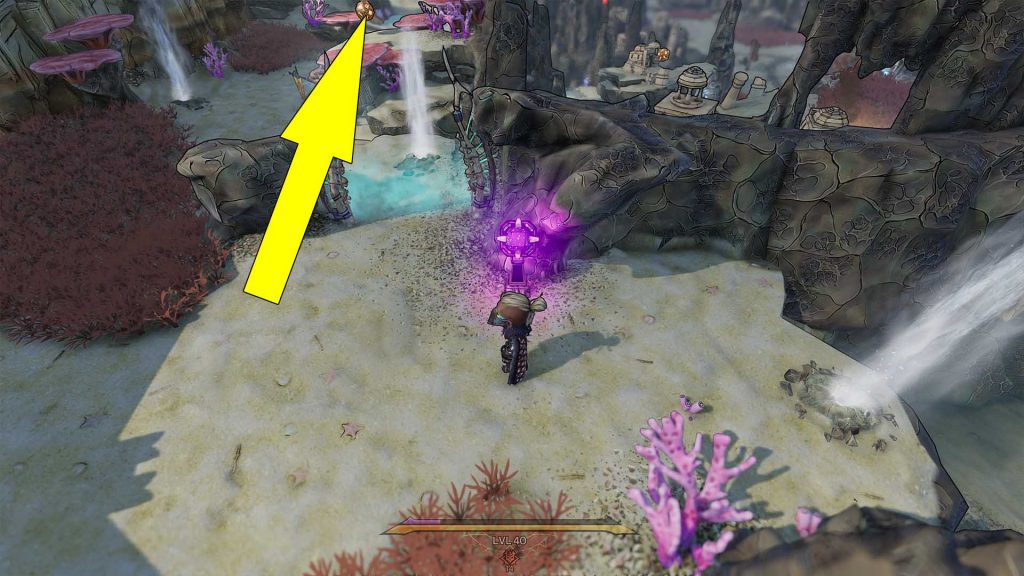
Lucky Die #7: Behind a Barrier
After the previous Chest, jump to the area below, and you’ll see the 7th Die on the map. This one sits behind a magical barrier you can remove by interacting with the pink switch; however, you won’t be able to do this unless you finish The Son of a Witch quest. After removing the barrier, use the jump pad to get the Die.
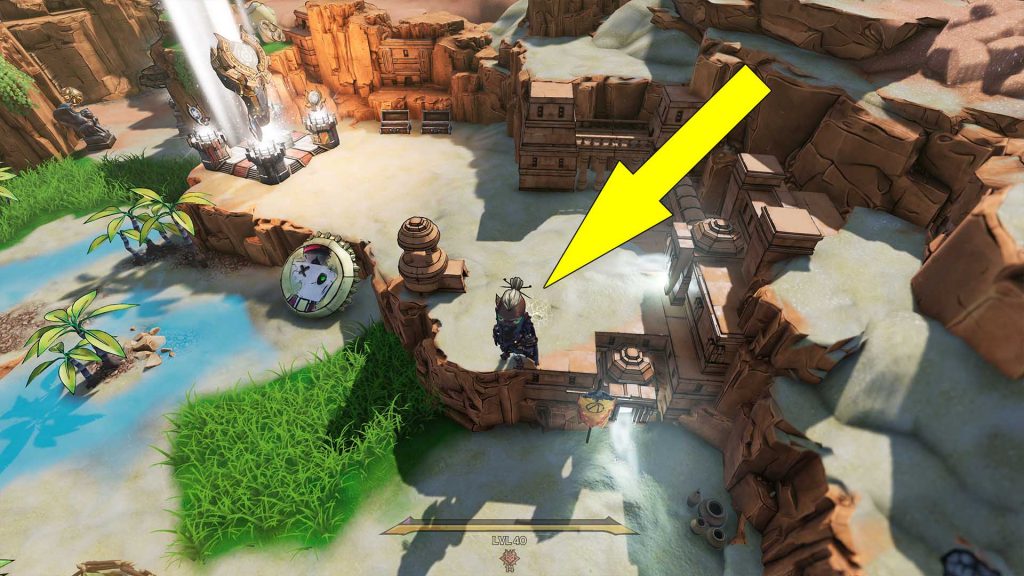
Lucky Die #8 On a Red Coral
The next Die Chest sits on a red coral. This one can’t be accessed from the ground, so you’ll have to drop on the coral from the area above. You can see the drop point in the following screenshot.

Lucky Die #9: On a Mountain Ledge
From the previous Chest, only several steps away, you can see the next one. It sits on a ledge above a lava pit. To get it, slowly head to the area between the pillars, and you’ll see an invisible bridge. Cross it and claim the Chest. Finish the Lens of the Deceiver quest if the bridge doesn’t spawn.

Lucky Die #10: Near a Shortcut
For the next Die, all you need to do is head to the location I have marked for you on the map above. You’ll see it sitting near an eraser that acts as a bridge.

Lucky Die #11: On a Cliff Behind a Barrier
The 11th Overworld Die is behind another magic barrier you can deactivate once The Son of a Witch quest is complete. Go around the stone pillars, press the switch, and claim the Lucky Die.

Lucky Die #12: Behind an Invisible Bridge
Once you finish the Lens of the Deceiver side-quest, you can get the 12th Lucky Chest on the map. It’s on top of a cliff, but to get to it, you’ll need to complete the said quest so you can cross the invisible bridge.

Lucky Die #13: Behind a Smoke Barrier
After getting the previous collectible, head to the next marker and look for the Die in my screenshot. It sits at the edge of the cliff behind a red smoke barrier you can smash.

Lucky Die #14: On a Hill Near Grindanna’s Shrine
Upon entering the area known as Unfathomable Fathoms, you’ll find another Lucky Chest on a hill close to the Shrine of Grindanna. Press the pink switch (after The Son of a Witch quest) to remove the barrier and claim it.

Lucky Die #15: Behind an Invisible Bridge
Once you finish the Lens of the Deceiver, you’ll be able to get the 15th Overworld Lucky Die chest at the location marked above. Cross the invisible bridge to collect it.

Lucky Die #16: Behind a Bottlecap Shortcut
The 16th Die is on a hill behind a bottlecap shortcut. The first time you get here, you’ll have to finish an encounter in the small dungeon near the shortcut. Upon exiting the area where the Chest is found, make sure you hit the bottlecap first, then get the collectible.

Lucky Die #17: On a Hill
The next Overworld collectible is probably the most accessible. It sits on a hill near some trees, and all you need to do is smash it.

Lucky Die #18: Behind a Mist Barrier
Several steps away from the previous Chest is the next one. You’ll see it in a small canyon, and first, you’ll have to smash the branches, then the red barrier.

Lucky Die #19: On Top of a Hill
The 19th Overworld collectible is on top of a hill behind another barrier you won’t be able to lower unless you finish The Son of a Witch quest. To get it, you’ll have to complete a dungeon the first time you try accessing this area; then, you’ll be able to unlock another bottlecap shortcut. The Die is on the other side.

Lucky Die #20: Near Snoring Valley Transition Point
For the 20th Lucky Die, you’ll need to learn the ability to smash objects in the Overworld area. This means that you’ll have to finish the Hero of Brighthoof quest. Once you complete the quest, smash the tree trunks next to the Snoring Valley transition point.

Lucky Die #21: Near Mount Craw Transition Point
The last two Lucky Dice in Overworld are in the area known as Haemon’s Gumline. One of them is on top of a snowy hill near the Mount Craw transition point, and to get it, you’ll have to finish an encounter or the small dungeon nearby.

Lucky Die #22: Next to a Large Die
Last but not least, the 22nd Die on the map is on top of a mountain, and you’ll need to finish the Lens of the Deceiver quest to see the invisible bridge in my screenshot below. Next to this Chest is a giant Die.

