Shattergrave Barrow Lucky Dice are the only Tiny Tina’s Wonderlands collectibles you have to find when you explore the graveyard area looking for a way to stop the Skeleton invasion in the video game developed by Gearbox Software.
A relatively small and linear region, Tiny Tina’s Wonderlands Shattergrave Barrow doesn’t include other collectibles or challenges, except for the 12 Lucky Dice. Following the Queen’s Gate guide, I’ll tell you where to find all 12 Shattergrave Barrow collectibles to get your hand on even more loot. Because you know you want it.
Where To Find the Shattergrave Barrow Dice Chests
Before starting, it’s worth mentioning that it is recommended to get the Lucky Chests in Shattergrave Barrow the first time you get to this area while playing the main quest that occurs here. Without spoiling the game, make sure you use the Shattergrave Barrow Lucky Die locations map below and get the collectibles as you progress through this region.
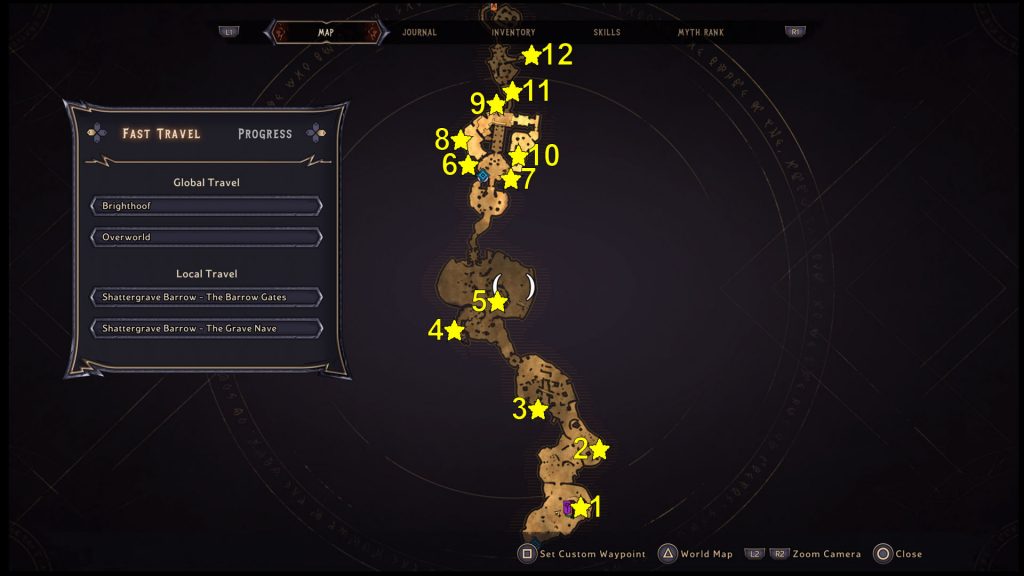
Obviously, if you need help with the chests marked on the map above, you can use the tips I have added for each of the collectibles in Shattergrave Barrow.
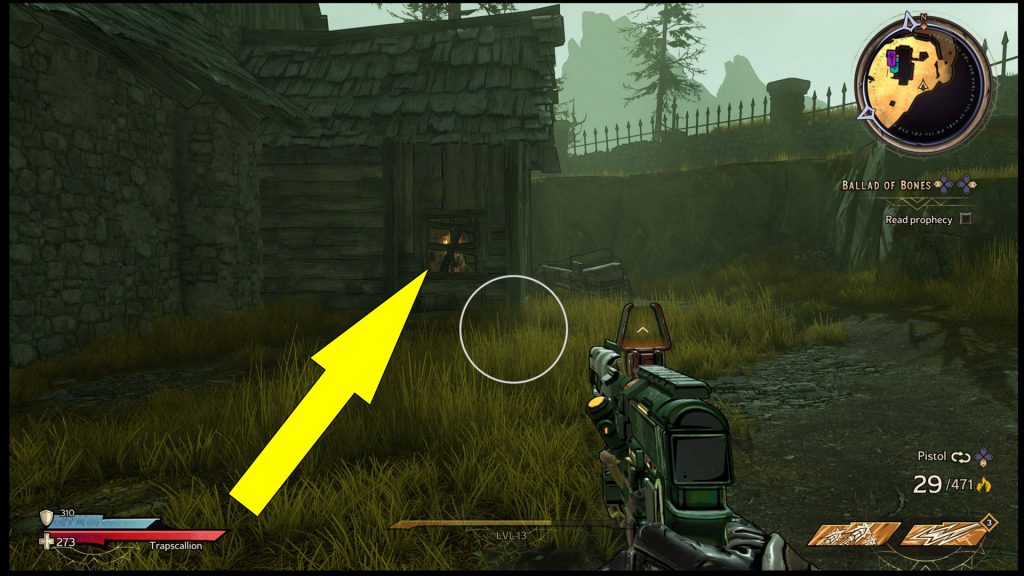
Lucky Die #1: Behind the Vending Machines
The first Shattergrave Barrow Lucky Die on the map above is behind the vending machines, and you can get it the moment you enter the graveyard. Head behind the large house where the vending machines are found, and you’ll see it through a small window. To get it, go around the corner and destroy the wooden planks.
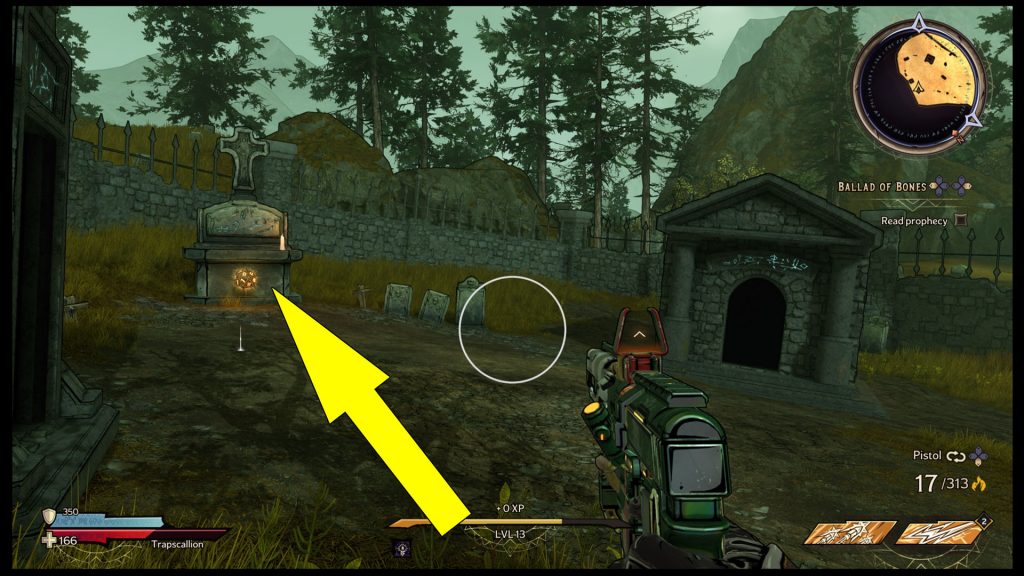
Lucky Die #2: In Front of a Gravestone
The second Lucky Die is found in front of a large gravestone on the right side of the graveyard as you enter Morhaim’s Crop. It’s pretty easy to spot because it’s in an opening.
Lucky Die #3: In a Grave
The next collectible is harder to find because it’s in a grave. Look for it at the location marked on my map above. This one is also in Morhaim’s Crop.

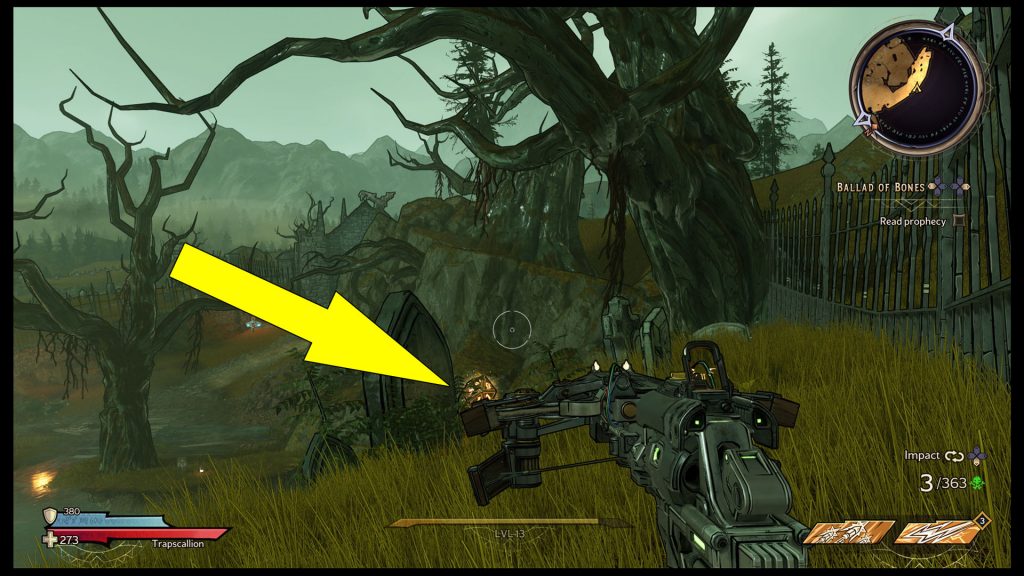
Lucky Die #4:In a Bush
Upon entering Bone Grove, you can find another Shattergrave Barrow Die collectible in a bush at the edge of the map. You have to climb several hills to spot it.
Lucky Die #5: On the Central Hill
The next Die is found in the same area as the previous one. Head to the central hill, where you can see a rather large tree. Climb to the top, then go around the edge, and you’ll spot it in the lower area.

Lucky Die #6: Outside the Church
As you continue to progress through this linear area, you’ll eventually reach the ruins of a large church. Before going inside, head left, and you’ll spot the next collectible near the exterior wall.

Lucky Die #7: In a Side Room
Upon entering The Grave Nave or the large church, while standing in the first room, you’ll see some crates on the right side. Destroy them to get the next Lucky Die found in a small room.

Lucky Die #8: On the Balcony
From the previous Lucky Die, head back to the main room, and while facing the altar, head left through the broken wall. In the next area, you’ll see a large chest and, close to it, a lower ledge where the next Die is waiting.

Lucky Die #9: On a Wooden Platform in the Church
After you get the previous Die chest, keep following the ruins and, in the following area, remain on the top floor. The Lucky Die is on an upper platform on the left side, and you can reach it by crossing the room, then turning around and jumping on the small crate nearby.

Lucky Die #10: Near a Staircase
Once you cross the library, follow the objective marker, and you’ll eventually see a large gate on top of some stairs. Behind the crates near the stairs is the Lucky Die.

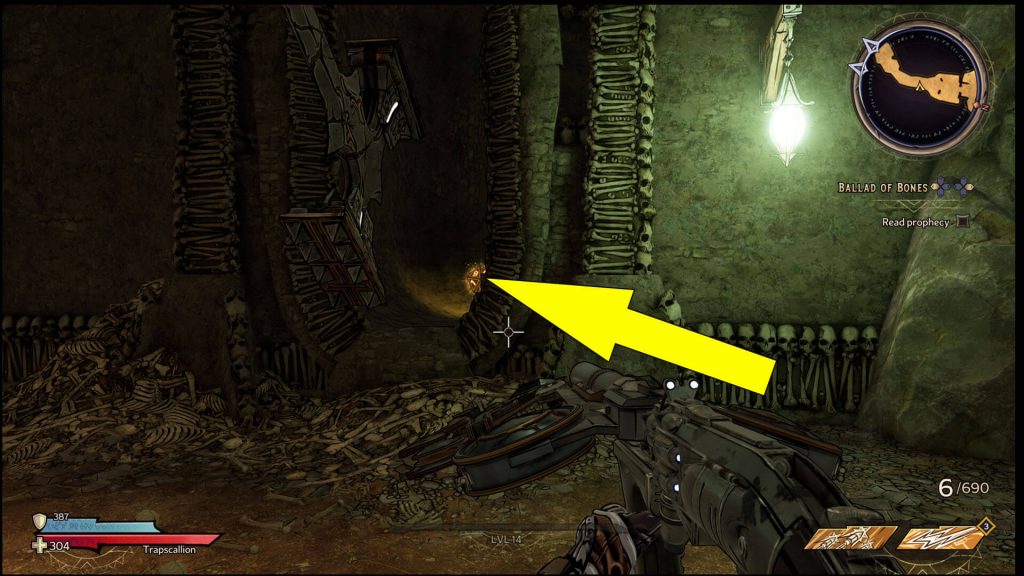
Lucky Die #11: In a Hole in the Wall
The next Shattergrave Barrow Die is very easy to miss, and it’s found inside the Sundercroft area or the underground tunnels. Look for it inside a hole in the wall where the large axe trap is swinging.
Lucky Die #12: In a Side Room Before Zomboss Fight
Finally, you have one last Lucky Die to find in the large room just before the Zomboss fight. The collectible is in a side room on the second floor, and you can easily climb the walls to get it.

