Fearamid Lucky Dice are probably the most accessible in Tiny Tina’s Wonderlands because the area is quite linear. These Fearamid collectibles count towards the 100% completion of the area, which means that you’ll have to find all nine of them. The good thing about the Lucky Dice in Fearamid is that they don’t require any side quests, meaning that you can find them while playing the main quest here without having to unlock new areas.
Where To Find the Fearamid Dice Chests
As you probably know from all previous Lucky Die locations guides, we’ll start with a map showing all Fearamid chests in this region. Following the same order as the one on the map, we’ll move from one Lucky Die to another, collecting all of them in a single run.

Lucky Die #1: On a Wooden Balcony
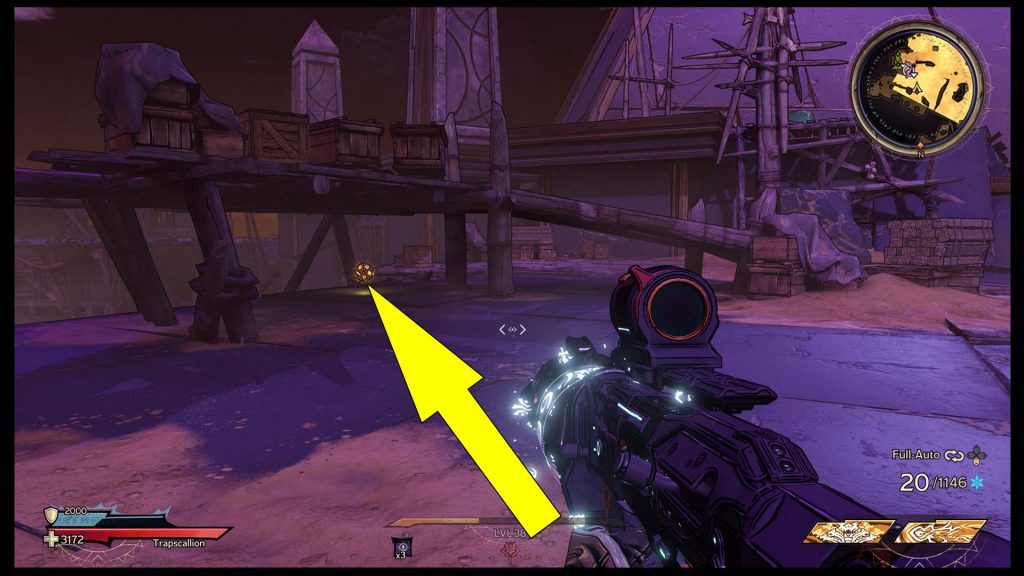
Starting from The Fearamid – Facing Fear fast-travel point, head inside the temple ahead, and when you reach the top of the stairs, you’ll see the center of the temple. Take a right turn to spot a wooden platform where the Rune Switch is found. While standing on it, you’ll see some invisible platforms spawning nearby. Jump on them to reach the other side of the temple, and on the balcony marked below, you’ll find the first Fearamind Lucky Die.
You’ll have to sprint jump from the large stone block below to get to it, and there is also a Lore Scroll nearby.
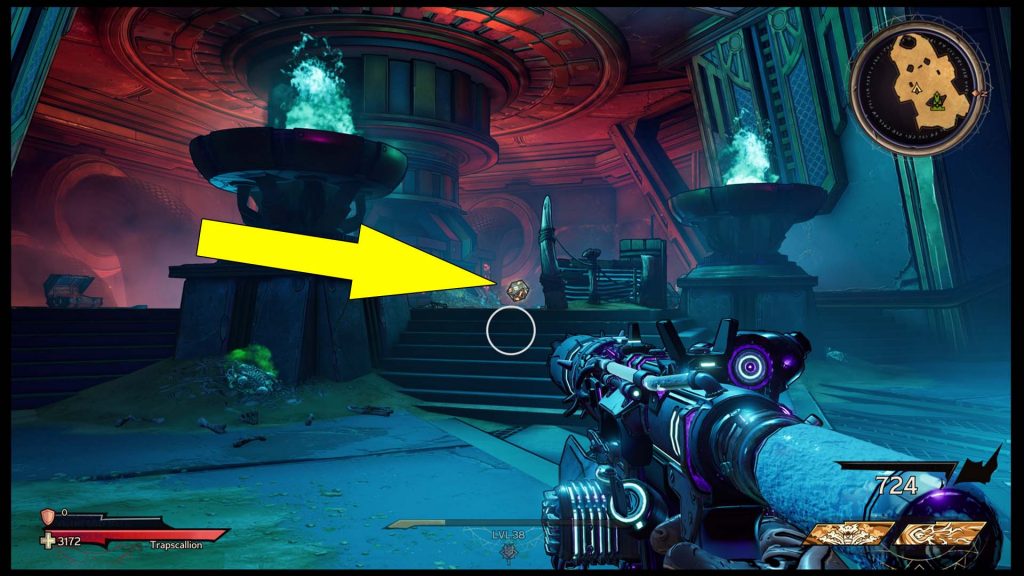
Lucky Die #2: Under the Central Platform
After getting the first Die, head back to the previous section and cross the bridge towards the central platform. Crouch and get under the large engine (with multiple wires) to spot the second Fearamind Lucky Chest.

Lucky Die #3: Under a Bridge
After you cross the central platform (there is only one possible path), push toward the third marker on the map above. Upon reaching the wooden bridge, drop below it, and you’ll see a wooden platform. Jump on it, then turn around to spot the third Fearamid Die chest. On the other side is the Fearamid Poetry Page.
Lucky Die #4: Beneath a Wooden Platform
The fourth Lucky Die is beneath a wooden platform; in the next section, you’ll reach after the previous bridge. You’ll have to turn around to spot it, and there are a lot of skeletons you’ll need to clear first.
Lucky Die #5: Near the Ancient Obelisk
For the next chest, you’ll have to cross a small room located north of the previous Die. So, instead of going through the hallway near the last Die, head north and explore the other one. Descend the stairs, and you’ll find the second Fearamid Scroll. Now drop to the area below (where the Ancient Obelisk is located) and look around to spot the Lucky Die pictured below.
Lucky Die #6: On a Lower Platform After the Elevator
Once you get the previous chest, use the pink jump pad to return to the upper section, then head back to the location where you found the fourth Die. Follow the long hallway with red lights, and you’ll get to The Fearamid – Catwalk to Obliteration fast travel point. Follow the ramps up, then use the elevator. As you step out of the elevator, you’ll see a lower section on the right side. Drop down, and the next Lucky Die will be on the platform you can reach by walking on a pipe.
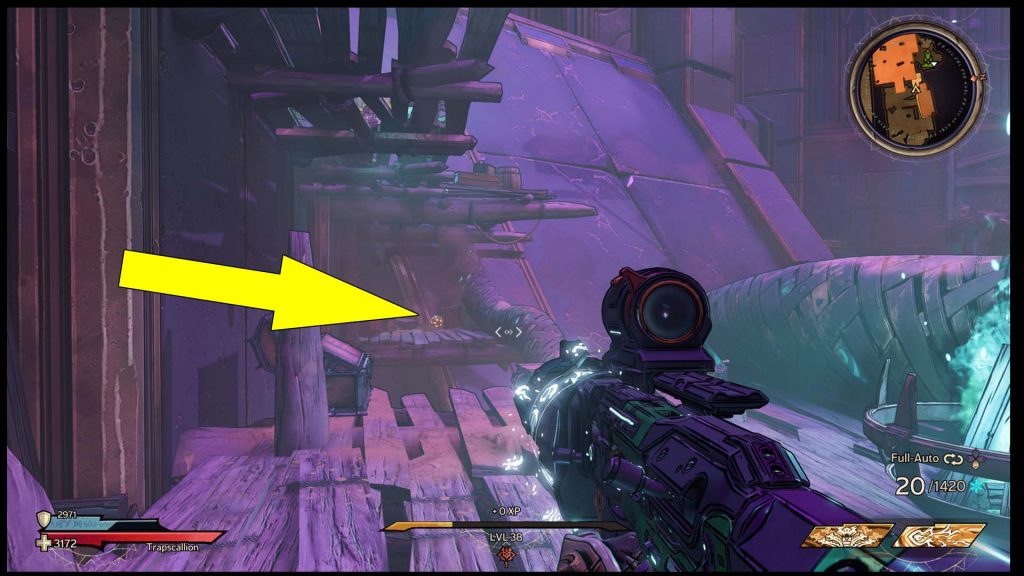
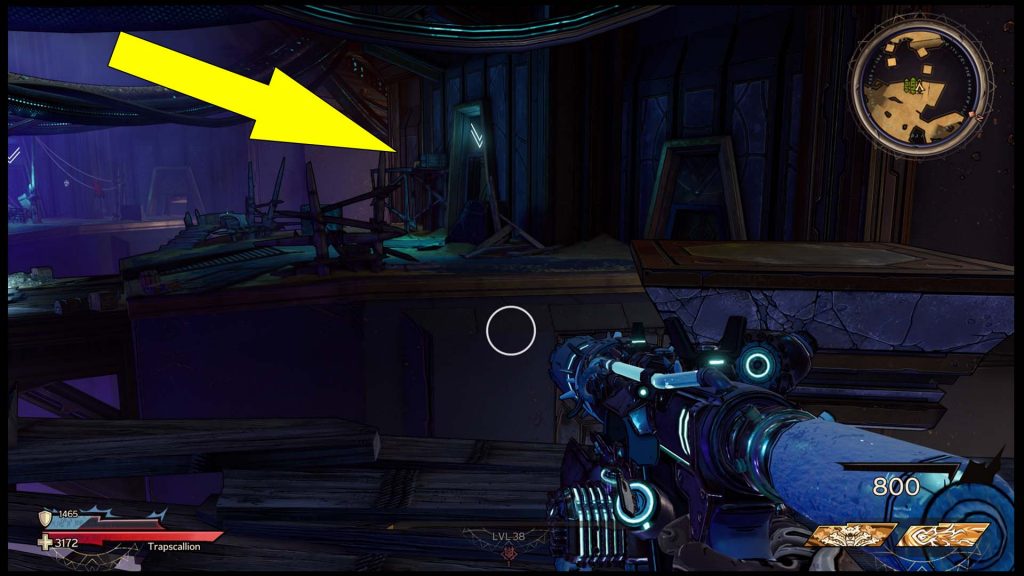
Lucky Die #7: On an Upper Platform After the Elevator
After the previous Lucky Chest, jump back to the elevator and use it again to reach the upper level. When you step out, look to your right, and you’ll see the next collectible on a wooden platform. Jump on the platforms to get to it.
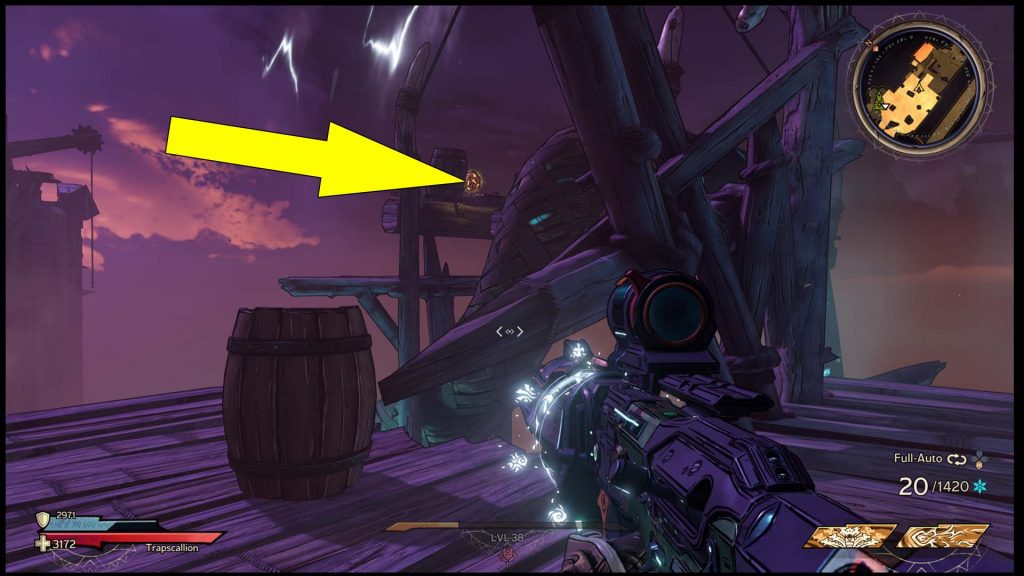
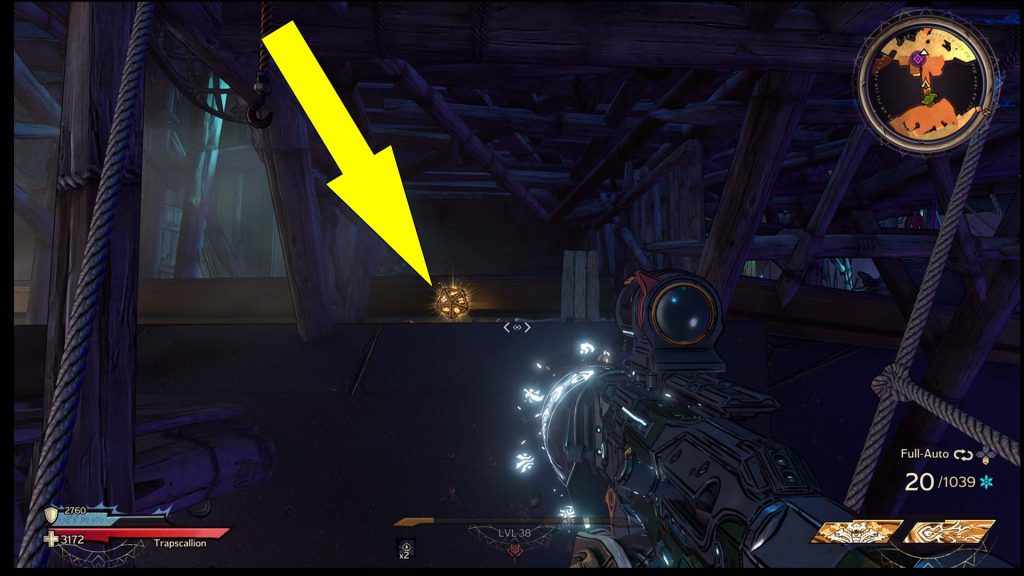
Lucky Die #8: Near a Pipe
For the next Fearamid Lucky Die chest, head through the next door near the previous collectible, and on the left side of the corridor, you’ll see another wooden platform near a pipe. Jump on it to get the chest.

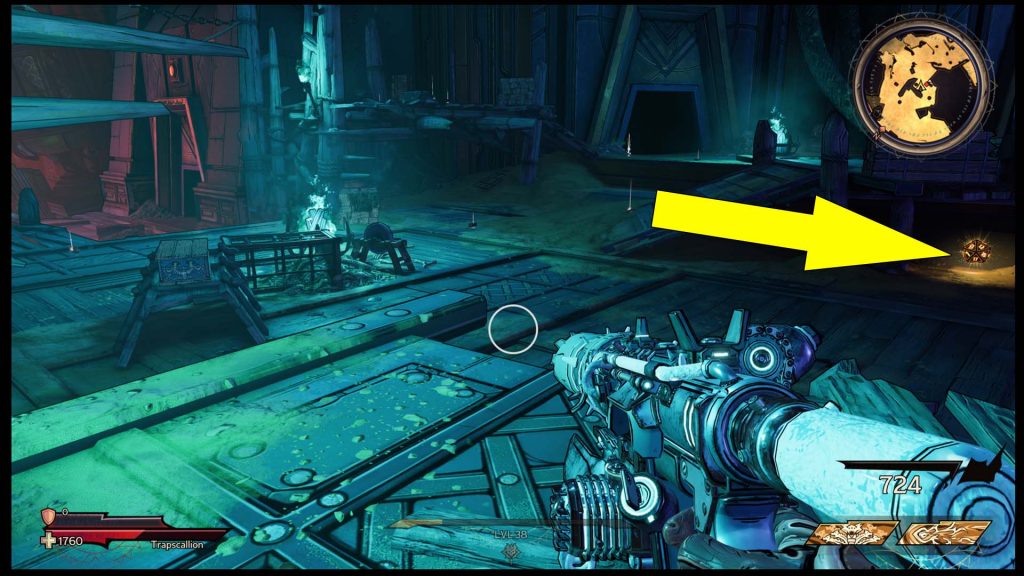
Lucky Die #9: In the Final Steps Area
The last Fearamid Lucky Die chest is also the most accessible because, most likely, you’ll see it during the catapult jump toward the Final Steps. Use the catapult to reach the upper section, known as The Final Steps, and after you land, look under the wooden platform where you landed.