Tiny Tina’s Wonderlands Karnok’s Wall Lucky Dice allow you to get your hands on extra loot, and they also provide experience points, thus helping you level up faster. Furthermore, the Karnok’s Wall Dice count as collectibles you’ll have to find if you aim to get 100% completion in the area known as Goblin-Cobbles Wall.
In the video game developed by Gearbox Software for PC, Xbox, and PlayStation, there are 20 Karnok’s Wall Dice Chests you’ll have to find, and throughout this guide, I’ll tell you where to look for them.
Where To Find the Karnok’s Wall Dice Chests
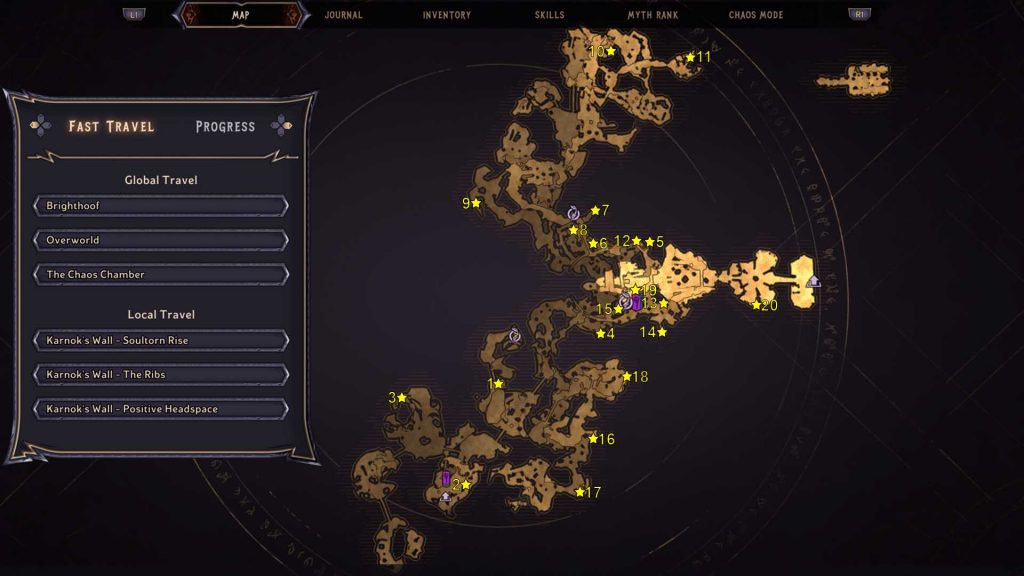
The following Karnok’s Wall Lucky Die locations map shows the general areas where you can find these collectibles. It is worth knowing, though, that like all other Lucky Dice in the game, the collectibles in Karnok’s Wall are best approached after you finish the main quest and all side-quests.
By doing this, you’ll unlock all areas so you can mop up the region before entering Ossu-Gol Necropolis.
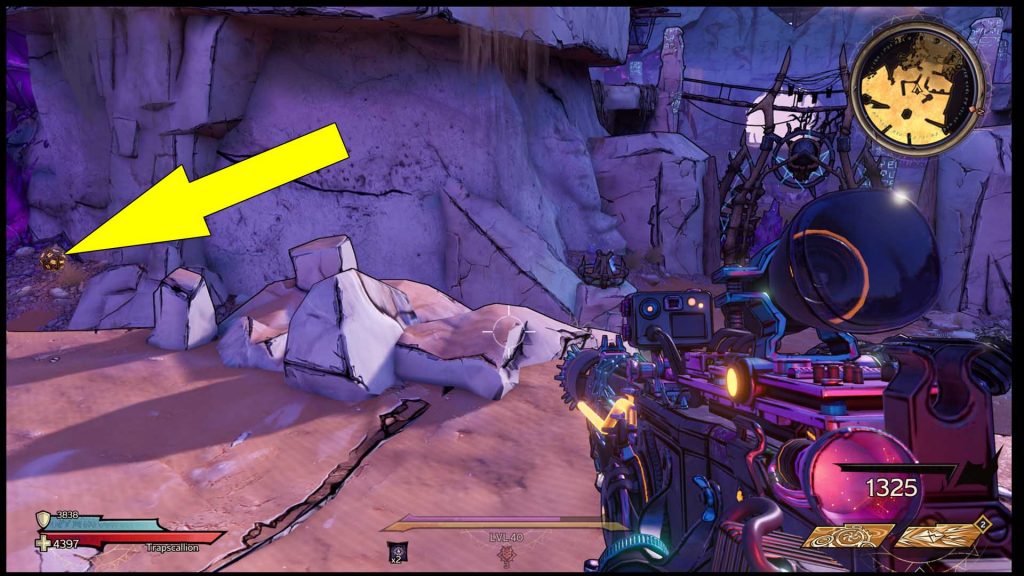
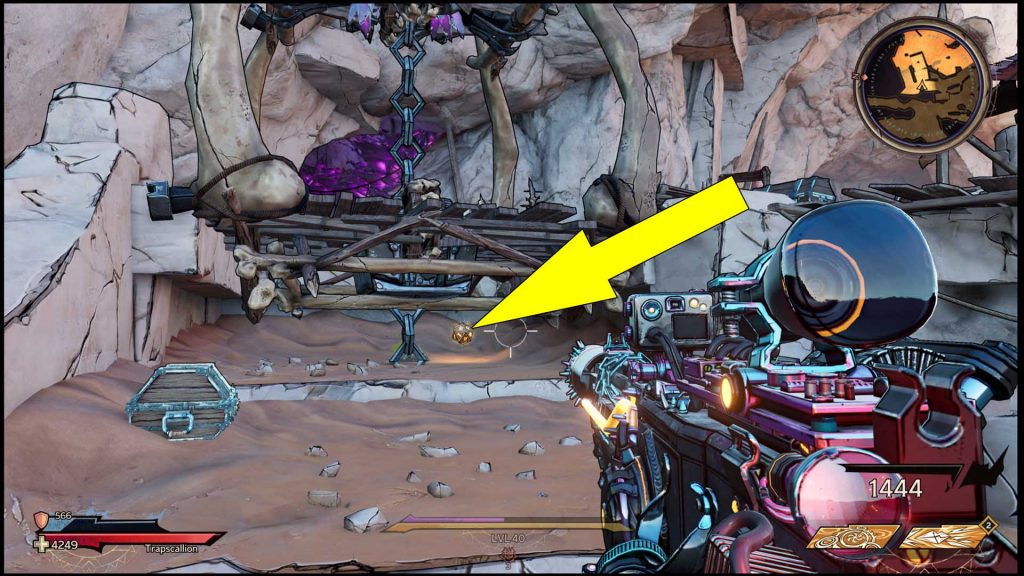
Lucky Die #1: On a Wooden Platform
Upon entering Karnok’s Wall, progress up the linear path, and before reaching the Karnok’s Wall – Soultorn Rise fast-travel station, you’ll find the first Lucky Die on a platform. Climb the crates nearby to get it.

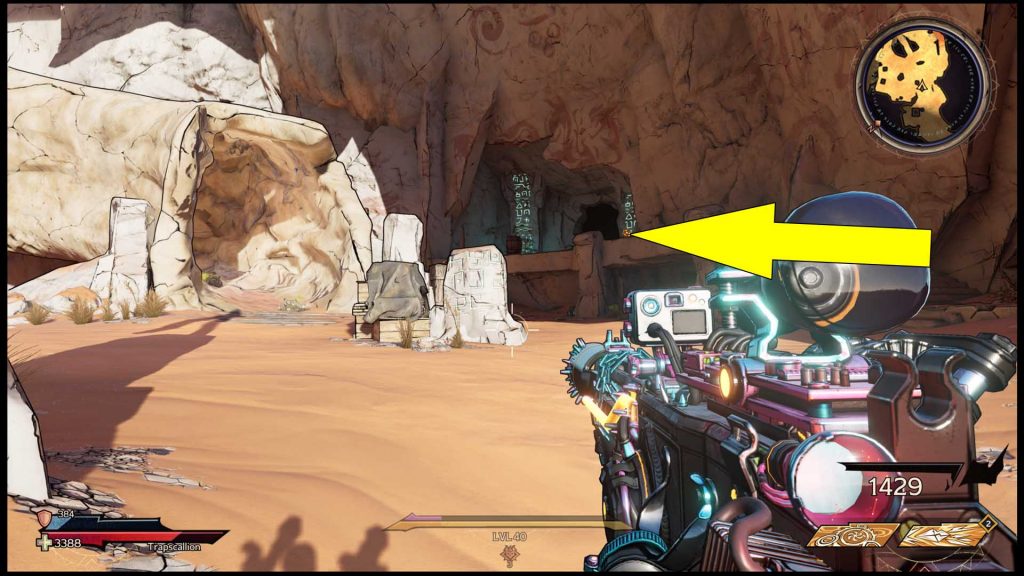
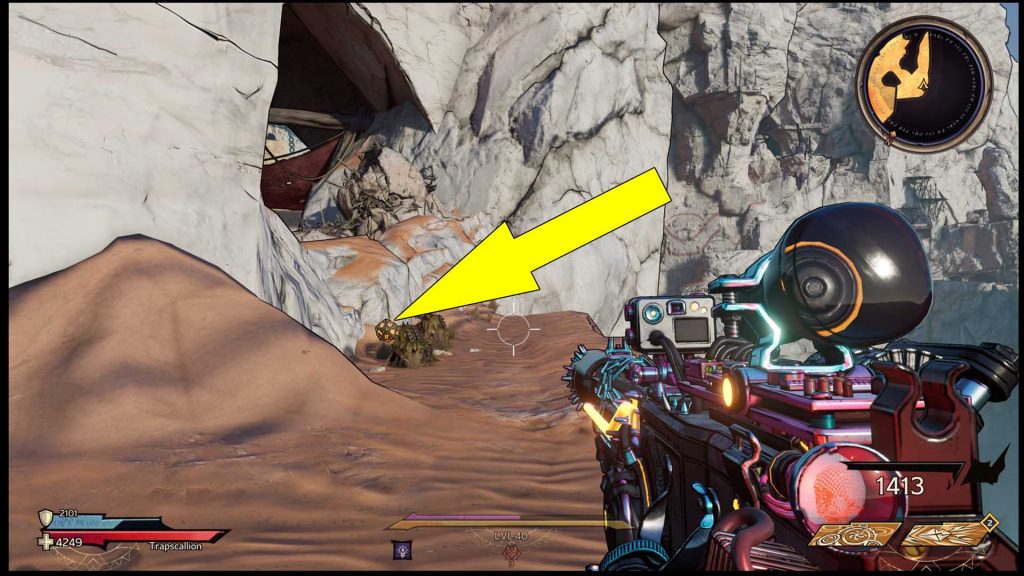
Lucky Die #2: Inside a Cave
After activating the first crystal from the previous Die, turn right and follow the stairs to the next area. On the other side of the first bridge, you’ll see the Ancient Obelisk. Go around it, cross the bridge, then you’ll see a cave that may be blocked by a force field. The next collectible is inside the cave, and you’ll need to complete a side quest to get it. Look for it on the left side as you enter. This area is known as Wyvern’s Wall and is on the lowest level.
Lucky Die #3: Behind the Wyverns’ Nests
To get the next Karnok’s Wall Lucky Die, head towards the area with the Wyverns’ nests. You’ll visit it during the Spell to Pay quest, and when you get here, you’ll see a pink jump pad. Use it to get to the upper section, then go right around the small mountain wall to find the collectible.
Lucky Die #4: Next to a Rune Stone
After getting the Die above, head back to the area before the Ancient Obelisk and move north to enter The Ribs region. While facing the first large rib, you’ll see another Karnok’s Wall Die on the right side.
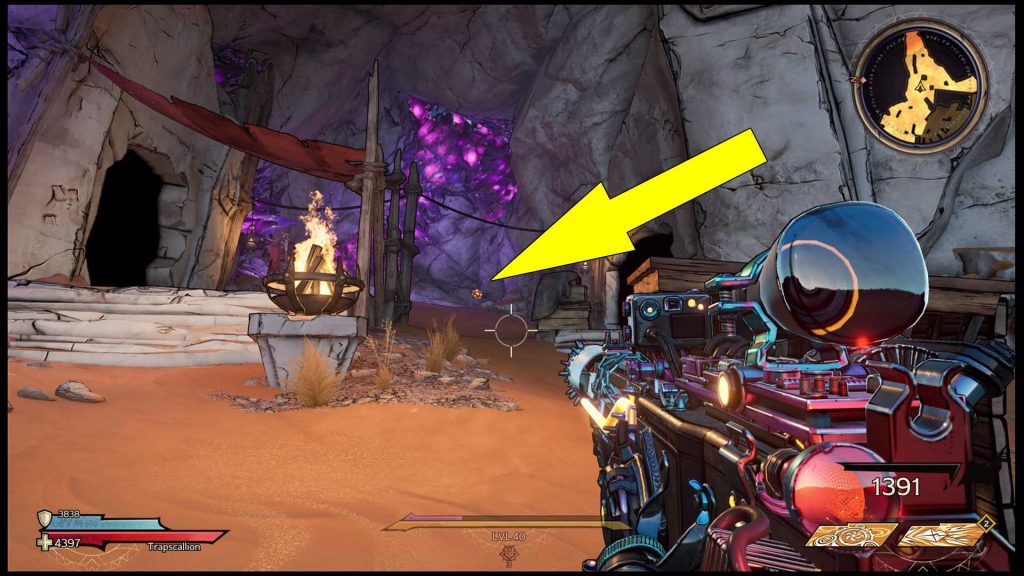
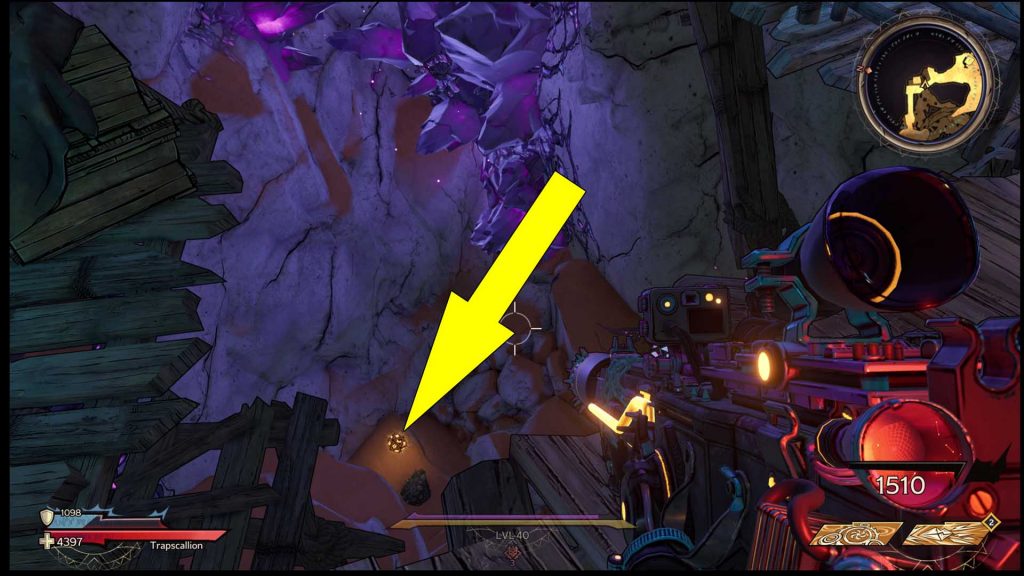
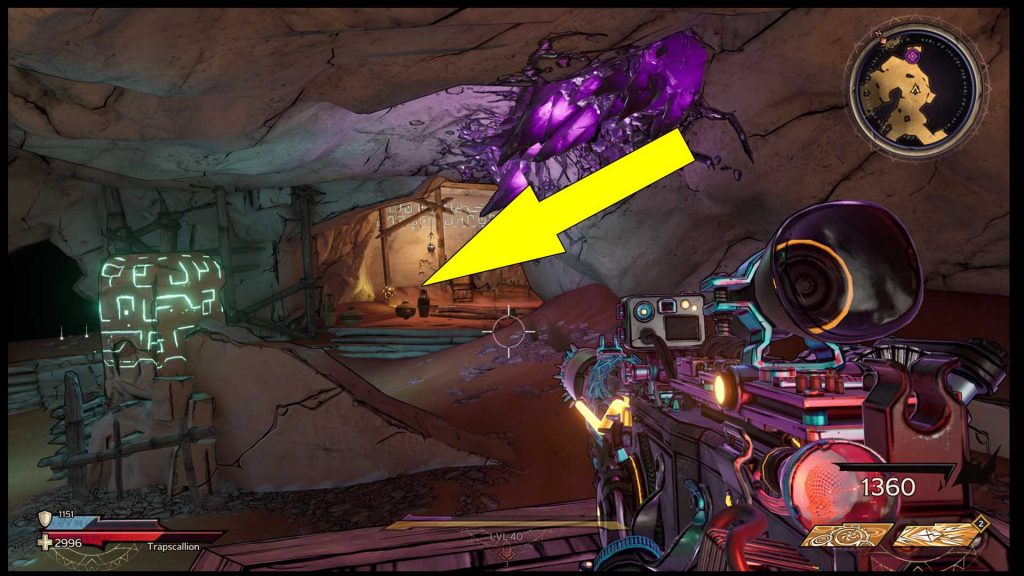
Lucky Die #5: Inside a Cave With Purple Crystals
Great job! Now get inside the rib and head up to the next hill. On the right side, when you reach the top, is a cave with some purple crystals. Here, you should be able to spot the next Die.
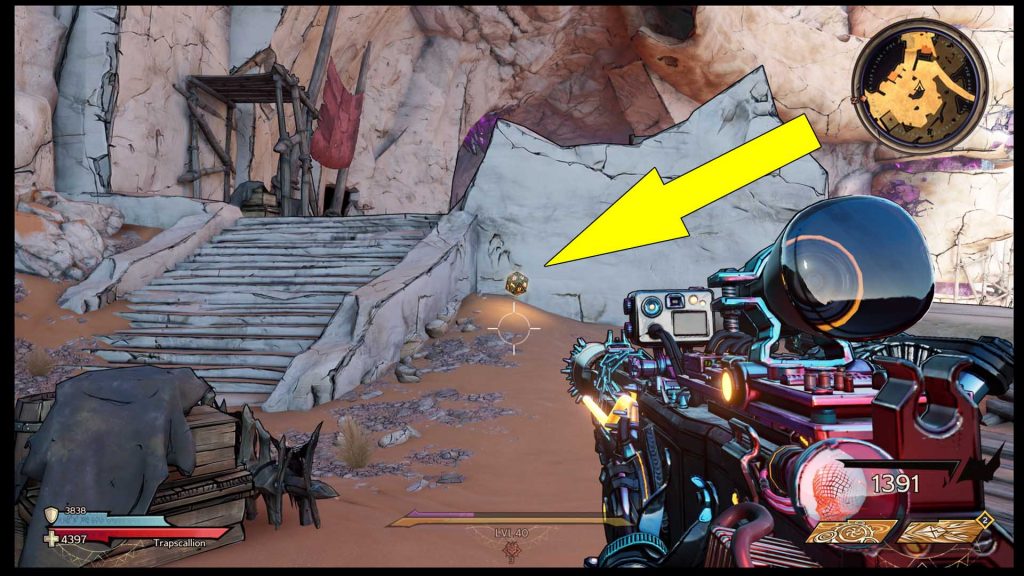
Lucky Die #6: Near Some Stairs
After you open the previous Chest, keep moving west up the hill, and several steps away, you’ll need to descend some stairs. On the left side is another Die.
Lucky Die #7: Behind a Barrier
While facing the elevator, on the right side, you’ll see a cave that is blocked by a magical barrier. To remove it, you’ll need to activate the switch on the right; however, you won’t be able to do this unless you progress The Son of a Witch main quest. Behind the barrier is the seventh Chest.
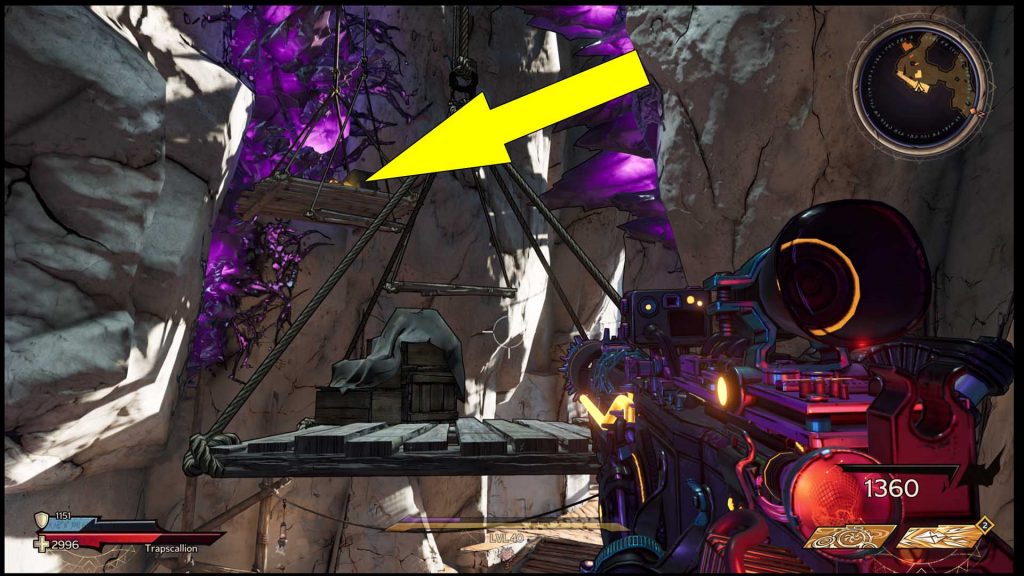
Lucky Die #8: Under the Elevator
Before taking the elevator to the next level, head down the stairs nearby and look under the moving platform. You’ll see the next Chest, and you can get it by pulling the lever on the elevator to send it up and then jump down.
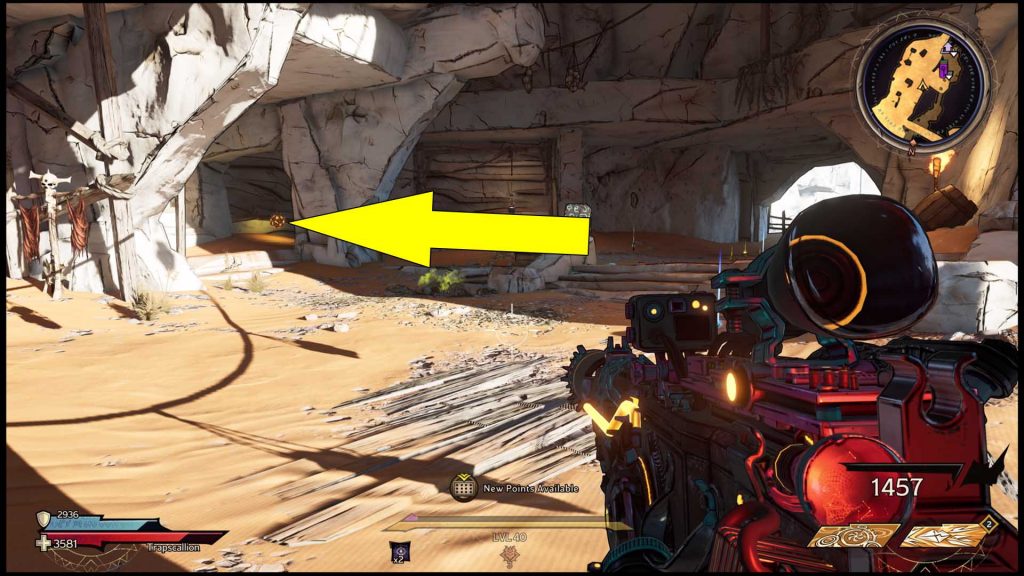
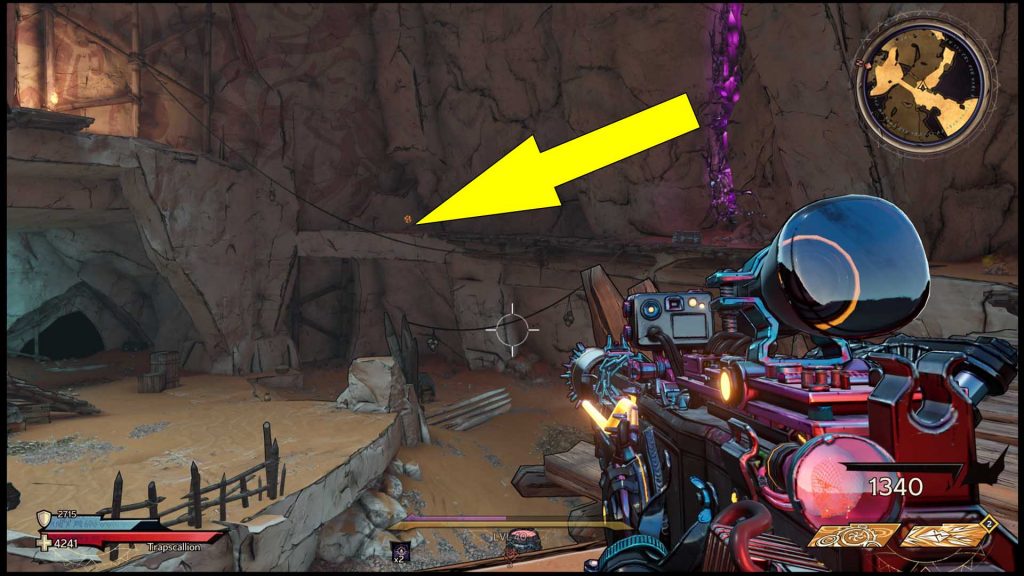
Lucky Die #9: At the Edge of the Map
The next Lucky Chest should also be retrieved before taking the elevator up. You’ll find it northwest of the previous one, on the lower level (jump all the way down). Follow the left passage, then turn left to see it at the cliff’s edge.
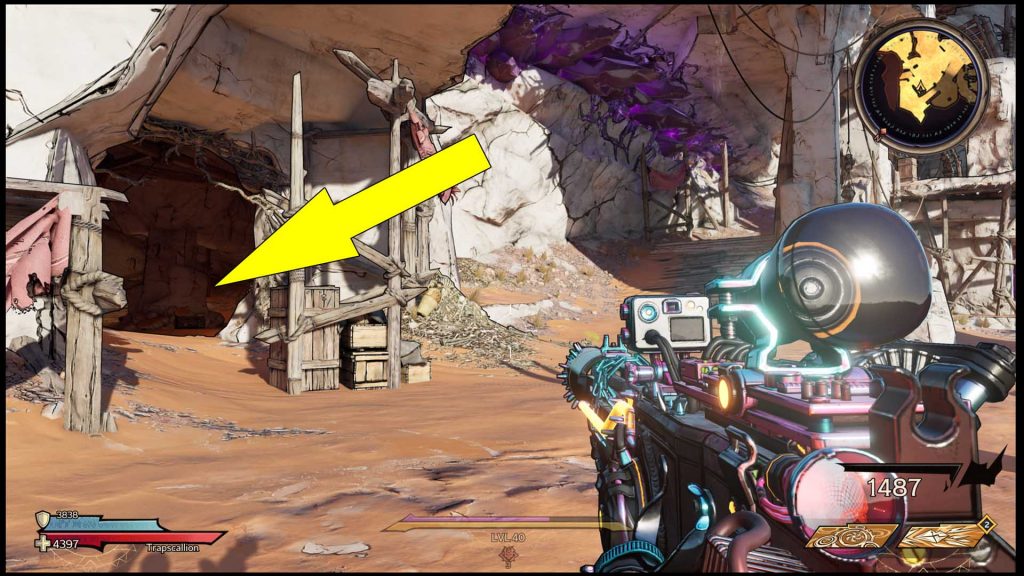
Lucky Die #10: In a Cave Behind Some Vines
Upon taking the elevator to the next floor, head north to enter The Dreadspine. This area is unlocked during one of the side quests. When you reach the northern side of the section, you’ll find a cave blocked by some vines. Melee them to get inside, then look for the Chest behind the pillar pictured below.
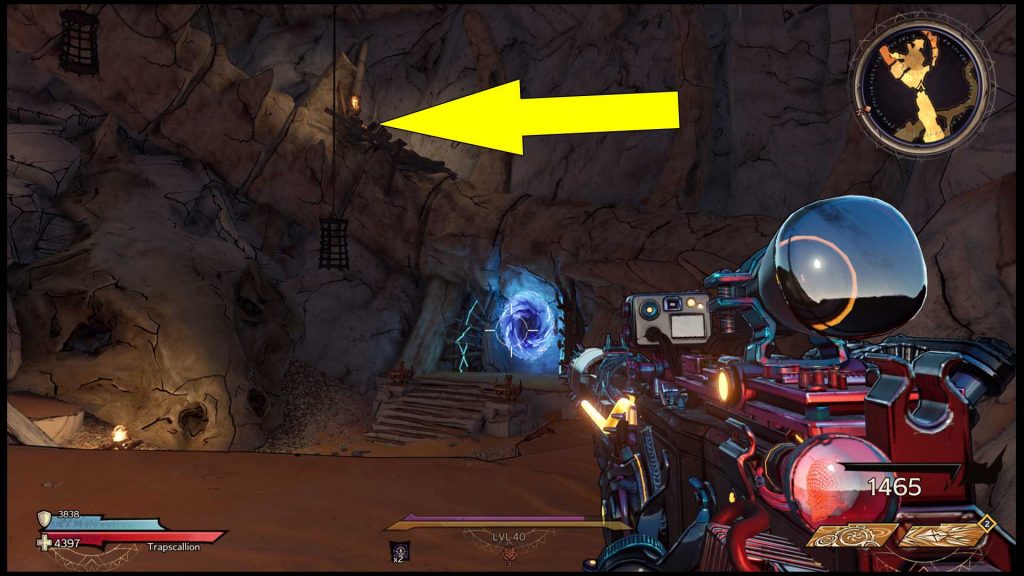
Lucky Die #11: On Top of a Spine
After you collect the previous Die, keep following the stairs on the right side (pictured above) and use the marker on the map above to get to the room where you can find the portal leading to the Shrine of the Tempest. Again, this room is accessed via a side quest. The Lucky Die sits on the spine above the portal. Walk on the spine to collect it.
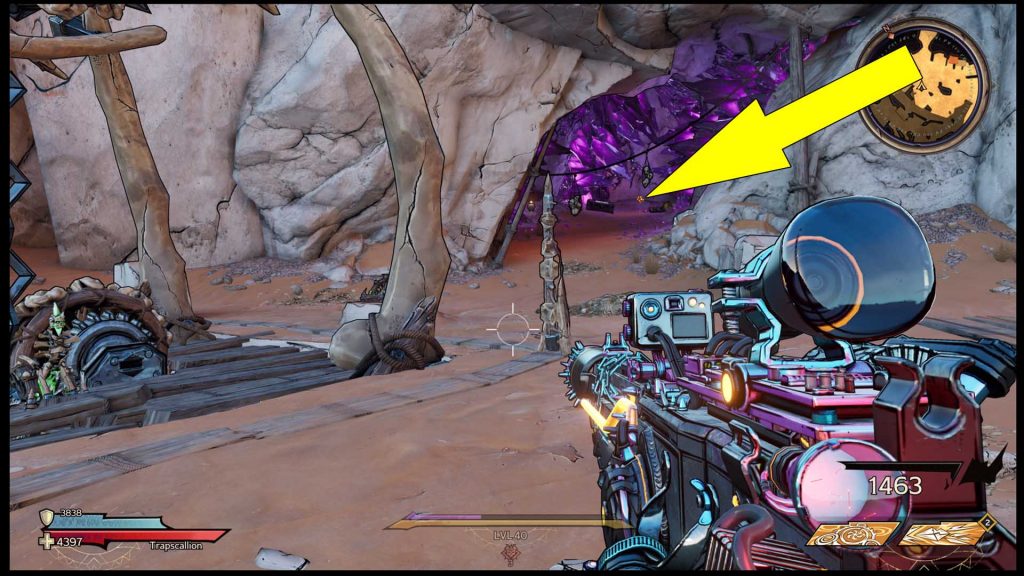
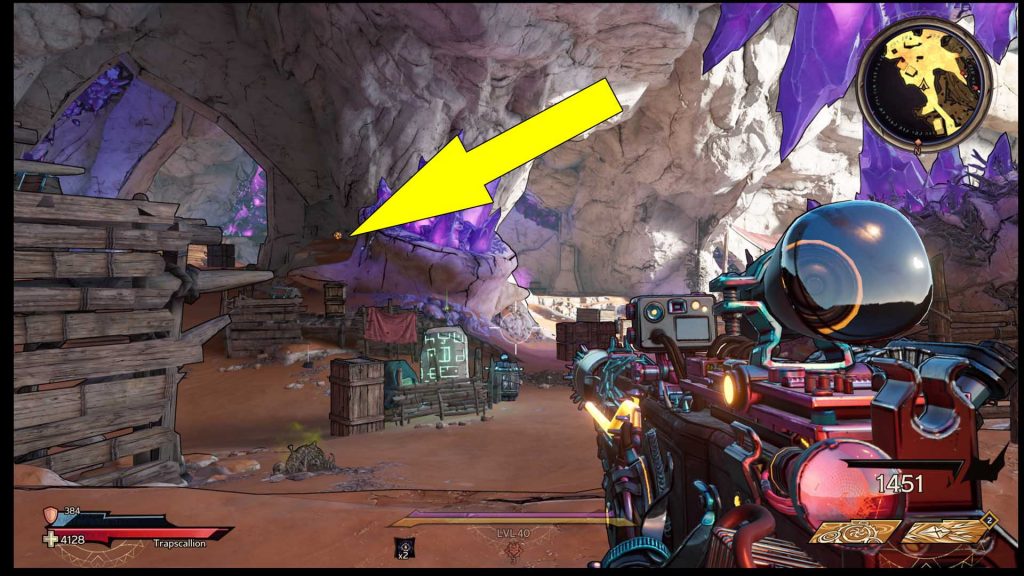
Lucky Die #12: At the Bottom of a Cave
For the next set of Tiny Tina’s Wonderlands Lucky Die, you’ll want to retrace your steps to the elevator or Karnok’s Wall – The Ribs fast travel station. While moving south, following the linear path, you’ll come across a large cave with purple crystals. When crossing the platforms, look down to see the next collectible.
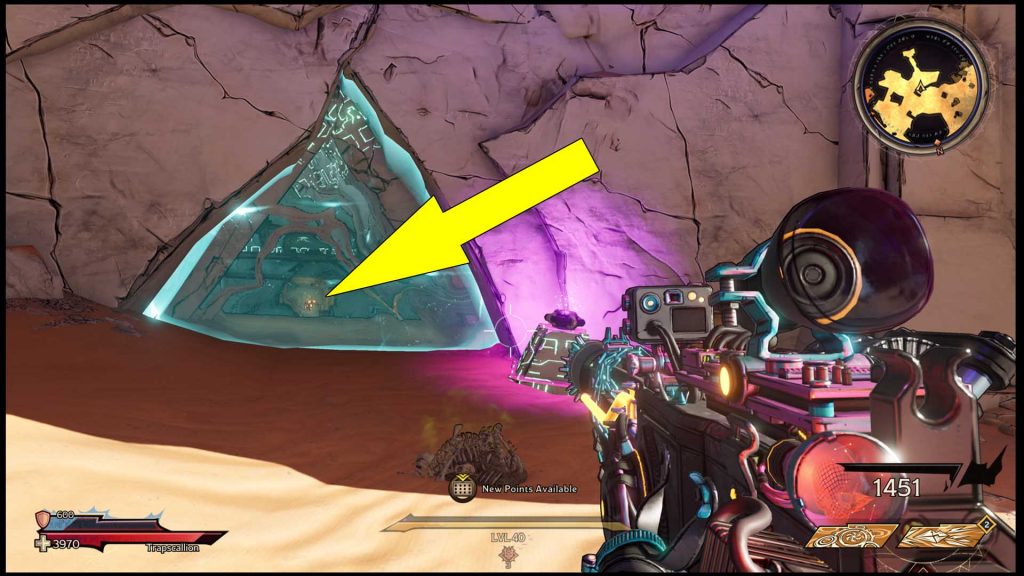
Lucky Die #13: Next to a Large Crystal
Retrace your steps to the upper section after the previous Chest and move south to enter a rather large cave. In front of you, next to a large crystal, sits the next collectible.
Lucky Die #14: Behind a Forcefield
Several steps south of the previous collectible is another Lucky Chest, but it’s behind a forcefield. To remove the forcefield, you have to interact with the switch on the right side. However, keep in mind that you won’t be able to do this until you complete the quest in this area.
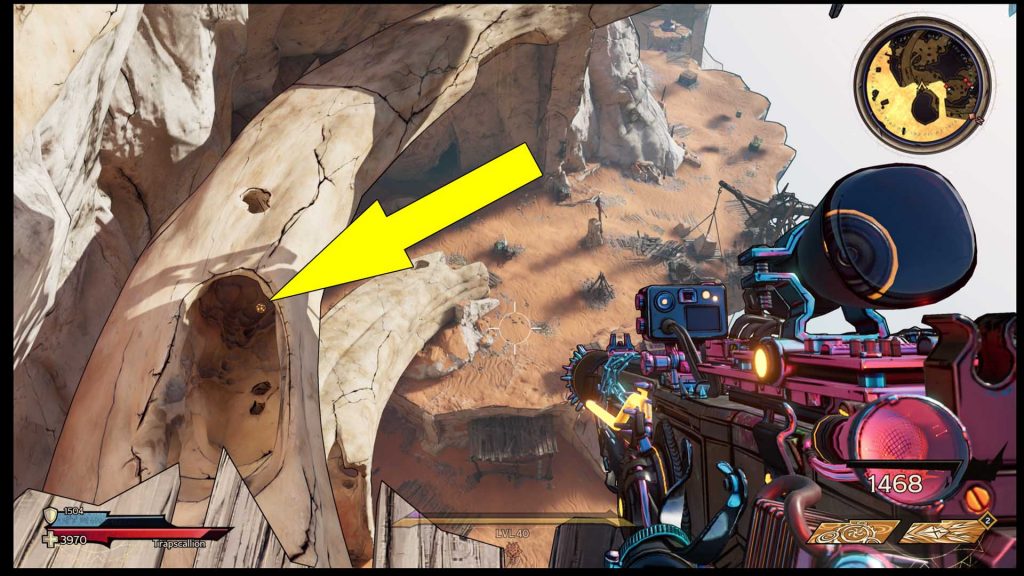
Lucky Die #15: Inside a Rib
The next Karnok’s Wall Lucky Die Chest is extremely hard to spot. Head west from the previous location and look down to spot a giant rib. Inside it is the collectible. To get this one, you’ll want to jump from the wooden platform above the rib.
Lucky Die #16: In an Alcove
As you keep pushing south from the previous area, you’ll eventually enter Fort Calcium, where you can find three additional Karnok’s Wall Lucky Dice. The first one is in the central area in a small alcove on the lowest level of the fort.
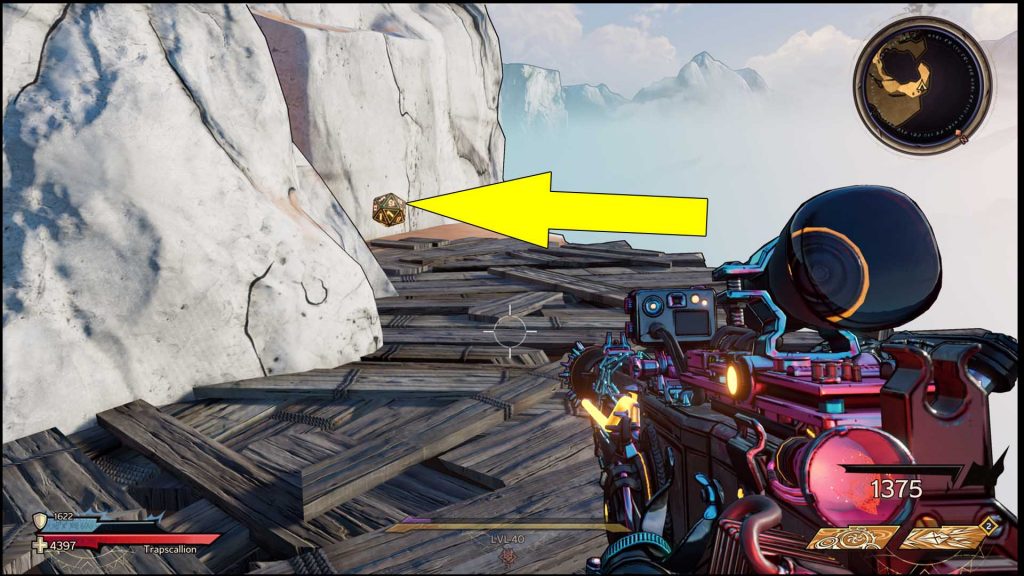
Lucky Die #17: On a Suspended Platform
South of the previous Chest is a large cave with multiple suspended platforms. Climb to the top (jump from one platform to another), and you’ll see the next Die.
Lucky Die #18: On Top of Fort Calcium
Upon reaching the highest floor in Fort Calcium, you’ll find a large cave. As you can see below, the collectible sits on the upper ledge.
Lucky Die #19: Above the Vending Machines
For the 19th Die in Karnok’s Wall, you’ll want to fast travel to Positive Headspace station. While near the vending machines, you’ll see some platforms. Climb the ladder near the burning fire, then head to the upper section to see some cannons and the collectible.

Lucky Die #20: After the Boss Room
Last but not least, after dealing with the boss in this area, you’ll need to find one last Chest. First, defeat Son of a Witch or Wastard, then head towards the transition point. Before going up the stairs, head left and around the corner; you’ll see the Die.