Crackmast Cove Rune Switch is by far the most difficult running challenge in Tiny Tina’s Wonderlands because, unlike all other Rune Switches, you can finish it only by following a specific path. In the video game developed by Gearbox Software for PC, Xbox, and PlayStation, the Crackmast Cove Rune Challenge is relatively easy to find, but beating the timer can be a bit frustrating.
Where To Find the Crackmast Cove Switch
On the map below, you can see the Crackmast Cove Rune Switch location in Tiny Tina’s Wonderlands, and you can also see that it is at a dead-end.

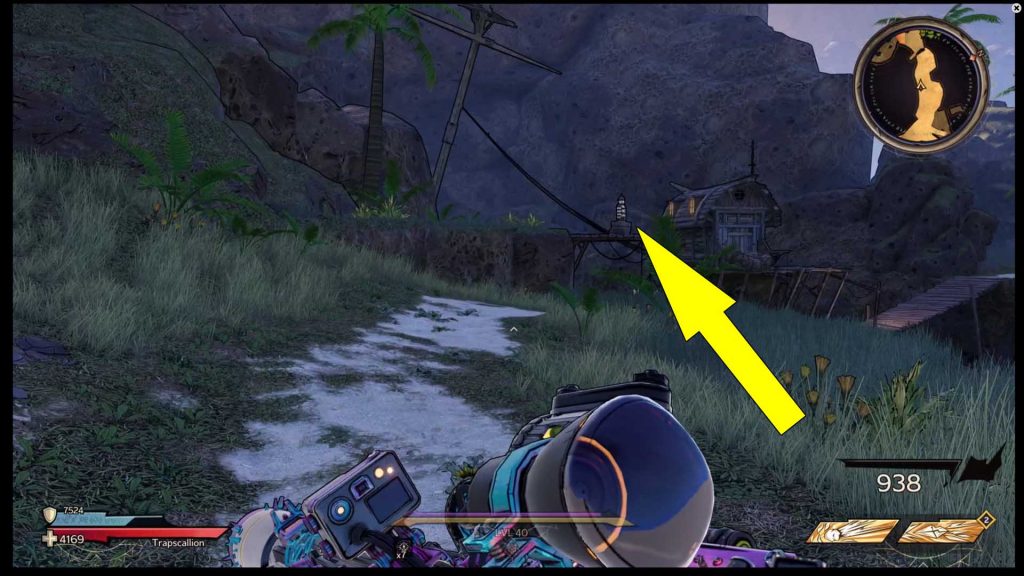
As said, the Rune Switch is easy to find because if you travel to Crackmast Cove – Scallywag Landing, you’ll be able to spot it on a platform while standing near the fast-travel station.

It goes without saying that, like all other Crackmast Cove collectibles, this challenge is best approached after you finish all side quests in the area. To get to Rune Switch near the Scallywag Landing, you’ll have to cross the Scallywag Landing town, which is, in fact, a pirate village.
The first thing you’ll want to do on your way to the Rune Switch is to clear Scallywag Landing because two of the beams you’ll have to reach are in this town, and you can’t allow the pirates to slow you down. So make sure you get rid of them, then go around the large gap near the town to activate the Rune Switch.
How To Complete the Rune Switch Crackmast Cove Challenge
The moment you activate the device and the Crackmast Cove Rune Swith Challange starts, you also have to start sprinting. Remain on the upper side of the mountain and follow the path northeast, heading towards the red house in Scallywag Landing. Your objective is to reach the back of the house marked below.

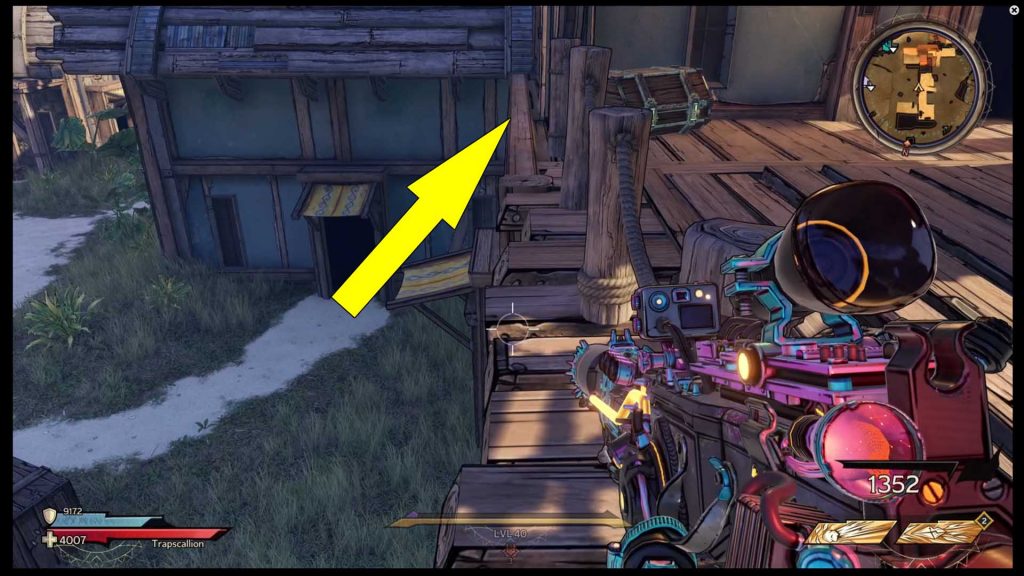
When you get to the back of the house, you’ll find several crates you can climb. Do so, then jump on the roof above, heading left. When you climb the next platform, shoot one of the wooden crates in the distance, then wait for the air streams to stop; otherwise, you’ll be pushed down.

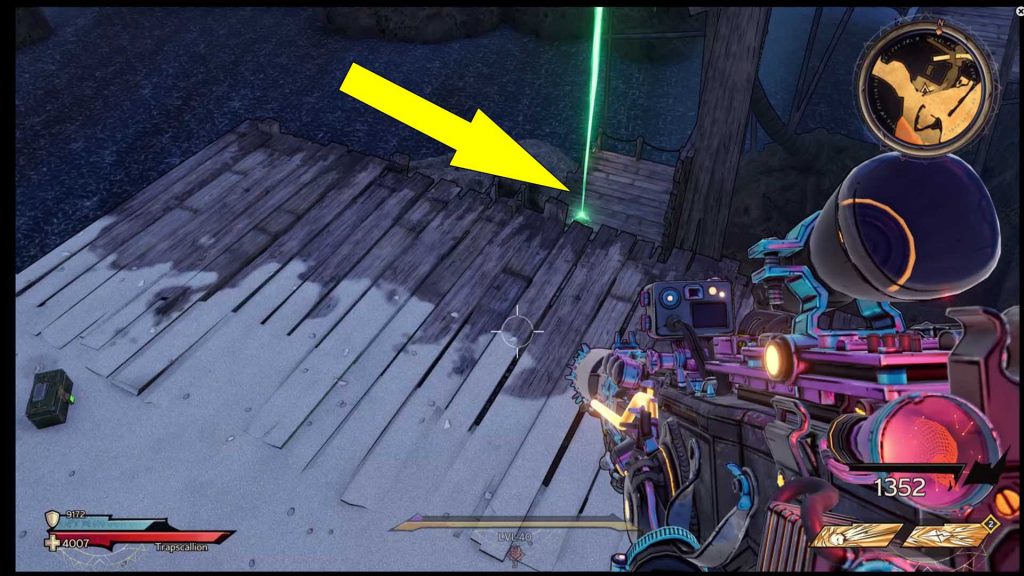
Sprint and jump to the platform where the first Switch is found and quickly activate it. Keep heading south from the previous platform, jumping on the next two roofs. Eventually, you’ll get to a small balcony, and here is the trickiest part. What you have to do is go behind the rope at the edge of the balcony and use the catwalk marked below to get to the next roof.
While on the roof of the next house, turn right and look up to see a lower section and a small ladder. Climb to the rooftop of the next house, then turn left to spot the second Crackmast Cove Switch.
After you activate it, turn west, and you’ll see the third beam of light in the gap near the city. Jump to the ground, then head around the large ship in the distance until you reach the edge of the mountain. Follow the wooden platforms down, but make sure that you jump to get to the one where the last Switch awaits.
If you do not jump, you’ll drop into the lake at the bottom, and you’ll need to restart the challenge.
