Wargtooth Shallows Lucky Dice chests count as Tiny Tina’s Wonderlands collectibles you have to get if you’re looking for 100% completion in the Ex-Seabed area. The Wargtooth Shallows Dice are similar to all other chests we already found, meaning that they provide loot and XP the moment you open them.
Since the Ex-Seabed area is quite large, as you are about to see, you’ll need to fully explore it to get the chests. So, throughout the guide below, I’ll help you find all of them.
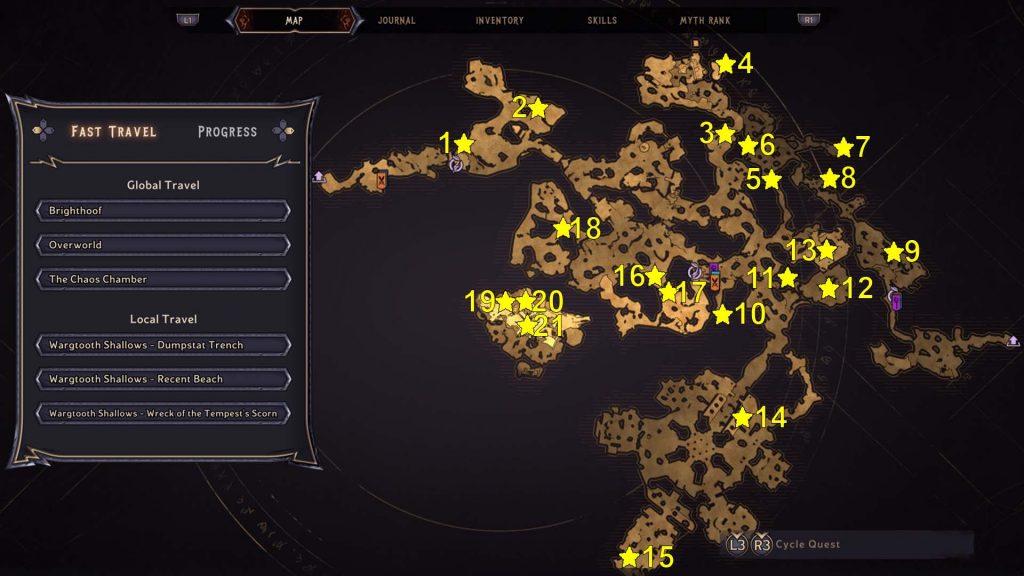
Where To Find the Wargtooth Shallows Dice Chests
Again, let’s start with the Wargtooth Shallows Lucky Die locations map to give you a general idea of where to look for these collectibles. It is worth knowing that the chests are best approached after you complete the main quest in this area and both side quests. As you are about to see, the side-quests here grant you access to areas you won’t be able to reach otherwise.
Lucky Die #1: At the Bottom of a Ravine
On the map above, the first Wargtooth Shallows Die is several steps away from Wargtooth Shallows – Recent Beach fast travel point. Look for it at the bottom of a ravine. Jump down to get it.
Lucky Die #2: On a Shipwreck
After you get the previous Die, head to the second location on the map above to spot another one on top of a shipwreck. Walk on the wooden pole pointing towards the collectible, then sprint-jump to reach it. One of the Lore Scrolls and the Ancient Obelisk are also found in this area.
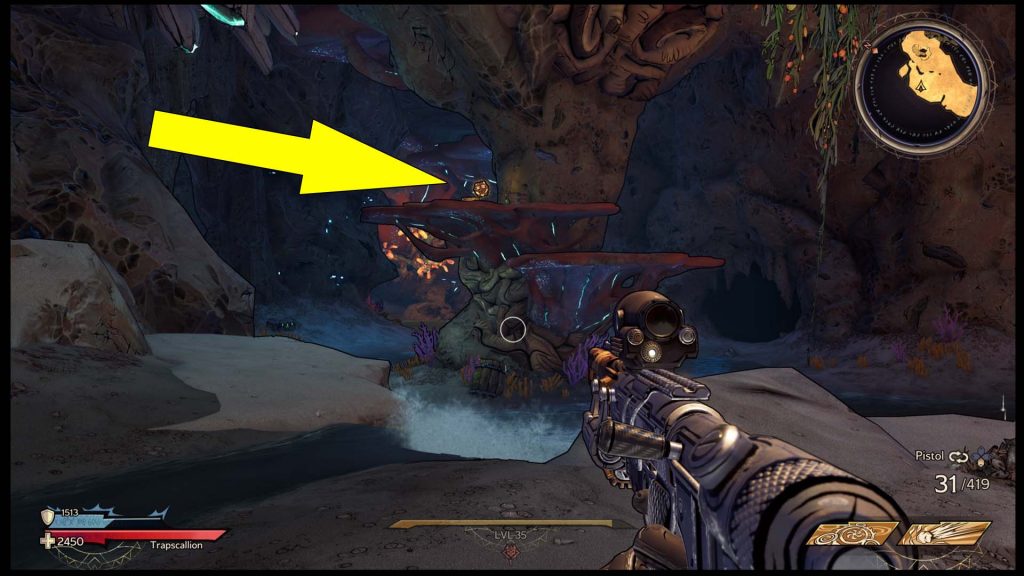
Lucky Die #3: On Top of a Coral
For the third Tiny Tina’s Wonderlands Die, get to the location on my map and look for a red coral. The collectible is on top of it. Simply climb to the upper section.
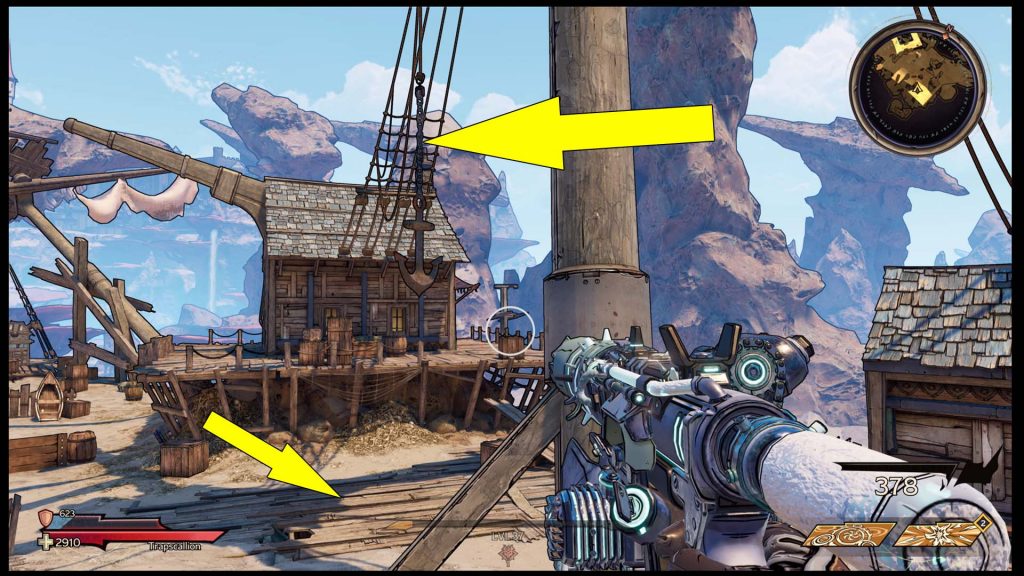
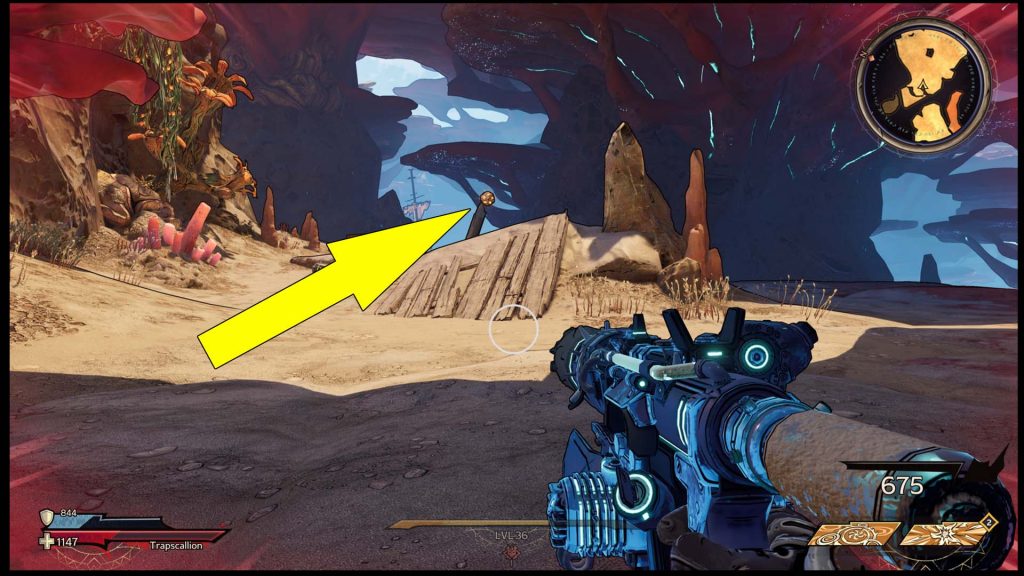
Lucky Die #4:Behind a Breakable Wall
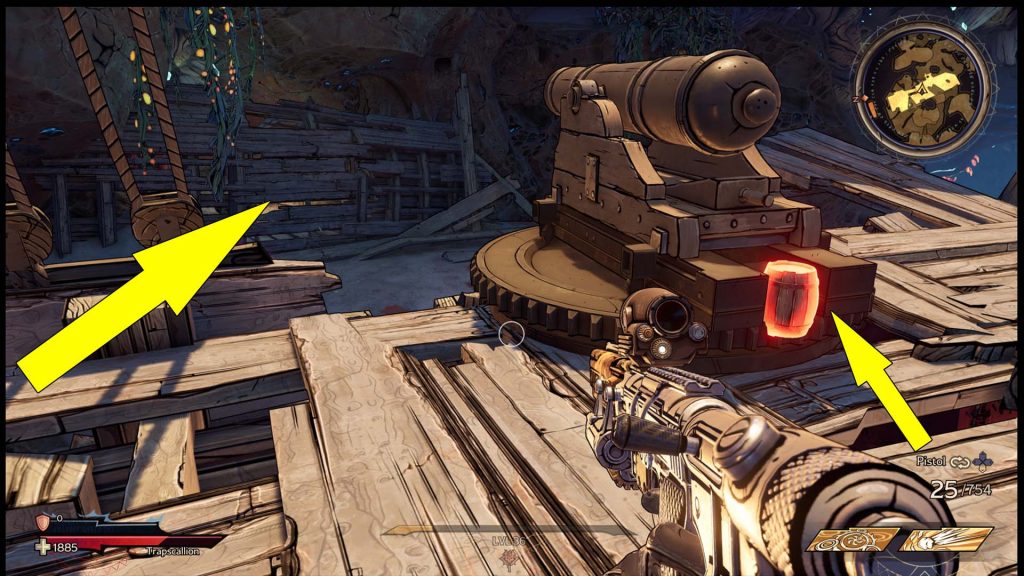
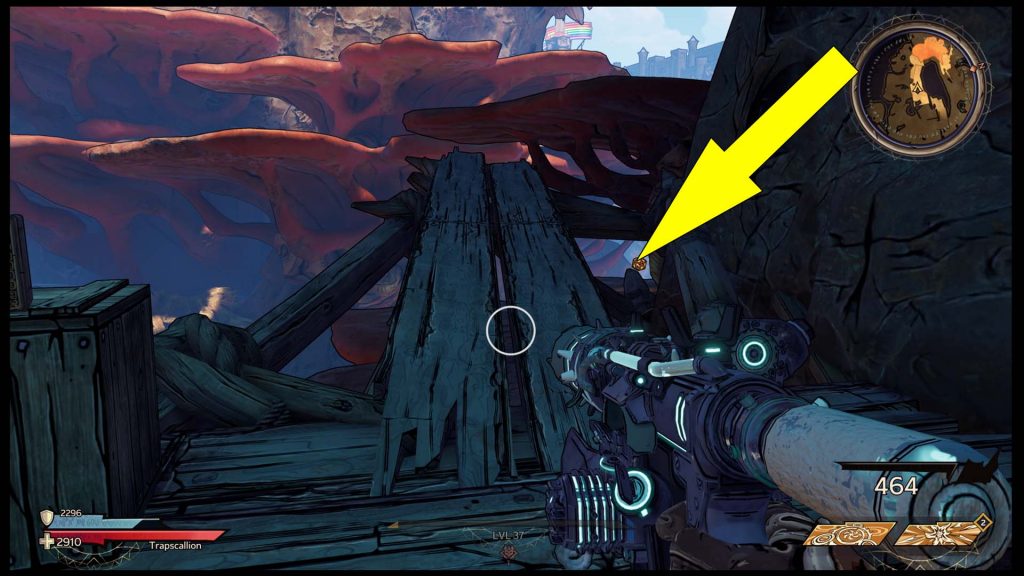
To get the next Wargtooth Shallows Lucky Die, you must progress the main quest and reach the area marked on my map. You’ll eventually have to climb the top of a large pirate ship when you get there. While on the top floor, you’ll see four cannons, one of them facing a breakable wall on the other side of the ravine (pictured).
Shoot the small barrel near the cannon, then use the wooden platform nearby to jump to the hidden area you discovered and get the collectible.
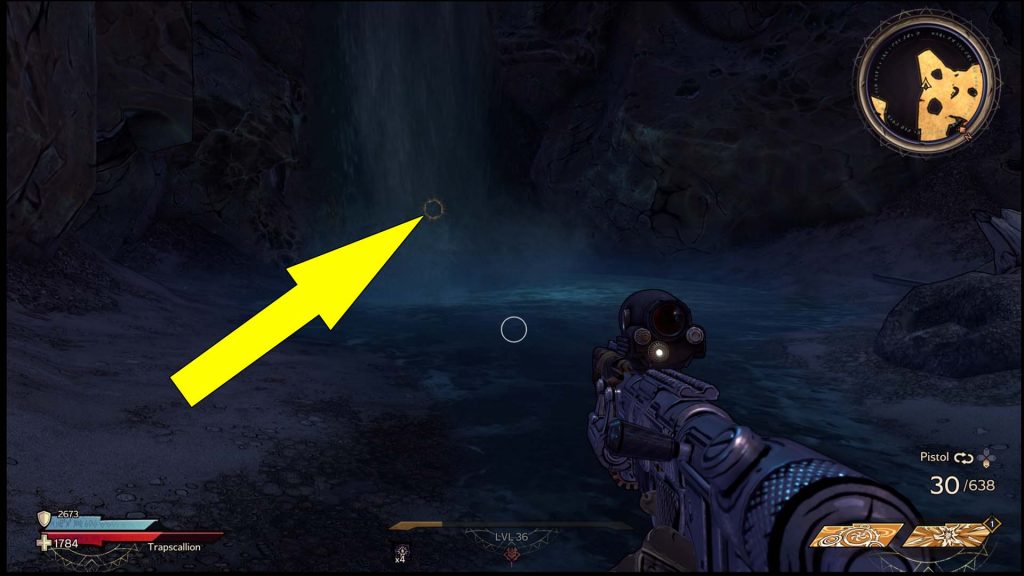
Lucky Die #5: Behind a Waterfall
As you use the water slide to get to the Wreck of Marley Maiden, you’ll notice that you’ll get to a relatively large area. Immediately turn around to spot another Tiny Tina’s Wonderlands Die behind the water curtain.
Lucky Die #6: Behind the Wreck of Marley Maiden
The sixth Lucky Die chest in Wargtooth Shallows is hard to spot. You’ll find it behind the Wreck of Marley Maiden. Use the pink jump pad to get to the ship’s top, then head left and follow the balcony. You should see it around the corner.
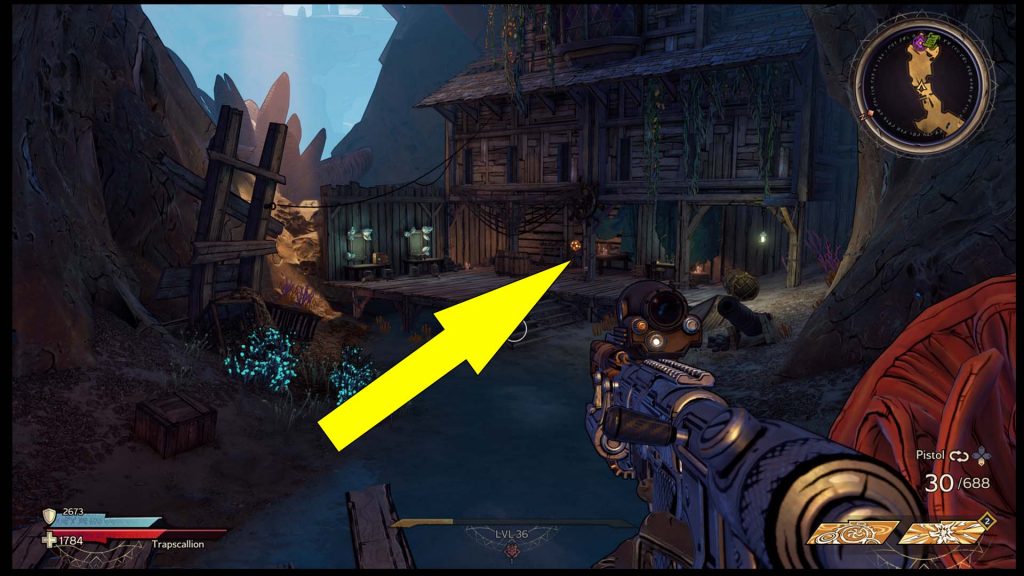
Lucky Die #7: In Front of a Cabin
The next Die collectible is relatively easy to spot. At the location marked on the map above, you’ll see a cabin, and the Die is in front of it. Nearby, you’ll also find one of the Poetry Pages.
Lucky Die #8: On a Balcony
After reaching the pirate town via story progression, you can get another Die chest. It sits on a balcony you can reach by jumping on the barrel nearby.

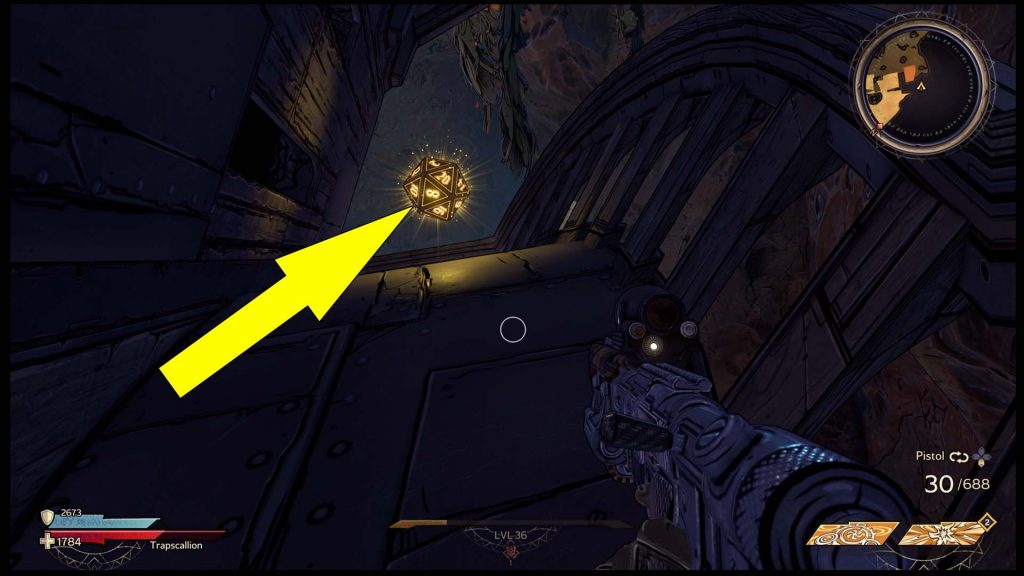
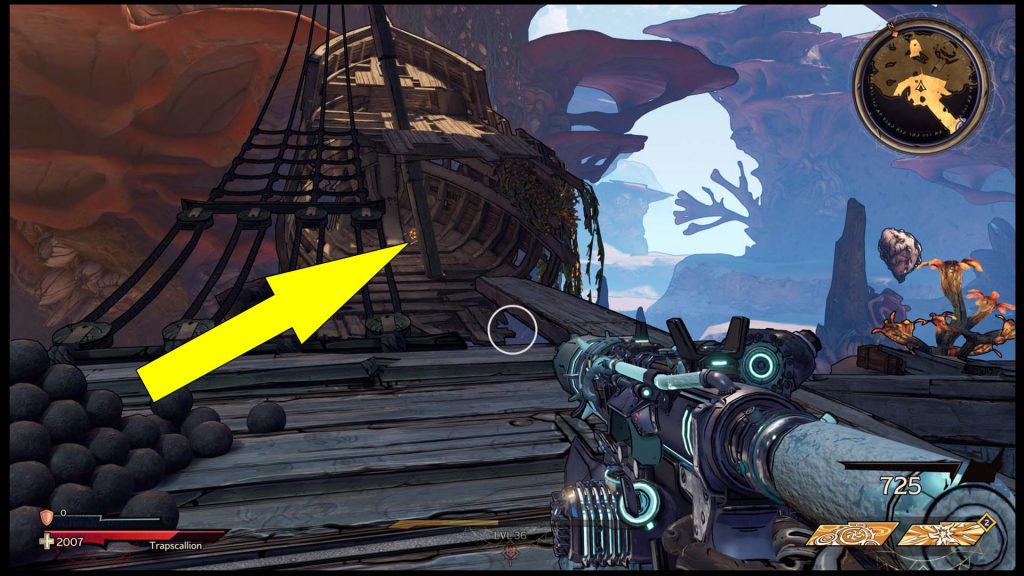
Lucky Die #9: Inside a Wreck
The next collectible is easy to spot. You can get it after reaching the Wargtooth Shallows – Wreck Of The Tempest’s Scorn fast travel point. Look for it inside a suspended shipwreck (pictured below). Sprint and jump to get inside.
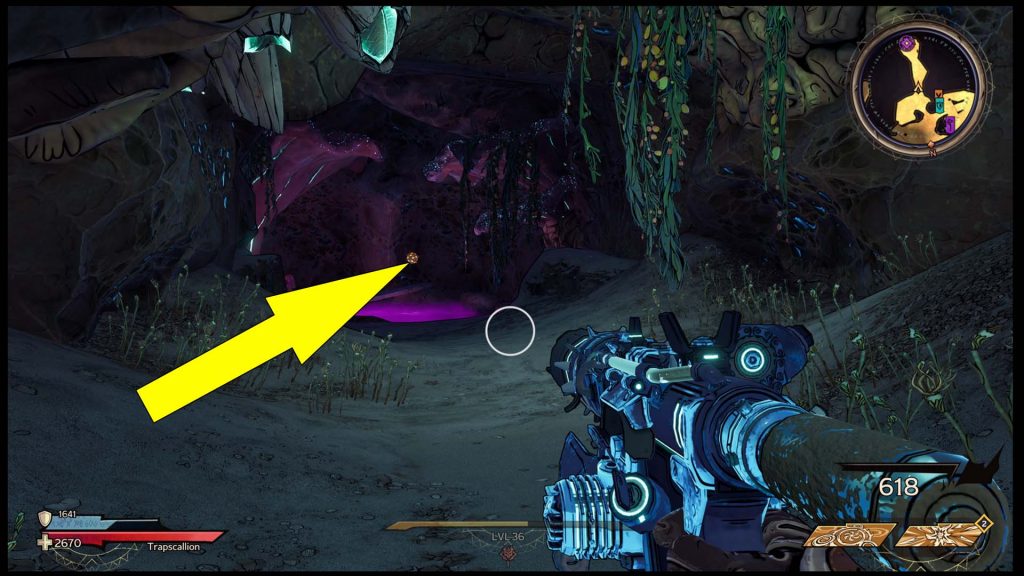
Lucky Die #10: Behind an Invisible Wall
Probably the trickiest Wargtooth Shallows Lucky Die collectible, the 10th one marked above is impossible to spot. That’s because it’s behind an invisible wall at the end of a tunnel. Get close to the wall and use a melee attack to reveal the secret area pictured below.
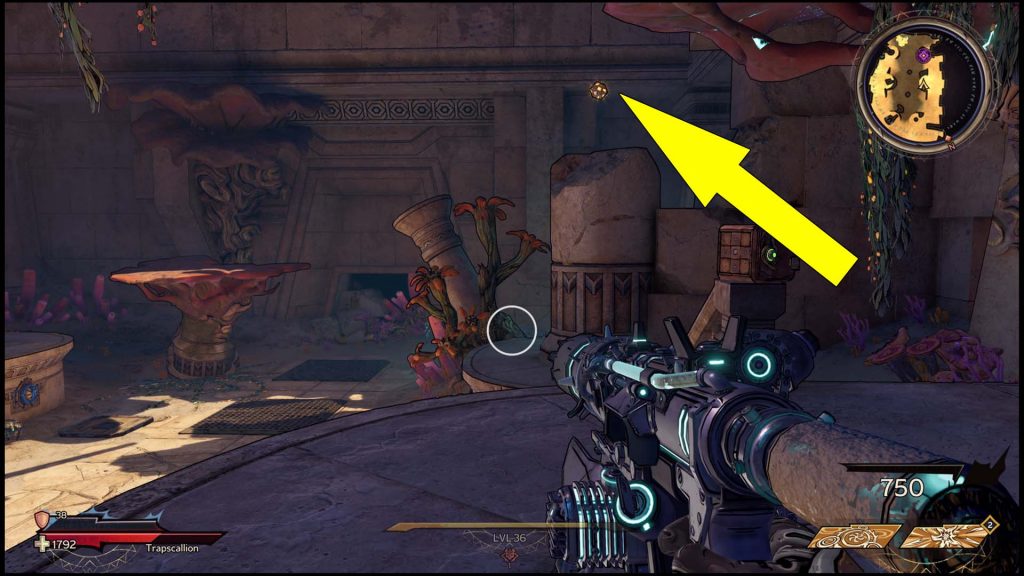
Lucky Die #11: On a Red Coral
The next Die chest is very accessible once you get to the location marked on the map above. Look for it on top of a red coral.
Lucky Die #12: On Top of a Sand Hill
After the previous Lucky Die, only several steps away in a clearing, you’ll see the next one. It sits on top of a small hill made of sand.
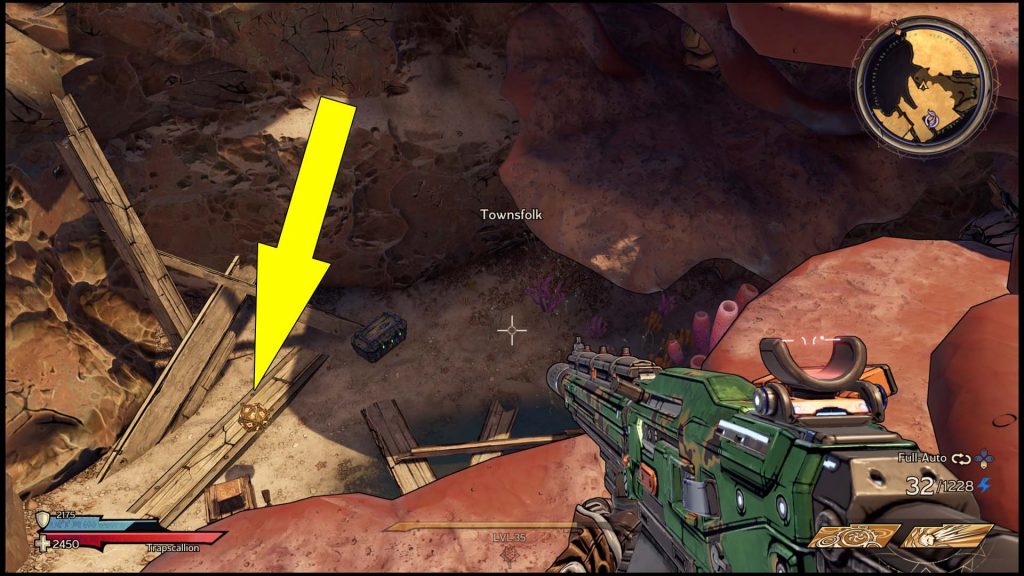
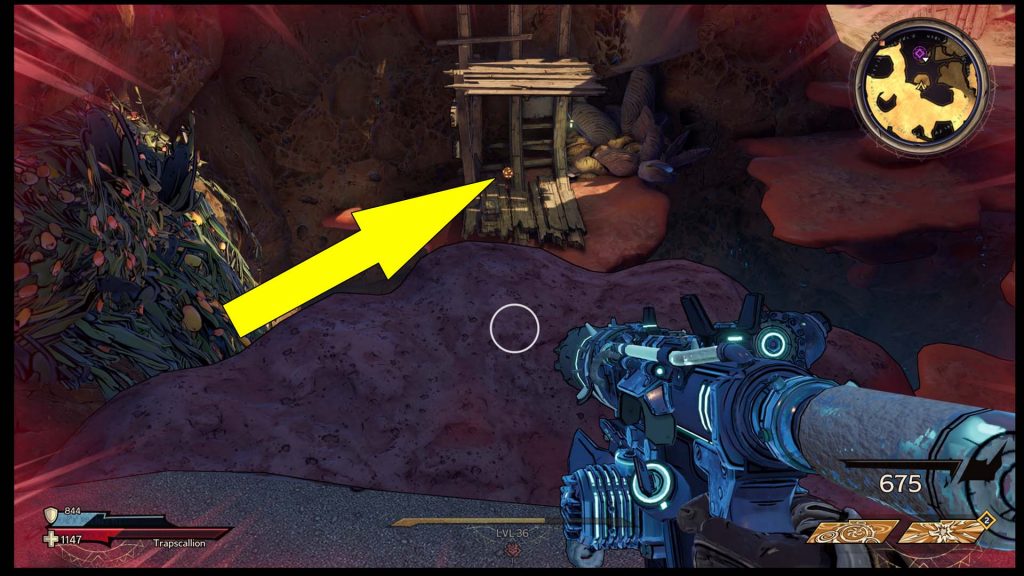
Lucky Die #13: On an Upper Platform
For the next chest, you’ll have to unlock an area by shooting a cannon (pictured below).
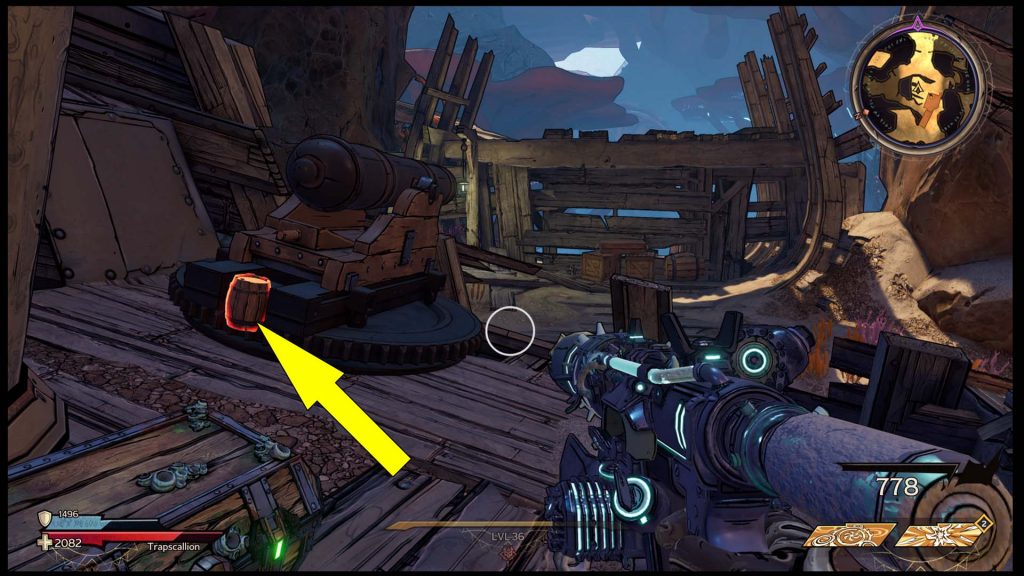
Once you destroy the wooden board, you’ll have to follow the ramps on the left side and then jump on a pink pad. The moment you land on the upper section, turn left, and around the corner, you’ll see the Wargtooth Shallows Die collectible. While here, you may also want to retrieve the Lore Scroll nearby.
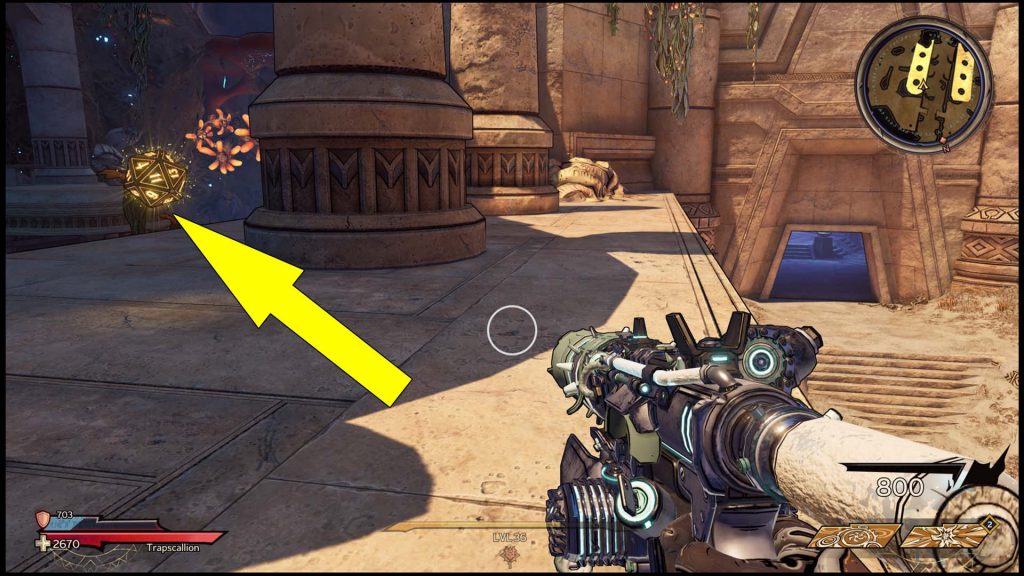
Lucky Die #14: Near the Entrance to Temple of Grissnissak
The 14th collectible marked on the map above can be retrieved by playing the Twenty Thousand Years Under The Sea side quest because it’s inside the Temple Of Grissnissak. After Oran opens the temple’s gate, head left through the first door and go around the corner. Jump on the wall near the entrance to spot it. While inside this temple, don’t forget to collect one of the two Lost Marbles.
Lucky Die #15: On Top of a Temple of Grissnissak Pillar
Another Temple Of Grissnissak Die can be found at the back of the building. It’s standing on top of a stone pillar, and you can get it by jumping on the red coral and then onto the next two pillars.
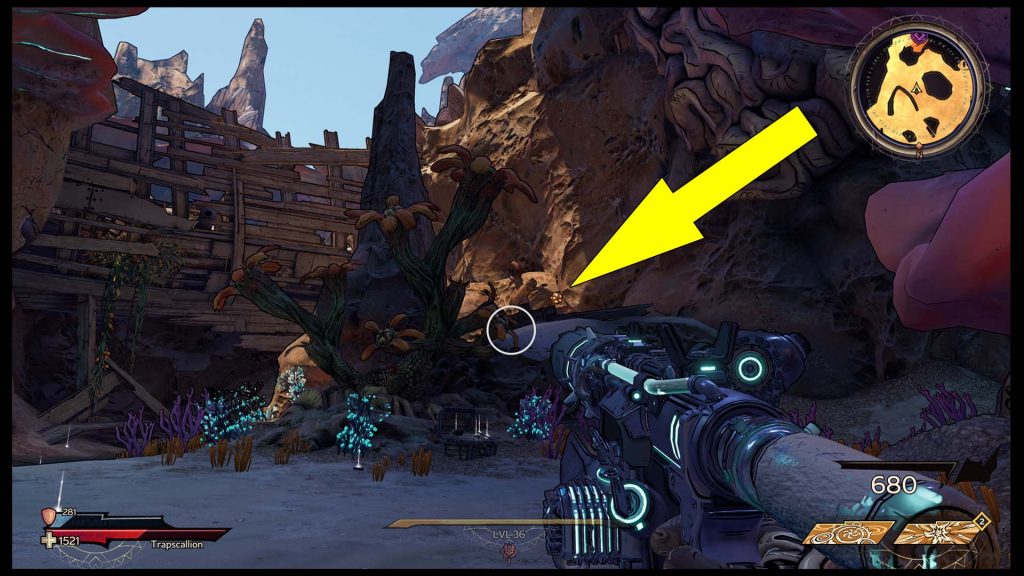
Lucky Die #16: On Top of a Stone
The 16th Lucky Die on the map above sits on top of a stone. Look for it in front of another shipwreck.
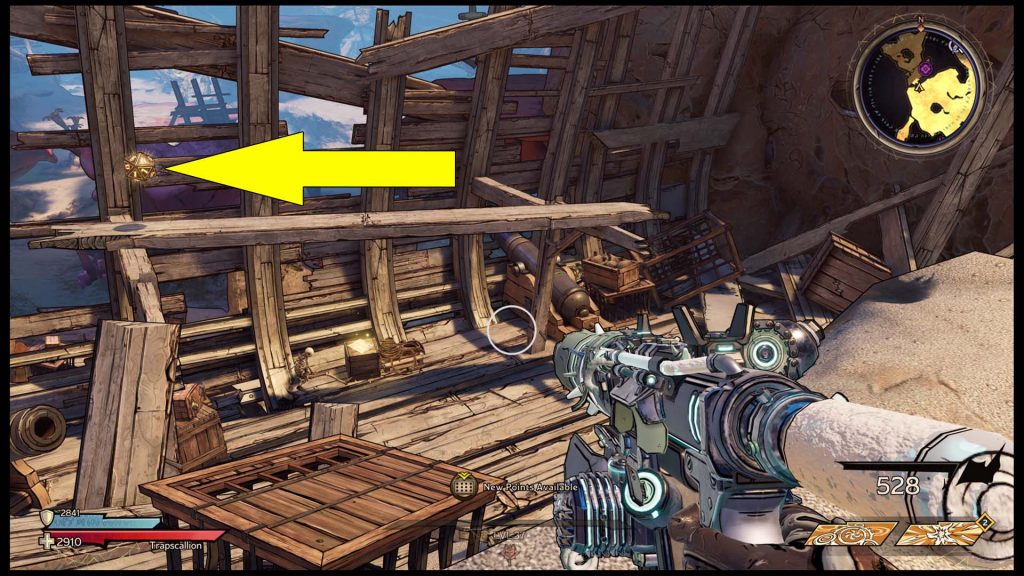
Lucky Die #17: In a Shipwreck
As you can see on the map above, the next collectible is close to the previous one. In fact, it is in the shipwreck you can notice in the screenshot above, but to get there, you’ll have to cross the area where Lucky Die #19 is found. After using the water slide, you’ll reach the Splish Splash Path, and the Die will be on your left side, near a Poetry Page.
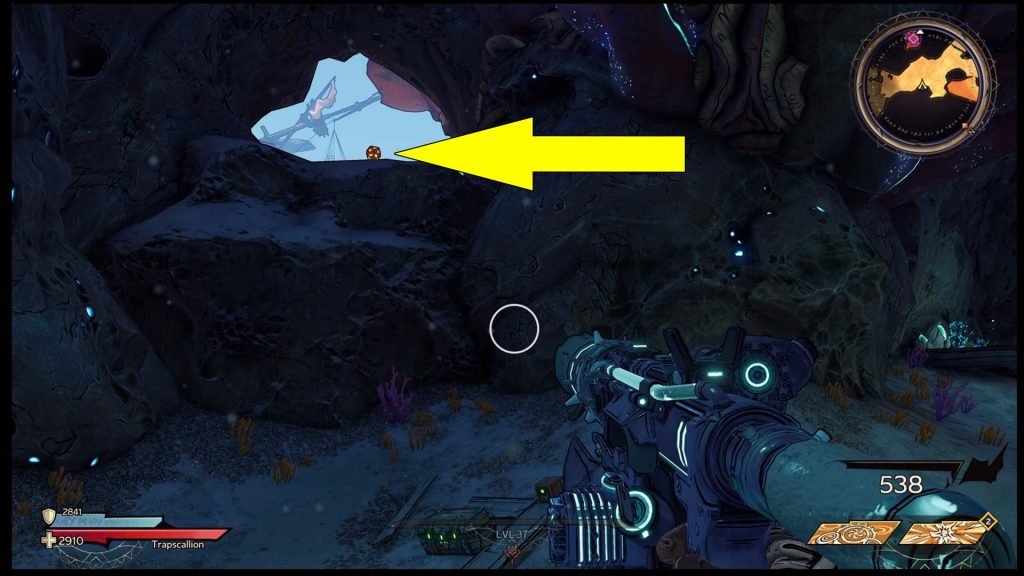
Lucky Die #18: Inside a Cave
To get the 18th Die in Wargtooth Shallows, you have to get to a cave. As you can see below, it’s on top of a rock wall. You can easily reach it by going around the mountain until you get to Plunder Port. From here, simply ascend the small hill.
Lucky Die #19: On a Coral Under a Wooden Platform
After getting the previous Die Chest, collect the Lore Scroll nearby and complete the Rune Switch in Plunder Port. Now, use the pink jump pad to get to the area in the distance and start ascending the central structure. Pay close attention to the area below as you progress, and you’ll spot the next Die as you cross a wooden catwalk.
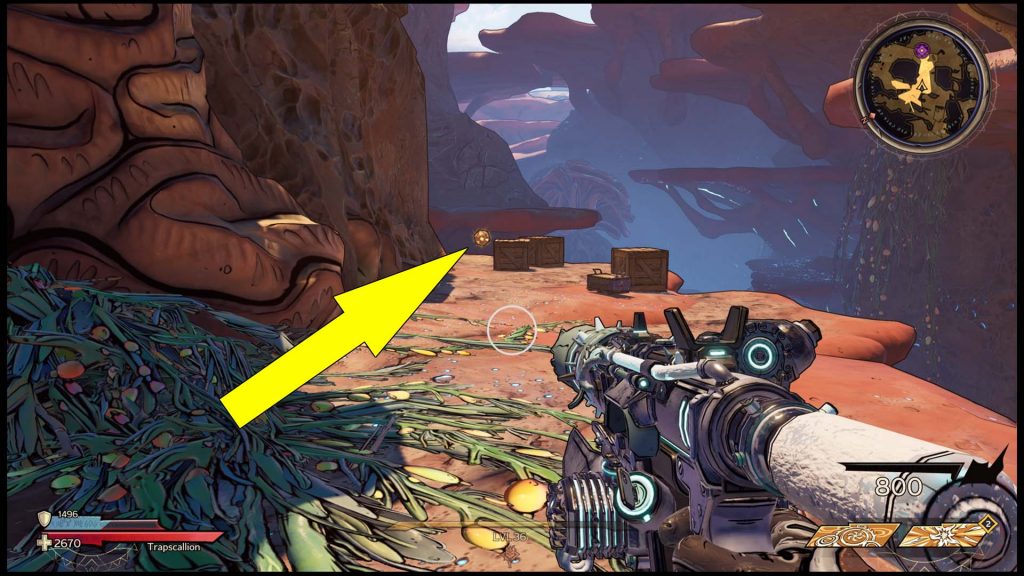
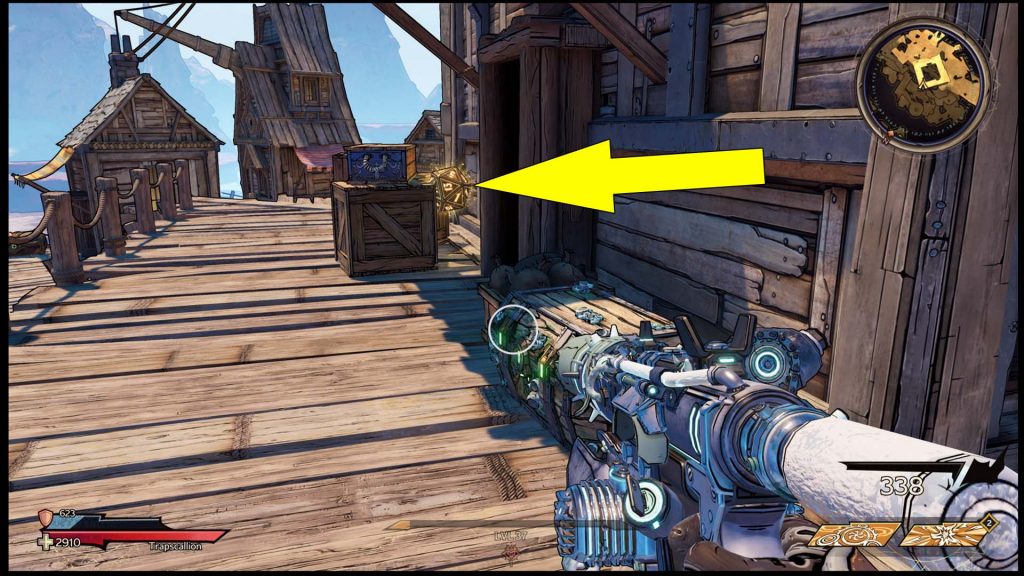
Lucky Die #20: Behind a House
Once you collect the previous Die, keep ascending until you reach the small village on top of the main structure in this area. Look for the large central house (with a bowstrip on the roof) and go around it to find the next Lucky Die behind some crates.
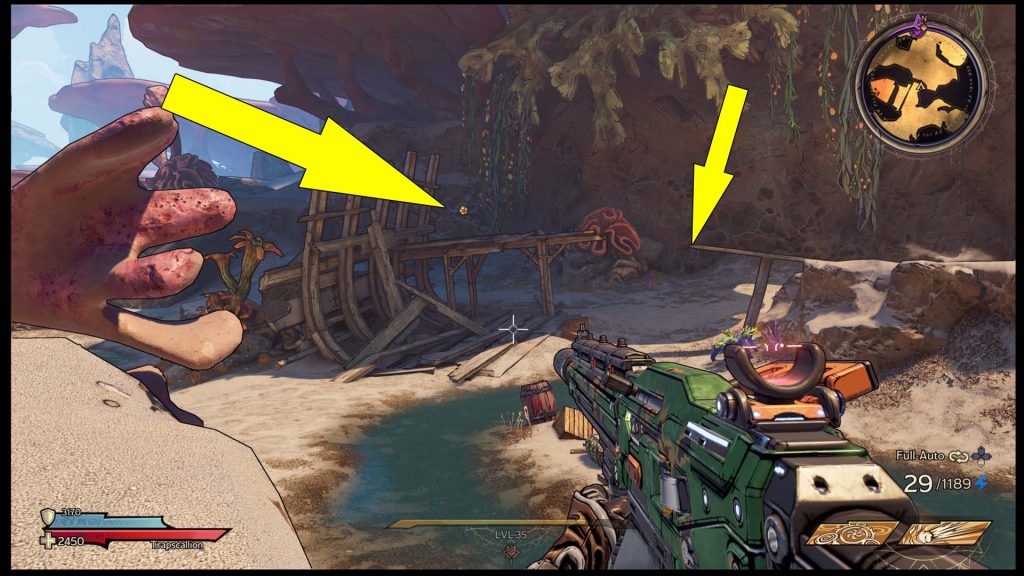
Lucky Die #21: In a Hidden Area
Finally, return to the center of the same village where you found the previous Die, and look for a suspended anchor. Shoot the chain (pictured), and it will fall on a wooden floor that will break, revealing the location of the last Wargtooth Shallows Lucky Die.