Wargtooth Shallows Rune Switch is trickier than all other Tiny Tina’s Wonderlands Rune Switch challenges we’ve covered so far, mainly because you’ll have to cross a pirate camp where many enemies spawn. The Rune Switch challenge in Wargtooth Shallows is also a bit confusing at first sight since the first Switch you’ll see in front of you is, in fact, the last one you’ll need to activate.
Where To Find the Wargtooth Shallows Switch
On the following map, you can see that the Wargtooth Shallows Switch is west of the Wargtooth Shallows – Dumpstat Trench fast travel point, provided you rotate the map to be in the same position.

After you get to the said fast-travel point, head west, and you’ll go through a cave, you can reach by sprint-jumping on a wooden ledge. Once inside the cave, hug the left wall and go through the first tunnel to get to the Plunder Port.
Here, you’ll find a Lore Scroll (revealed here) and one of the Lucky Dice chests (#18 if you follow our guide and map). Now, look for the Wargtooth Shallows Rune Switch nearby.

How To Complete the Rune Switch Wargtooth Shallows Challenge
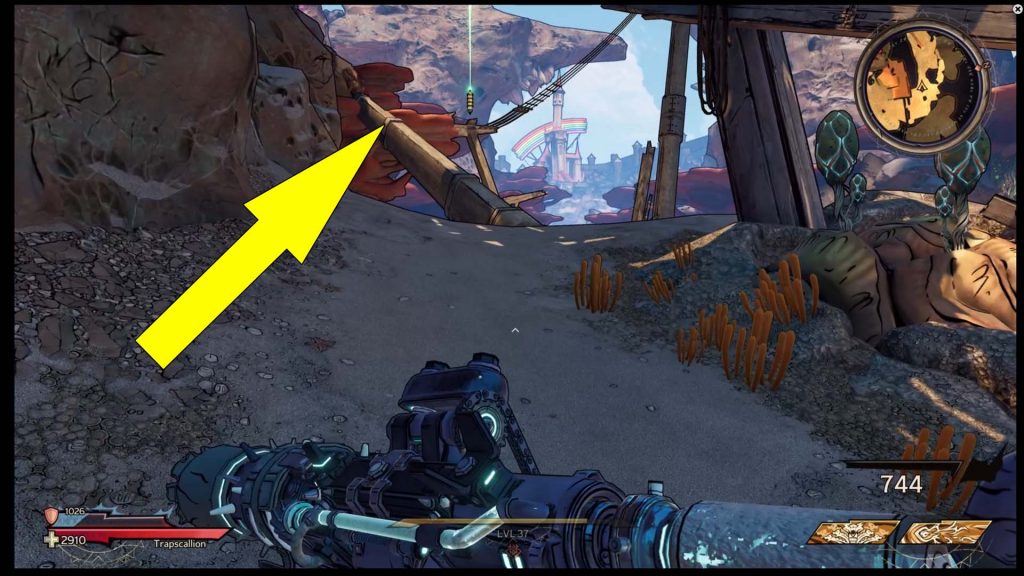
The moment you activate the Wargtooth Shallows Rune Switch, don’t get fooled by the red light pillar that spawns on the other side because that’s the last one you’ll have to activate. Instead, run towards the pink jump pad nearby, and you’ll fly over the large gap. In front of you is a pirate camp, and you should ignore all enemies. Head towards the hill, and when you reach the top (pictured below), jump on the shipwreck where the first Rune Switch awaits.
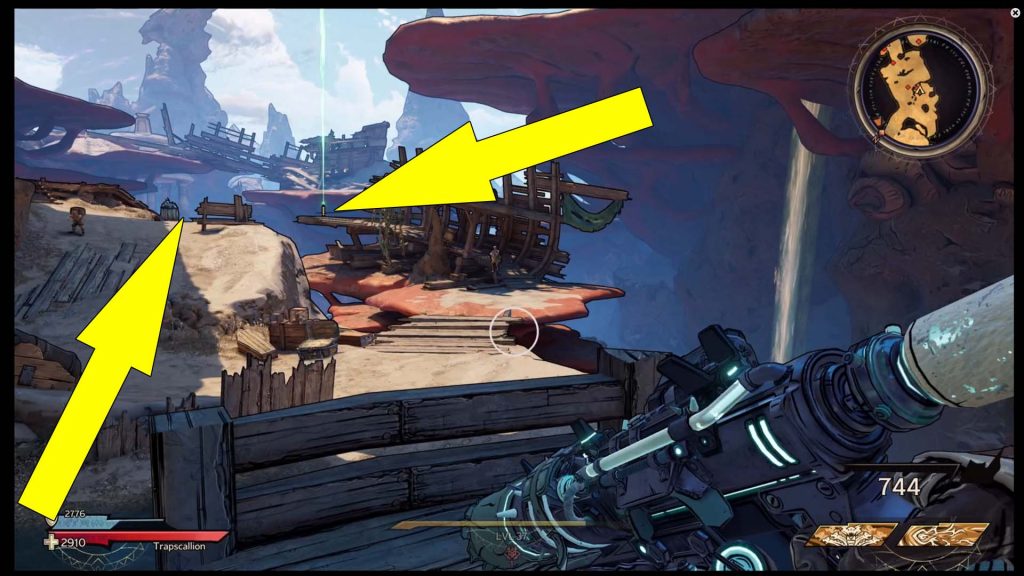
Upon activating the first Switch, turn around, and you’ll see the second one. Sprint-jump over the gap, then slide through the hole in the wooden board marked below.
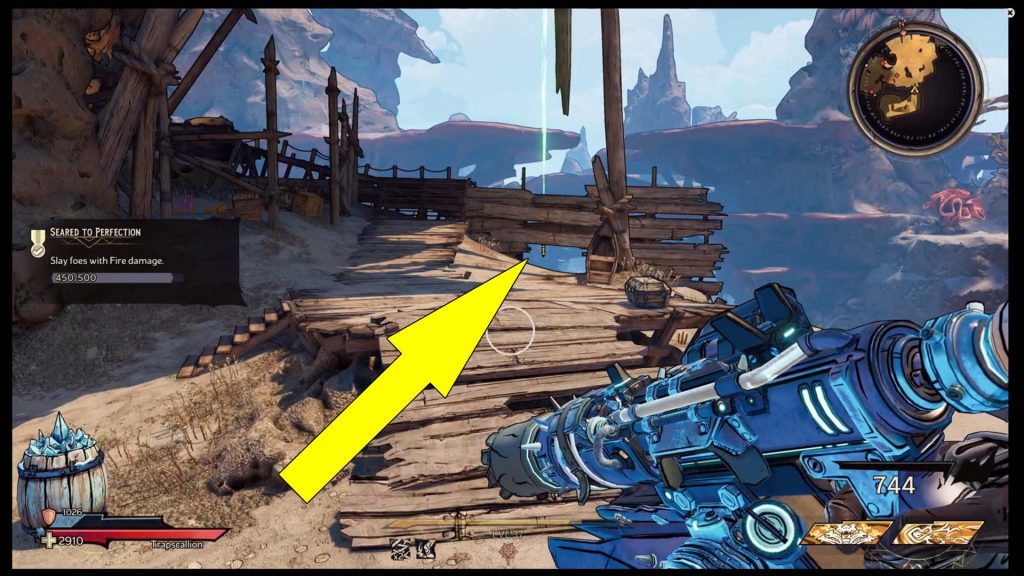
For the last Wargtooth Shallows Rune Switch, turn left, and you’ll see it on a wooden platform near a red coral. Walk on the bowstrip marked below, then turn right and activate it.