The Crackmast Cove Lucky Dice are the most difficult Tiny Tina’s Wonderlands collectibles you’ll have to find in the area known as the Pirate Beach because they do not appear on your map even if you get close to them. In the video game developed by Gearbox Software for PC, Xbox, and PlayStation, Crackmast Cove is one of the largest regions; therefore, while exploring it, you’ll need to find 22 Lucky Die Chests.
This can become problematic if you don’t know where to look for them, and some Lucky Die collectibles are also in areas that are hard to reach.
Where To Find the Crackmast Cove Dice Chests
As usual, let’s start with Tiny Tina’s Wonderlands Crackmast Cove Lucky Die locations map, which pinpoints the areas where you can find these collectibles.

It’s worth pointing out that if by any chance you can’t get to some of these areas, you should consider completing all side-quests in Crackmast Cove because the NPCs you’ll help will grant you access to all locations. Therefore the Crackmast Cove Lucky Chests are best approached after completing the main quest and all side quests in this large region.
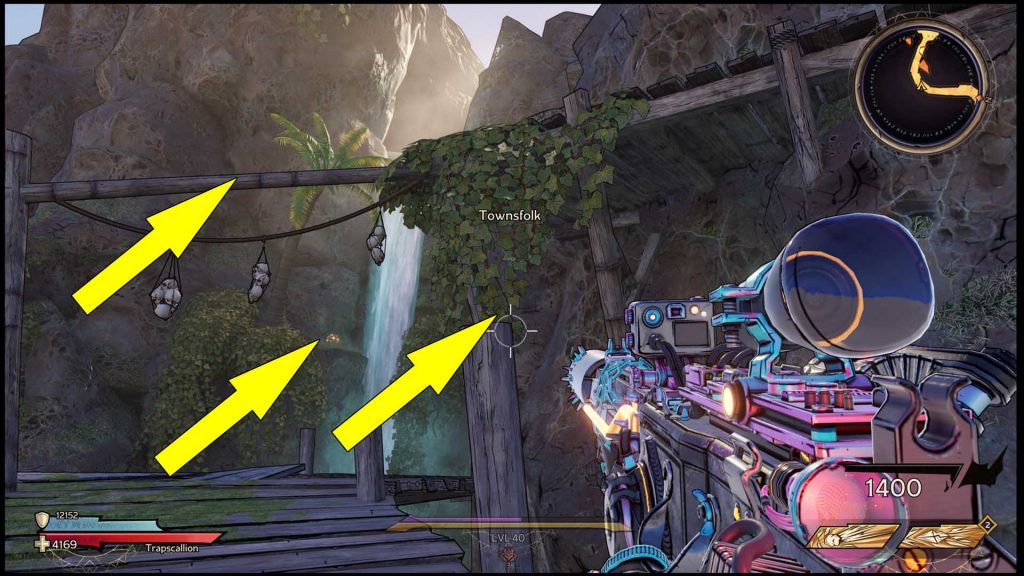
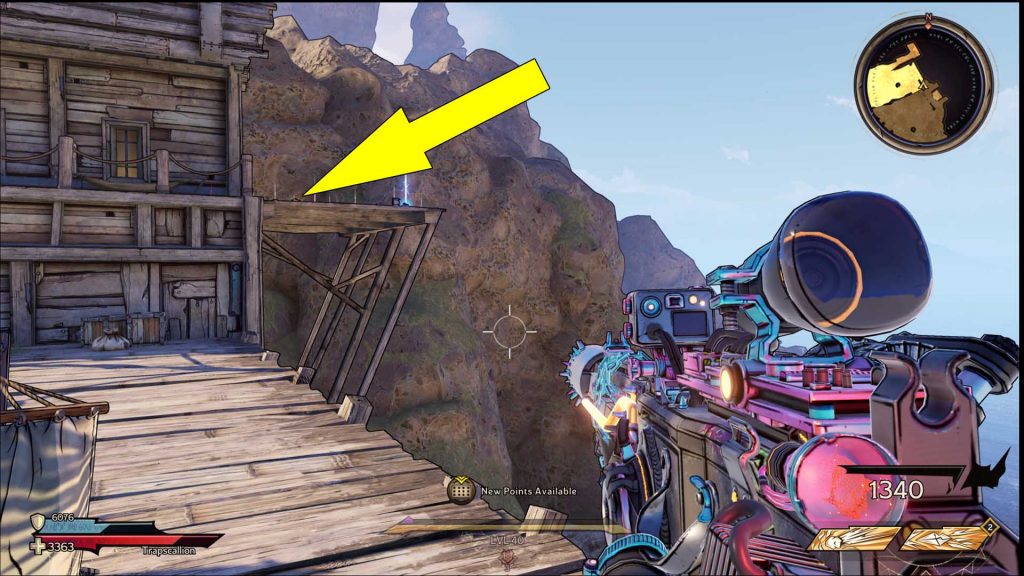
Lucky Die #1: Near a Waterfall
Starting from the Crackmast Cove – The Salty Saunter fast travel point, head towards the central area, and as you follow the wooden bridge, you’ll see the first Lucky Chest on the map above, sitting on the left side of a waterfall. This one is quite tricky to get because you have to jump on the tallest pole on the bridge (marked below). From here, you’ll want to sprint and jump to grab the wooden beam (also marked), then head right and climb the lege close to the mountain’s wall. From here, sprint and jump to the other side to claim the Lucky Chest.
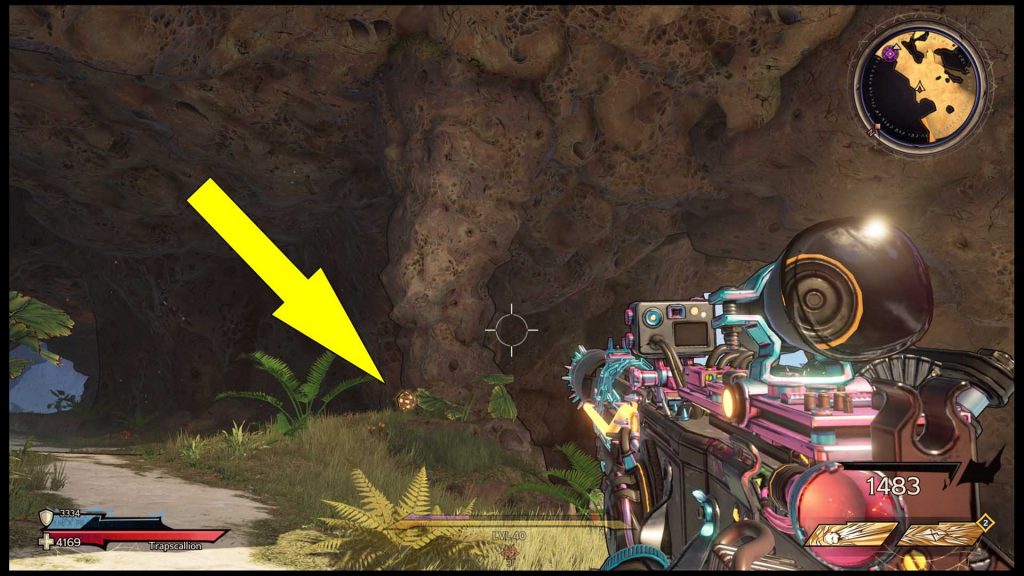
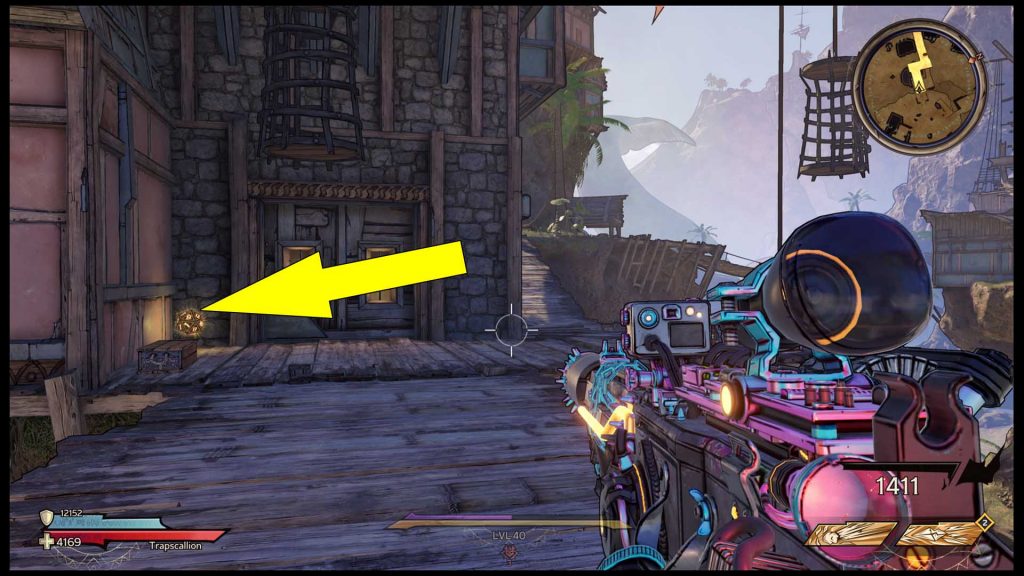
Lucky Die #2: In Front of a House
Upon exiting the first cave, you’ll enter the Swarthy Cannonade area. As soon as you exit the tunnel, turn left to spot the next Lucky Die Chest in front of a house near a hammock.

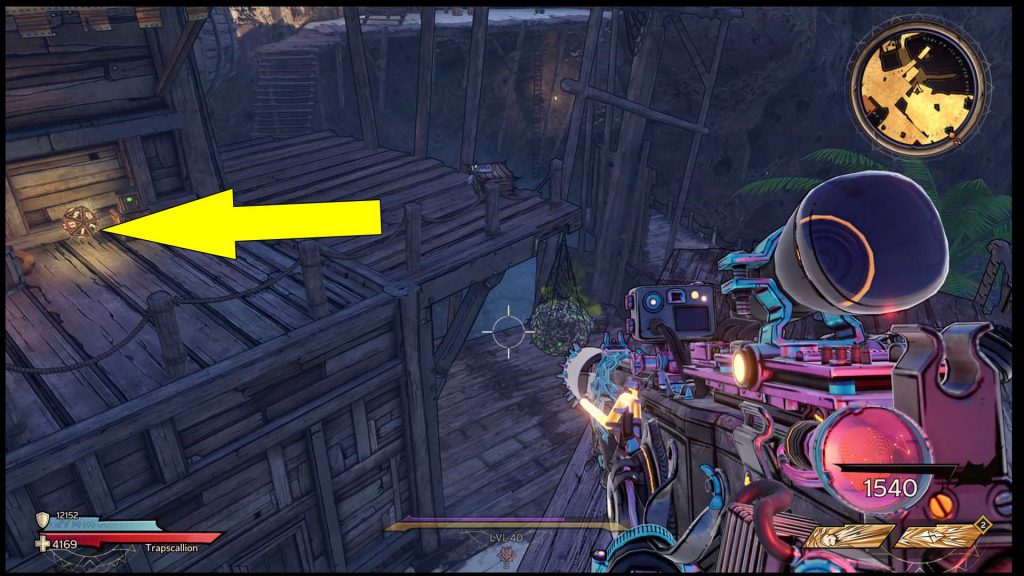
Lucky Die #3: On a Wooden Balcony
After the previous Chest, head towards the small village in the distance, and you’ll find the third collectible on a small balcony. Use the wooden crates nearby to get it.

Lucky Die #4: In a Shipwreck
Several steps away from the previous Chest, you’ll find another one. This Crackmast Cove Die is pretty easy to collect since it’s inside a shipwreck.

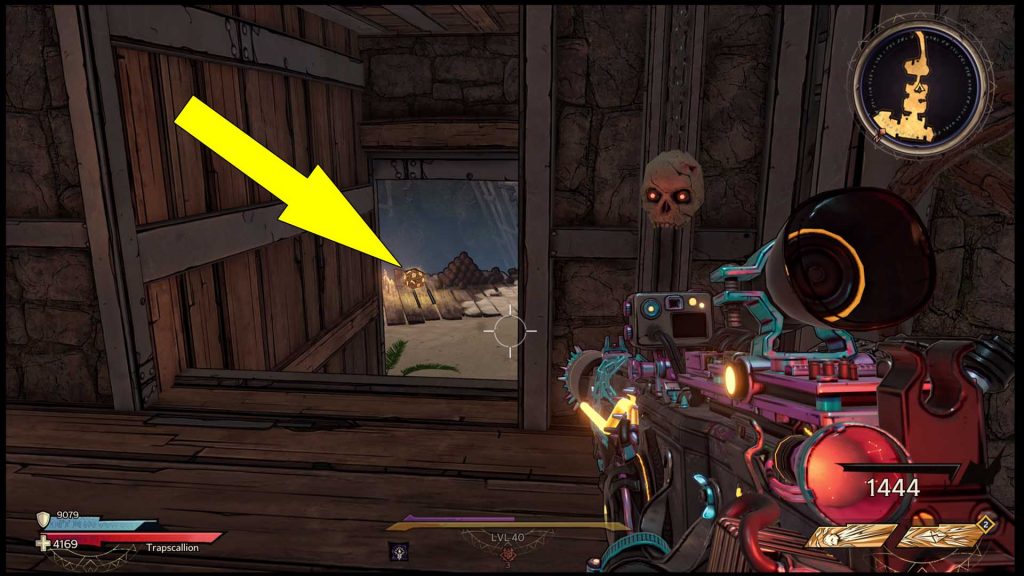
Lucky Die #5: On a Bowstrip
For the next Lucky Die, head to the location I have marked above and look for a house with a bow strip on the roof. The collectible is visible from the ground, and you can reach it by jumping from the balcony of a nearby house (marked below).

Lucky Die #6: On a Dock
The next Die Chest marked on the map above sits on a dock, and it’s the most accessible so far. Once you find it, make sure you also grab the Poetry Page nearby.

Lucky Die #7:Outside a Cave
The seventh Crackmast Cove Chest is outside a cave you’ll explore during one of the side-quests. You’ll see it next to a large chest while working on helping Le Chance.

Lucky Die #8: At a Dead End
Once you collect the previous Chest, jump to the area below and head north. You’ll find the eighth Crackmast Cove Die Chest at a dead-end, close to the giant whale you can’t miss.

Lucky Die #9: Near the Ancient Obelisk Cave
Head east after you get the Chest above, and eventually, you’ll enter Coiled Hollow, where you’ll see a waterfall. Behind it is the Crackmast Cove Ancient Obelisk. Before reaching the said cave, near a stone pillar, sits another Die collectible.
Lucky Die #10: In a Hut
You’ll want to fast travel to Crackmast Cove – Scallywag Landing station for the next Die. Head through the iron gates from here, and then you’ll enter Wrecker’s Bane. Turn right after the wooden bridge and follow the tunnel ahead to find a small hut and the Lucky Die.

Lucky Die #11: Next to a Cannon
While playing The Trial of Crooked-Eye Phil quest, you’ll reach an area known as Phil’s Digs. The Die is next to a cannon at the location marked above. It’s hard to miss because the quest takes you to this area.
Lucky Die #12: On a Terrace
After the previous Chest, head back to Crackmast Cove – Scallywag Landing fast travel station, but this time, head towards the bridge. As you cross it, you’ll see a suspended house, and the next Lucky Die is on the terrace. This one is also tricky to reach. What you have to do is jump on the wooden pole marked below, then on the beam, then on the terrace.

Lucky Die #13: Near a Campfire
Follow the wooden ramp up after you get the previous Chest, and then you’ll reach a clearing. In the northernmost point of this small area is a campfire and behind the tent is the 13th Crackmast Cove Lucky Die Chest.

Lucky Die #14: On a Lower Balcony
After you enter the pirate town where the Rune Switch Challenge is found, you’ll see a rather large hole or the former dock. At the location marked on the map above is a balcony you can drop on to secure another Die.
Lucky Die #15: Behind a Blue House
Once you have collected the previous Chest, head towards the pirate town. In the central area that looks like an arena, after dealing with the sharks, look around to spot another Tiny Tina’s Wonderlands Die behind a blue house.

Lucky Die #16: Behind the Witch Doctor’s House
As you progress through A Wandering Aye quest, you’ll meet a Witch Doctor you’ll have to wake up. Check behind his house nearby, and around the corner, you’ll find the 16th Die.
Lucky Die #17: Under a Wooden Bridge
For the 17th Crackmast Lucky Die, you’ll have to play the All Swashed Up quest and enter the Jaggs area. As part of the quest, you’ll enter the sewers via a tunnel. The collectible awaits under a wooden bridge when you drop into the next area.

Lucky Die #18: Behind a Suspended House
From the previous collectible, head up to the courtyard of the fortress. The next Lucky Chest sits on the terrace behind the suspended house pictured below. To get it, jump on the wooden platforms behind the wall and then on the wooden crate near the balcony.

Lucky Die #19: Behind a Fence
For the last 4 Crackmast Cove Lucky Die, you should use the Crackmast Cove – The Supreme Port fast-travel station, then move east. After you exit the first large building (prison), you should spot another Lucky Chest behind a building and a wooden fence as you move east.

Lucky Die #20: On a Balcony in Dead Man’s Charleston
After you enter Dead Man’s Charleston, check the eastern side of the pirate town. Behind a house, you’ll find the next Chest. It sits on a balcony overseeing the area below.
Lucky Die #21: Inside a Pirate Ship Wreck
The next Lucky Die is also in Dead Man’s Charleston, and you’ll see it the moment you cross the northern bridge. Look up, and you’ll spot a giant pirate ship. Inside its hull is the Die. This one, however, is problematic because you’ll have to jump on the rope on the right side of the bridge and then on the ladder marked below. Climb up, then get the Chest. If you miss the jump, consider traveling back to Crackmast Cove – The Supreme Port station.

Lucky Die #22: Inside the Sewers
Last but not least, the 22nd Lucky Chest on the map above is inside the sewers under Dead Man’s Charleston. You can spot it behind a fence, but you’ll have to enter the sewers to get it. Once you find the Chest marked below, follow the stairs on the right side, turn left after the first house, and reach the edge of the hill. While on the wooden platform, drop to the area below, then turn around and smash the wooden boards to get inside the sewers. Avoid the fire traps, and on the other side of the tunnel, you’ll find the Chest.

