While progressing through Act 2 of Baldur’s Gate 3‘s story, you’ll eventually enter the Grand Mausoleum and the Gauntlet of Shar in the Shadow-Cursed Lands. The first puzzle in the Gauntlet of Shar requires reaching and touching the Umbral Gem to progress deeper into the sanctuary.
Also, you can find some answers in the Gauntlet of Shar for several quests, such as Find Ketheric Thorm’s Relic, Find the Nightsong, Kill Raphael’s Old Enemy, Lift the Shadow Curse, and The Chosen of Shar, which is Shadowheart’s questline.
But before you can progress any of them, you must solve the Umbral Gem puzzle in Gauntlet of Shar.So, our guide will help you disable the force field around the Umbral Gem, allowing you to interact with it and progress further in the Gauntlet of Shar in Baldur’s Gate 3.
Where to Find the BG3 Gauntlet of Shar Umbral Gem Puzzle
The Gauntlet of Shar can be found inside the Grand Mausoleum or Thorm Mausoleum in the far northeastern corner of the Shadow-Cursed Lands.

You must pass by the House of Healing and the Masons Guild to reach the Grand Mausoleum. Upon arriving at the Mausoleum Entrance, Raphael will approach you and ask you for help with a problem inside.
Once inside the Mausoleum, you must solve a puzzle by pressing the buttons below the murals in a specific order. Go through the freshly opened doors and interact with the Traversal Gem to reach the Gauntlet of Shar. Now, let’s see how to solve the BG3 Umbral Gem puzzle in Gauntlet of Shar.
How to Solve the Gauntlet of Shar Umbral Gem Puzzle
After going through the first Stone Door inside the Gauntlet of Shar, you find yourself in a room with a glowing purple forcefield protecting an Umbral Gem. Your objective is to interact with the Umbral Gem, but we must find a way to bypass the forcefield.
It’s important to note that the room contains marble plates that trigger the vents around, releasing a black fog that will keep dealing cold damage to your characters until you disarm the vents. These marble pates are located at the top of the stairs of each crypt.
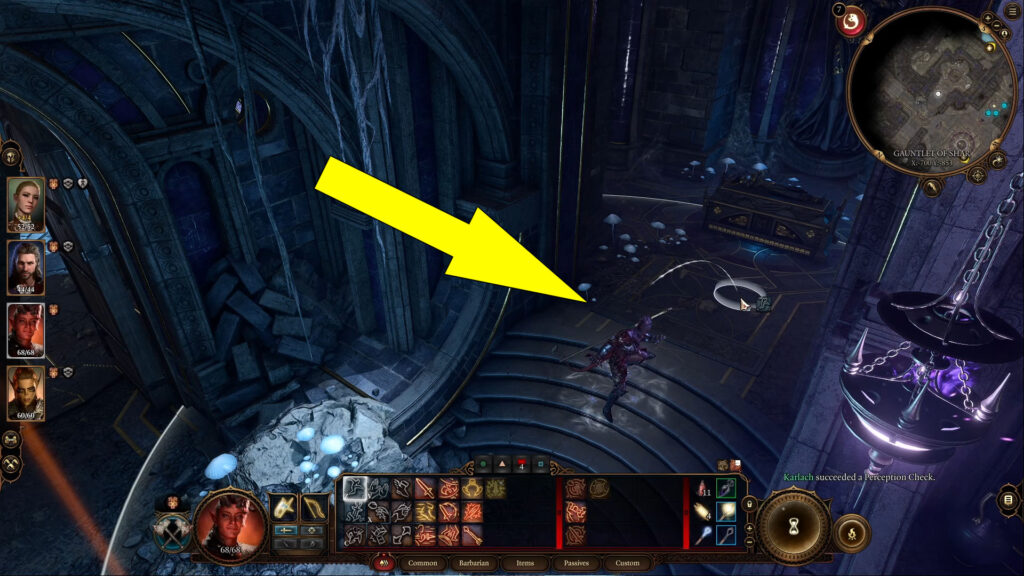
Make sure to jump over them to avoid triggering the vents and releasing the black fog. There are four crypts around the Umbral Gem, two on the left and two on the right, each with a Lever.
Interact with each lever to lower all eight purple-glowing braziers, known as Mystic Thuribles, in the main room. Then, interact with each Mystic Thurible to put them out and darken the room.
If a second glowing ring does not appear around the statue, unequip any light-producing weapons, such as the Moonlantern. After you remove all the light sources, you’ll see the whole maze.
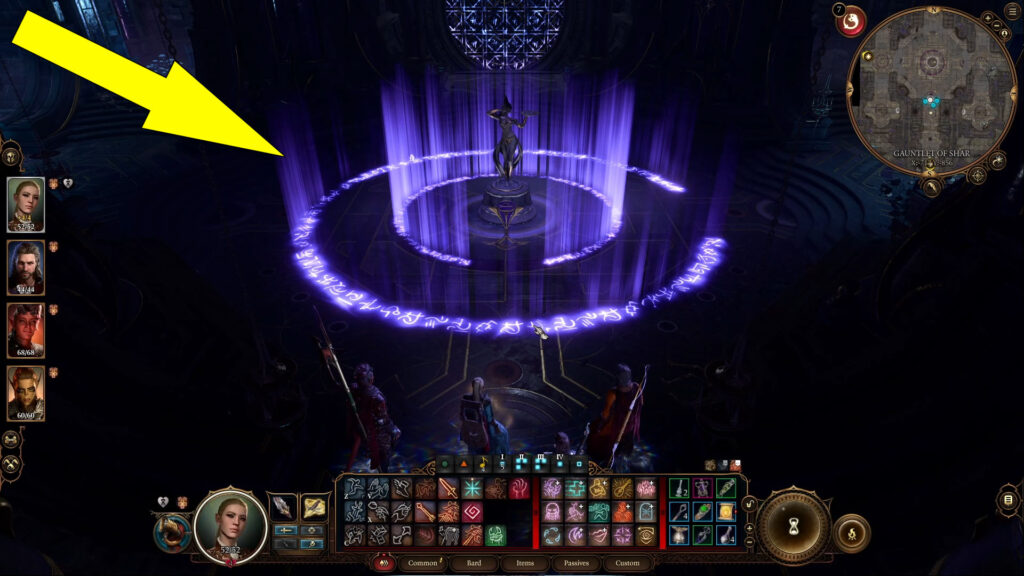
Avoid the glowing runes to reach and interact with the Umbral Gem. After picking up the Umbral Gem, you’ll remove the magical barrier blocking the Stone Door ahead.
Then, head into the next room and clear the area by defeating the Umbral Tremors and Dark Justiciars before taking on the Gauntlet of Shar’s Soft-Step Trial puzzle. If you think this guide was helpful, we have plenty more of them on our Baldur’s Gate 3 Wiki Hub Page here.
