Far Cry 6 Ida’s Triada Relic is a Madrugada Treasure Hunt that requires you to navigate a series of caves that connect two landmarks: La Triada Mural and Lunatico Caves. Far Cry 6 Ida’s Triada Relic Treasure Hunt is one of the 21 Treasure Hunts available in the video game developed by Ubisoft; however, unlike the previous one (Cache Money), this one is focused on exploration. Or it is a challenge that tests Danis’ parkour skills.
The idea behind Ida’s Triada Relic Far Cry 6 Treasure Hunt is relatively easy, and all you have to do is explore the caves and reach the other side to claim your prize. The prize, or reward, in this case, is Ida’s Sigil Head Gear. Since this Treasure Hunt requires you to follow a specific path inside the caves, below, I’ll tell you how to complete it or how to find a way into the caves.
As you can quickly notice on the map below, the FC6 Ida’s Triada Relic is a side-mission that starts in Monjas Valey, part of Lozania and Madrugada Region.

The starting location for this Treasure Hunt is northeast of Hideout Trova and west of Verdera. As usual, the only requirement to start this side mission is to find the associated note inside an orange box. In this case (as you can see below), the orange box is on a wooden pole at the bottom of a mountain.

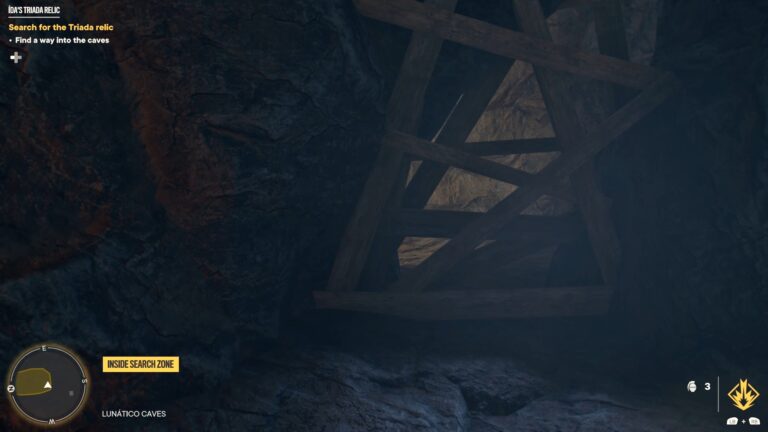
Once you read the note, the actual Treasure Hunt starts, and your first goal is to reach the cave’s entrance.
How To Enter La Triada Mural Cave
To enter the cave where the Treasure Hunt begins, look up to see a Grappling Point. Use it to pull yourself up. Now, look right to spot some vines (pictured). Climb on them, then follow the linear path to see even more vines.

Once you climb these as well, head left and climb the ledge, then more vines. Now, on the left side, you’ll see the entrance to Lunatico Caves. Here, you’ll want to use the Grapple Point (see below) to descend into the actual cave.

How To Find A Way Into The Caves
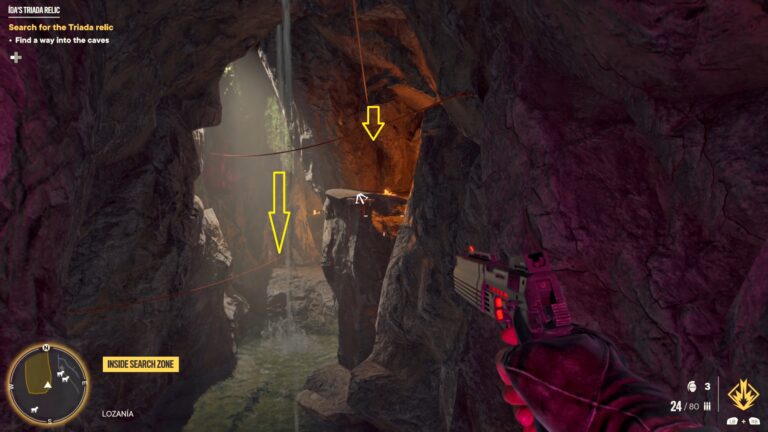
Now that you have entered the caves, there is a specific path you have to follow. And particular actions you have to complete. You’ll also need to follow the white arrows painted on the walls of the cave.
The idea here is to use the ziplines to cross the caves; however, you also need to move from one zipline to another, which can be done by detaching when sliding. For example, in the first area of the cave (pictured), while sliding down the first zipline, press the detach button when above the next zipline.

After you slide the second zipline, use the ledges on the left side to pull yourself up. Now slide the next zipline and detach when above the next one, then do the same for the third zipline. When you reach the next section, melee the wooden planks in my image.
After you climb the three ledges behind the wooden wall above, you’ll see even more ziplines. This time, however, you will not detach. So, slide the upper zipline to cross the large gap, then turn left to see the next area in my screenshot. Remember that your goal is to follow the white arrow.

To continue, use the grapple point on the ceiling, then swing and detach. Now, you’ll see another wooden wall. Shoot it before sliding down the zipline; then, in the following area, you’ll see a pink brazier. Here, you’ll want to grapple on the ceiling and swing to the other side. Next, you’ll see a cave with three ziplines.
As you can guess, here, you have to reach the lower zipline in my image by timing your detach button pushes. When you get to the other side of the cave, turn right to see two ledges. Climb on them, then turn left and jump on the third one.
Now, pull yourself up and follow the ladder. In the next section, use the grapple point on the ceiling, followed by the zipline on the right side, then detach when above the next zipline. While standing in the next area, you’ll see a purple brazier.
Drop on the zipline below your current position and climb the ledge behind the said brazier. Here, you’ll have to climb the cave’s wall. Start with the ledge on the right, then go left and then right again. These will bring you to the end of Ida’s Triada Relic Treasure Hunt.
How To Use Ida’s Triada Relic Oluwa Idol
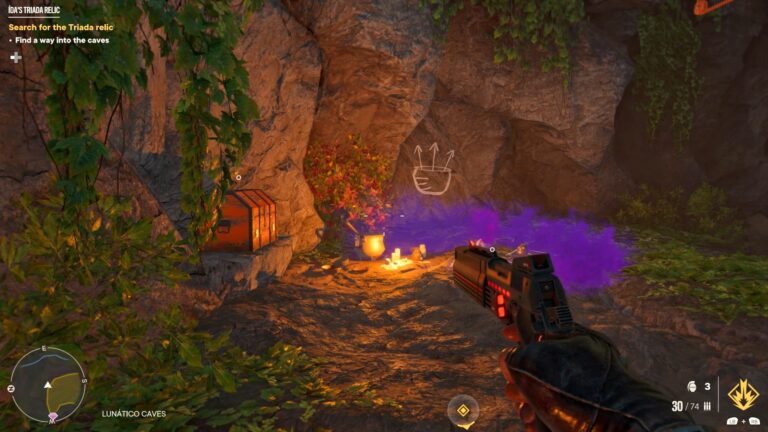
When you reach the end of this Treasure Hunt, there are two essential items you need to get.
- The first one is Ida’s Sigil, which is a helmet found in the chest pictured above
- The second one is the Oluwa Idol in the area covered by purple smoke
The Far Cry 6 Ida’s Triada Relic Oluwa Idol reveals the locations of 28 Oluwa Idols you can collect to gain additional XP. Each idol you find grants 50 XP Points. After you pick these two items, use the zipline nearby to head outside, then head towards the next Treasure Hunt named High Supply.
