Elden Ring Fort Gael is a landmark you’ll encounter while exploring the southwestern side of Caelid, and it is also an important location you’ll have to clear because it allows you to reach Redmane Castle in one piece. Besides being rich in loot, Fort Gael also features a mini-boss you’ll have to deal with.
However, before fighting the boss, you’ll have to enter Fort Gael, which can prove a bit challenging. Once inside the stronghold, you’ll need to open the main gate, and throughout the guide below, we’ll tell you how to complete this location, where to find all key items, and why visiting Fort Gael in Elden Ring is mandatory.
Where To Find Fort Gael
Let’s start with the Fort’s location in the Caelid area, and as you can see below, this stronghold is south of Gael Tunnel, and south of Fort Gael North Site of Grace.
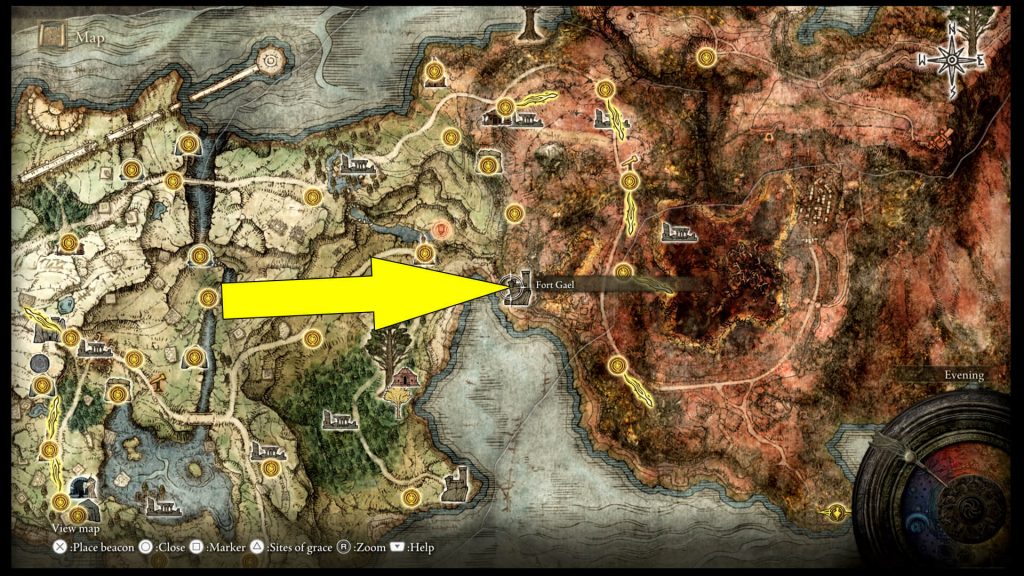
In fact, Fort Gael North Site of Grace is your last stop before attempting to conquer the actual Fort. Make sure you restock there and then get ready to assault the Fort. How you do this depends on your playstyle because Fort Gael is on top of a hill, and on your way towards it, you’ll have to fight a large number of soldiers.
However, you can also sneak around them and rush towards the main gate. You can see the gate below, and it is mandatory to get close to it because there is a Statue of Marika you can use to respawn in case you die.
Upon reaching the location in my screenshot is time to find a way inside Fort Gael.
How To Get Inside Fort Gael
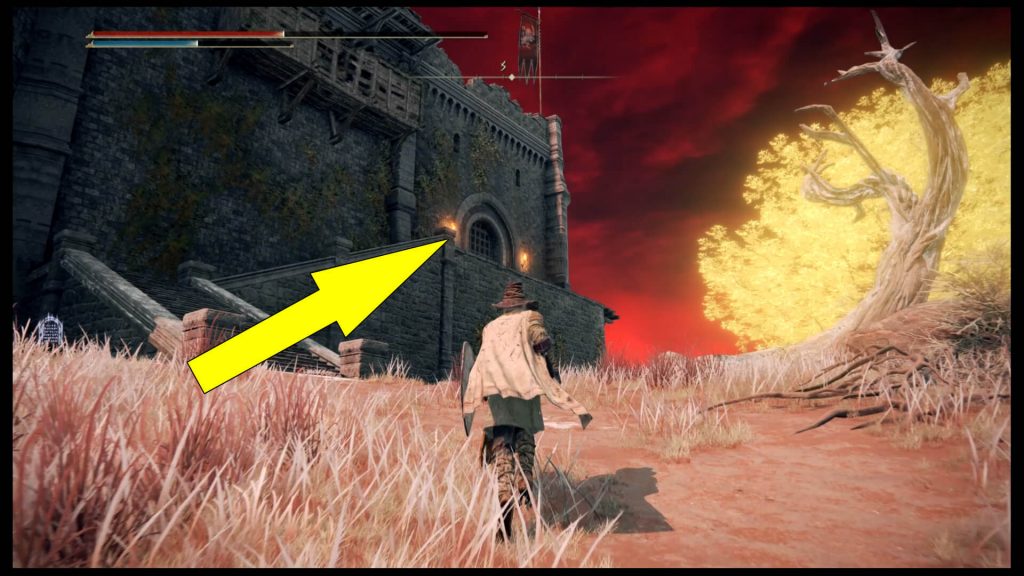
To get inside Fort Gael, from the large iron gate, go around the corner, and you’ll see some barrels. Smash them, then from the wooden platform, drop down on the large tree branch pictured below.
Follow the branch around the Fort’s wall, and you’ll see a ladder guarded by a soldier. Deal with him, then climb the ladder. Now, you should be on Fort Gael’s upper level. So basically, you are inside the Fort. But there is a lot to do here.
Where To Find All Fort Gael Items
The moment you get inside Fort Gael, you’ll see a catwalk you can use to advance. Try not to fall, and deal with the soldier on the other side.

Since he’s not looking at you, you can sneak behind him. Once you deal with him, walk on the wooden beam marked above and loot the corpse to get two Warming Stones. Now, retrace your steps, but stay on the upper level and follow the stairs to the next section.
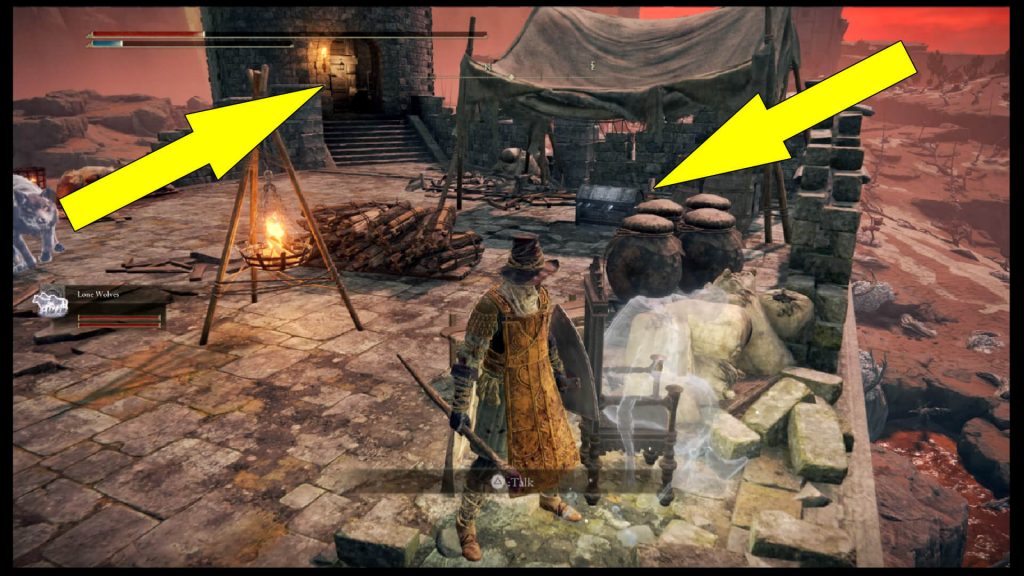
Here, you’ll have to be extra careful because there are three soldiers. One of them is patrolling around, so deal with the first two before he returns. Next, take out the last soldier wielding a lance. Once you clear the area, feel free to talk to the Fort Gael ghost pictured below, then loot the chest under the tent to obtain the Starscourage Heirloom Talisman.
As you can see in my screenshot, you can also access a tower, but for now, ignore it.
How To Open the Gate Fort Gael Gate
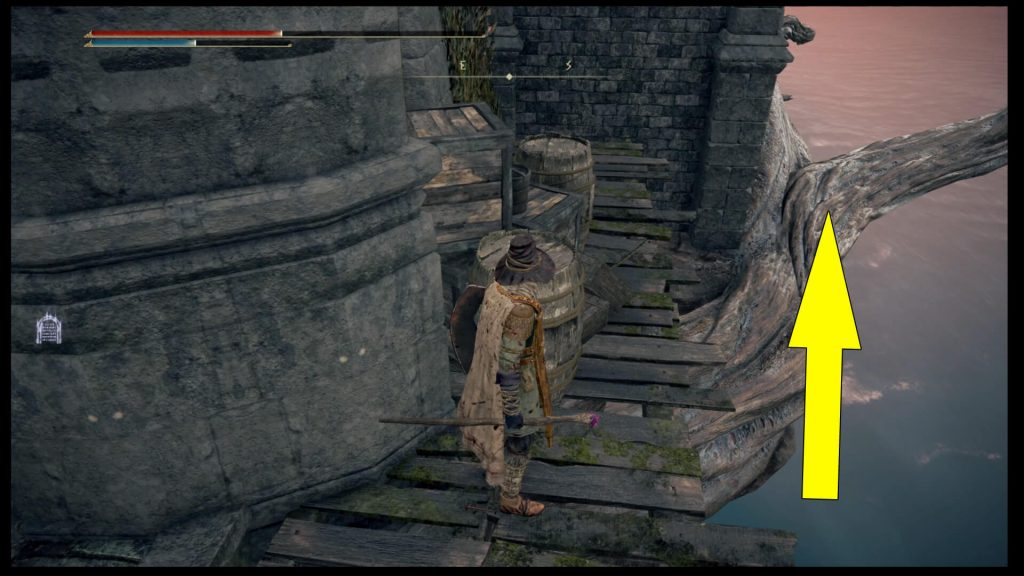
To open the Fort Gael Iron Gate, you’ll need to pull a lever on top of the gate. From the ghost you found earlier, head back to the top of the stairs and smash the protection beam I have marked below.

Now, jump on the wooden platform below and head left to find the lever (also marked above). This will open the large gate of the imposing Fort. From here, you can also access the external wooden platform and loot the corpse at the end of it for one Mushroom.
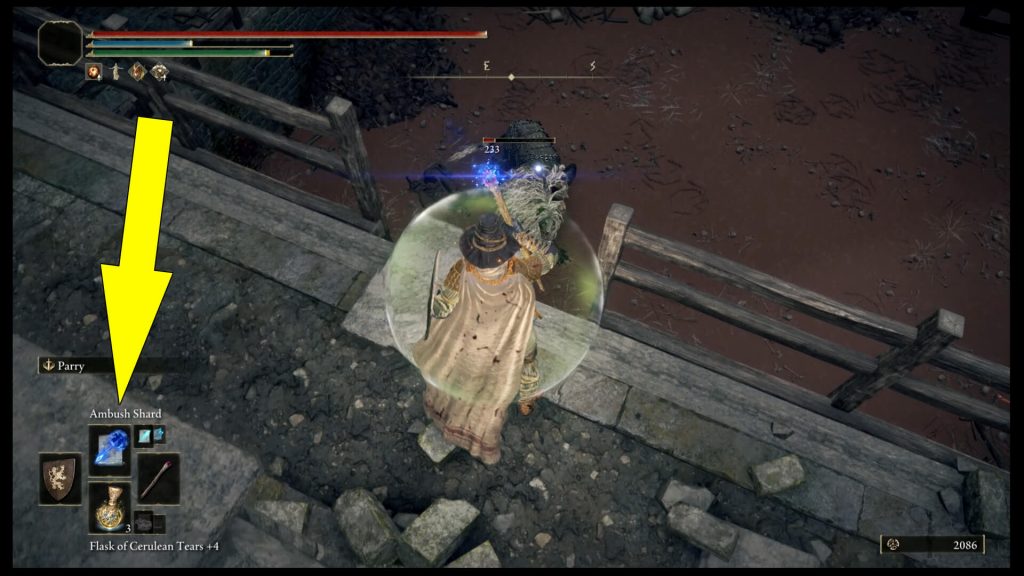
Furthermore, you can deal with the boss in the courtyard from this wall. The creature is extremely fast, and your chance of success mainly depends on your skills and class. If you are a spellcaster and want to defeat it faster, consider using the Ambush Shard obtained from Sorceress Sellen, which is found inside the Waypoint Ruins Cellar in Limgrave.
The creature can’t dodge this spell and won’t even touch you, provided you remain above.
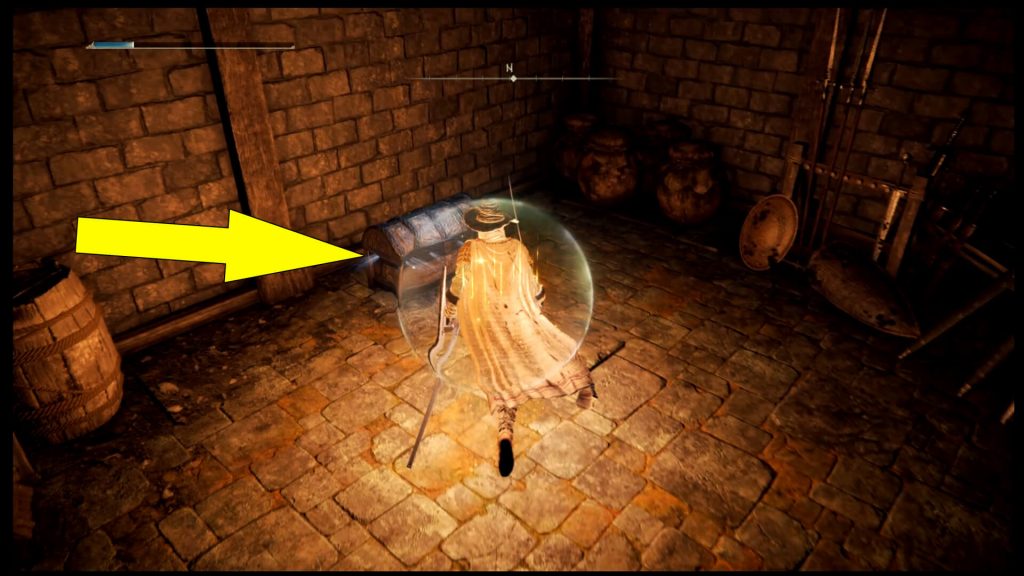
Regardless of how you decide to deal with the strange animal in Fort Gael, you’ll get the Ash of War: Lion’s Claw once you defeat it. Before jumping into the courtyard, head around the upper wall and drop to the level below to enter the armory. Inside, you’ll find a chest that contains the Katar (pictured below).
Get the weapon, then loot the corpse in the courtyard to receive a Rune Arc. Once you get it, climb the ladder inside the courtyard, turn left, and walk on the Fort’s wall, crossing the beam again. When you reach the other side, jump over the Fort’s wall on the right side, and you’ll land on a wooden platform (pictured below).
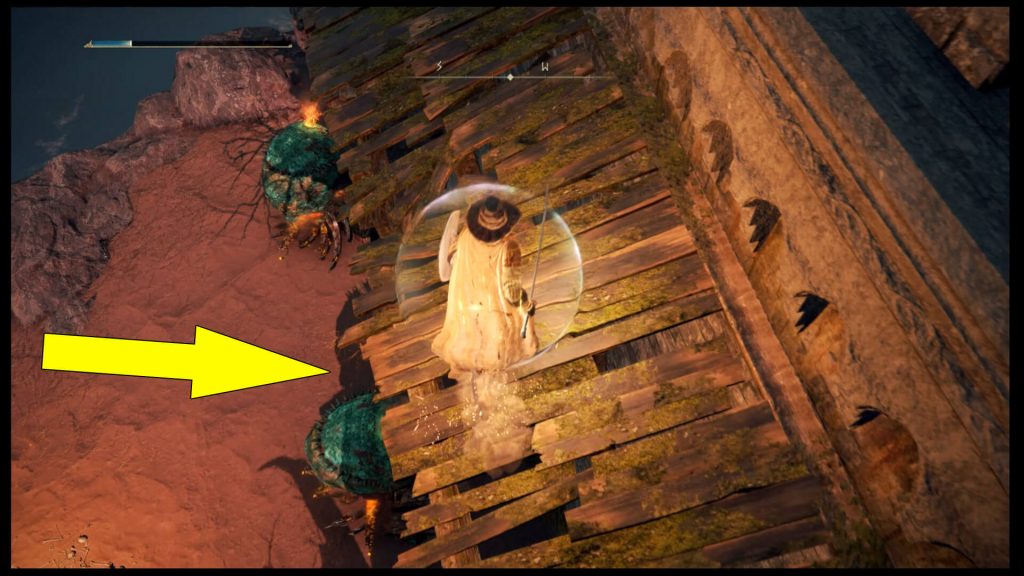
In the back of the Fort are two chariots you’ll have to destroy. These vehicles are powerful, and you must hit them from behind because that’s where their drivers stand.
Again, the Ambush Shard spell works pretty well on these. After you deal with them, get the Flame Grant Me Strength Incantation from the corpse resting near the wall. Now that you have cleared Fort Gael head back to the tower where you fought the three soldiers.
How To Use the Fort Gael Portal
If you climb the tower, you’ll find the Fort Gael Portal in FromSoftware’s game. As mentioned in the beginning, this Portal is essential because if you use it, you’ll be teleported across the Impassable Greatbridge. Use it after you get the Talisman in the tower near the Great Bridge.
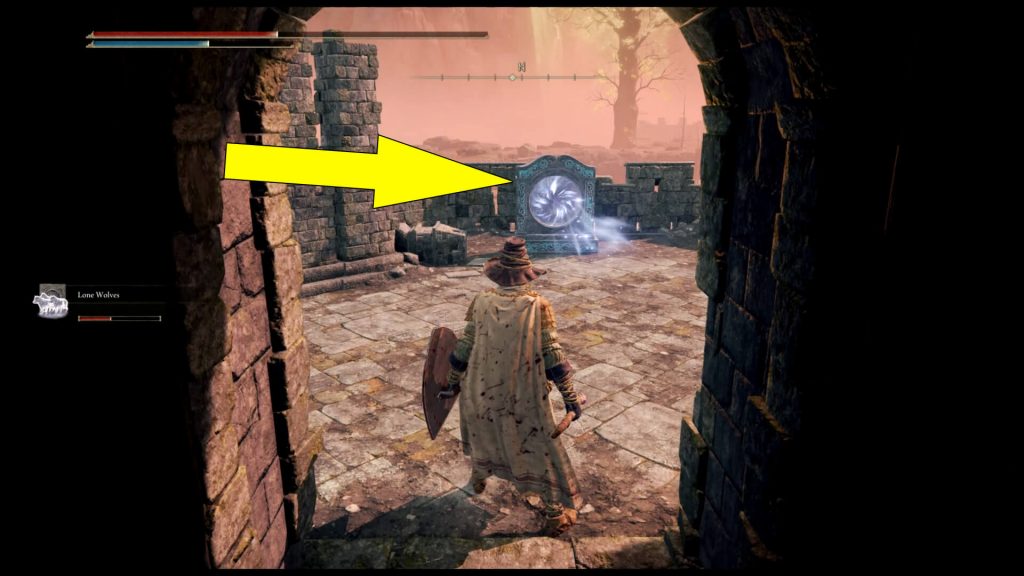
So, the only way to cross the Impassable Greatbridge is the Elden Ring Fort Gael Portal pictured above. Since the gate is now wide open, feel free to use the Portal when you want to visit Redmane Castle.
