Gaol Cave is an Elden Ring dungeon located in the western Calid region that you may want to explore as soon as you enter Caelid because of the loot you can find inside. The Elden Ring Gaol Cave dungeon may also look a bit complicated at first because of the numerous tunnels inside; however, once you learn how to navigate it, it’s very accessible.
It is also worth mentioning that inside the Caelid Gaol Cave dungeon, you’ll find three pieces of gear:
- Pillory Shield
- Wakizashi
- Regalia of Eochaid
Since this dungeon is quite rich in loot, throughout the guide below, we’ll tell you how to navigate the Gaol Caves and retrieve the most important items inside.
Where To Find the Gaol Cave
Let’s start with the dungeon’s location. As you can see on the map below, in the video game developed by FromSoftware, Gaol Cave is found northwest of Fort Gael.
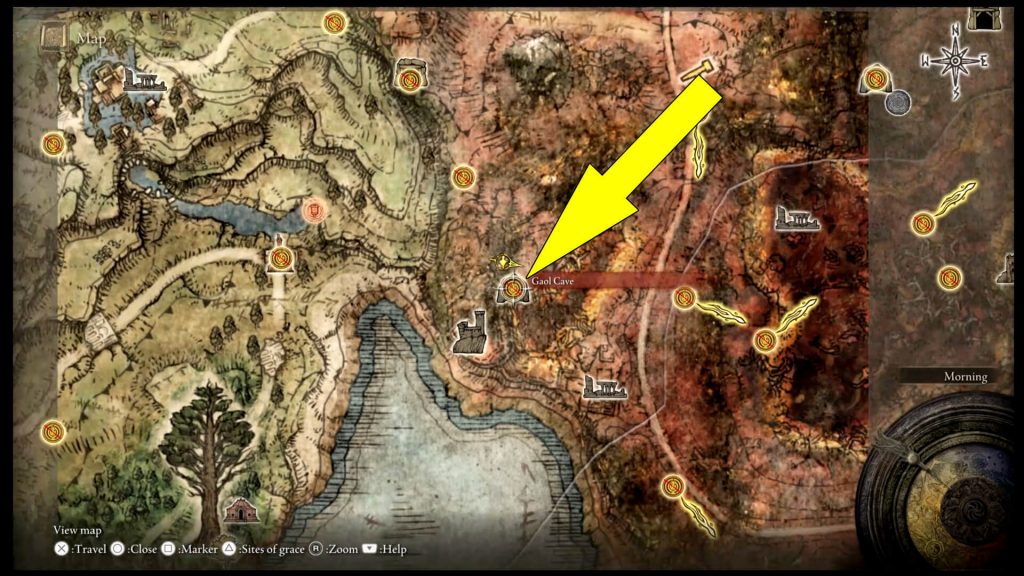
The Gaol Cave entrance is on the river’s bank, and there is also a ghost you can find across the said river that will lead you to the cave. Just look for the ghost northwest from the location marked on my map above.
When you find the entrance, you’ll have to remove the fog by interacting with the Imp statue on the left side and trade 2 Stonesword Keys.
As you probably know by now, these keys can be obtained by exploring the world or buying them from merchants.
Once you remove the Gaol Cave barrier at the entrance (pictured above), head inside and follow the main tunnel to get to the Site of Grace. You can do this before or after looting the chest nearby for 1 Rune Arc.
After resting at the Site of Grace, follow the only possible path (tunnel) and in the next cave, kill the rat and loot the corpse on the left side for a Gold Rune.
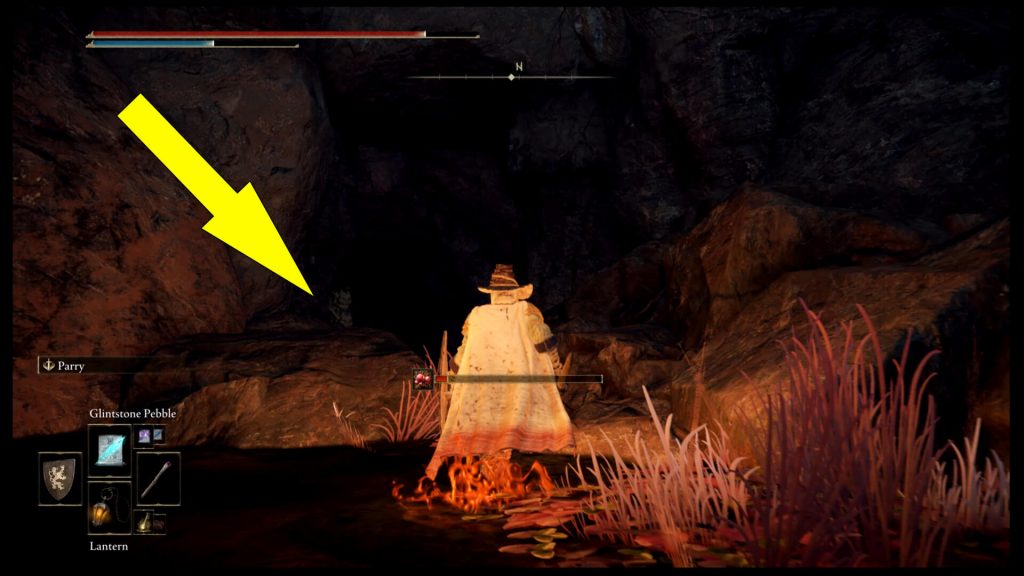
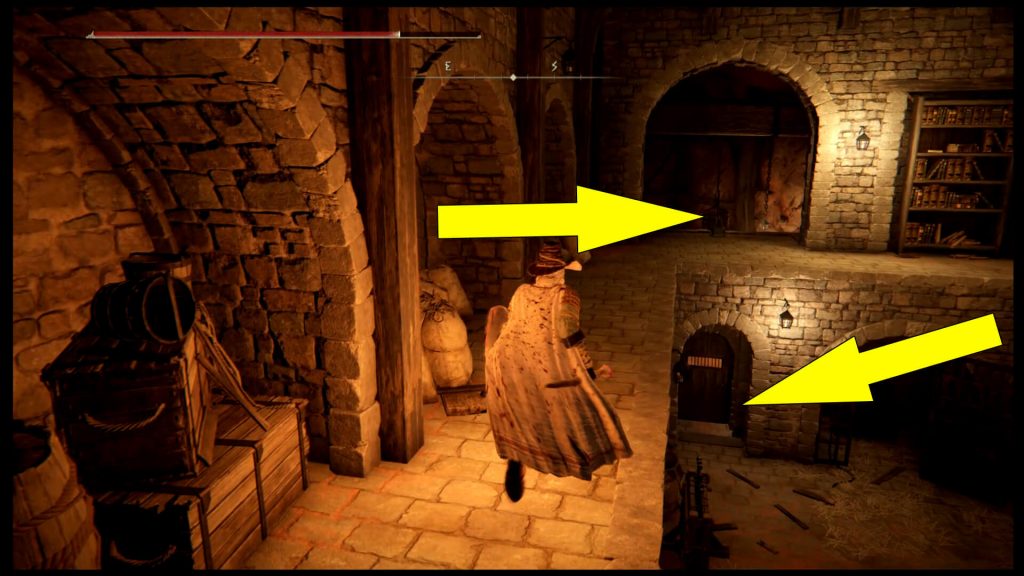
Now, keep pushing through the next tunnel (there is only one possible path here), and you’ll reach another large cave with some suspended cages. Here, you’ll want to kill another rat, then head through the metal gate on the right side (pictured below).
At the end of the next tunnel, you’ll fall through a hole to the lower level. Keep pushing through the next tunnel, and you’ll get to the actual dungeon, which is, in fact, a prison. The idea here is to find a lever that opens all cells in the dungeon, along with the one leading to the boss area.
You should know, though, that by opening the cages or the cells, you’ll also release the prisoners inside or the fire ghouls. If you want to play it safe, you may want to deal with them through the bars of the cells. Simply approach the doors and hit them with a melee weapon. Now, let’s see where is the lever in question.
How To Open The Doors (Gaol Cave Prison Cells Lever Location)
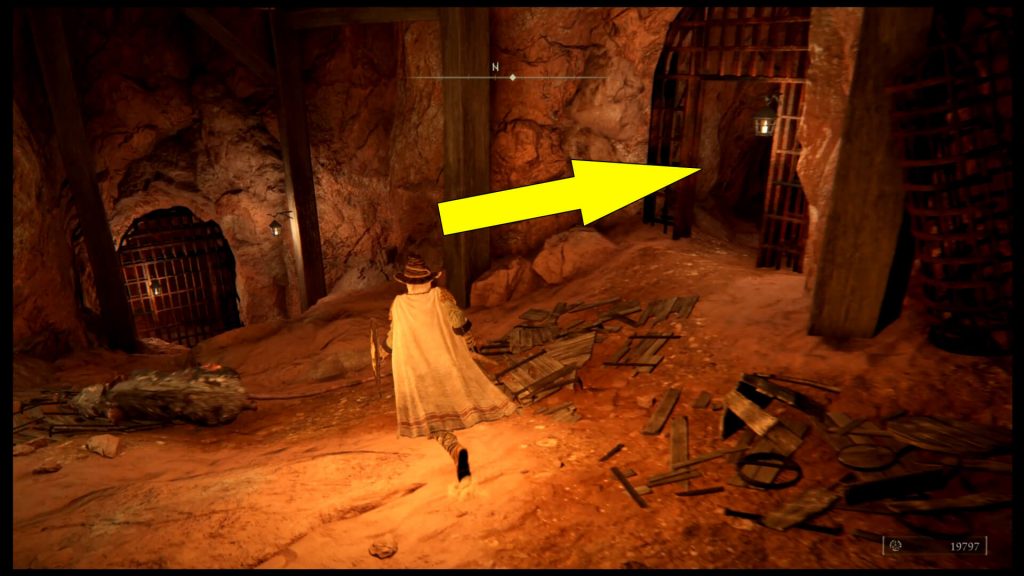
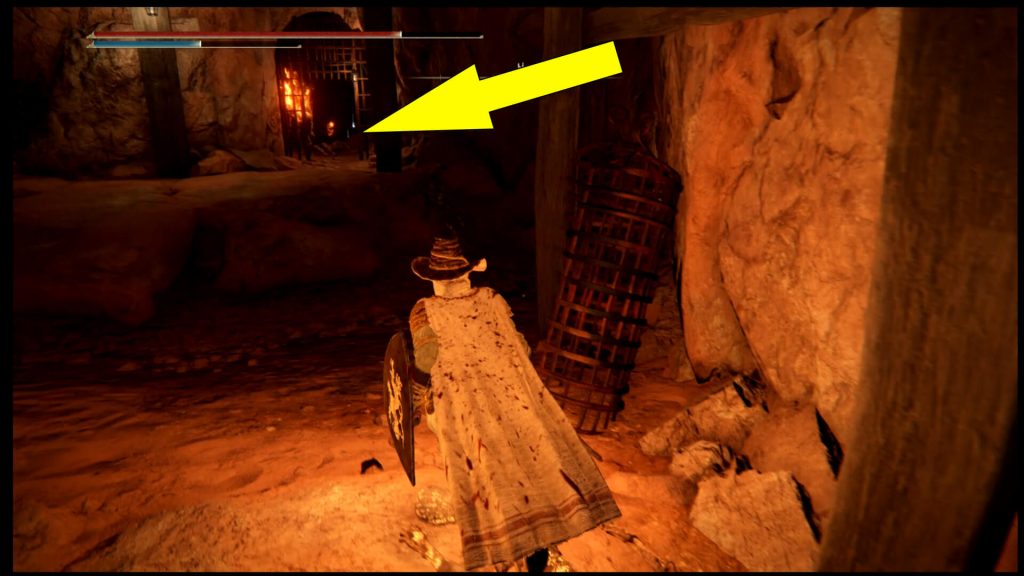
From your current location, there is only one exit that leads to another cave, which is a bit larger. If you turn right when you enter this cave (after dealing with the guard), you’ll see a wooden door (pictured below).
Above it is the lever you want to reach to open the cages, so head through the tunnel on the left side while facing the locked door. The path is marked in my screenshot by the left arrow.

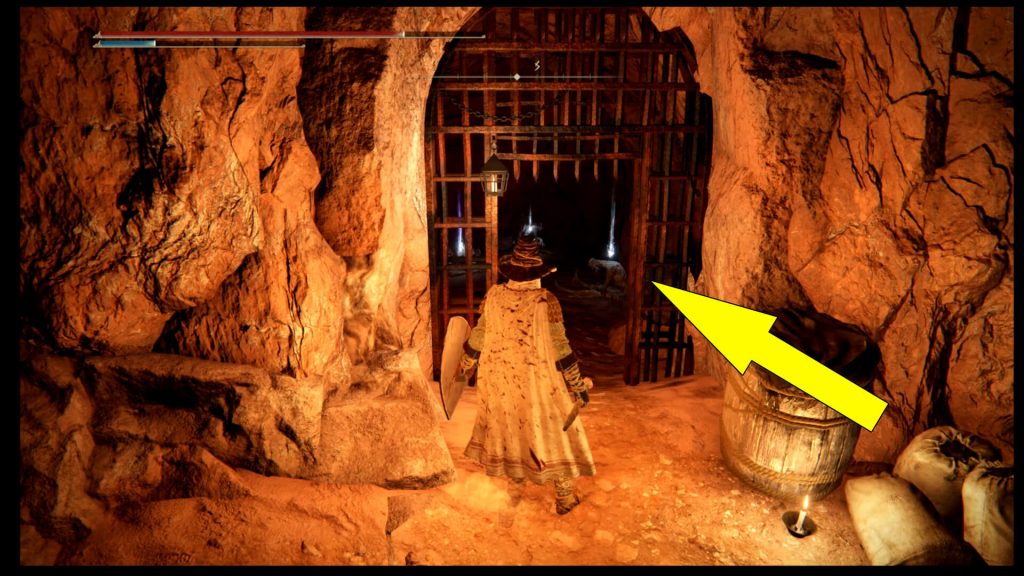
Drop in the tunnel below, but be careful because there are two guards. One is on the right side by a locked cage, while the other is under the upper section. Turn left now and continue through the next tunnel, ignoring all locked cells.
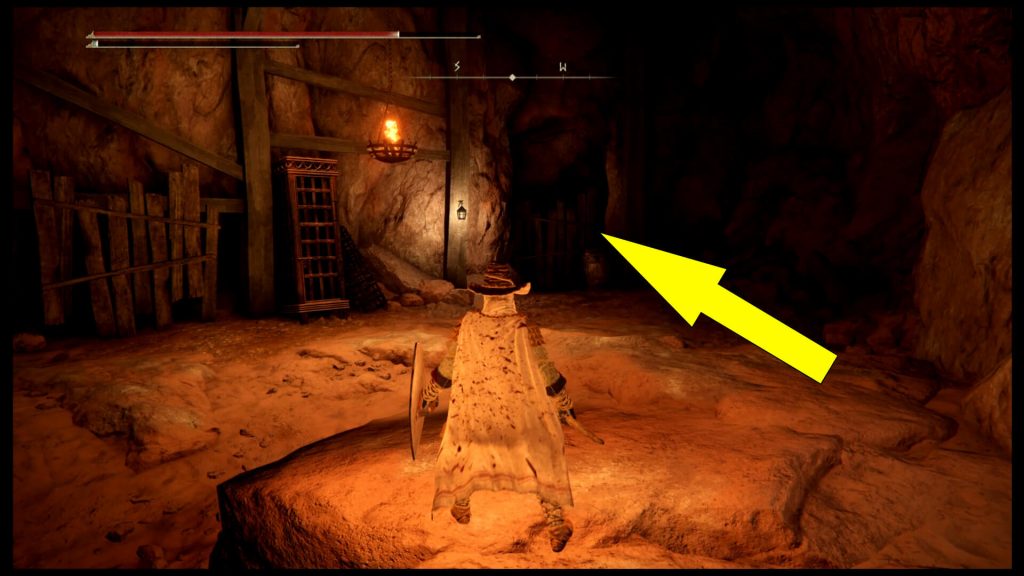
When you reach the other side, you’ll see two more guards near another cell. Deal with them, then turn right. As you progress through the next tunnel, you’ll start ascending, and on the left side, you’ll see a giant rat.

Here, you’ll want to kill the rat and loot both corpses in my screenshot above to get a Gold Rune and some Turtle Neck Meat. Now, turn around and keep following the tunnel ahead, killing two additional rats and avoiding the caltrops on the ground.
Eventually, this tunnel gets you to the Gaol Cave Armory, where you’ll need to dispatch several Vulgar Militia. Upon clearing the armory, inside, you should loot the corpse by the entrance to get a Gold Rune, then the chest on the other side of the lower floor.
From here, you can also open the Gaol Cave Locked Door (pictured below), and if you follow the stairs to the second floor, you’ll get to the lever that unlocks all cells (second arrow in my screenshot).
Where To Find All Gaol Cave Items
Upon opening the doors to all cells, things can get pretty messy because the burning ghouls explode after a while. So remember to dodge and try not to get swarmed by them. From the lever’s location, you’ll want to jump to the room below, and after you clear it, check the first cell on the left after you jump.
Here, you’ll find an Old Fang, a Melted Mushroom, and the Pillory Shield. From here, you’ll want to head back to the tunnel on the other side, where the Statue of Marika is found, and drop to the area below.
In the cell on the right side is a Golden Rune. Follow the tunnel ahead, and on the left side, you’ll see another cell with three corpses.
Loot all of them to obtain the Wakizashi, a Stonesword Key, and another Golden Rune. Now, exit the cell, turn left, and keep pushing forward, going through the door that was previously flanked by two guards.
Here, you’ll spot two corpses on the left side carrying a Rainbow Stone and a Golden Rune, as well as a dead end.
Where To Find the Boss Room
To progress through the dungeon and complete it, you’ll have to find the Gaol Cave Boss Room, which is, in fact, below your current location. Therefore, in the current room, find the wooden planks in my screenshot and smash them with a melee attack.
There is a hole in the area behind the planks, and you’ll use it to descend to the boss. Make sure you jump from one platform to another, and when you reach the ground, you’ll find the Frenzied Duelist.
The boss is very accessible, especially since you have already faced a similar one in Limgrave. Just make sure you avoid his attacks and summon a Spirit to keep him busy. Once you defeat the Frenzied Duelist, he’ll drop the Putrid Corpse Ashes.
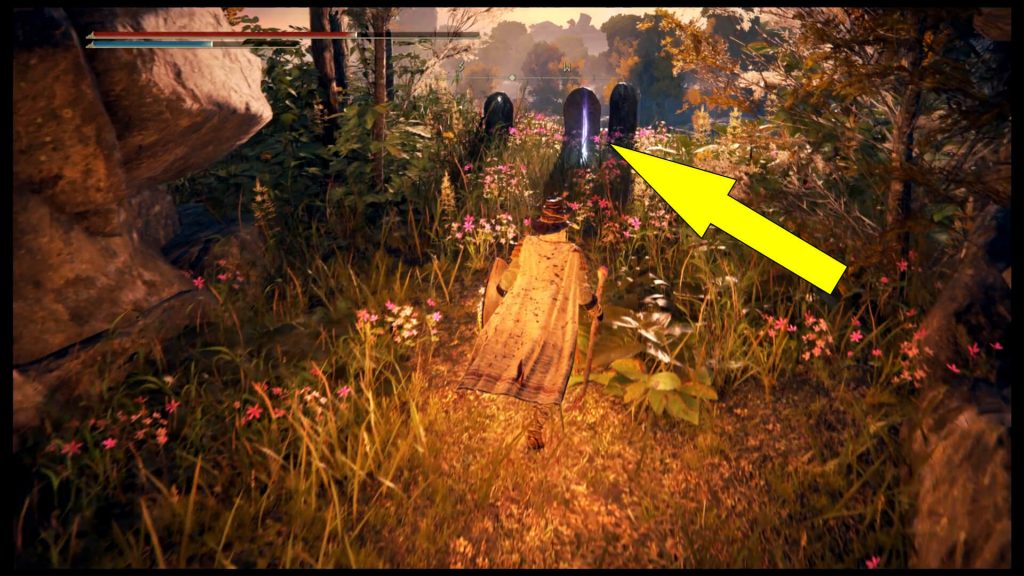
Now that you’re done with him, instead of exiting the Gaol Cave using the teleportation point in the Boss Room, follow the tunnel on the left side. As you exit the cave, you’ll see three tombstones and the Regalia of Eochaid sword between them.