Sorceress Sellen is an Elden Ring NPC you will meet pretty early in the game while exploring the Limgrave region with a lengthy questline and a lot of loot and lore tied to her.
Even though Sorcerer Sellen’s questline won’t unlock a special ending in the video game developed by FromSoftware, like Ranni the Witch and Dung Eater questlines, it will reward you with new great-looking Armor Sets and some powerful Sorceries for your Tarnished.
Therefore, in this guide, we go over all of the steps you’ll need to complete in Sorceress Sellen Quest, including all the items you’ll need to collect and the NPCs you’ll need to speak with.
How To Start Sorceress Sellen’s Quest
You’ll first encounter her at the Waypoint Ruins in the Limgrave region, where she’ll introduce herself as the Graven Witch.

To pursue her quest, you need to agree to study under her tutorship. Learning new sorceries will allow you to have more dialogues with her, but that’s all for now.
Primeval Sorcerer Azur
After exhausting all the dialogues, you need to travel north of the Hermit Village in Mt. Gelmir region, where you will meet an NPC known as Primeval Sorcerer Azur. Primeval Sorcerer Azur used to be Sorcerer Sellen’s tutor and will need to be found to progress with her quest.
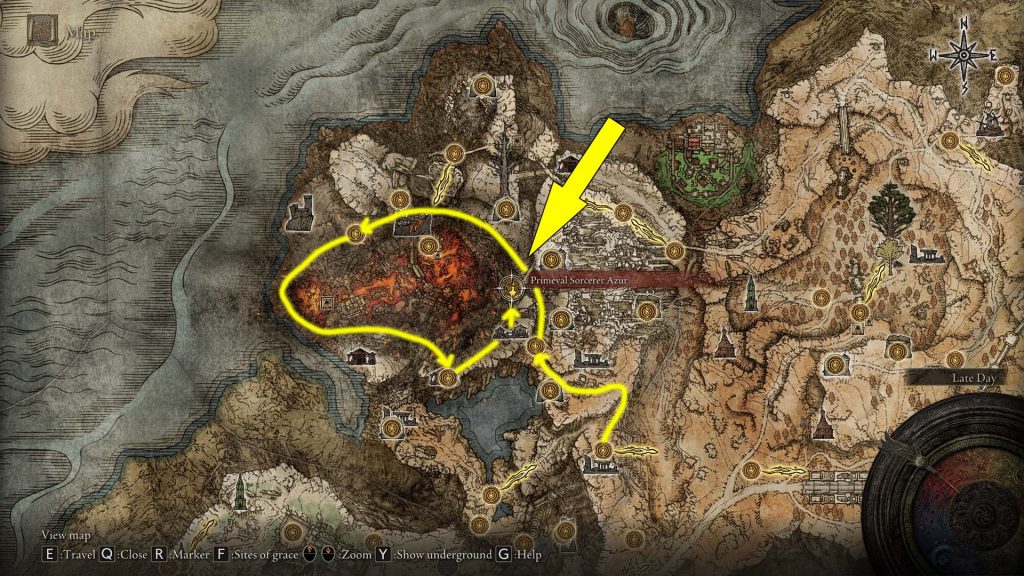
To reach this place, you must circle the volcano:
- Head to the Seethewater River Site of Grace, located west of Wyndham Ruins.
- Follow the river north, then west, until you reach Seethewater Terminus Site of Grace, located west of Fort Laiedd.
- Travel southwest and you should encounter the Magma Wyrm Boss (you can fight or avoid it).
- Past this boss, head southeast-east on a ramp between the cliffs until you reach Craftsman’s Shack with the Site of Grace inside.
- East of the shack, up the hills, and past the wooden barricades, you will find Hermit Village.
- Head north to find the Primeval Sorcerer Azur.
You will find Primeval Sorcerer Azur sitting behind giant rocks next to the site of grace named by him.
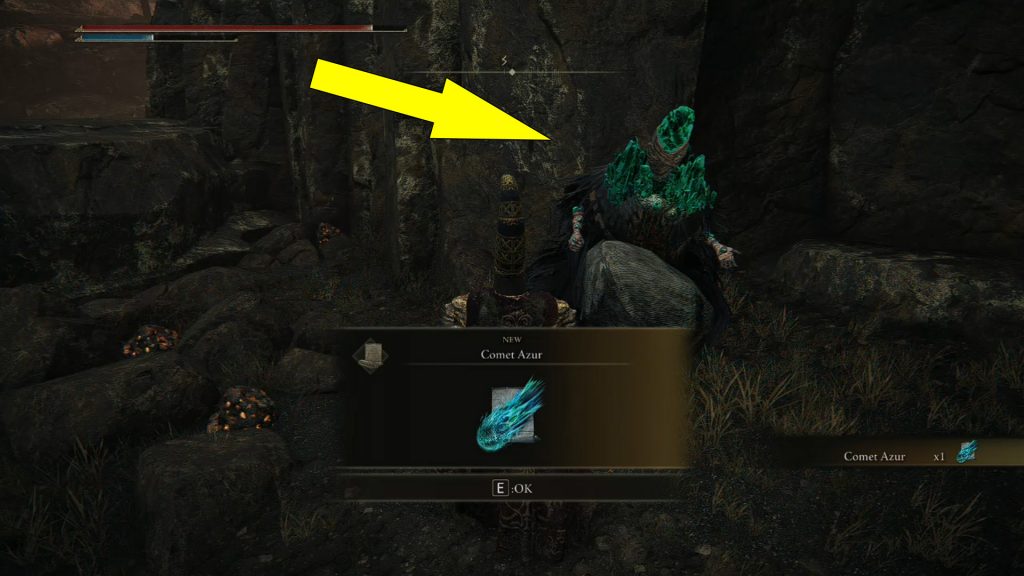
He won’t say anything when you interact with him, but he’ll give you the Comet Azur Sorcery after a while. After obtaining the Comet Azur Sorcery, return to Waypoint Ruins and speak with Sellen.
If you exhaust her dialogue, she will ask you a favor: to find Master Lusat, who’s been banished from the academy and imprisoned in a place known as Sellia in the eastern Caelid Wilds. She will also give you the Sellian Sealbreaker key to cross the boundary that encloses him.
Master Lusat
Master Lusat can be found inside the Sellia Hideaway dungeon in northeast Caelid.
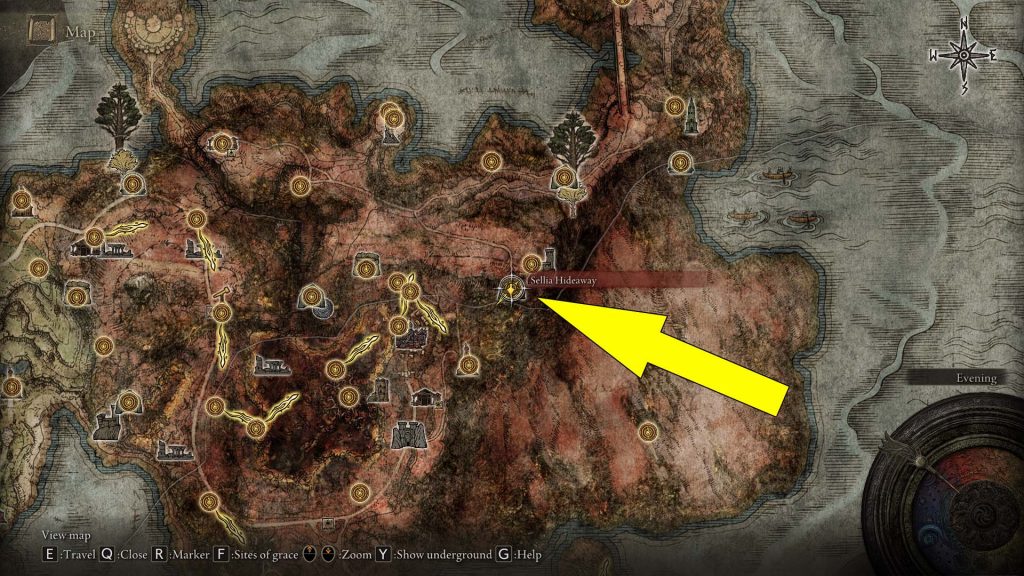
To reach the entrance, head north up the hill from the Church of the Plague Site of Grace and go straight beneath the wooden arch. You can reveal the secret entrance along the cliffside behind the largest tombstone (defended by a sorcerer enemy) by rolling or hitting the illusory rock wall.
Make your way through the dungeon following the Sellia Hideaway guide. Once you reach the magical barrier, use the Sellian Sealbreaker key to unlock the room and interact with Master Lusat.
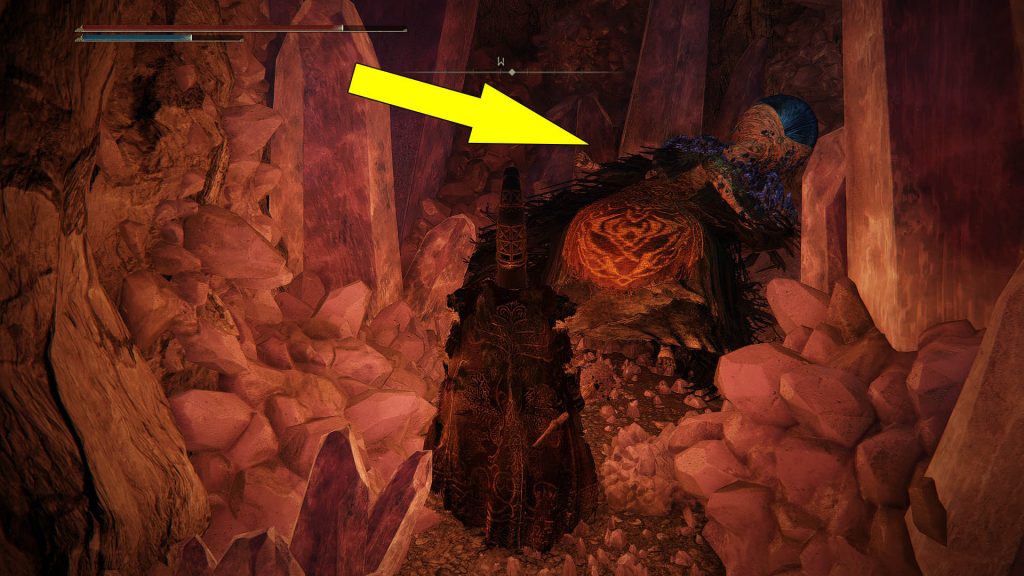
Without saying anything, the sorcerer will hand you over the Stars of Ruin Sorcery. Return to Sorceress Sellen in Waypoint Ruins and report back about Master Lusat’s location.
Witchbane Ruins
NOTE: To progress her quest, you will need to defeat Starscourge Radahn during Ranni the Witch questline.
After defeating Starscourge Radahn, return to Sellen in Waypoint Ruins, and she will request that you meet her in person at the Witchbane Ruins, west of Weeping Peninsula. Witchbane Ruins can be found south of the Fourth Church of Marika.
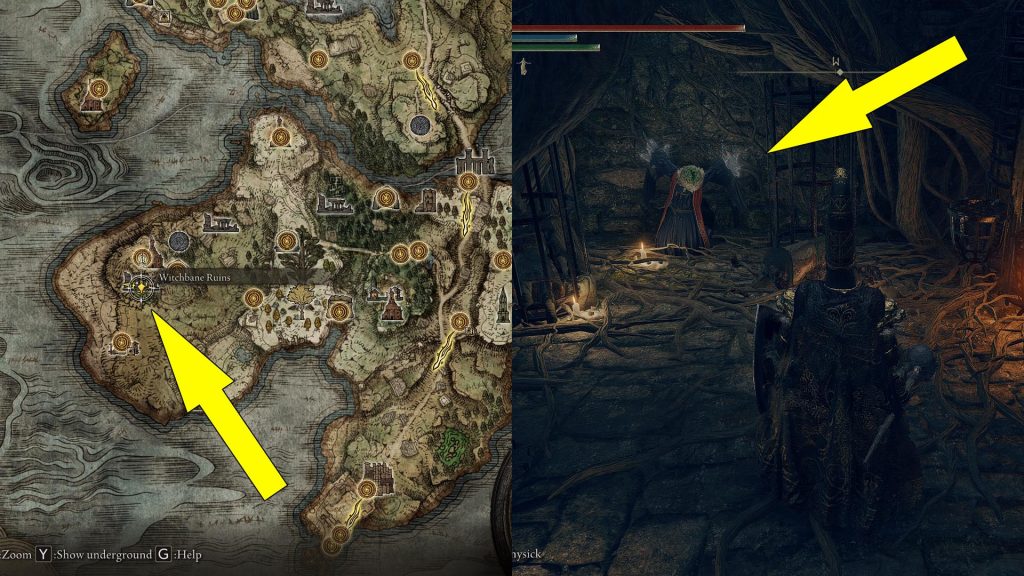
You’ll find Sellen shackled when you enter the cellar in Witchbane Ruins. Interact with her, and she’ll ask you to deliver Sellen’s Primal Glintstone, which contains her life essence, to another body.
Seluvis’ Hidden Cellar
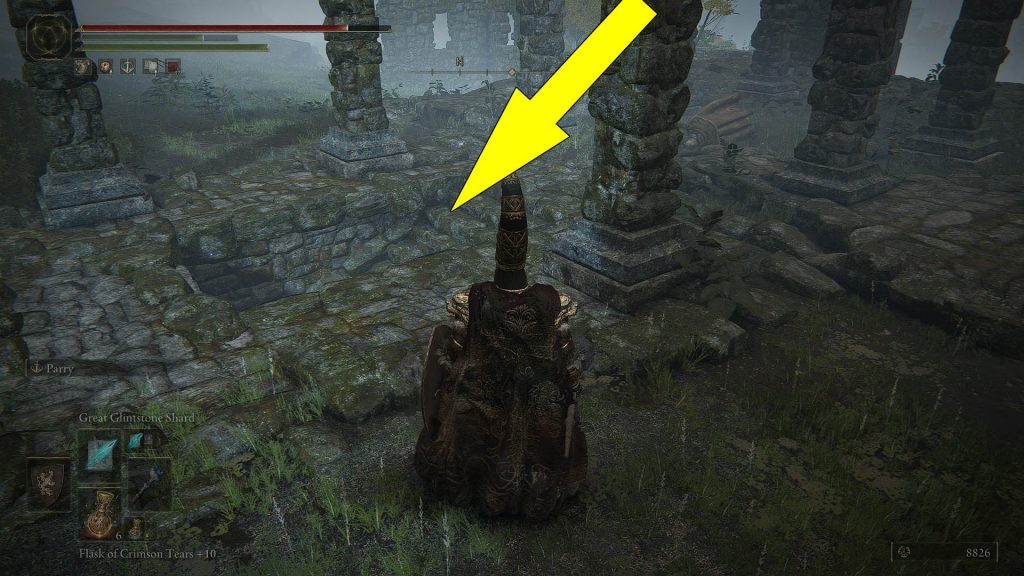
Once you have Sellen’s Primal Glintstone, you will need to travel to the Three Sisters area, in the north of Liurnia of the Lakes. You will find some ruins between Ranni’s Rise and Renna’s Rise. Between the stone pillars inside the ruins, there is an illusory floor that, if you strike it or roll on the ground, reveals the hidden entrance to Seluvis’ Hidden Cellar.
Inside, there will be a message note left on the ground by Seluvis: “Seluvis’ puppet. Do not touch.” Next to the message is an illusory wall that will reveal Sorceress Sellen’s new body.
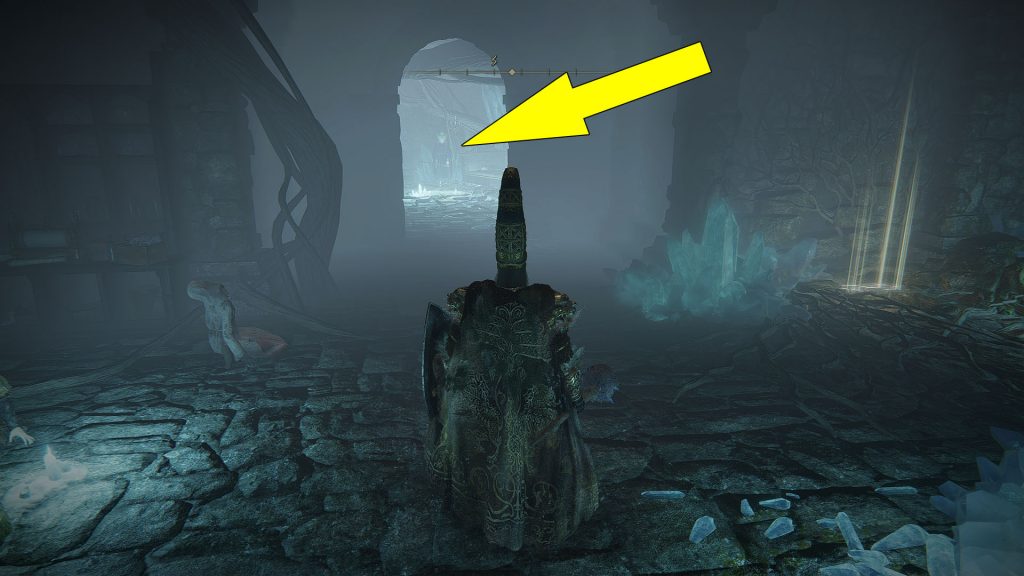
Interact with the body by transplanting Sellen’s Primal Glintstone to bring Sorceress Sellen back to life. After speaking with her, she will resume selling sorceries here and have vanished from the Waypoint Ruins.
Witch-Hunter Jerren
Travel to Redmane Castle in Caelid, where Witch-Hunter Jerren is now in the throne room, and exhaust his dialogue. If you’ve already exhausted all dialogue options, he might not appear here, and you can skip the Redmane Castle visit. Return to Witchbane Ruins and look for Witch-HunterJerren in the room with Sorceress Sellen.
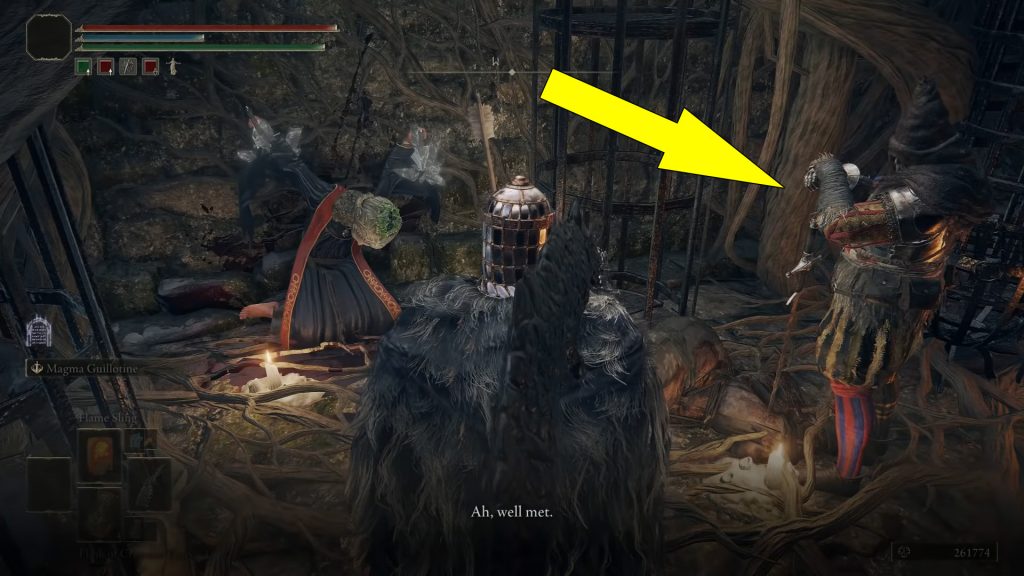
To progress the questline, you must once again exhaust his dialogue.
NOTE: If he doesn’t appear here, proceed to the next step.
Raya Lucaria Academy
The final step to complete the Sorceress Sellen Quest is fast travel at Raya Lucaria Academy’s Grand Library, the Rennala, Queen of the Full Moon boss room. From here, head outside through the door on the east, and you will find two summoning signs: gold and red.
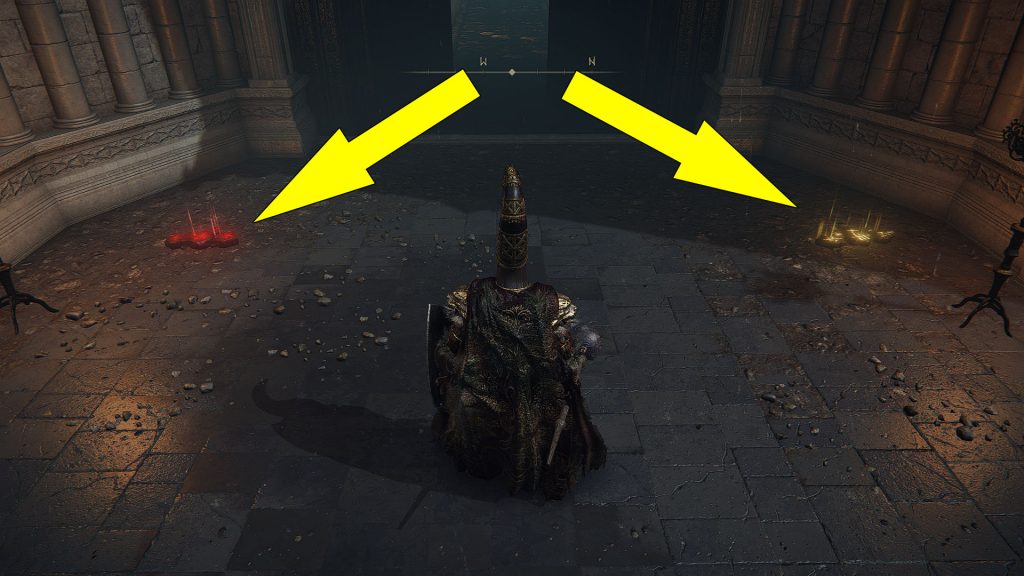
Each summoning sign has a different outcome, so you must choose wisely.
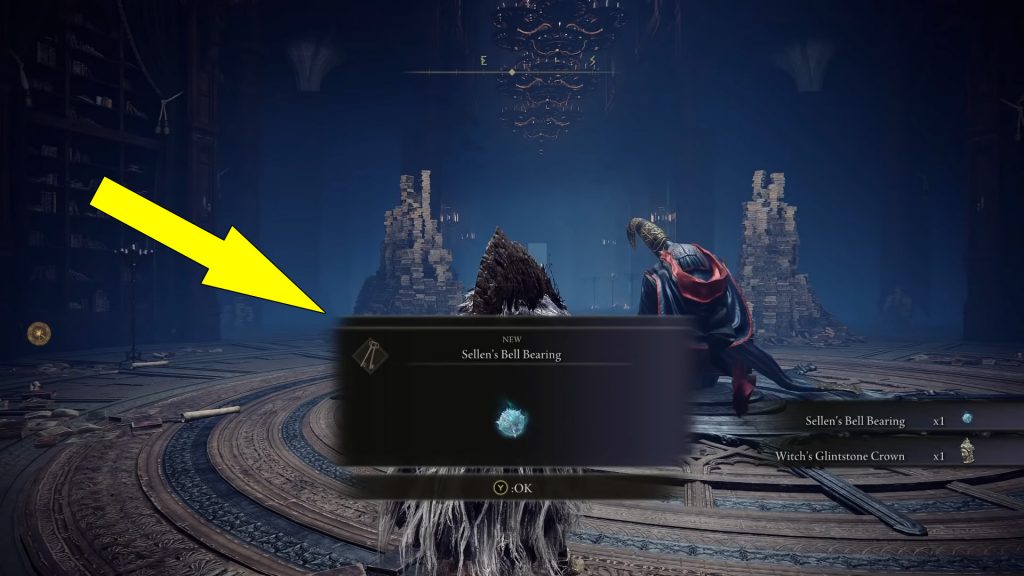
Red Summoning Sign: Summon Witch-Hunter Jerren to Defeat Sorcerer Sellen
After defeating Sorceress Sellen, you will be rewarded with the Witch’s Glintstone Crown and Sellen’s Bell Bearing.
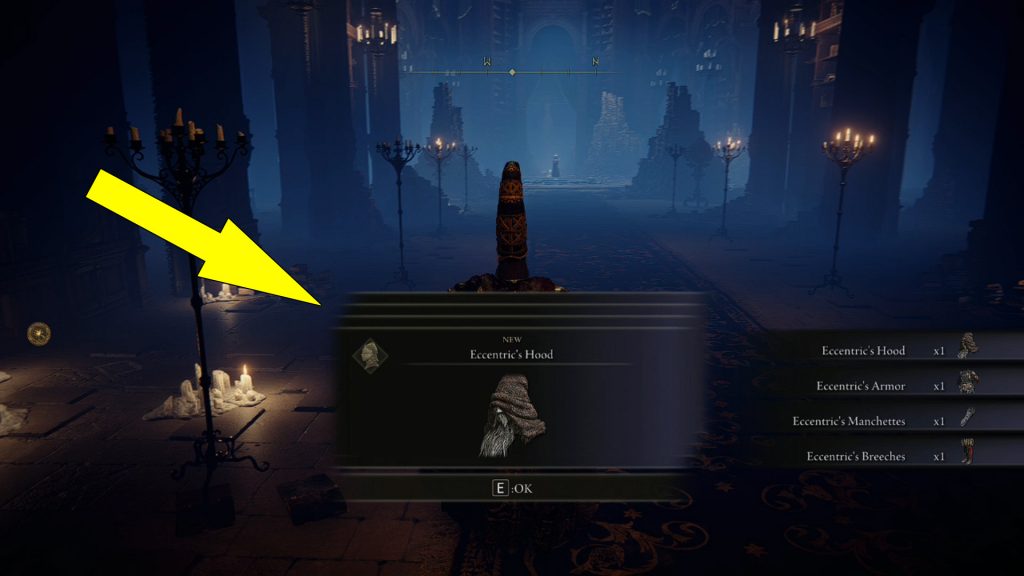
Jerren Witch-Hunter stands outside the Grand Library, next to his summoning sign. Once you exhaust his dialogue, he will give you an Ancient Dragon Smithing Stone. Since there is no other purpose for keeping Witch-Hunter Jerren alive, you can kill him to receive the Eccentric Armor Set.
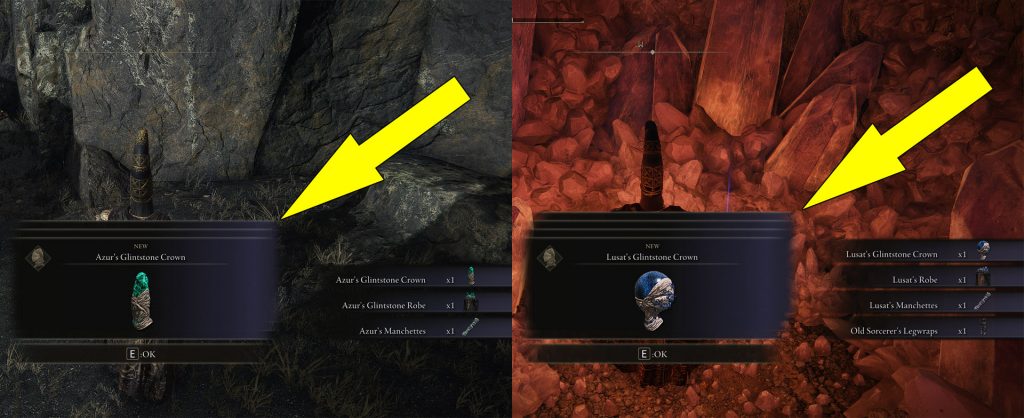
NOTE: If you choose to kill Sellen, you won’t be able to obtain Azur’s Glintstone Set and Lusat’s Set.
Gold Summoning Sign: Summon Sorcerer Sellen to Defeat Witch-Hunter Jerren
After defeating Witch-Hunter Jerren, you will be rewarded with the Eccentric Armor Set.
Sorcerer Sellen will take Rennala’s place in the library. Once you exhaust her dialogue, she will give you the Glintstone Kris Dagger, and Shard Spiral Sorcery will be available for purchase in her shop. After exhausting Sellen’s dialogue in the Raya Lucaria Academy’s Grand Library, reload the area (rest at the nearby site of grace) and watch her transformation.
Next to her, you will find the Witch’s Glintstone Crown, and Rennala will be back in her original place.
NOTE: Sorceress Sellen will remain in Raya Lucaria Academy’s Grand Library until you find Master Lusat in Sellia Hideaway dungeon.
After Sellen’s transformation, you can re-visit Primeval Sorcerer Azur and Master Lusat’s bodies to obtain Azur’s Glintstone Set and Lusat’s Set.
That’s everything you need to know to complete the Elden Ring Sorceress Sellen Questline. If you have any questions or suggestions, let us know in the comments section below.
