There are 6 Astronomy Wing Collection Chests in Hogwarts Legacy, and if you are a completionist, you need to obtain all of them along with the ones in the rest of the areas in Hogwarts Castle. You also get random wand handles and conjuration recipes for the Room of Requirement from the Collection Chests, which may interest you.
The problem is you must first find the collectibles, and for some of them, you’ll need to solve puzzles, which can be tricky.
Where To Find the Six Astronomy Wing Collection Chests in Hogwarts Legacy
The Astronomy Wing can be quickly accessed by opening your map, selecting the top right flag, and fast-traveling to one of the 7 Floo Flames in the area.
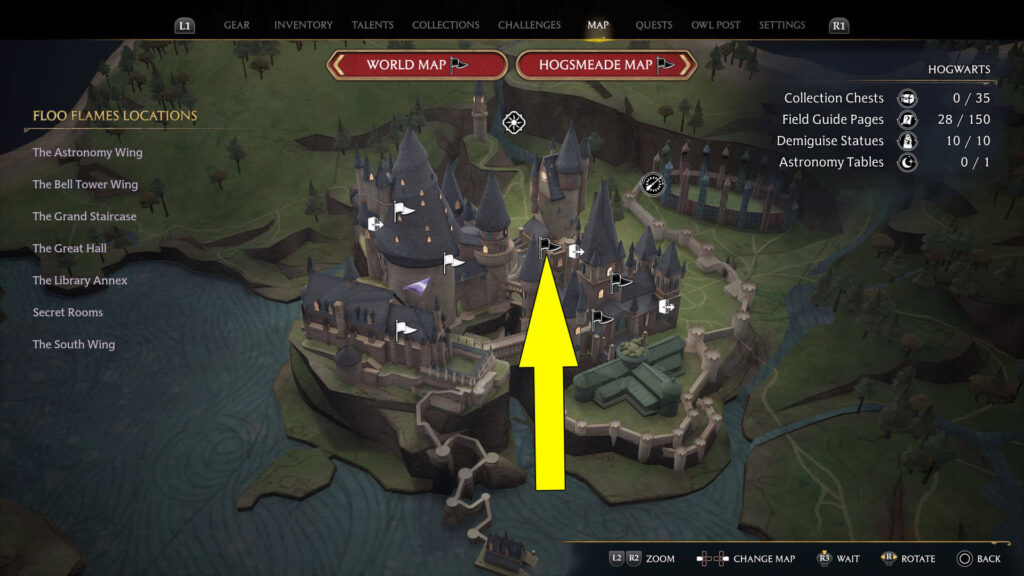
Of course, obtaining the Astronomy Wing Collection Chests is easier if you have all the Floo Flames in the area unlocked. Now, let’s see how to get the chests in this area.
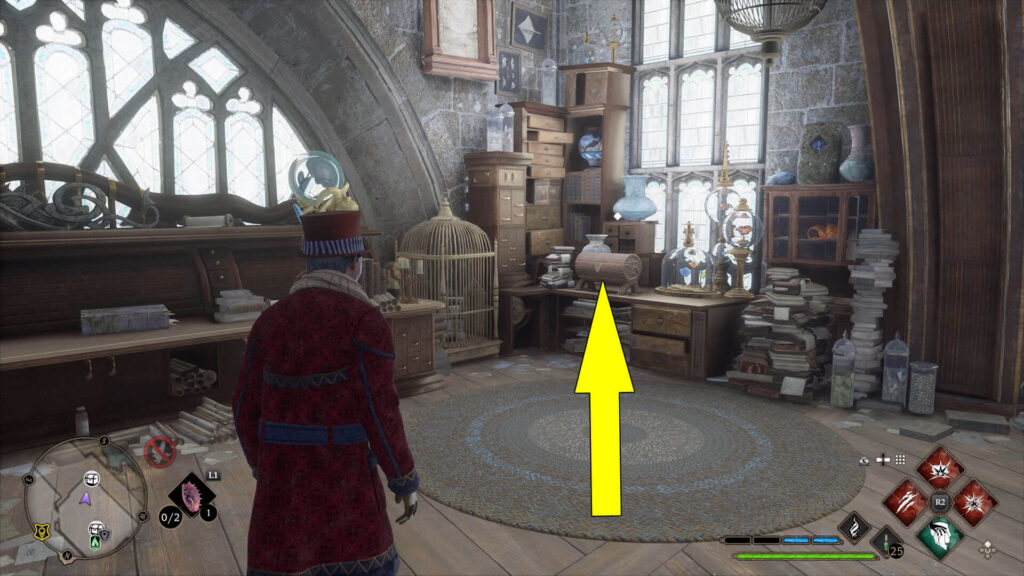
Collection Chest #1: Next to a Cage
The first Hogwarts Legacy Astronomy Wing Collection Chest is close to Professor Fig’s Classroom Floo Flame. Just go through the door southwest of the Floo Flame to find the Chest collectible on a table next to a cage in the southern corner of Professor Fig’s Classroom.
Collection Chest #2: Next to a Fireplace
For the second Collection Chest in the Astronomy Wing, you’ll need first to fast-travel to the Transfiguration Courtyard Floo Flame. Then, enter the castle through the door next to the Floo Flame and head west to reach another door on top of a few stairs.
Open the door using the upgraded version of Alohomora, learned during The Man Behind The Moons side quest. After you pick the level 2 lock and go through the door, you’ll find the collectible on the table next to the fireplace.

Collection Chest #3: Next to a Statue
The next Astronomy Wing Chest will require you to solve an animal symbols door puzzle. To find the puzzle, you have to fast-travel to the Charms Classroom Floo Flame, then turn southwest, go a couple of meters forward, and turn around to see the puzzle door to the right.
Approach the door with the animal symbols around it and interact with it to reveal two triangles in the middle. Notice that the triangles have numbers and symbols on them.
We’ll start with the bottom triangle, which has the number 12 in the middle and around it a 4, a Unicorn symbol, and two question marks. The trick is to find out what symbol must replace the question marks.
To do so, you must know that each animal symbol has a number assigned to it, starting with the Owl in the bottom left of the door, which is 0. The Unicorn above the Owl is 1, the Dragon 2, and so on, going clockwise until you reach the last symbol, the Kraken, which is 9.
As a result, this means that the Unicorn on the bottom triangle is a 1. Now, you should also know that the smaller numbers around the triangle added up must equal the big number in the middle. Knowing all the above results, the question marks can only have the number 7 assigned to them.
The symbol for the number 7 is the Octopus; thus, head to the triangle with the two question marks on the wall to the right of the door, then interact with it until it displays the Octopus symbol. For the top triangle, you can easily figure out that the question mark stands for the number 2, which has the Dragon symbol assigned to it.
Interact with the triangle with the question mark left of the door to make it display the Dragon symbol. Now, you can finally open the door and find the next Chest near the statue of a winged creature.

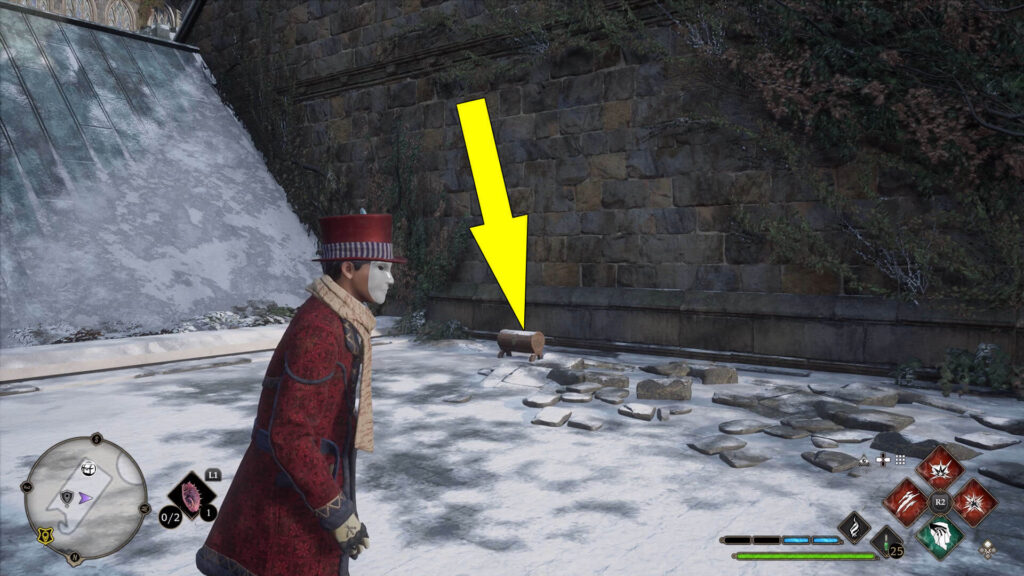
Collection Chest #4: On a Roof
The fourth Chest will first take you back to the Charms Classroom Floo Flame, from where you have to go down the stairs to the northeast and through the door to the right. Then, go up the curved staircase and open the door by picking the level 1 lock using Alohomora again. Head in and go up the spiral staircase to reach the roof. The crate is in front of the wall to the southwest.
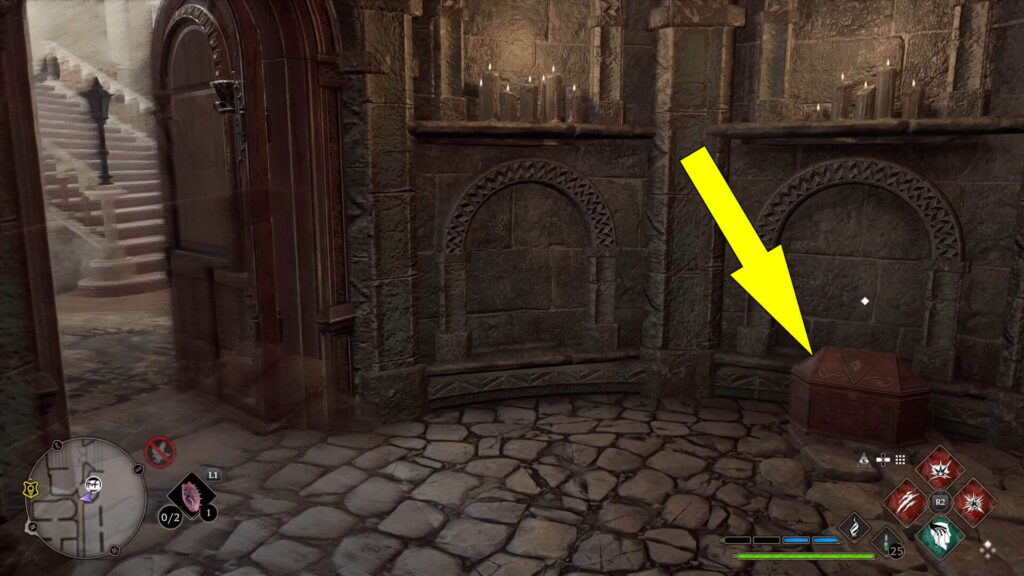
Collection Chest #5: Under Some Candles
For the next Collection Chest, you’ll have to solve another animal symbols door puzzle for which you have to fast-travel to the Potions Classroom Floo Flame in the Library Annex area. Then, head northwest to find the door with animal symbols next to the stairs. To continue, you must follow the same logic as you did with the puzzle from Chest #3.
Interact with the door, then do the math to figure out that for the top triangle, the question mark is an 8, which is represented by the Spider symbol. Now, interact with the triangle with the question mark left of the door to roll a Spider symbol on it. Then, do the math for the bottom triangle on the door, and you’ll conclude that the two question marks stand for the number 3, represented by the Hydra symbol.
To find the triangle with the two question marks, you must head up the stairs next to the door, then go up the stairs immediately to the left. Roll the Hydra symbol on the triangle and return to the door, which can now be opened. Head inside to find another collectible under some candles.
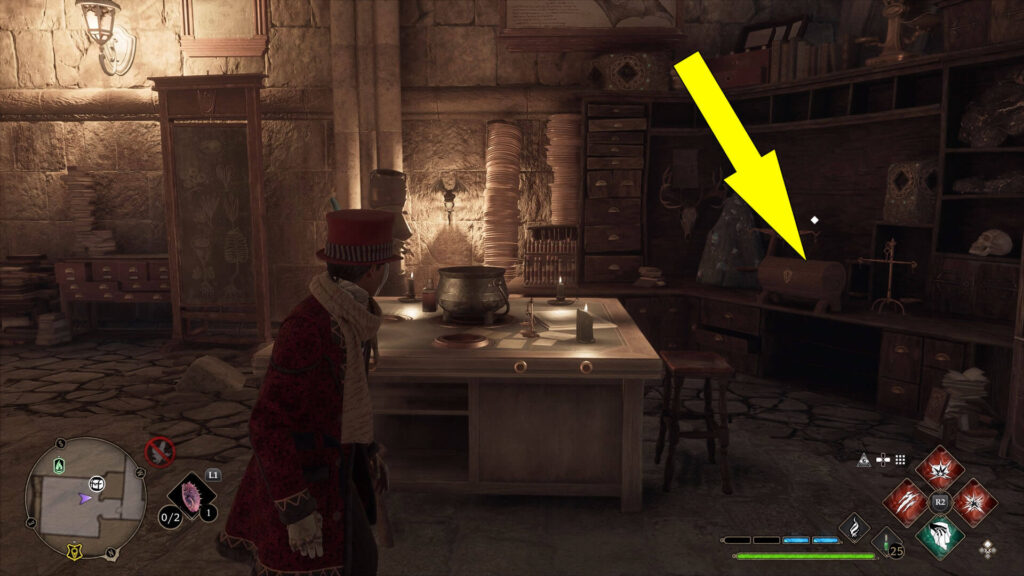
Collection Chest #6: Between Two Scales
To find the last Collection Chest in the Astronomy Wing, you must first fast-travel to the Bell Tower Courtyard Floo Flame in the Bell Tower Wing area. Then head up the first set of stairs to the southwest, make your way forward, and go through the door.
Immediately turn left, go down the stairs, then head through the door, and continue until you go down more stairs and see a dragon statue on the left side. Now, head forward on the corridor on the other side of the dragon statue to reach a locked door with four piles of pots around it. Pick the level 2 lock, head inside, and go to the right to find the last Chest between two scales on a table.