Hogwarts Legacy Lodgok’s Loyalty is one of the saddest quests in the video game published by Warner Bros. Games and the one that you’ll need to complete to access the final Trial. Similar to the main quest named In the Shadow of the Mountain, Lodgok’s Loyalty requires you to explore the Coastal Mine dungeon; however, this time around, if you want to get all Treasure Chests, you’ll have to be prepared.
Furthermore, Lodgok’s Loyalty in Hogwarts Legacy is an end-game quest; hence, you should get ready to face multiple enemies and fight your way to reach Lodgok’s location.
The Coastal Mine is also full of Treasure Chests, and as usual, our Hogwarts Legacy Lodgok’s Loyalty walkthrough below covers all of them; however, before entering the cave, it is recommended that you empty your inventory and expand it by completing as many Merlin Trials as possible.
Where To Find the Entrance to the Mine in Lodgok’s Loyalty
To be able to start Lodgok’s Loyalty, first, you need to reach Level 24; then, you have to complete In the Shadow of the Mountain main quest. After you exit the Tower Tunnel dungeon with Sebastian, you’ll receive one last letter from Lodgok.

Check your Owl Post in the Field Guide and select Lodgok’s icon to see all the letters you received from your Goblin friend. The second one reads:
“I found one of Ranrok’s drills in a mine along the shore. I intend to destroy it. I am tired of trying to reason with him. You are welcome to join me. But if I don’t see you there, I will reach out when I return. I have something to give you.“
According to the letter, Lodgok intends to destroy the drill Ranrok built to mine for the repositories. Even though there is no time to waste, you should be aware that if you want to get your hands on all Coastal Mine Treasure Chests, you’ll first have to complete The Man Behind the Moons side quest and unlock the third upgrade for your Alohomora Spell. Assuming you are ready, open your Field Guide Map and switch to the World Map if needed. Next, check the Marunweem Lake region on the southwestern side, as pictured below.
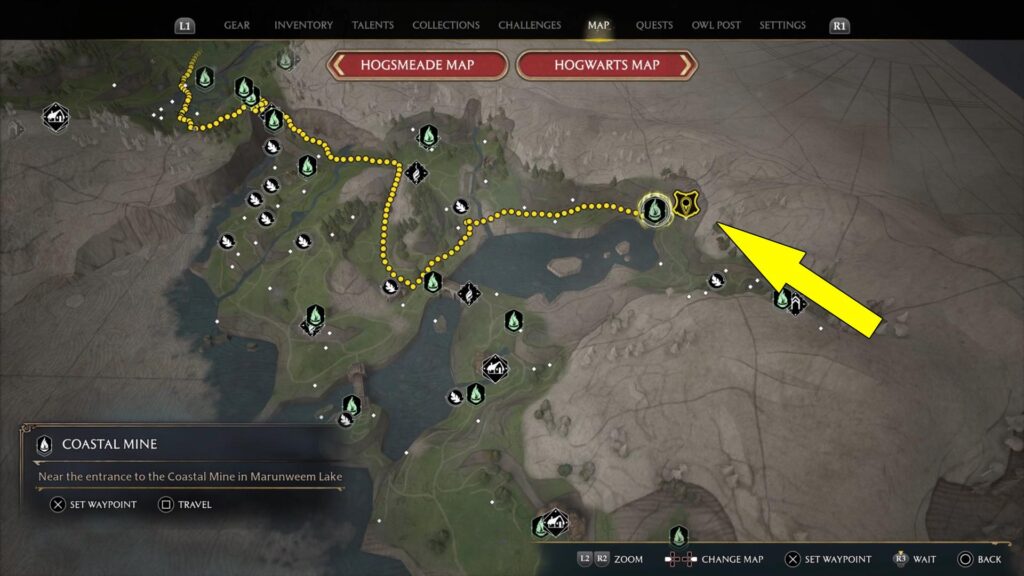
Now, fast-travel to the closest Floo Flame, and from there, fly towards the location on the map above, but stay alert because the entrance to The Coastal Mine is heavily protected by Goblins and Trolls. After you deal with them, check the western tunnel, which is impossible to miss due to its size.

The entrance to the mine is on the right side of the large tunnel above, through a metal door.
Where To Find Lodgok in the Coastal Mine
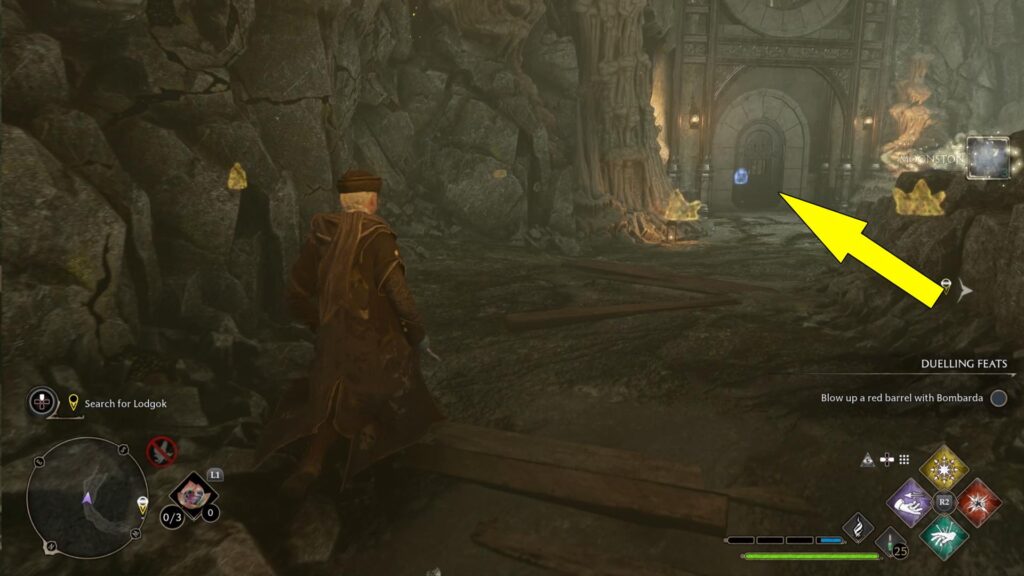
To find Lodgok in The Coastal Mine, you’ll have to navigate the whole dungeon, so from the entrance, follow the linear path until you reach the first room with some Goblins. Deal with them however you see fit, then loot the Treasure Chest on the right side by the moving gears. Now, hop into the cart marked below, and it will take you deeper into the mine.

After reaching the next section, grab the Galleons on the table on the right side, then loot the large bag on top of the western stairs. Now head right, climb the stairs, and on the left side, you’ll see a furnace you can activate. Make sure you don’t miss it because it’s connected to one of the two Coastal Mine Collection Chests. Simply cast Confringo on it, then continue following the path ahead, and you’ll reach a platform.
Pull it towards you using Accio, jump on it, and pull yourself to the other side of the section. Now grab the large bag on the balcony on the left side, then cross the bridge ahead. In the next large room, first deal with all Goblins, then check the northeastern side to spot a crate you can move with Accio. Place it at the bottom of the wall and climb on it to reach the upper side of the next tunnel. Follow the tunnel ahead, and it will lead you to a locked door. To open it, you’ll need Alohomora Level 3. Once inside, loot all treasures.
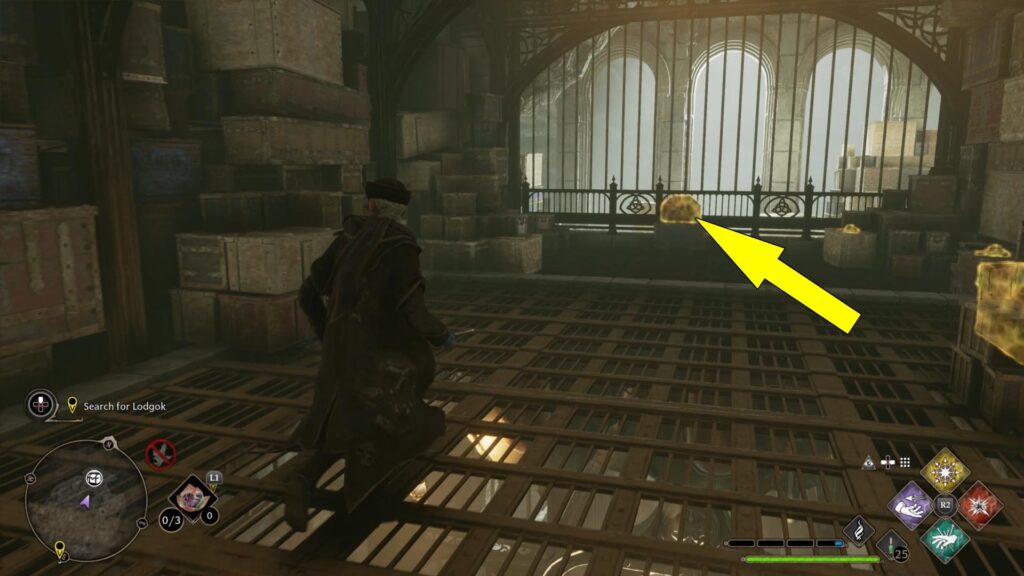
Now head back to the main area where you fought the last group of Goblins, and head north to enter a storage area. Here, you’ll find a small Treasure Chest by the entrance and a large furnace; you’ll want to start by casting Confringo. Once you start the fire, you’ll activate an elevator in the lower area, north of your current location. Take the elevator down, but stay alert because here you’ll encounter the Marunweem Lake Infamous Foe.
After you clear the lower storage area, take your time to explore it to find the following loot:
- One large Treasure Chest near the southern wall
- One small Treasure Chest on a crate near the western wall
Great, so now head back to the elevator and return to the upper level; set the brazier on the right side on fire while facing the elevator.

Retrace your steps to the central area, then head west, ignoring the quest marker for now. Follow the stairs up, and in the next section, get the large Loot Bag on the balcony, climb the northern spiral stairs, and loot the Treasure Chest on the left side. Climb the eastern wall, then the next one, and you’ll reach the upper side of the cave.
On the ground, you can see a maintenance hole cover; you’ll want to pull with Accio. Be advised that this cover can glitch if not pulled properly. So don’t step on it because if it falls inside the room below, you won’t be able to descend the ladder. After pulling the cover, head down through the small tunnel, and you’ll find a secret room where the first Collection Chest awaits, along with another Treasure Chest.
After you collect all the loot, open the round door, loot the chest on the right side, and follow the path ahead. Step on the conveyor belt, and you’ll return to the previous area. Now, follow the quest marker on the screen and pull the platform on the other side of the gap with Accio. Step on it and pull yourself to the other side of the gap, moving south.
Upon reaching the lower level, loot the small Treasure Chest on the right side near the balcony, then deal with the Goblins guarding the area. Now that the area is clear, there are three Treasure Chests you don’t want to miss.
Head towards the cart near the southern wall pictured below. The first Treasure Chest is on the left side of the cart on top of some crates. The second chest is in the lower area you can reach by descending the stairs on the right side of the cart.

The third chest is the Collection Chest, which is in a hidden section you can reach using the cart above, but you won’t get it unless you light the first brazier you encountered when you entered the mine (explained at the beginning of the guide). So, grab the Treasure Chests in the order mentioned above, then after you find the second Coastal Mine Collection Chest, take the cart back to the main area.
From the cart above, head right and light the brazier nearby, then take the elevator to the next section. As you exit the elevator, follow the linear path ahead, and when you reach the upper side of the mine, you’ll find Ranrok and Lodgok. While you won’t face Ranrok, for now, get ready to deal with many Goblins. Once you clear the area, you must collapse all pillars to destroy the drill.
How To Collapse All Pillars To Destroy the Drill
To complete this objective, cast Revelio, and you’ll notice five pillars used to sustain the cave. Some of them will fall while fighting Ranrok’s Loyalists. The remaining pillars (pictured below) can be destroyed by casting Confringo.
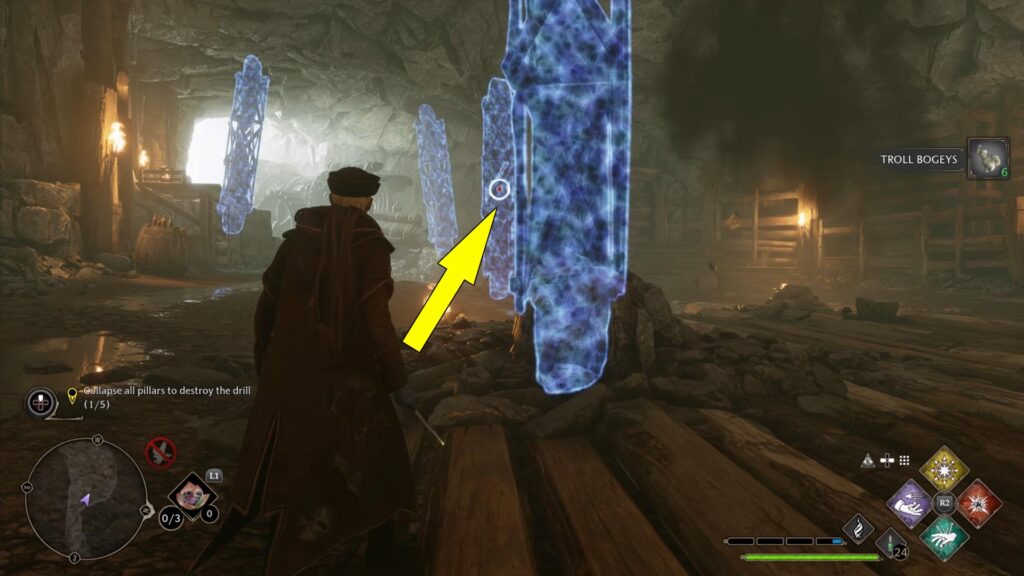
Target each pillar by pressing the Right Thumbstick and destroy them. This will trigger a final cutscene where you’ll see Lodgok trying to reason with his brother Ranrok. Unfortunately, your Goblin friend won’t succeed, and he won’t be able to escape Ranrok’s wrath. After losing Lodgok, you’ll need to exit the mine, which starts to fall apart. Once you get to the upper floor, head through the grated gate, then take a left turn to return to the Marunweem Lake area.
After finishing Hogwarts Legacy Lodgok’s Loyalty, get ready to start San Bakar’s Trial quest, and don’t forget to focus on the collectibles you may have missed or the remaining side-quests.
