Hogwarts Legacy Depulso Puzzle Room 2 is a secret room in Hogwarts Castle, which features two sections of puzzles that can be solved using only Accio and Depulso. Depulso Puzzle Room 2 can be accessed only after you’ve completed The Helm of Urtkot Main Quest and the Hall of Herodiana Side Quest from Sophronia Franklin.
Also, the room’s complexity might leave you puzzled and looking for solutions because it has one of the most challenging riddles in the game.
Where To Find the Depulso Puzzle Room 2 in Hogwarts Legacy
The second Depulso Puzzle Room can be found close to the Bell Tower Courtyard Floo Flame in The Bell Tower Wing of Hogwarts Castle. Fast-travel to Bell Tower Courtyard Floo Flame, turn left (south), go up the first set of stairs, and straight through the door ahead.
Climb another set of stairs and enter Professor Binns’s History of Magic Class. On the other side of the room, unlock the door with the Level 1 Lock using Alohomora I learned during The Caretaker’s Lunar Lament Main Quest to reach an Ancient Egypt-themed room. In the southwest corner of this room, you will find the switch on the right-hand wall that you can activate by casting Depulso.
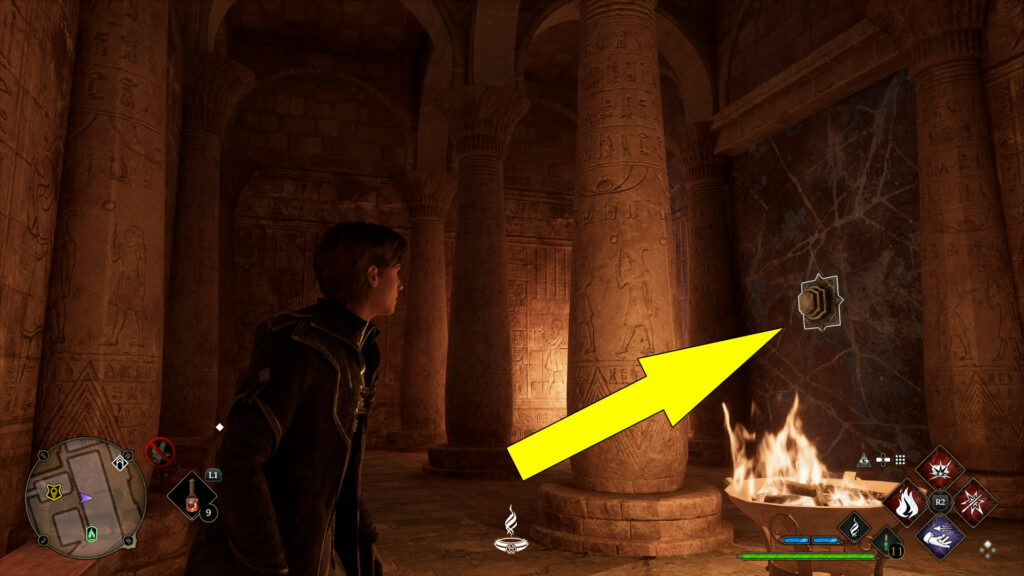
After you trigger the switch, it will reveal the entrance to the Depulso Puzzle Room 2.
Depulso Puzzle Room 2 Tips & Tricks
Before we cover the puzzles in the Depulso Puzzle Room 2, we will explain a few mechanics and show you some tips and tricks. Firstly, you can hit the switch (spinning cube) with a Basic Cast to return all the blocks to their original places. If you make a mistake, you can quickly reset the room using this feature.
Secondly, avoid getting hit by moving blocks because doing so results in an unpleasant knockout. Position yourself accordingly before pulling blocks. Also, make sure to enter aim mode by holding (R2)/(RT) when you want to cast Depulso or Accio. Doing so will significantly improve your accuracy. Now, follow the steps below to complete the puzzle.
How To Complete the First Set of Puzzles in Depulso Puzzle Room 2
Depulso Puzzle Room 2 is actually divided into two rooms. To reach the second room or section, you must first open a chest and then find a way across to reach the second room. Here’s how you can get the chest and then get to the second room.
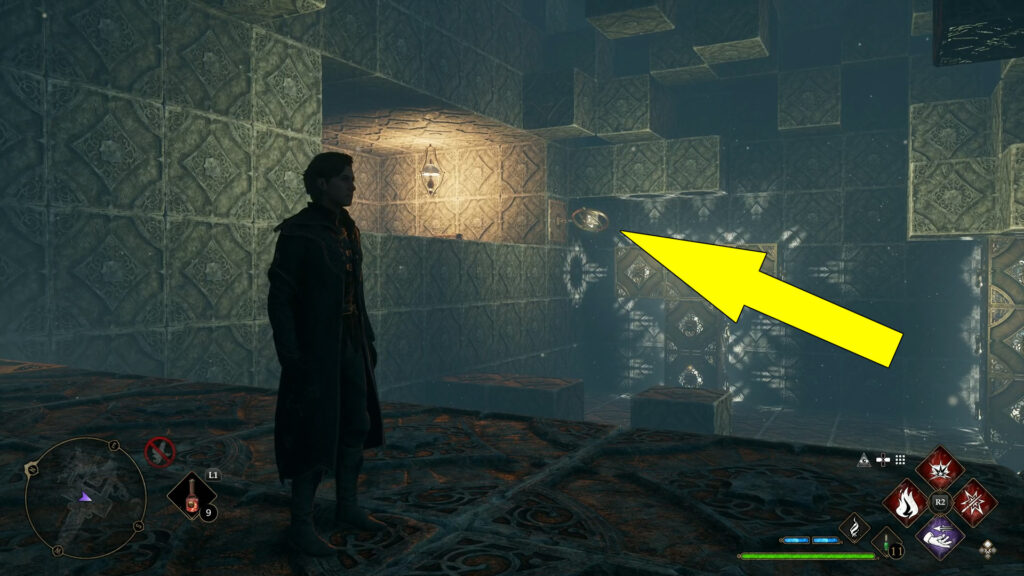
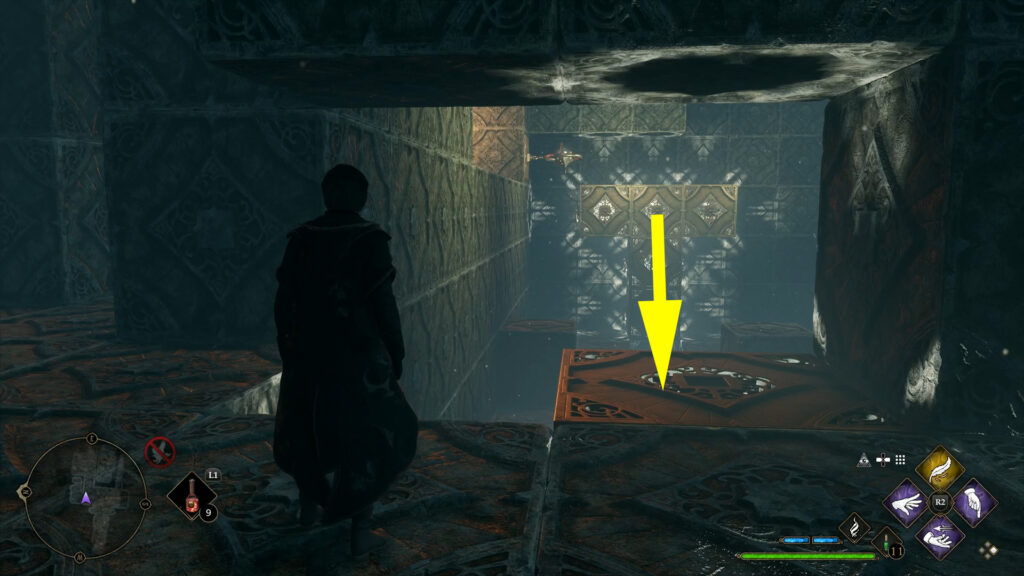
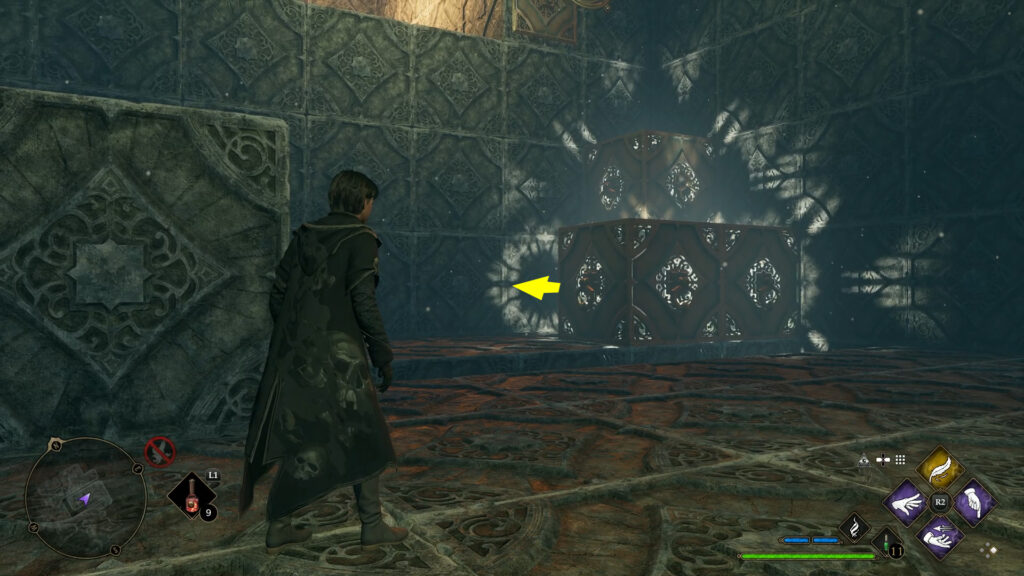
Puzzle #1: First Room
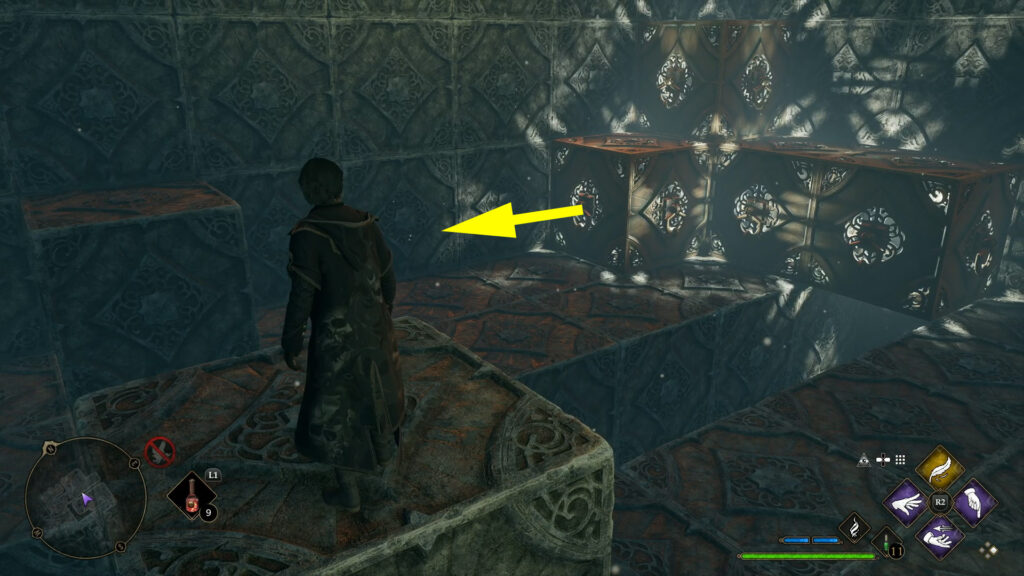
Pull the T-shaped stack of blocks in your direction by casting Accio.
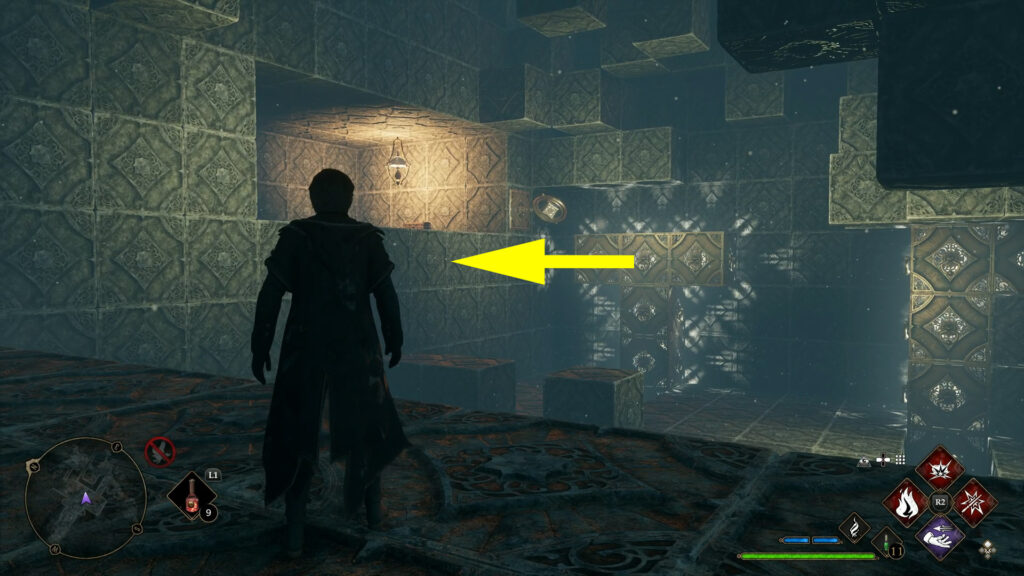
Drop down to the left of the T-Shaped stack of blocks and use Accio to pull the block near where you dropped to the back (eastern) wall.

Jump over the ravine and pull the block to the right toward the center of the room with Accio. In fact, you will pull two blocks stacked in a line.
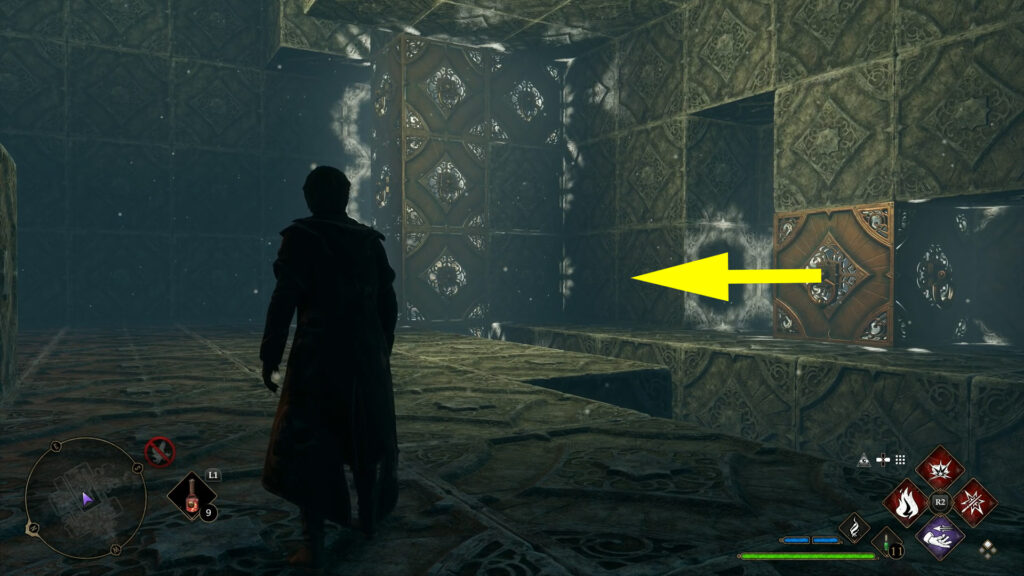
Push the two blocks toward the back (eastern) wall with Depulso.
Cast Depulso to push the two blocks toward the northeast corner to connect all three blocks.
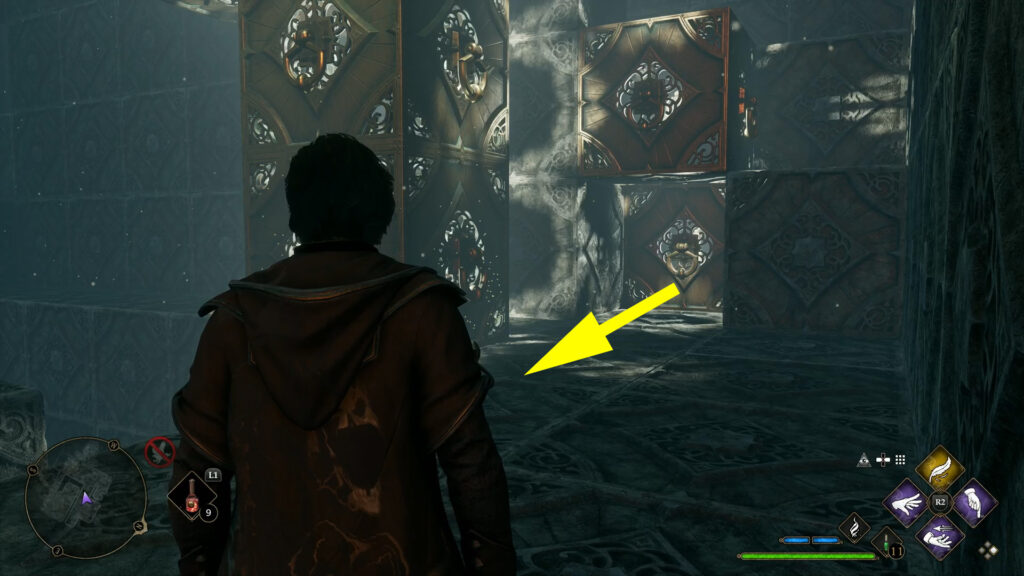
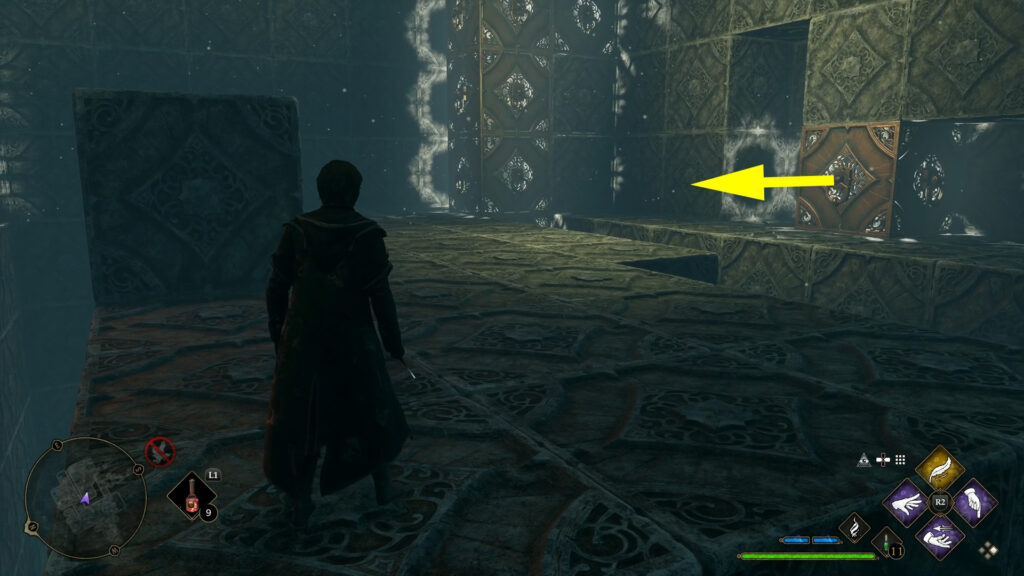
Pull the three blocks toward the entrance (west) with Accio.
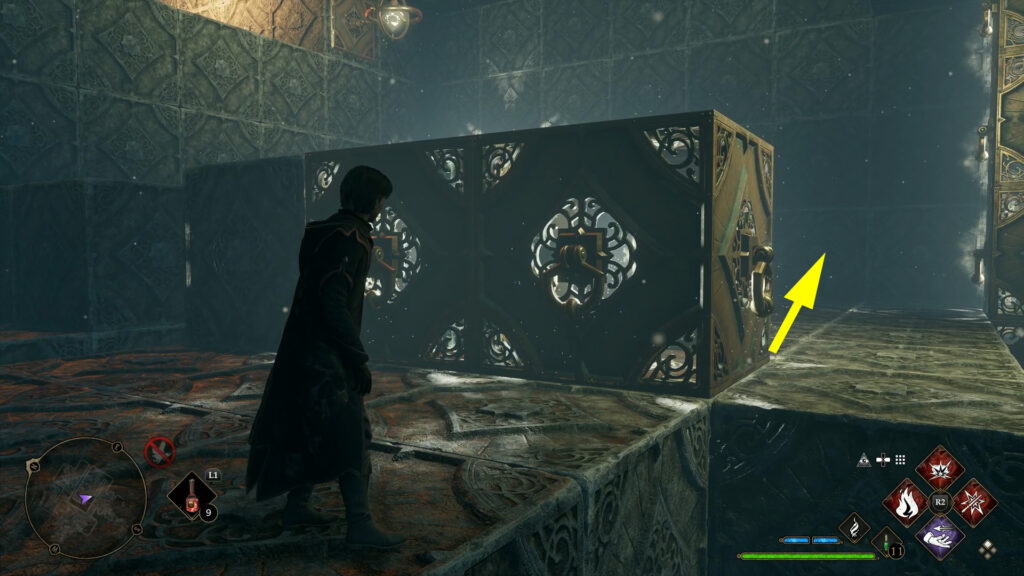
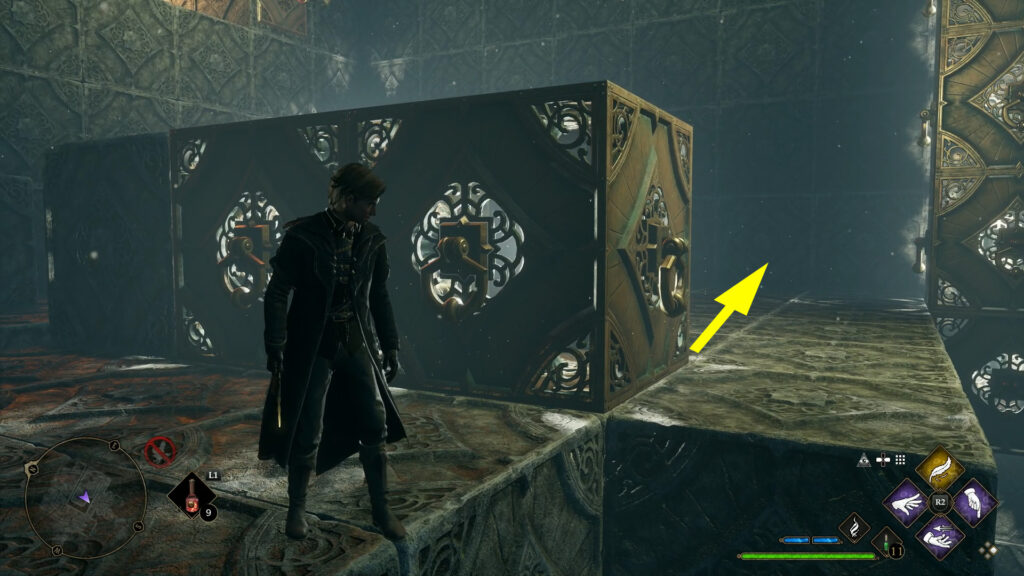
Climb the stone block near where you pulled the three blocks, jump over the ravine, and climb the blocks, then the left wall to reach the first chest.
After you open the chest, the room will reset and shift, and you’ll have to create a path to the door leading to the second room.
Puzzle #2: First Room
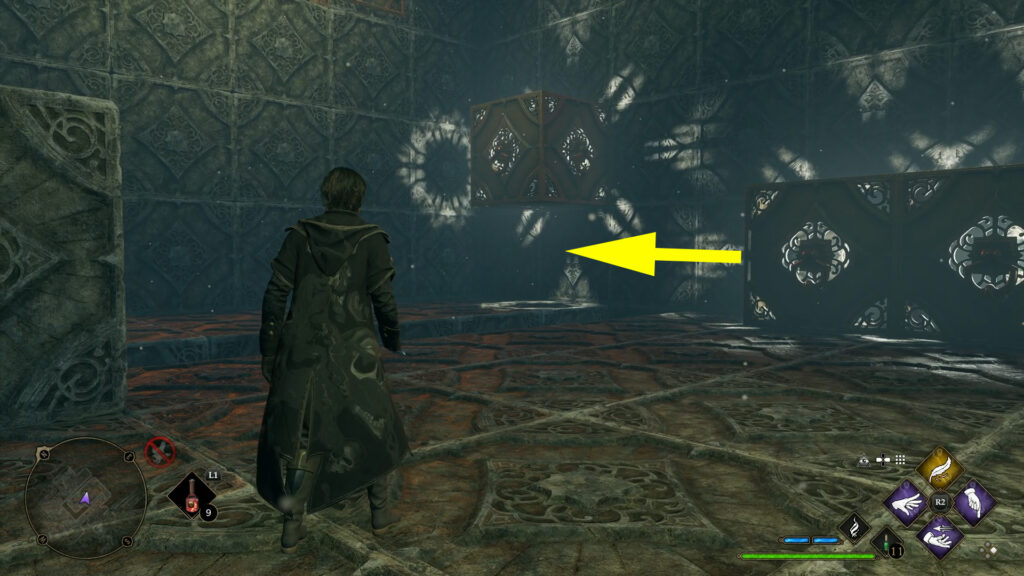
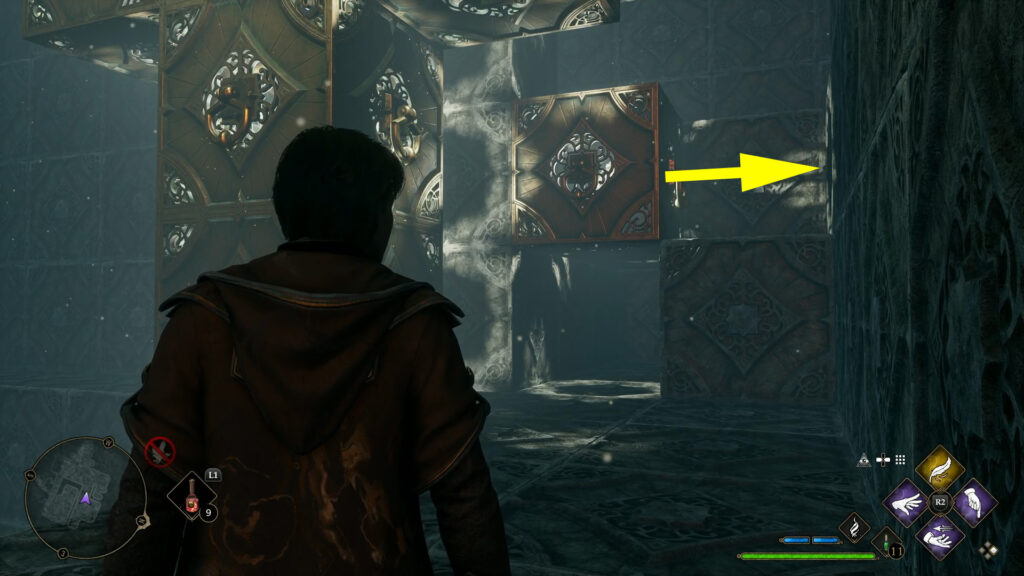
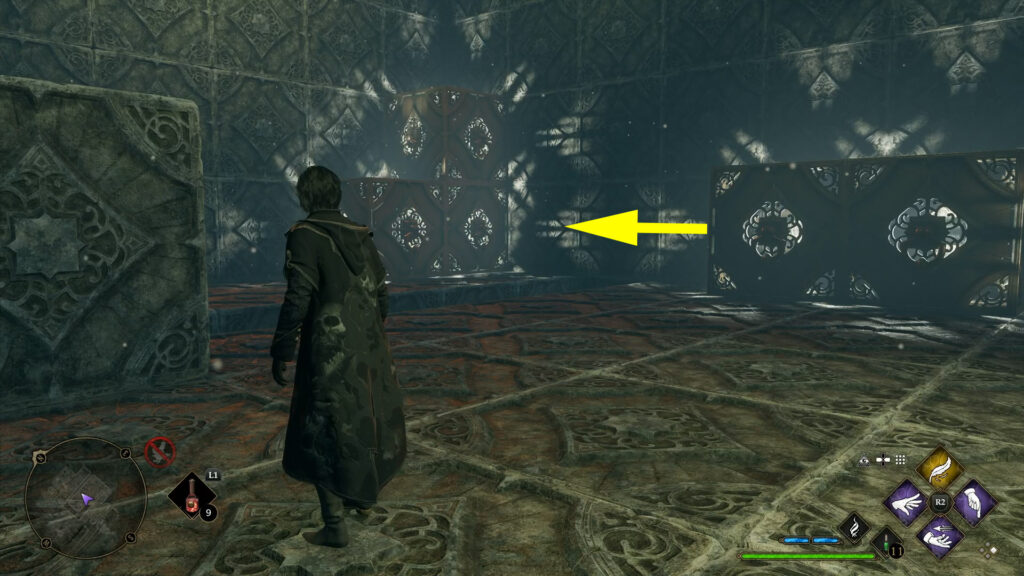
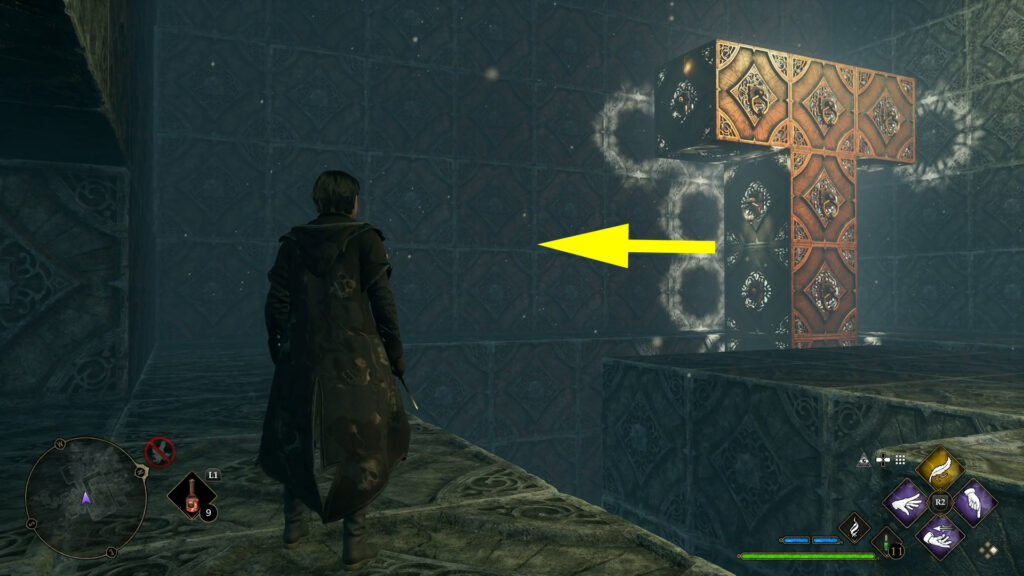
Return to the entrance and cast Accio on the T-shaped stack of blocks to pull it toward you.
Drop to the left of the T-shaped stack of blocks to find two blocks. Pull the bottom block toward the back (eastern) wall by casting Accio on it.
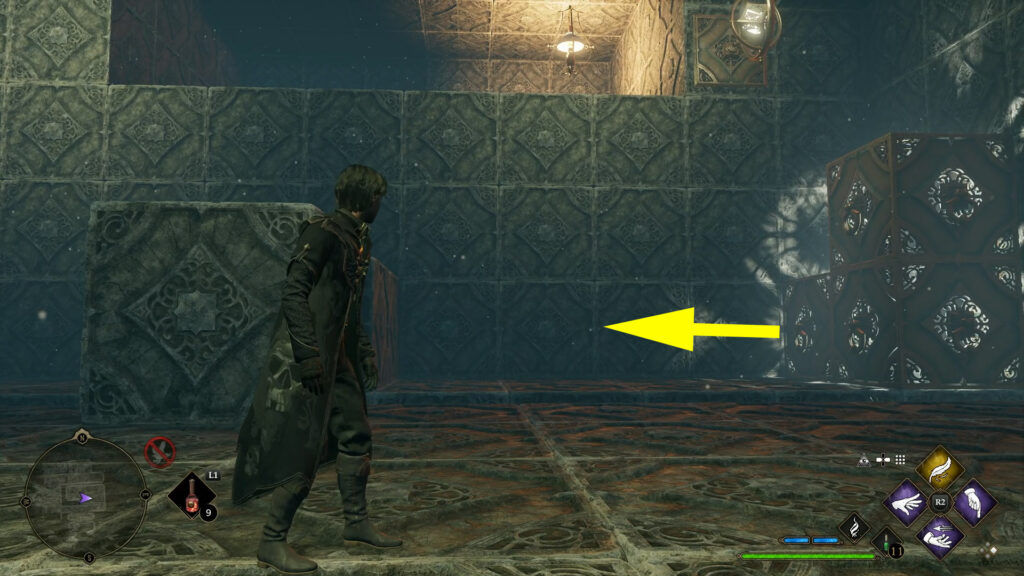
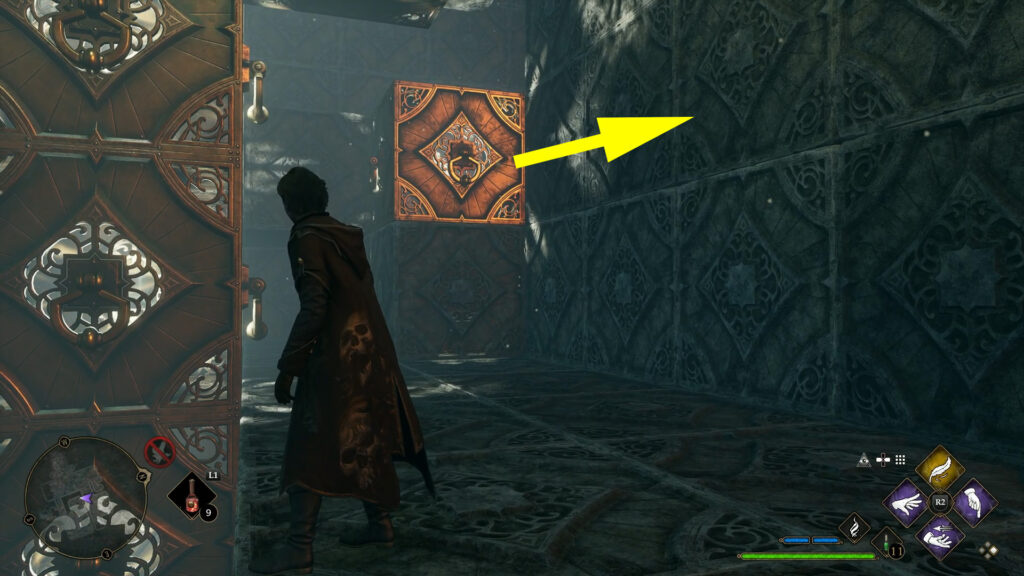
Now, move the top block to the right (north) with Accio.
Cast Accio on the previous block to pull it toward the back (eastern) wall.
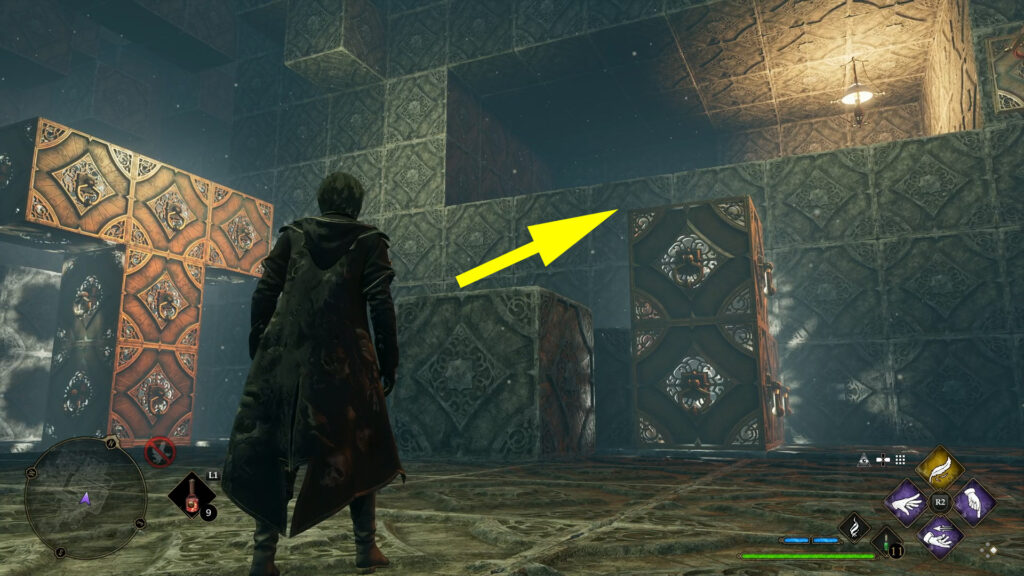
Cast Depulso on the two blocks at the back of the room into the corner to connect them with another block above them.
Use Accio to pull the blocks on the right-hand (south) wall into the center of the room.
Push the previous two blocks into the back (eastern) wall with Depulso.
Cast Depulso on the same blocks to push them into the other three-stacked blocks in the northeast corner.
Pull the five blocks toward the entrance using the spell Accio.
Pull the five blocks in the direction of the right-hand (south) wall with Accio.

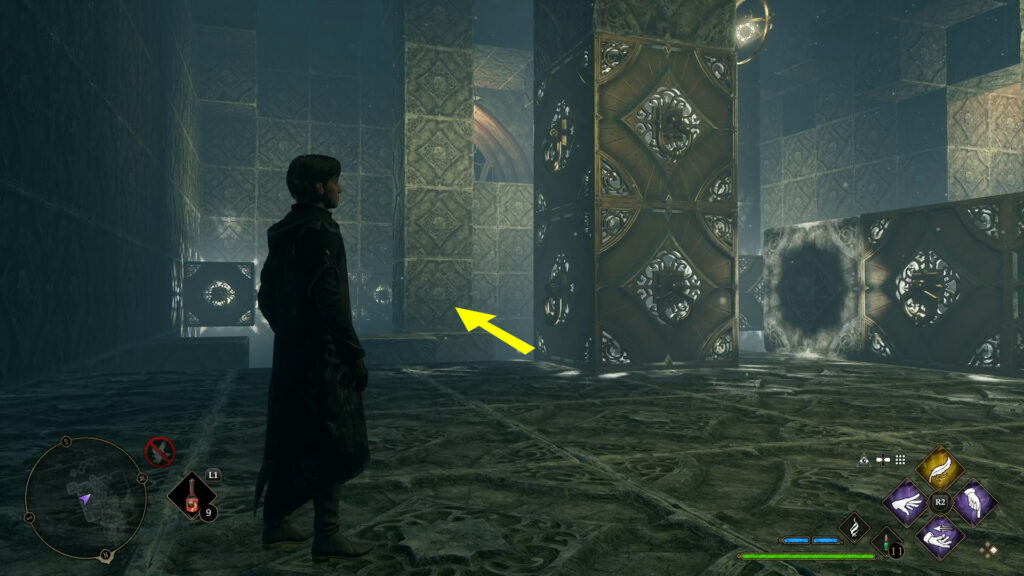
Then, pull the T-shaped stack of blocks to the left (south) with Accio.
Use Accio to pull the T-shaped stack of blocks toward the other pile of blocks to create a large structure of blocks.

Climb this structure of blocks to reach the door to the second room.
How To Complete the Second Set of Puzzles in Depulso Puzzle Room 2
For the second room, you’ll have to open all three chests and then find a way to reach the exit. Follow the steps below to get all three chests and reach the exit in the second part of Depulso Puzzle Room 2.
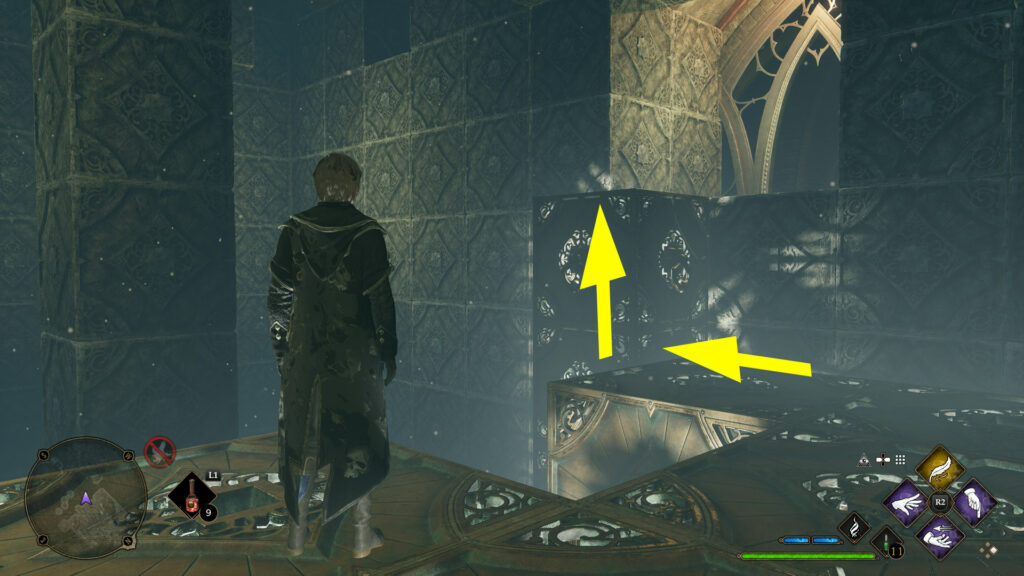
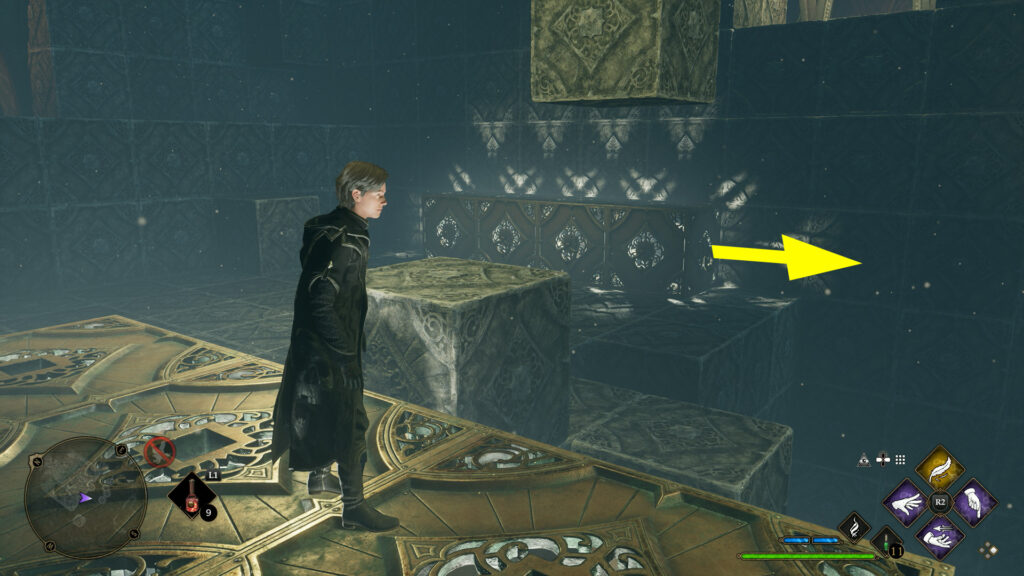
Puzzle #3: Second Room
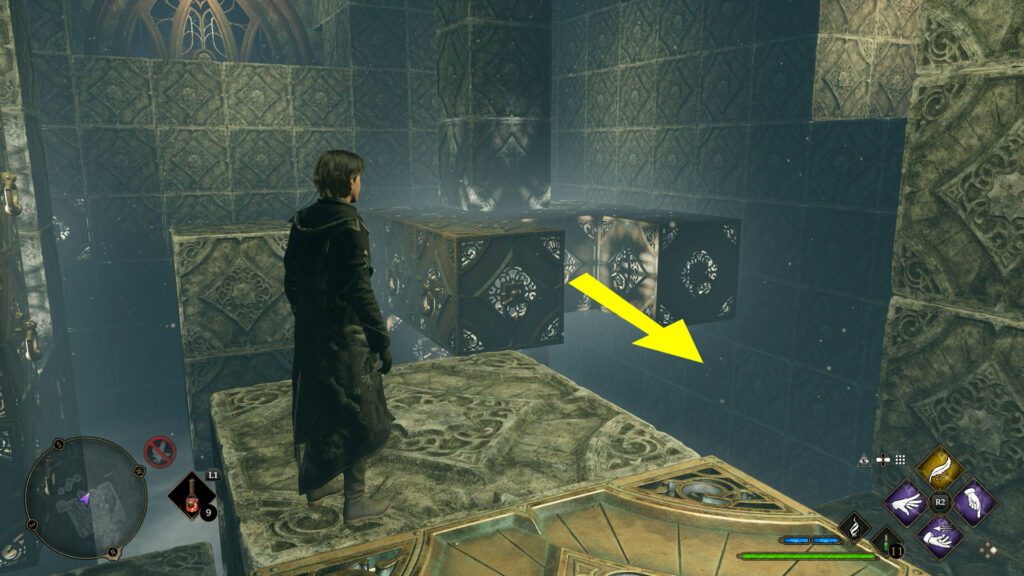
Jump down and push the three blocks on the left toward the back (east) wall by casting Depulso on them.
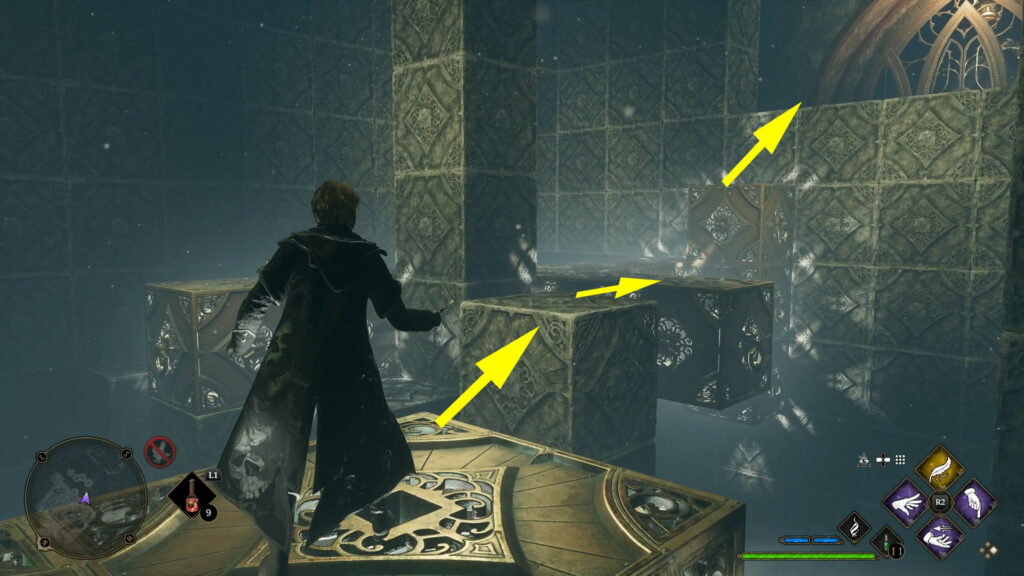
Climb up the middle blocks and pull the H-shaped stack of blocks in front of you with Accio.
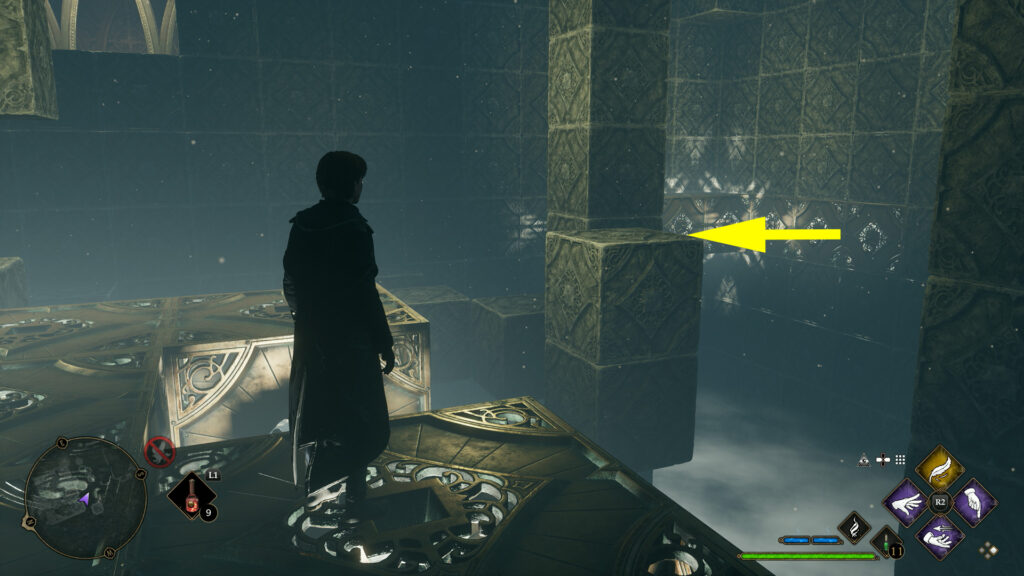
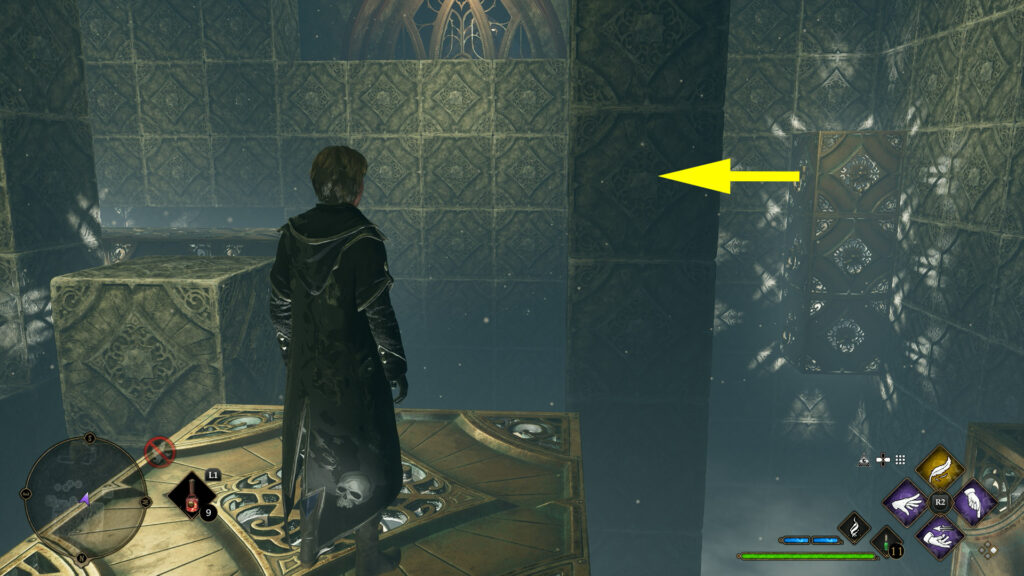
Jump over the ravine onto the T-shaped stack of blocks and turn your camera southeast. Use Accio to pull the three stack blocks towards the right-hand (west) wall.

Now, jump onto the three blocks you’ve previously pulled and climb up to reach the first chest. This is a really tricky jump, and it might require a couple of tries until you find the right angle. Don’t forget to sprint before you jump.
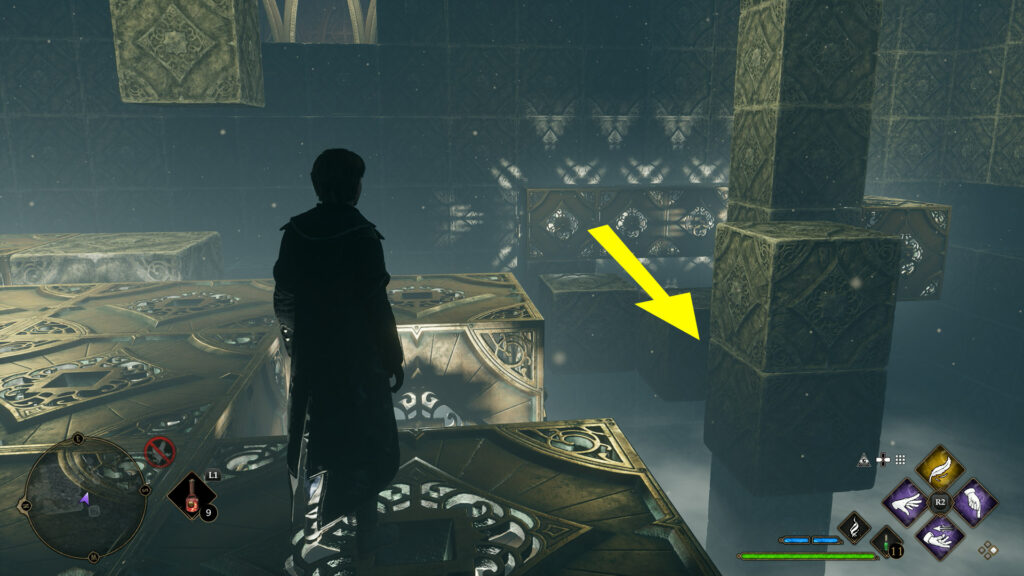
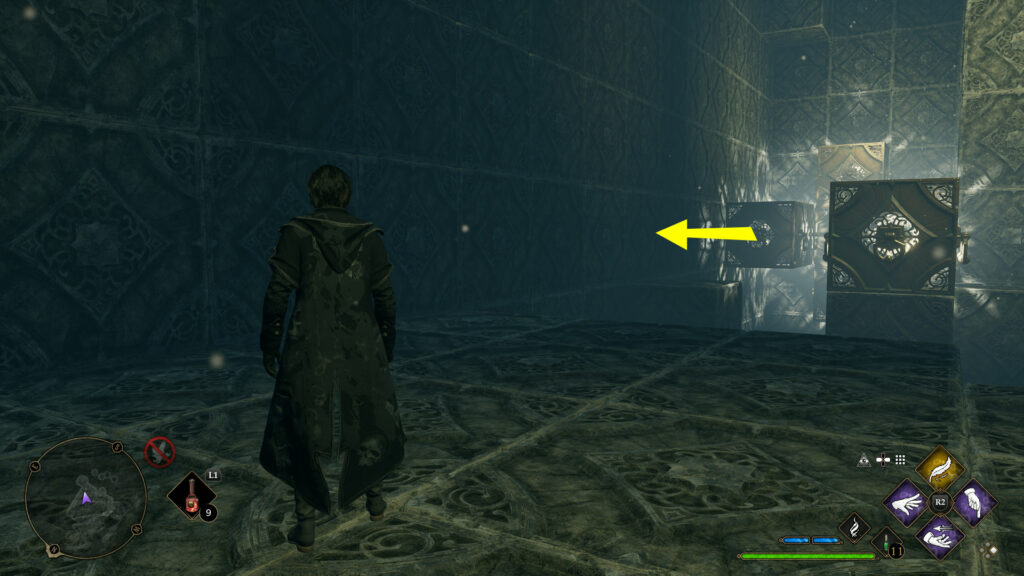
After you open the first chest, jump over the gap back onto the T-shaped stack of blocks and turn your camera toward the room’s southeast corner. Pull the blocks in the back (east) wall toward the entrance (west) by casting Accio.
Cast Accio on the previous blocks to pull them toward you.
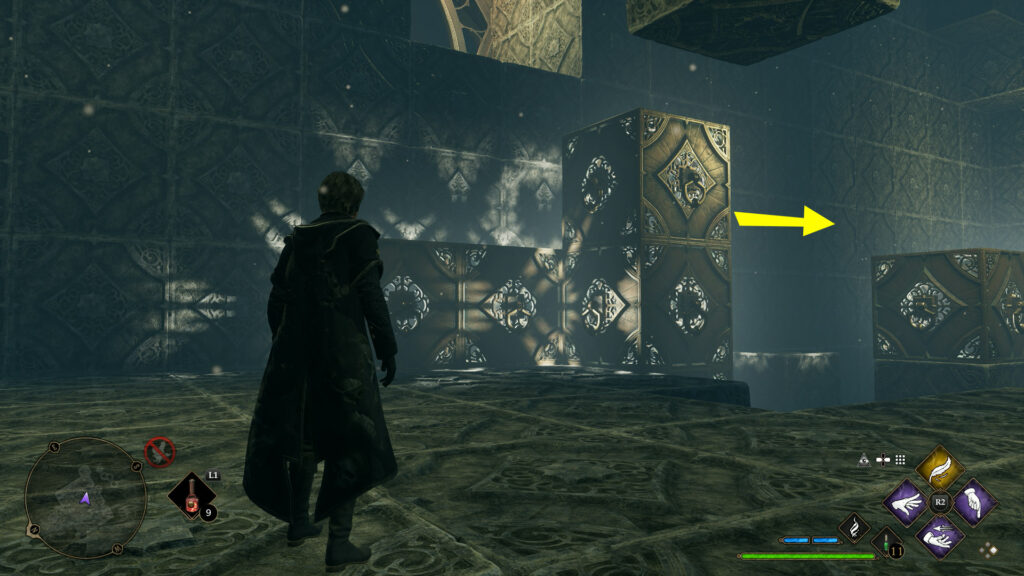
Turn your camera northeast. Cast Depulso on the aligned four blocks in the middle of the room to push them to the right (east).
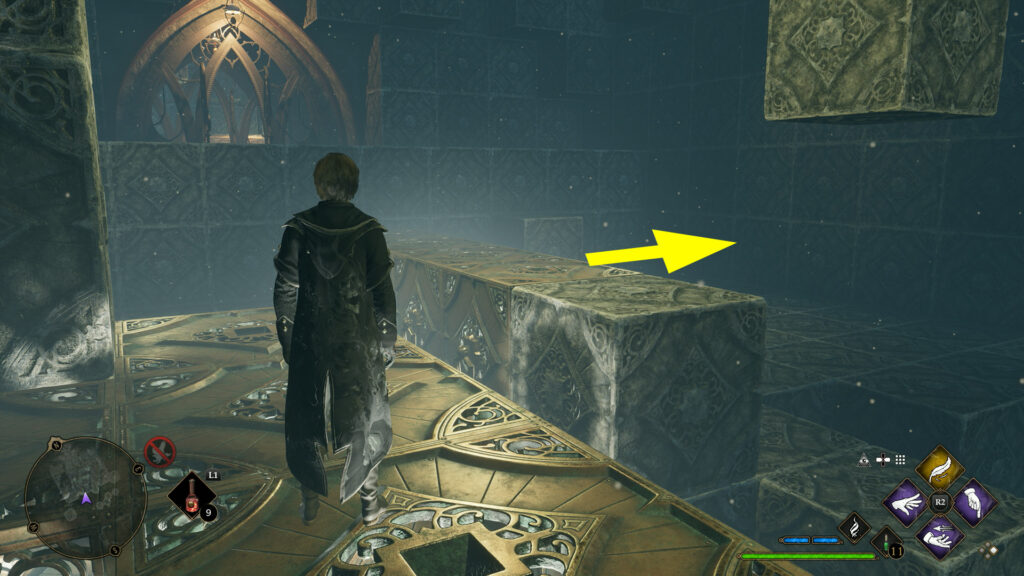
Pull the previous blocks toward the back (south) wall using the spell Accio.
Turn around and cast Depulso on the blocks you climbed to get to the first chest to push them against the back (south) wall.

Then, use Accio to pull them toward the left corner of the room.
Go to the room’s northeast corner and pull all the blocks in the left corner towards you with Accio. Climb these blocks to reach the second chest.
After you’ve opened the chest, go back down and push the blocks you climbed earlier back into the left corner.
Climb back up the T-shaped stack of blocks and cast Accio on the blocks in the left corner to pull them to the right. From the top of the T-shaped stack of blocks, you’ll have to jump over the ravine onto the middle stone block and jump across the blocks. Then, climb up to reach the exit and find one of The Bell Tower Wing Collection Chests.
You will obtain a random Conjuration for the Room of Requirement from the Collection Chest. That’s everything you need to know about how to complete the Depulso Puzzle Room 2 in Hogwarts Legacy.
