San Bakar’s Trial is the fourth and final Hogwarts Legacy Keeper Trial you’ll need to complete, and the most accessible one because even though you’ll have to fight one of the most powerful Beasts in the video game, the quest doesn’t involve too many puzzles. San Bakar’s Trial quest is also required to progress the story, meaning you must complete it to get closer to Ranrok.
Furthermore, the story quest is needed to unlock the Grappling with a Graphor and The One Who Mastered the Memories trophies/achievements. During this quest, you’ll need to open San Bakar’s Pensieve Chamber.
Returning to the Map Chamber
San Bakar’s Trial main quest in Hogwarts Legacy starts after you finish the previous main quest named Lodgok’s Loyalty. Even though Lodgok was killed by his brother, your quest to stop Ranrok continues. So, after San Bakar’s Trial becomes available, make sure your character is at least Level 24, and head back to The Map Chamber by activating your Field Guide Map, then the Hogwarts Map.
From the list of available Floo Flames, select the Secret Rooms, then The Map Chamber. After arriving, interact with the glowing circle in front of the door to start the quest. Now, approach Professor Fig and talk to him.
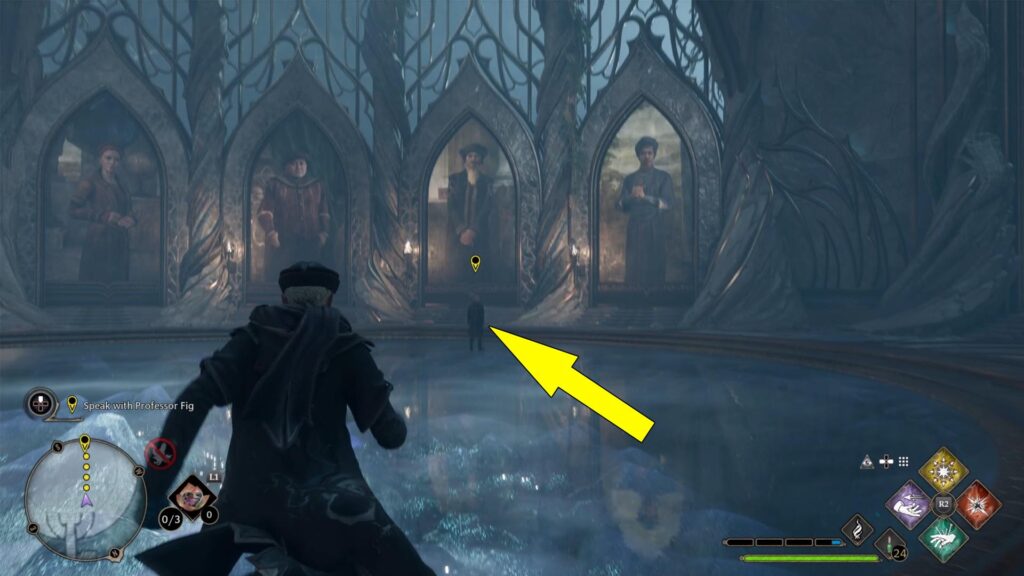
After informing the Keepers and Professor Fig that Ranrok knows where the last repository is (from Bragbor’s journal, which he retrieved from Lodgok before killing him), San Bakar asks you why Bragbor would keep journals.
You may remember that Isidora told him why she needs the containers, so feel free to tell San Bakar, although the second dialogue choice is also valid. When you tell Professor San Bakar that you saw Isidora’s memories (during In the Shadow of the Mountain main quest), Professor Rackham reveals the location of the fourth and final Trial. According to Rackham, the Trial requires an exceptional level of magical skill, and you’ll engage a magical beast. Although worried, Professor Fig agrees to help you.
Where To Find San Bakar’s Pensieve Chamber
Hogwarts Legacy San Bakar’s Pensieve Chamber is found in the region known as Cragcroftshire. Specifically east of Bainburgh, so get ready for a long flight if you didn’t unlock the Cragcroft Shore Floo Flame.
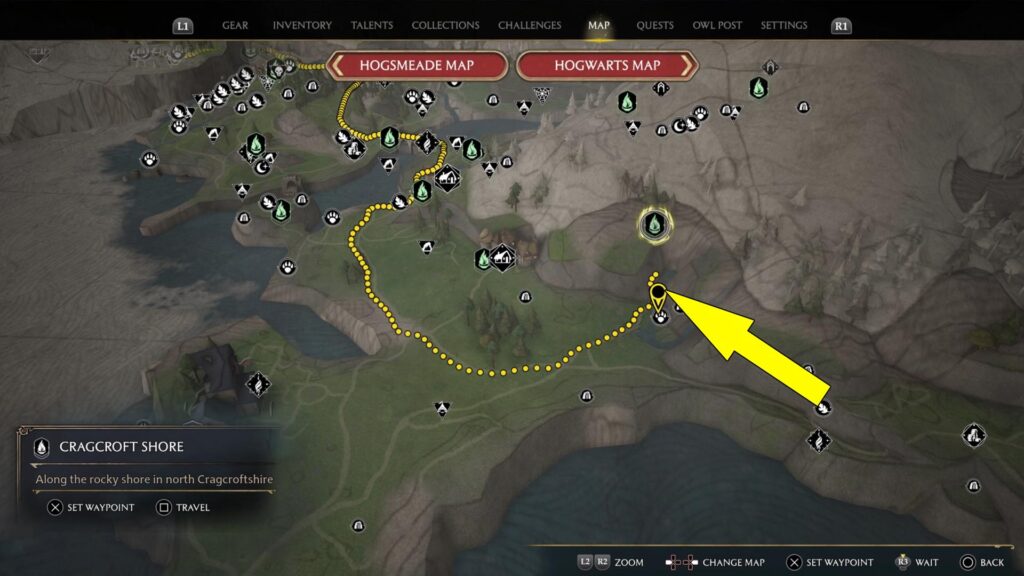
From your current location, open the Field Guide Map, navigate to the World Map, and select the closest Floo Flame. Now, use your broom and fly to the location marked on our map above. You should see Fig investigating a large stone circle on the ground when you get close. If he hasn’t arrived yet, you must wait for him by interacting with the glowing circle on the ground.
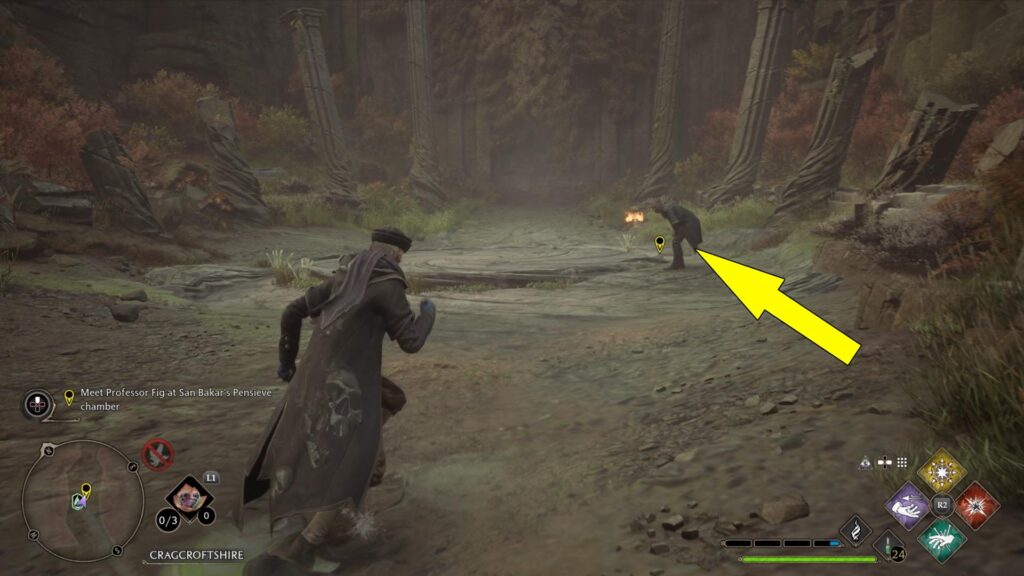
Where To Find the Clue To Open the Pensieve Chamber
Once you get close to Fig, you’ll receive a new objective, which involves finding the clue to open the Pensieve Chamber. The clue is easy to spot if you scan the area using Revelio. It is northeast of the stone circle, behind the vines, you can burn with Confringo.
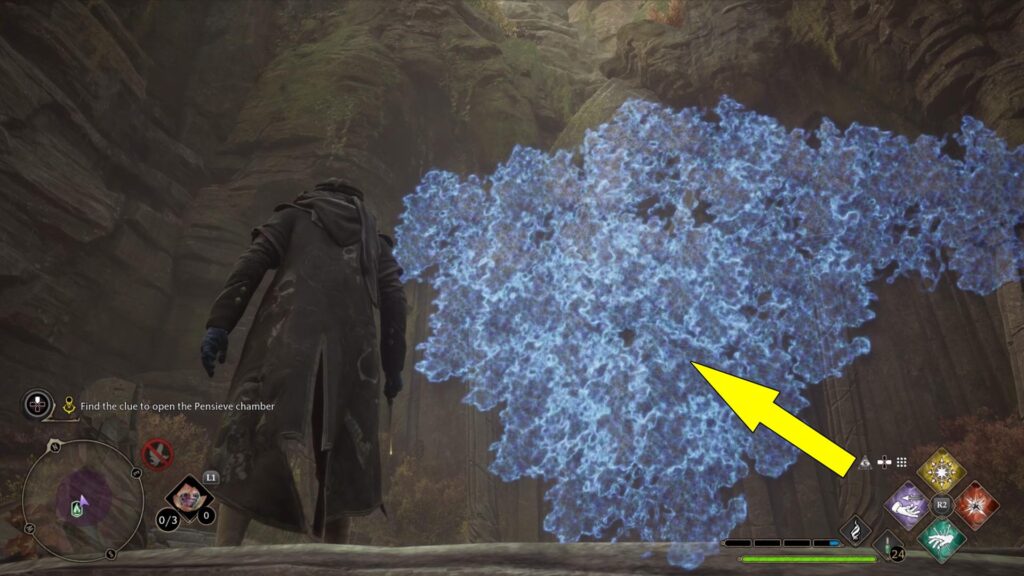
Once you burn the said vines by targeting them and then casting Confringo, you’ll see an engraving depicting a large beast head. Talk to Professor Fig now, and he’ll ask if you recognize the head sculpted into the wall. If you don’t remember the Beast from Fantastic Beasts and Where to Find Them, then answer with I’m not certain, and Fig will explain that it’s a Graphorn, and he’ll help you open the path ahead.
Fig now explains that the last of a long dynasty of Graphorns leaves nearby. The Beast is known as the Lord of the Shore, and you must bring it to the stone circle. Now, you can ask Fig how to subdue the Beast before he returns to the Map Chamber.
Where To Find the Lord of the Shore in San Bakar’s Trial
The Hogwarts Legacy Lord of The Shore is found in the southeasternmost region known as Clagmar Coast. You can see its exact location on the map below, and the closest Floo Flame is South Clagmar Coast. If you didn’t activate it yet, you must fly there.

After reaching the location on the map, dismount on top of the hill where the quest marker is found, then head east under the large rock to enter a clearing. As you can guess, you are entering an arena where you’ll get to fight the Graphorn. When fighting the impressive Beast, dodging is vital to winning, as well as cursing the Graphorn to increase the damage you inflict. Furthermore, you’ll get to deal more damage by using the Ancient Throw.
After depleting the Graphorn’s health bar, you’ll be able to make a choice:
- Kneel
- Attack
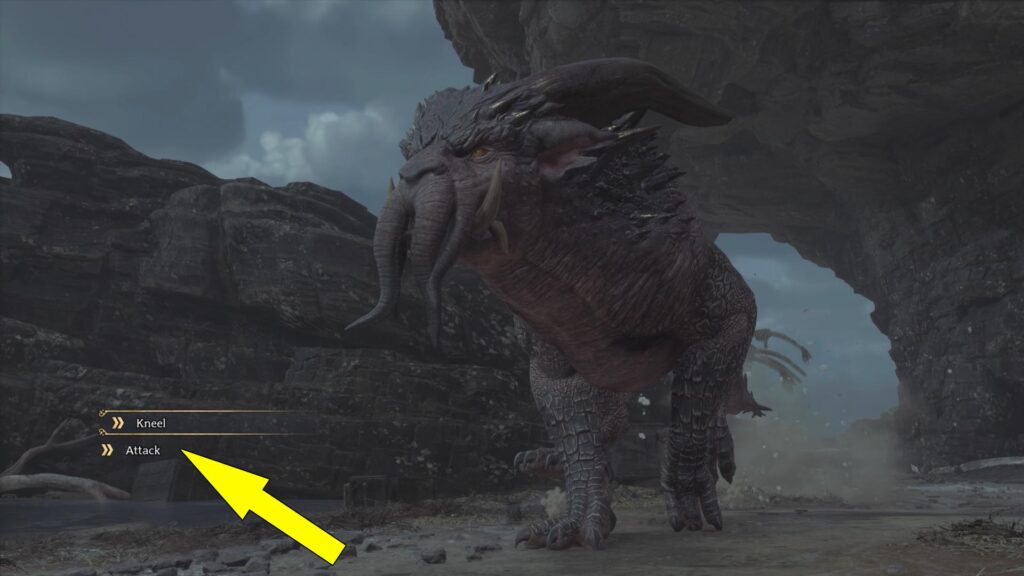
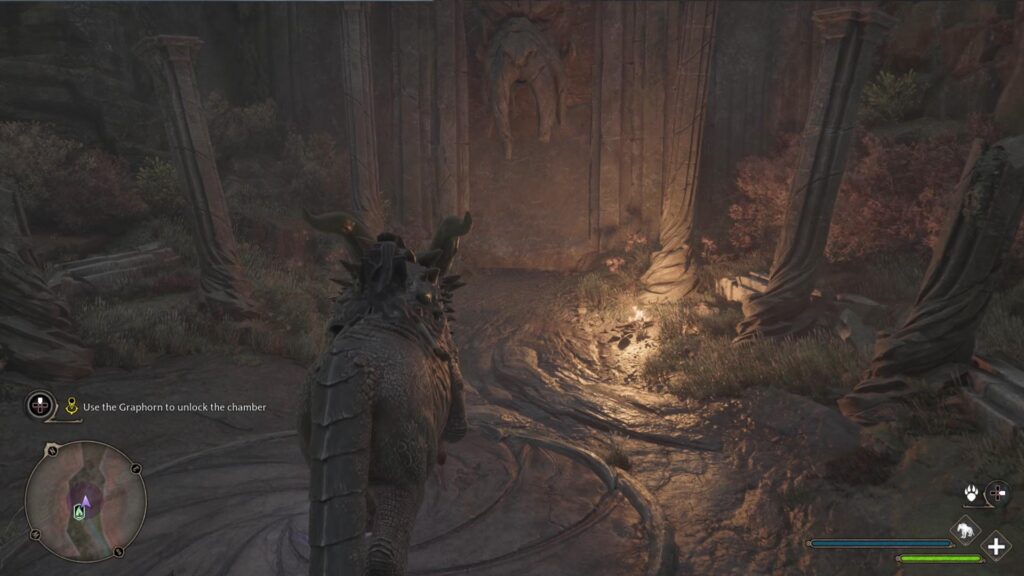
Regardless of what you choose next, you’ll subdue the majestic Beast, but kneeling is more appropriate for the great fight you have experienced. By subduing the Graphorn, you’ll unlock it as your final mount, and now you’ll have to ride it back to San Bakar’s Trial entrance.
The path you need to follow is marked on your minimap, and the next section of the quest is focused on teaching you how to ride the Beast. Take your time and experience his charge attacks on the Loyalists you encounter, and when you get close to the Pensieve Chamber, step on the stone circle on the ground.
San Bakar’s Trial Pensieve Memory
The moment you place the Graphorn in front of the door, you’ll access the Pensieve Chamber, so head inside and cross the northeastern bridge. After a short discussion with San Bakar, he’ll tell you that you’ll learn about Isidora and what happened to her. Now, interact with the Pensieve in the large room.
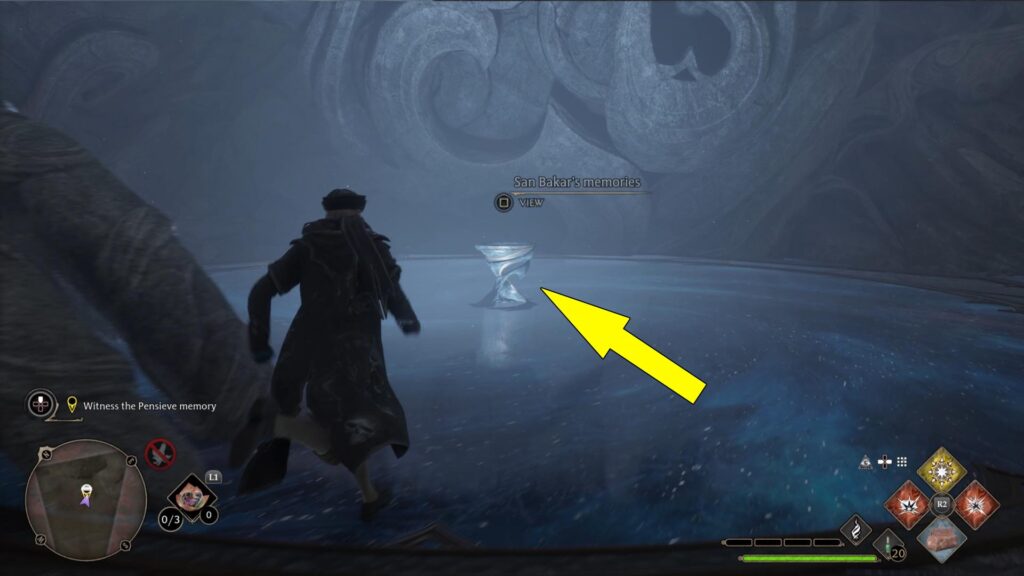
From Professor San Bakar’s Memory, you’ll learn that by removing his father’s pain, the man turned into an “empty vessel”; therefore, Bakar rushed back to the school to tell the rest of the Keepers the real effects of Isidora’s experiments. What Isidora didn’t know is that by removing pain, she was stripping all emotions because, as Niamh outlines in her Trial, without darkness, there is no light, and without pain, happiness cannot exist.
Even more concerning, Isidora didn’t stop after removing the pain from her father, so she continued her experiments on the Hogwarts students.
Eventually, Isidora faced the four Keepers, and even though they gave her a chance to surrender, she fought them, proving that the power she harnessed was far superior to theirs. Unexpectedly, San Bakar killed Isidora by casting Avada Kedavra, one of the Unforgivable Curses that nobody should use, especially a Hogwarts teacher.
Now that you know what happened to Isidora and have obtained the last Pensieve Artefact, return to the Map Chamber via the southwestern glass wall and talk to the Keepers. You’ll find out that the final repository is under the school. Furthermore, the four Keepers will share their story with you. Finally, you’ll learn that to enter the final repository, you’ll need a unique wand created using the four Pensieve Artifacts you collected during the trials.
As such, the next step is to visit Ollivander and have the unique wand crafted. In the meantime, Fig will visit Professor Weasley and tell her everything so she can prepare for the upcoming attack on Hogwarts.
After Fig departs, you’ll start the Wand Mastery main quest, but be advised you are getting close to the end of the story, so it’s recommended that you complete all side-quests you have available and find all collectibles following our Hogwarts Legacy guides.
